
Valeo 43881
Manual de instruções de montagem da lanterna traseira original do lado do passageiro Valeo 043881
Modelo: 43881
1. Introdução
This manual provides essential information for the proper installation, operation, and maintenance of your Valeo 043881 Passenger Side Boot OE Tail Light Assembly. This product is designed as an original equipment (OE) quality replacement part, ensuring compatibility and performance.
2. Informações de segurança
Instruções importantes de segurança:
- Sempre desconecte a bateria do veículo antes de realizar qualquer trabalho elétrico para evitar choque elétrico ou danos ao sistema elétrico do veículo.
- Utilize equipamentos de proteção individual (EPI) adequados, como luvas e proteção ocular, durante a instalação.
- Certifique-se de que o veículo esteja estacionado em uma superfície plana e com o freio de estacionamento acionado.
- Se tiver dúvidas sobre qualquer etapa do processo de instalação, consulte um técnico automotivo qualificado.
- Mantenha as peças pequenas longe das crianças.
3. Conteúdo da embalagem
The package for your Valeo 043881 Tail Light Assembly should contain the following items:
- One (1) Valeo 043881 Passenger Side Boot OE Tail Light Assembly, including premium quality bulb(s).
Please inspect all contents upon receipt. If any items are missing or damaged, contact your retailer immediately.
4. Produto acabadoview
The Valeo 043881 Tail Light Assembly is a direct replacement for the passenger side (right) tail light of specific vehicle models, such as the Golf 2010. It is designed to meet original equipment specifications, ensuring a precise fit and reliable performance. The assembly features a red lens made from durable polycarbonate and is waterproof for enhanced longevity.

Figura 4.1: Frente view of the Valeo 043881 Passenger Side Boot OE Tail Light Assembly. This image shows the red lens and clear sections for reverse or turn signals, typical of a modern tail light design.

Figura 4.2: Angulado view of the Valeo 043881 Passenger Side Boot OE Tail Light Assembly. This perspective highlights the contours and overall shape of the light, demonstrating its vehicle-specific design.
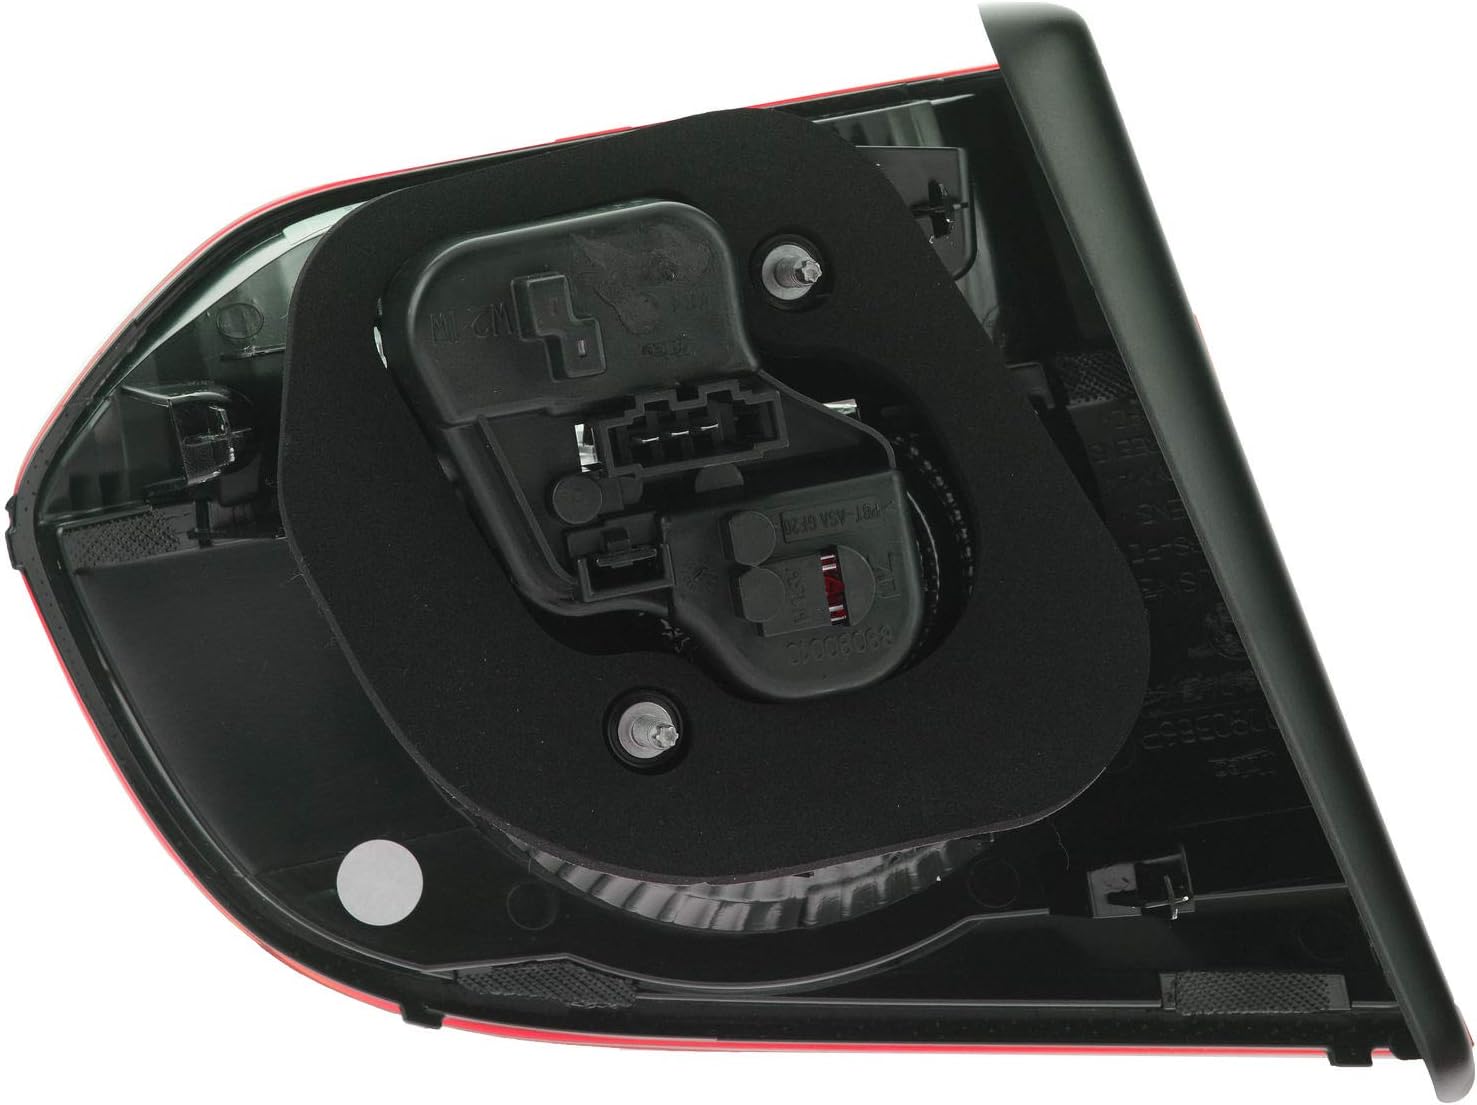
Figura 4.3: Traseira view of the Valeo 043881 Tail Light Assembly. This image displays the back of the unit, including the wiring harness connection point and the access points for the included premium quality bulbs.
5. Configuração e instalação
Installation of a tail light assembly typically involves working with vehicle electrical systems and body panels. If you are not experienced with automotive repairs, it is highly recommended to seek professional installation.
General Installation Steps (may vary by vehicle model):
- Prepare o veículo: Estacione o veículo em uma superfície plana, acione o freio de estacionamento e desligue o motor. Desconecte o terminal negativo da bateria do veículo.
- Access the Tail Light: Open the vehicle's trunk or tailgate. Locate the access panel or trim covering the rear of the tail light assembly. Remove any screws, clips, or fasteners securing this panel.
- Remove the Old Tail Light: Identify the mounting bolts or nuts holding the tail light assembly in place. Carefully remove these fasteners. Gently pull the tail light assembly away from the vehicle body.
- Desconecte a fiação: Disconnect the electrical connector(s) from the old tail light assembly. Some models may require twisting bulb sockets to remove them.
- Instalar nova lanterna traseira: Connect the electrical connector(s) to the new Valeo tail light assembly. Ensure connections are secure.
- Mount New Tail Light: Carefully position the new tail light assembly into the vehicle's body opening. Align the mounting points and secure it with the previously removed bolts or nuts. Do not overtighten.
- Funcionalidade de teste: Reconnect the vehicle's battery. Test all tail light functions (running lights, brake lights, turn signals, reverse lights) to ensure proper operation before reassembling interior trim.
- Remontar: Reinstall any removed access panels or trim.
Consulte o manual de serviço do seu veículo para obter instruções específicas e especificações de torque.
6. Operação
The Valeo 043881 Tail Light Assembly functions as a critical component of your vehicle's exterior lighting system. Once correctly installed, it will operate automatically in conjunction with your vehicle's electrical system to provide:
- Luzes de circulação diurna: Illuminating when headlights or parking lights are on, indicating the vehicle's presence.
- Luzes de freio: Activating when the brake pedal is pressed, signaling deceleration to following vehicles.
- Sinais de direção: Flashing to indicate an intended turn or lane change.
- Luzes de ré: Illuminating when the vehicle is in reverse gear, providing visibility and warning.
Ensure all functions are checked regularly for safety.
7. Manutenção
Proper maintenance ensures the longevity and optimal performance of your tail light assembly.
- Limpeza regular: Keep the outer lens clean from dirt, dust, and road grime using a soft cloth and mild automotive cleaning solution. Avoid abrasive cleaners that can scratch the polycarbonate lens.
- Substituição de lâmpada: While the assembly includes premium quality bulbs, bulbs have a finite lifespan. If a bulb fails, replace it with a bulb of the correct type and wattage as specified by your vehicle manufacturer. Refer to your vehicle's manual for bulb replacement procedures.
- Inspecione quanto a danos: Periodically check the tail light assembly for cracks, moisture intrusion, or loose connections. Address any issues promptly to prevent further damage or malfunction.
8. Solução De Problemas
If you encounter issues with your tail light assembly, consider the following troubleshooting steps:
- Luz que não ilumina:
- Check the bulb: The included bulb may have failed. Replace with a new, correct bulb.
- Check the fuse: A blown fuse in the vehicle's fuse box can cause a light to stop working. Consult your vehicle's manual for fuse box location and diagram.
- Check wiring connections: Ensure all electrical connectors are securely plugged in and free from corrosion.
- Operação intermitente:
- Loose connection: Re-check all electrical connections for tightness.
- Corrosion: Inspect terminals for corrosion and clean if necessary.
- Umidade dentro das lentes:
- Condensation: Small amounts of condensation can be normal and should dissipate.
- Seal integrity: If significant water ingress occurs, inspect the seal around the assembly for damage or improper seating. Re-installation or seal replacement may be required.
If problems persist after these steps, it is advisable to consult a professional automotive technician.
9. Especificações
| Recurso | Detalhe |
|---|---|
| Marca | Valeo |
| Número do modelo | 43881 |
| Posição da peça automática | Right (Passenger Side) |
| Usos específicos para o produto | Luz traseira |
| Tipo de serviço do veículo | Golf (Year 2010) |
| Cor da lente | Vermelho |
| Material da lente | Policarbonato |
| Recurso especial | Impermeável |
| Dimensões do item (C x L x A) | 9.37 x 8.03 x 7.01 polegadas |
| Peso do item | 1.36 libras |
| Montagem necessária | No (refers to the internal assembly of the light unit itself) |
| Tipo de ajuste automotivo | Ajuste específico do veículo |
| Número(s) de peça OEM | 5K0945094AA; 5K0945094AB |
10. Informações de garantia
For specific warranty terms and conditions regarding the Valeo 043881 Passenger Side Boot OE Tail Light Assembly, please refer to the documentation provided with your purchase or contact Valeo directly. Warranty coverage typically addresses manufacturing defects and material flaws under normal use.
11. Suporte ao cliente
If you require further assistance, have questions about installation, or need to report an issue, please contact:
- Seu revendedor: For purchase-related inquiries or returns.
- Valeo Customer Service: Visit the official Valeo website for contact information and support resources. You can often find a "Contact Us" or "Support" section on their website.
Ao entrar em contato com o suporte, tenha em mãos o número do modelo do seu produto (43881) e os detalhes da compra.
Ask a question about this manual
Ask about setup, troubleshooting, compatibility, parts, safety, or missing instructions. Manuals+ will review the question and use this page’s manual context to help answer it.