
1. Introdução
This manual provides detailed instructions for installing, configuring, and maintaining your GIGABYTE GA-B150M-D3H Micro ATX motherboard. The GA-B150M-D3H is designed to support 6th Generation Intel Core Processors and features Dual Channel DDR4 memory, PCIe Gen3 x4 M.2 connector, SATA Express, and 8-channel HD audio with Audio Noise Guard.
Please read this manual thoroughly before beginning installation to ensure proper setup and operation.
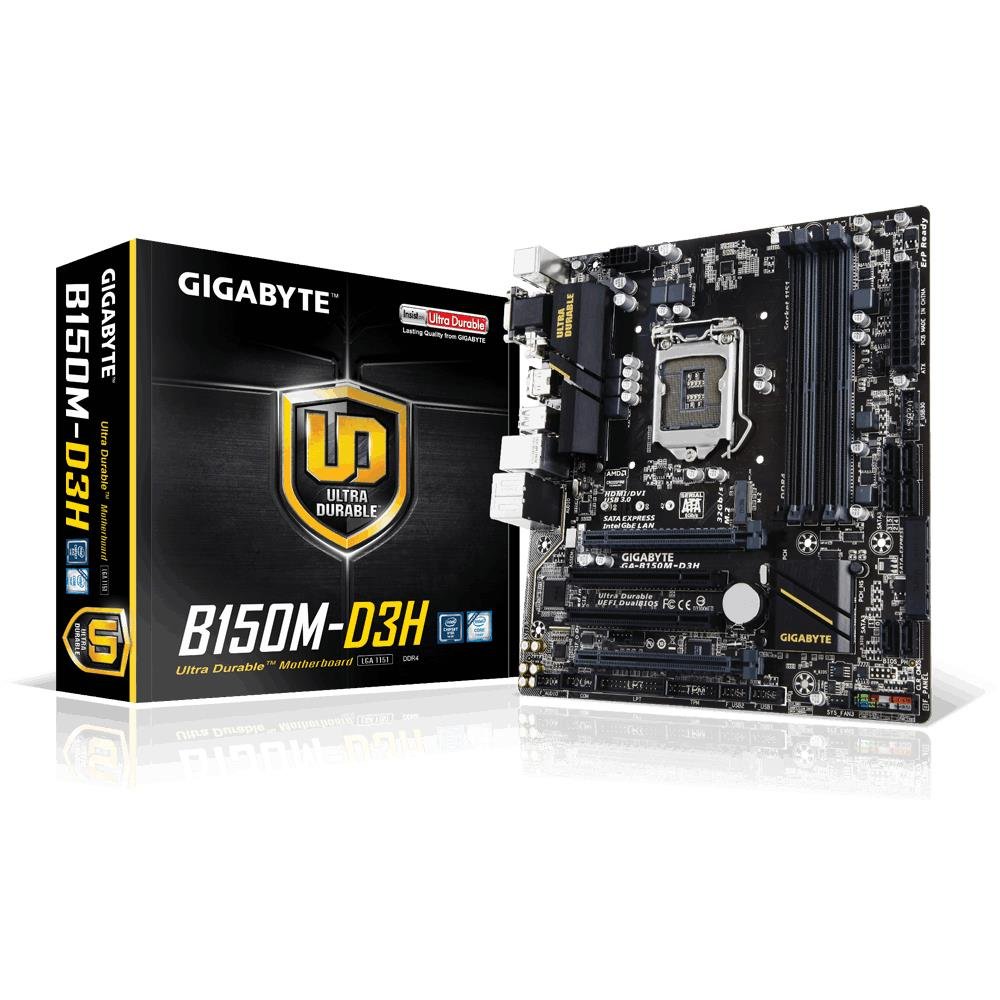
Image 1.1: GIGABYTE GA-B150M-D3H Micro ATX Motherboard. This image displays the overall layout of the motherboard, highlighting its compact Micro ATX form factor and various component slots.
2. Informações de segurança
Observe the following safety precautions to prevent damage to the motherboard and injury to yourself:
- Desconecte sempre o cabo de alimentação da tomada antes de tocar em qualquer componente.
- Use uma pulseira antiestática ou toque frequentemente em um objeto metálico aterrado para descarregar a eletricidade estática.
- Manuseie a placa-mãe pelas bordas para evitar tocar em componentes sensíveis.
- Mantenha a placa-mãe longe da umidade e de temperaturas extremas.
- Garanta uma ventilação adequada dentro do gabinete do computador para evitar o superaquecimento.
3. Conteúdo da embalagem
Verifique se todos os itens estão presentes na embalagem da sua placa-mãe:
- GIGABYTE GA-B150M-D3H Motherboard
- Manual do usuário
- Blindagem de E / S
- Cabos SATA
- Driver CD/DVD
Note: Contents may vary slightly depending on region or revision.
4. Layout da placa-mãe
Familiarize yourself with the various components and connectors on the GA-B150M-D3H motherboard.
Image 4.1: GIGABYTE GA-B150M-D3H Motherboard Layout. This image provides a visual reference for the location of key components such as the CPU socket, DIMM slots, PCIe slots, SATA ports, and M.2 connector.
Componentes principais:
- Soquete de CPU LGA 1151: For 6th Generation Intel Core Processors.
- Slots DIMM DDR4 (4): Supports Dual Channel DDR4 memory up to 2133 MHz.
- Slots PCIe: Includes PCIe Gen3 x16 for graphics cards and PCIe x1 slots for expansion.
- M.2 Connector: Supports PCIe NVMe & SATA SSDs with up to 32Gb/s data transfer.
- SATA Express Connector: For up to 16Gb/s data transfer.
- Portas SATA 6Gb/s: Para conectar dispositivos de armazenamento SATA tradicionais.
- Conector de alimentação ATX de 24 pinos: Entrada de energia principal.
- 8-Pin ATX 12V Power Connector: Entrada de energia da CPU.
- Cabeçalhos do painel frontal: For power button, reset button, LED indicators, and USB ports.
- Conectores de áudio: 8-channel HD Audio with high quality capacitors and Audio Noise Guard.
5. Configuração e instalação
Siga estes passos para instalar corretamente sua placa-mãe e componentes.
5.1. Instalação da CPU
- Locate the LGA 1151 CPU socket.
- Abra a alavanca do soquete da CPU e levante a placa de carga.
- Carefully align the CPU with the socket, ensuring the gold triangle on the CPU matches the triangle on the socket. Do not force the CPU into the socket.
- Abaixe a placa de carga e fixe-a com a alavanca.
5.2. Instalação do Cooler da CPU
Refer to your CPU cooler's instruction manual for specific installation steps. Ensure thermal paste is applied correctly between the CPU and cooler base.
5.3. Instalação de memória (RAM)
- Abra as travas em ambas as extremidades dos slots DIMM DDR4.
- Alinhe o módulo de memória com o slot, certificando-se de que o entalhe no módulo coincida com a chave no slot.
- Pressione firmemente ambas as extremidades do módulo de memória até que as presilhas se encaixem no lugar.
- For dual-channel performance, install memory modules in matching colored slots (e.g., DIMM1 and DIMM2).
5.4. Installing Expansion Cards
- Remove the metal bracket from the desired PCIe slot on your computer case.
- Alinhe a placa de expansão com o slot PCIe e pressione firmemente até que esteja encaixada corretamente.
- Prenda a placa com um parafuso na carcaça do computador.
5.5. Connecting Storage Devices
- Dispositivos SATA: Connect one end of the SATA data cable to a SATA 6Gb/s port on the motherboard and the other end to your hard drive or SSD. Connect the SATA power cable from your power supply to the device.
- SSD M.2: Insira o SSD M.2 no slot M.2 em um ângulo, pressione-o suavemente para baixo e fixe-o com o parafuso fornecido.
- SATA Express: If using a SATA Express device, connect it to the designated SATA Express connector.
5.6. Conectando os conectores do painel frontal
Connect the cables from your computer case's front panel (power button, reset button, HDD LED, power LED, front USB, front audio) to the corresponding headers on the motherboard. Refer to the motherboard layout diagram for exact locations and pin assignments.
5.7. Conectando a fonte de alimentação
- Connect the 24-pin ATX main power connector from your power supply to the 24-pin power socket on the motherboard.
- Connect the 8-pin ATX 12V CPU power connector to the 8-pin socket near the CPU.
- Certifique-se de que todas as conexões elétricas estejam seguras.
6. Instruções de operação
6.1. Primeira inicialização
After assembling all components, connect your monitor, keyboard, and mouse. Power on the system. The system should display the GIGABYTE splash screen and then enter the BIOS/UEFI setup or attempt to boot from a connected storage device.
6.2. Configuração da BIOS/UEFI
To enter the BIOS/UEFI setup, press the DEL key repeatedly during the boot process when the GIGABYTE logo appears. Here you can configure system settings, boot order, and monitor hardware status. The GA-B150M-D3H features GIGABYTE UEFI Dual BIOS for enhanced reliability.
6.3. Instalação do driver
After installing your operating system, install the necessary drivers for the motherboard components. These can be found on the included driver CD/DVD or downloaded from the official GIGABYTE website. Key drivers include chipset, audio (Realtek ALC892 codec), LAN, and any integrated graphics drivers.
6.4. Instalação do sistema operacional
Insert your operating system installation media (USB drive or DVD) and configure the boot order in the BIOS/UEFI to boot from it. Follow the on-screen instructions to install your preferred operating system (e.g., Windows 8.1, Windows 10).
7. Manutenção
7.1. Limpeza
Regularly clean the interior of your computer case to prevent dust buildup, which can lead to overheating. Use compressed air to remove dust from fans, heatsinks, and motherboard components. Ensure the system is powered off and unplugged before cleaning.
7.2. Atualizações da BIOS
GIGABYTE periodically releases BIOS updates to improve system stability, compatibility, and performance. Visit the official GIGABYTE website for your motherboard model (GA-B150M-D3H) to check for the latest BIOS version and follow the provided instructions for updating. Exercise caution during BIOS updates, as an interruption can render the motherboard inoperable.
8. Solução De Problemas
Esta seção aborda problemas comuns que você pode encontrar.
8.1. No Power / System Does Not Turn On
- Check if the power supply is connected correctly to the motherboard (24-pin and 8-pin connectors).
- Certifique-se de que o interruptor da fonte de alimentação esteja na posição LIGADO.
- Verifique se o cabo do botão liga/desliga do painel frontal está conectado corretamente ao conector da placa-mãe.
- Teste a fonte de alimentação com outro sistema ou com um testador de fontes de alimentação.
8.2. Sem saída de vídeo
- Ensure the monitor is connected to the correct graphics output (either integrated graphics on the motherboard or a dedicated graphics card).
- Reinstale a placa gráfica e os módulos de memória.
- Try booting with only one memory module installed.
- Verifique se o monitor está ligado e configurado para a entrada correta.
8.3. Instabilidade/Travamentos do Sistema
- Verifique as temperaturas da CPU e da GPU para garantir que estejam dentro dos limites operacionais seguros.
- Verify that all drivers are installed and up to date.
- Execute ferramentas de diagnóstico de memória para verificar se há módulos de RAM defeituosos.
- Certifique-se de que a fonte de alimentação forneça energia suficiente e estável a todos os componentes.
9. Especificações
Detailed technical specifications for the GIGABYTE GA-B150M-D3H motherboard:
| Recurso | Especificação |
|---|---|
| Nome do modelo | GA-B150M-D3H |
| Fator de forma | Micro-ATX (24.4 cm x 22.5 cm) |
| Soquete da CPU | LGA 1151 |
| Processadores compatíveis | Processadores Intel Core de 6ª geração |
| Chipset | Intel B150 Express Chipset |
| Tecnologia de memória | DDR4 |
| Slots de memória | 4 x DDR4 DIMM sockets (Dual Channel) |
| Capacidade máxima de memória | 16 GB |
| Velocidade do relógio de memória | 2133 MHz |
| Slots PCIe | 1 x PCI Express x16, 1 x Total PCIe Ports |
| Interfaces de armazenamento | PCIe Gen3 x4 M.2, SATA Express, SATA 6Gb/s |
| Codec de áudio | Realtek ALC892 codec, 8-channel HD Audio |
| Portas USB | Total 8 USB Ports (including USB 2.0) |
| Conector de alimentação principal | ATX de 24 pinos |
| Conector de energia da CPU | 8-Pin ATX 12V |
| Características únicas | GIGABYTE UEFI Dual BIOS, Audio Noise Guard with LED Trace Path Lighting, App Center (Easy Tune, Cloud Station) |
10. Garantia e Suporte
For warranty information, please refer to the warranty card included in your product package or visit the official GIGABYTE webOs termos e condições da garantia podem variar conforme a região.
For technical support, driver downloads, BIOS updates, and further product information, please visit the GIGABYTE official support website:
https://www.gigabyte.com/Support
When contacting support, please have your motherboard model (GA-B150M-D3H) and serial number ready.