
1. Instruções importantes de segurança
Leia atentamente todas as instruções antes de usar este aparelho. Guarde este manual para futuras consultas.
- Não toque em superfícies quentes. Use alças ou botões.
- Para evitar incêndios, choques elétricos e ferimentos, não mergulhe o cabo, os plugues ou o aparelho em água ou qualquer outro líquido.
- É necessária supervisão rigorosa quando qualquer aparelho for usado por crianças ou perto delas.
- Desligue da tomada quando não estiver em uso e antes de limpar. Deixe esfriar antes de colocar ou retirar peças e antes de limpar o aparelho.
- Não utilize nenhum aparelho com cabo ou plugue danificado, ou após o aparelho apresentar mau funcionamento ou ter sido danificado de alguma forma. Entre em contato com o serviço de atendimento ao cliente para verificação, reparo ou ajuste.
- O uso de acessórios não recomendados pelo fabricante do aparelho pode resultar em incêndio, choque elétrico ou ferimentos às pessoas.
- Não utilize ao ar livre.
- Não deixe o cabo pendurado na borda da mesa ou do balcão, nem toque em superfícies quentes.
- Não coloque sobre ou perto de um queimador a gás ou elétrico quente, nem em um forno aquecido.
- Sempre conecte o plugue ao aparelho primeiro, depois conecte o cabo na tomada. Para desconectar, gire qualquer controle para “off” e remova o plugue da tomada.
- Não use o aparelho para outro uso doméstico que não o pretendido.
- Podem ocorrer escaldamentos se a tampa for removida durante o ciclo de preparo.
- The glass carafe is designed for use with this appliance only. It must never be used on a range top.
- Não coloque uma garrafa térmica quente sobre uma superfície fria ou molhada.
- Não utilize uma jarra rachada ou com a alça solta ou enfraquecida.
- Não limpe a jarra com produtos de limpeza, palha de aço ou outros materiais abrasivos.
2. Produto acabadoview e Componentes
Familiarize yourself with the parts of your SOGO Drip Coffee Maker.
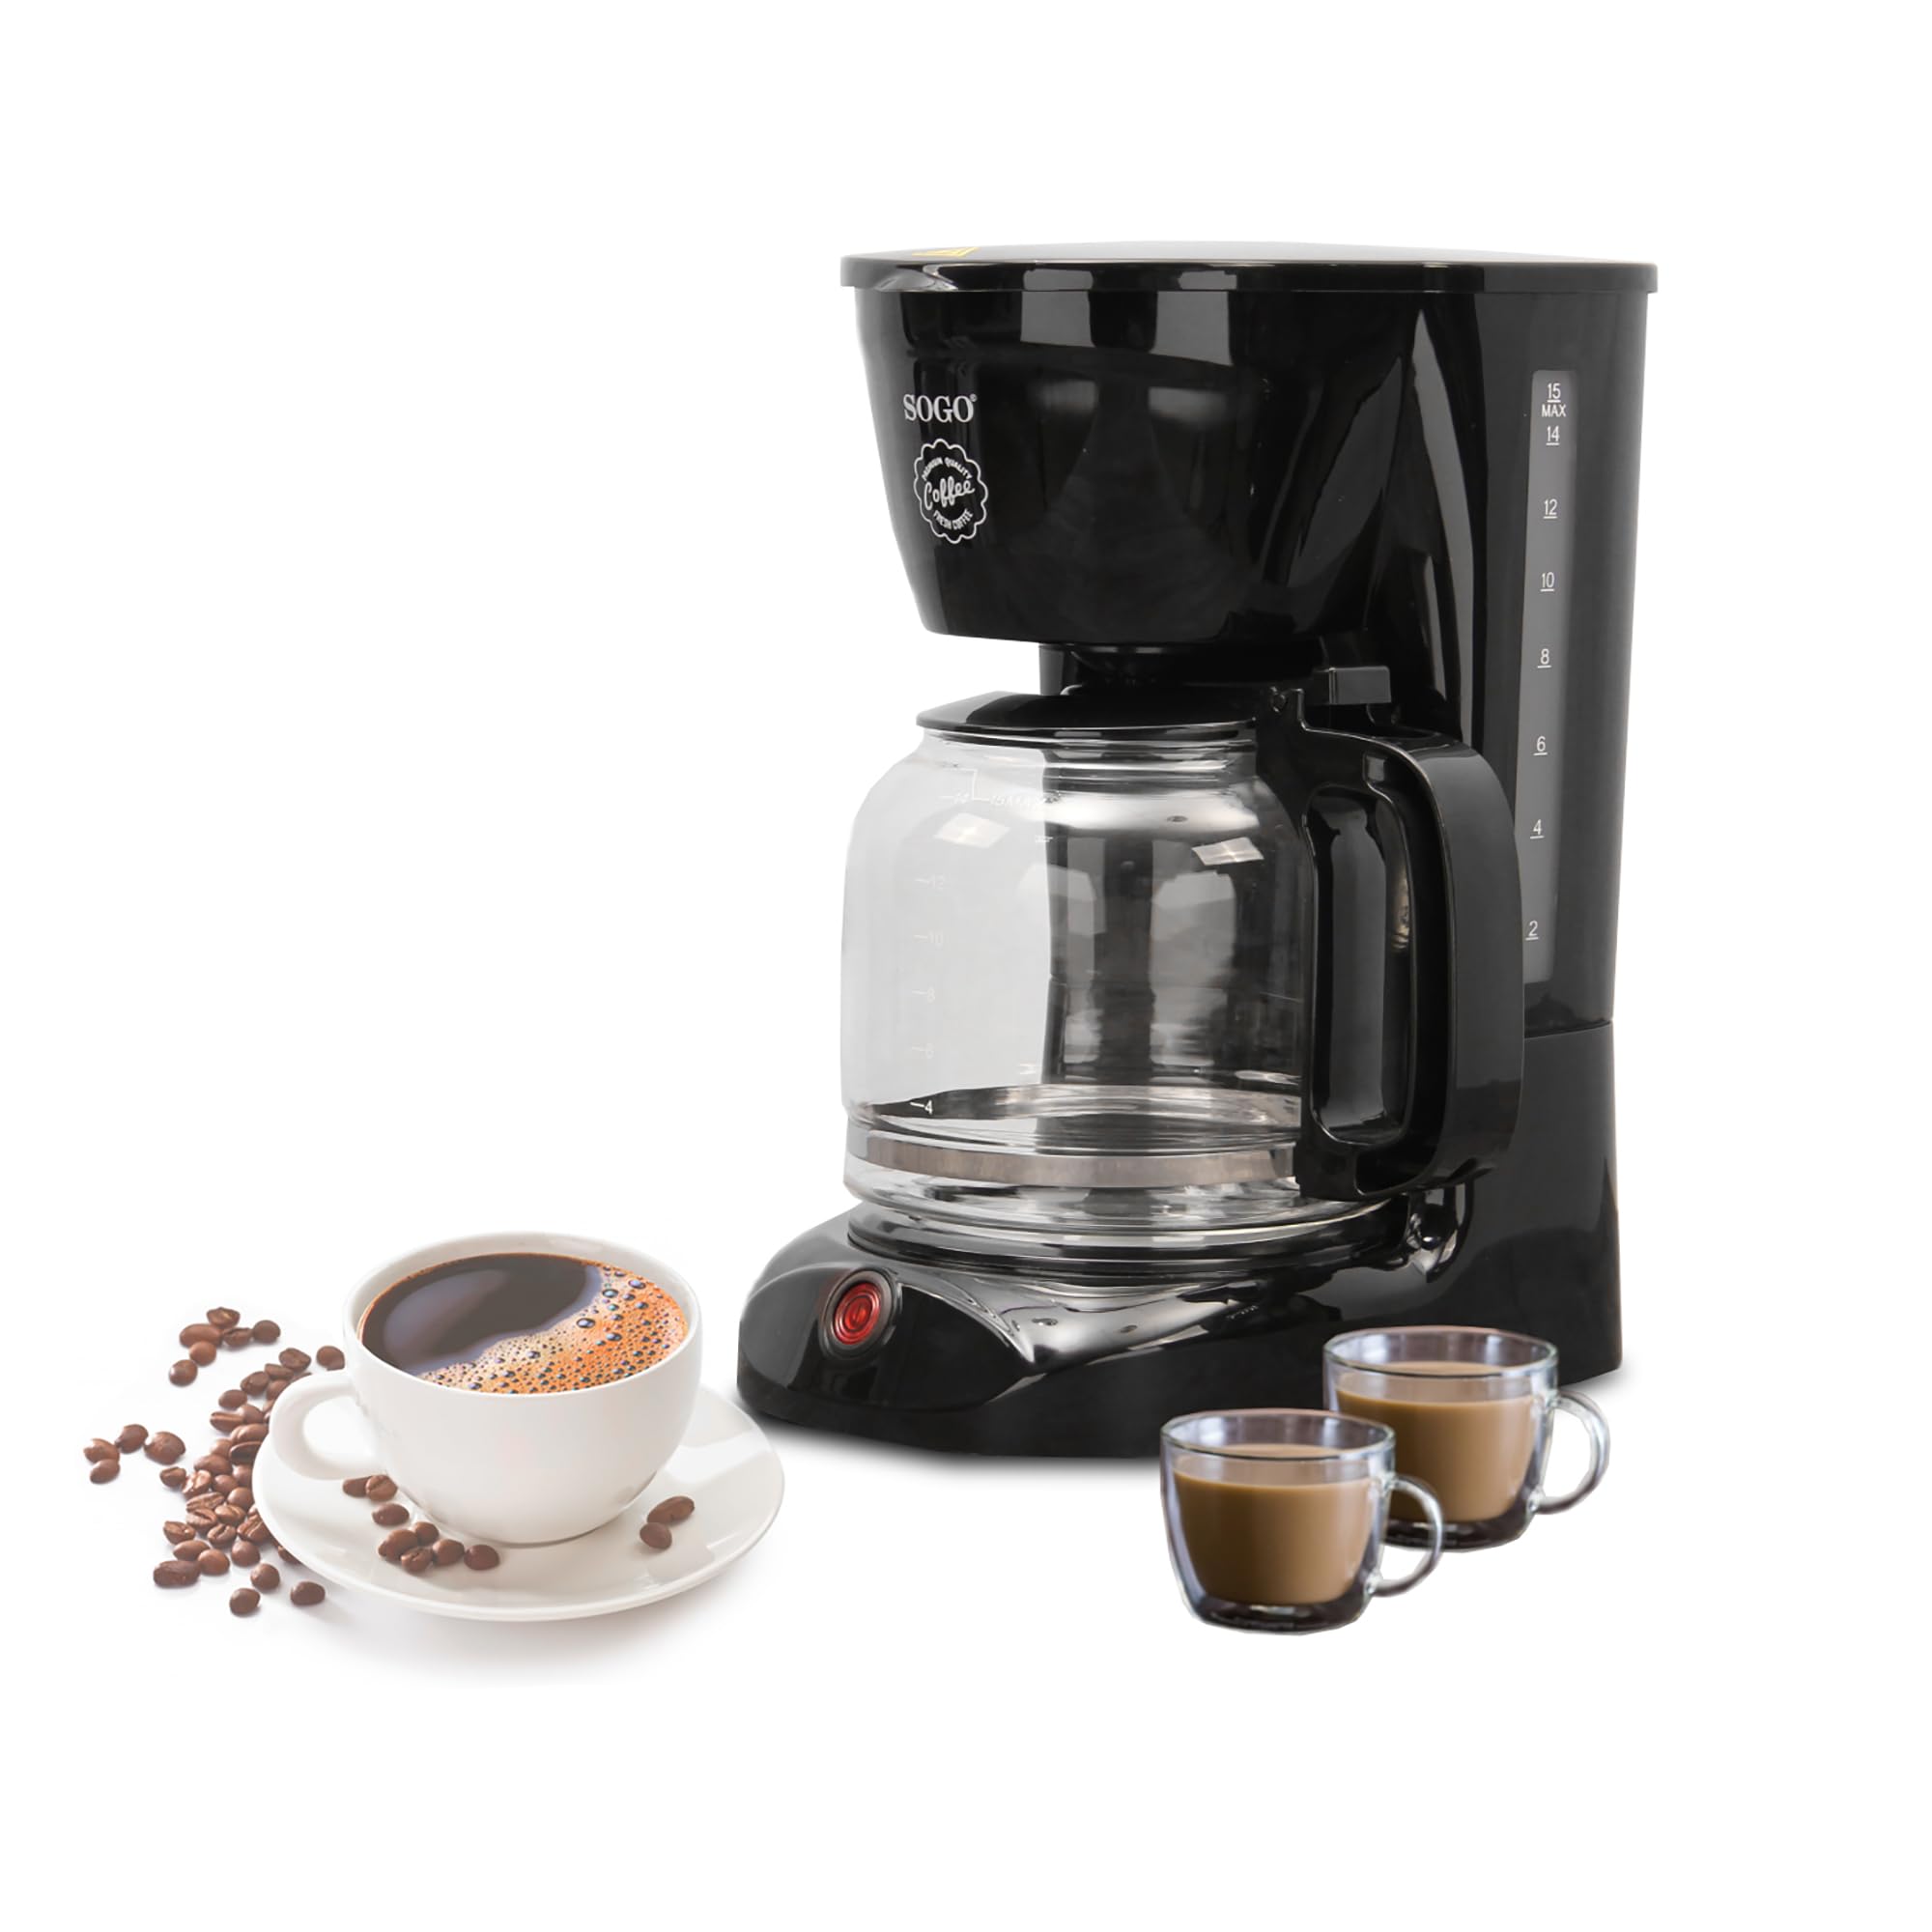
Imagem: Explodida view of the SOGO Drip Coffee Maker, displaying the main unit, glass carafe, filter basket, permanent filter, and coffee scoop.
- Unidade principal: Abriga o elemento de aquecimento, o reservatório de água e o painel de controle.
- Tampa: Abrange o reservatório de água e a área do cesto do filtro.
- Reserva de agua: Armazena água para o preparo de bebidas.
- Cesta de filtro: Holds the permanent filter and ground coffee.
- Filtro Permanente: Reusable filter for ground coffee.
- Jarra de vidro: Collects brewed coffee. Features a handle and measurement markings.
- Placa de aquecimento: Mantém o café preparado aquecido.
- Interruptor de alimentação: On/Off button with indicator light.
- Colher de café: For measuring ground coffee.
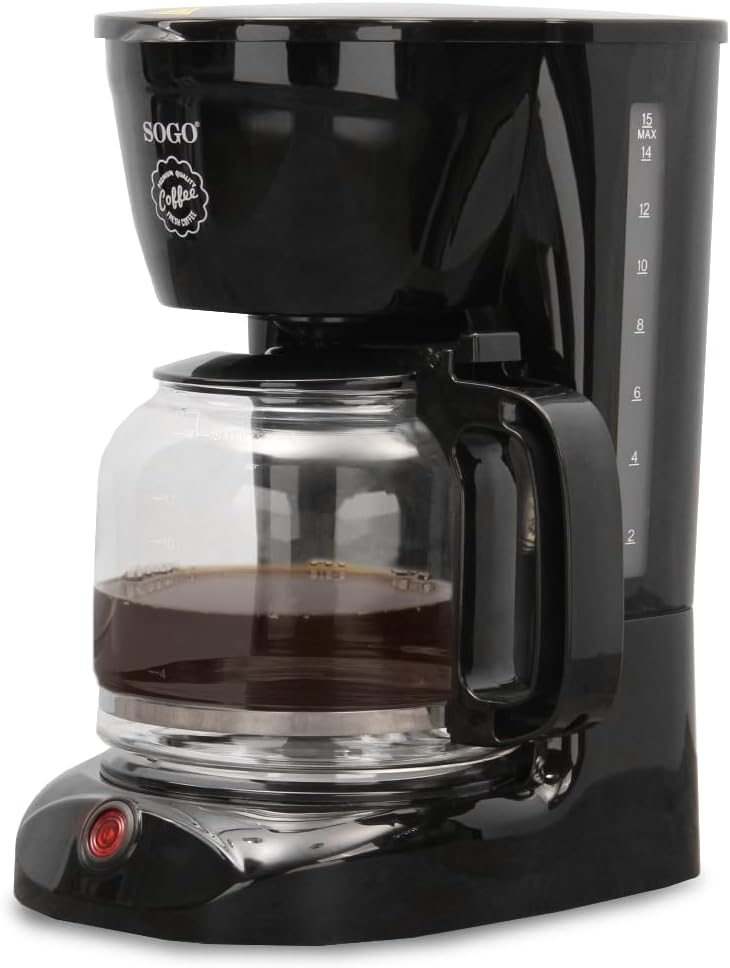
Imagem: Um close-up view of the reusable permanent filter, designed to hold ground coffee during the brewing process.
3. Antes do primeiro uso
Before using your coffee maker for the first time, it is recommended to clean all removable parts and run a brewing cycle with water only.
- Wash the glass carafe, lid, filter basket, and permanent filter in warm, soapy water. Rinse thoroughly and dry.
- Place the filter basket into its housing in the main unit. Insert the permanent filter into the filter basket.
- Fill the water reservoir with fresh cold water up to the 1.8L (15 cup) mark. Do not add coffee grounds.
- Coloque a garrafa de vidro com a tampa na placa de aquecimento.
- Conecte o cabo de alimentação a uma tomada elétrica padrão.
- Press the power switch to turn on the appliance. The indicator light will illuminate.
- Allow the full cycle to complete. Discard the hot water from the carafe.
- Desligue o aparelho da tomada e deixe-o esfriar. Sua cafeteira está pronta para uso.
4. Operation: Making Coffee
Follow these steps to brew a fresh pot of coffee.

Image: The SOGO Drip Coffee Maker fully assembled with the glass carafe in place, ready to brew coffee.
- Certifique-se de que a cafeteira esteja desligada da tomada e fria.
- Fill the water reservoir with fresh, cold water to the desired level, using the markings on the reservoir or carafe as a guide. Do not exceed the “MAX” line.
- Place the permanent filter into the filter basket.
- Add the desired amount of ground coffee to the permanent filter. A general guideline is one level scoop (approximately 7g) of ground coffee per cup (150ml) of water. Adjust to your taste.
- Feche bem a tampa.
- Place the empty glass carafe with its lid onto the warming plate. Ensure it is properly seated to activate the drip-stop mechanism.
- Conecte o cabo de alimentação a uma tomada elétrica padrão.
- Press the power switch. The indicator light will turn on, and brewing will begin.
- The brewing process will take several minutes. Do not open the lid during brewing as scalding may occur.
- Once brewing is complete, the coffee maker will automatically switch to a “keep warm” function. The warming plate will keep the coffee hot.
- To serve, carefully remove the carafe from the warming plate.
- After serving, return the carafe to the warming plate to keep the remaining coffee warm.
- To turn off the appliance, press the power switch again. The indicator light will turn off.
- Unplug the coffee maker from the outlet when not in use or when the warming function is no longer needed.
5. Limpeza e Manutenção
A limpeza regular garante o desempenho ideal e prolonga a vida útil da sua cafeteira.
- Desligue sempre a cafeteira da tomada e deixe-a arrefecer completamente antes de a limpar.
- Remove the glass carafe, filter basket, and permanent filter. Discard used coffee grounds.
- Wash the carafe, lid, filter basket, and permanent filter in warm, soapy water. These parts can also be rinsed under running water.
- Limpe o exterior da cafeteira com um pano macio e úmidoamp pano. Não use produtos de limpeza abrasivos ou esfregões.
- Nunca mergulhe a unidade principal, o cabo de alimentação ou a ficha em água ou qualquer outro líquido.
- To clean the warming plate, wipe it with a damp pano. Não use materiais abrasivos.
- For descaling (mineral deposit removal), fill the water reservoir with a mixture of white vinegar and water (1:2 ratio). Run a brewing cycle without coffee grounds. Repeat if necessary. Then, run two cycles with fresh water to rinse thoroughly. Descale every 2-4 weeks depending on water hardness.
- Certifique-se de que todas as peças estejam completamente secas antes de remontar e armazenar o aparelho.
6. Solução De Problemas
If you encounter issues with your coffee maker, refer to the following common problems and solutions.
| Problema | Possível causa | Solução |
|---|---|---|
| O café não se prepara. | Appliance not plugged in; Power switch not turned on; No water in reservoir. | Ensure plug is securely in outlet; Press power switch; Fill water reservoir. |
| O café está muito fraco. | Not enough coffee grounds; Water-to-coffee ratio incorrect; Coarse grind. | Add more coffee grounds; Adjust ratio; Use a finer grind. |
| O café transborda do filtro. | Too many coffee grounds; Filter basket not seated correctly; Clogged filter. | Reduce coffee grounds; Ensure filter basket is properly in place; Clean permanent filter or descale appliance. |
| O processo de fermentação é lento. | Mineral deposits (scale) in the appliance. | Descale the coffee maker as described in the Cleaning and Maintenance section. |
| O café não está quente o suficiente. | Warming plate not functioning; Appliance needs descaling. | Ensure warming plate is on; Descale the coffee maker. |
7. Especificações
Technical details for the SOGO Drip Coffee Maker Model CAF-SS-5640.
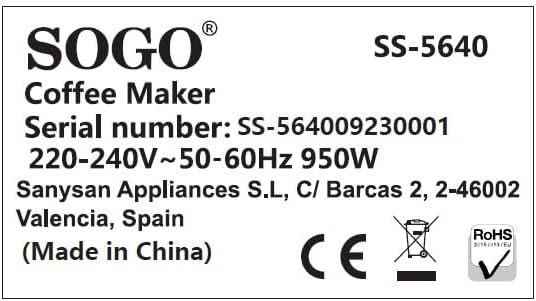
Image: Product label showing model number SS-5640, serial number, power requirements (220-240V~ 50-60Hz 950W), and manufacturer details.
| Recurso | Detalhe |
|---|---|
| Marca | SOGO |
| Número do modelo | CAF-SS-5640 |
| Cor | Preto |
| Dimensões (C x L x A) | 23.5 x 17.5 x 30.5 cm |
| Capacidade | 1.8 litros (aprox. 15 xícaras) |
| Poder | 950 Watts |
| Material | Glass (carafe) |
| Recurso especial | Filtro permanente |
| Peso do item | 1.39 quilos |
| Componentes Incluídos | jarro |
8. Garantia e Suporte
Information regarding spare parts availability is not provided in the product details. For warranty claims or further support, please refer to the retailer or manufacturer's official weblocal onde o produto foi adquirido.