
1. Introdução
This manual provides essential information for the safe and efficient operation of your ECTIVE CSI 15 Pure Sine Wave Inverter. Please read these instructions carefully before installation and use. Keep this manual for future reference.
2. Instruções de segurança
AVISO: Failure to follow these safety instructions may result in electric shock, fire, serious injury, or death. Always consult a qualified electrician for installation if you are unsure.
- Ensure proper ventilation around the inverter. Do not cover the fans.
- Do not insert objects or body parts into the device.
- Mantenha o inversor longe de água, umidade e materiais inflamáveis.
- Conecte o inversor apenas a uma fonte de alimentação de 12V CC.
- Certifique-se de que todas as conexões estejam firmes e corretamente polarizadas.
- Não tente abrir ou modificar o inversor. Não existem peças que possam ser reparadas pelo usuário em seu interior.
- Disconnect the power source before performing any maintenance or cleaning.

Imagem: Traseira view of the ECTIVE CSI 15 inverter, highlighting the cooling fans and important safety warnings regarding fan obstruction and foreign objects.
3. Produto acabadoview
The ECTIVE CSI 15 is a 1500W pure sine wave inverter designed to convert 12V DC power to 230V AC power. It features an integrated battery charger, Network Priority Switching (NVS), and Uninterruptible Power Supply (UPS) functionality.
3.1 Principais Características
- Pure Sine Wave Output: Suitable for all 220V/230V appliances.
- High Power Output: 1500W continuous, 2250W for 10 seconds, 3000W for 2 seconds.
- Integrated IUoU Charger: Compatible with AGM, wet, gel, and lithium batteries.
- NVS (Network Priority Switching) / UPS Function: Provides emergency power.
- Comprehensive Protection: Soft start, over/under voltage, proteção contra sobrecarga.
3.2 Componentes

Imagem: ângulo frontal view of the ECTIVE CSI 15 Pure Sine Wave Inverter, showcasinseu design e marca.
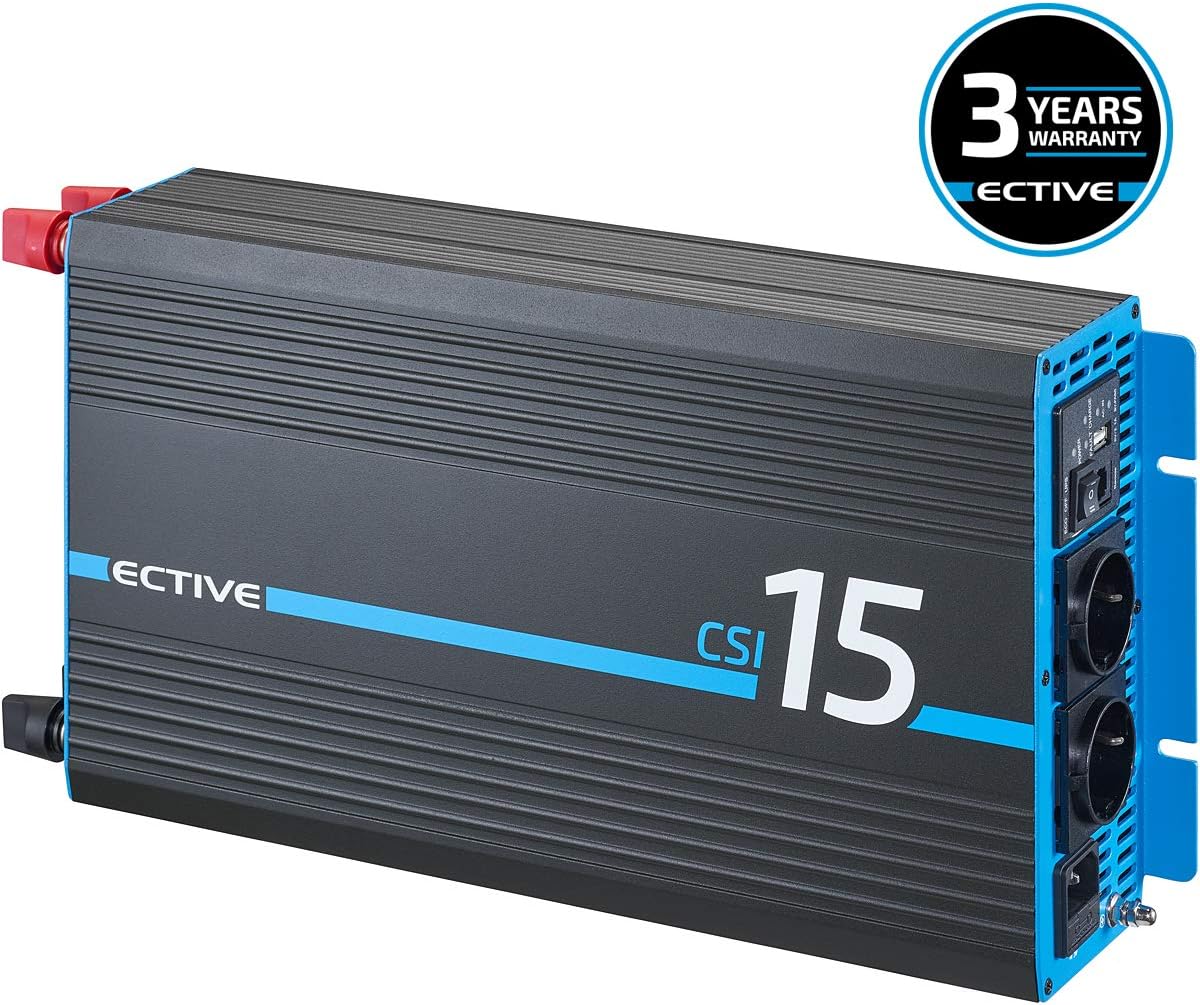
Imagem: Principal view of the ECTIVE CSI 15 inverter, showing the heat dissipation fins.

Imagem: Detalhado view of the front panel, showing the AC outlets, power switch, remote port, USB port, and indicator lights for power, fault, and charge status.

Imagem: The ECTIVE CSI 15 inverter shown with its included 0.95m power cable and the user manual.
3.3 Vídeo do produtoview
Vídeo: Um breve fimview of a similar voltage converter, demonstrating its physical appearance and connections. Note: This video is for illustrative purposes and may not show the exact ECTIVE CSI 15 model.
4. Configuração e instalação
A instalação correta é crucial para o funcionamento seguro e eficiente do seu inversor. Siga estas etapas cuidadosamente.
- Escolha um local: Select a dry, well-ventilated area away from direct sunlight, heat sources, and flammable materials. Ensure sufficient clearance around the inverter for airflow, especially around the cooling fans.
- Montagem: Securely mount the inverter to a stable surface using appropriate fasteners.
- DC Input Connection (Battery):
- Connect the positive (+) terminal of the inverter (red) to the positive (+) terminal of your 12V battery.
- Connect the negative (-) terminal of the inverter (black) to the negative (-) terminal of your 12V battery.
- Use heavy-gauge cables suitable for the inverter's power rating to minimize voltage drop and ensure safety.
- Certifique-se de que as conexões estejam firmes e seguras.
- AC Output Connection (Appliances): Plug your 230V AC appliances into the AC outlets on the front panel of the inverter. Ensure the total power consumption does not exceed the inverter's continuous power rating.
- AC Input Connection (Grid/Shore Power for Charger/UPS): If using the integrated battery charger or UPS function, connect the inverter's AC input to a 230V AC grid or shore power source using the provided power cable.

Imagem: Um example of connecting the positive battery cable to the inverter, demonstrating the secure connection process.

Imagem: A schematic diagram showing how the ECTIVE CSI inverter connects to a power source (generator/grid), a battery, and supplies power to 230V consumers, illustrating the DC to AC conversion and charging capabilities.
5. Instruções de operação
This section details how to operate your ECTIVE CSI 15 inverter.
5.1 Ligar/Desligar
- To turn on the inverter, press the power switch on the front panel to the "ON" position. The power indicator light will illuminate.
- To turn off the inverter, press the power switch to the "OFF" position.
5.2 Inverter Mode (DC to AC Conversion)
When the inverter is powered on and not connected to an external AC source (or NVS is not active), it will convert 12V DC battery power to 230V AC for your appliances.
5.3 Battery Charger Mode
If the inverter's AC input is connected to a 230V AC grid/shore power source, the integrated IUoU charger will automatically begin charging the connected 12V battery. The charge indicator light will show the charging status.
5.4 NVS (Network Priority Switching) / UPS Function
The NVS function allows the inverter to prioritize external AC power (grid/shore power) over battery power. When external AC power is available, it will pass through to your appliances and simultaneously charge the battery. If the external AC power fails, the inverter will automatically switch to battery power, providing an uninterruptible power supply (UPS) to your connected devices.
- Ensure the AC input is connected to the grid/shore power.
- The inverter will automatically manage power flow.
- In case of grid power loss, the inverter will seamlessly switch to battery power.
5.5 Controle Remoto (Opcional)
An optional RC3 remote control (sold separately) can be connected to the remote port on the front panel. This allows for remote operation and monitoring of power parameters.
6. Manutenção
A manutenção regular garante a longevidade e o desempenho ideal do seu inversor.
- Limpeza: Periodically clean the exterior of the inverter with a dry, soft cloth. Ensure the cooling vents and fans are free from dust and debris. Do not use liquid cleaners.
- Conexões: Regularly check all DC and AC connections to ensure they are tight and free from corrosion. Loose connections can cause overheating and damage.
- Saúde da bateria: Monitor your battery's health and charge level. Ensure the battery is suitable for use with the inverter's charging profile.
- Ventilação: Always ensure adequate ventilation around the inverter. Do not block the air inlets or outlets.
7. Solução De Problemas
If you encounter issues with your inverter, refer to the following common problems and solutions.
| Problema | Possível causa | Solução |
|---|---|---|
| Sem saída CA | Inversor desligado, tensão da bateria baixatage, overload, fault condition. | Check power switch, charge battery, reduce load, check fault indicator. |
| Aviso de sobrecarga | Connected appliances exceed inverter's capacity. | Desligue alguns aparelhos para reduzir a carga. |
| Aviso de bateria fraca | Vol da bateriatage é muito baixo. | Carregue a bateria imediatamente. |
| O inversor desliga. | Overload, overheating, low/high battery voltage. | Reduce load, ensure ventilation, check battery voltage. |
| Ventiladores funcionando constantemente/em alto volume | High internal temperature, normal operation under load. | Ensure adequate ventilation. This can be normal under heavy load. |
If the problem persists after attempting these solutions, please contact ECTIVE customer support.
8. Especificações
Technical specifications for the ECTIVE CSI 15 Pure Sine Wave Inverter.
| Recurso | Detalhe |
|---|---|
| Modelo | CSI 15 |
| Potência Contínua | 1500 W |
| Potência de pico (10s) | 2250 W |
| Potência de pico (2s) | 3000 W |
| Vol de entradatage | 12 V CC |
| Volume de saídatage | 230 V CA |
| Forma de onda de saída | Pure Sine Wave |
| Carregador Integrado | IUoU (for AGM, wet, gel, lithium) |
| Funções | Inverter, Battery Charger, NVS, UPS |
| Dimensões (C x L x A) | 44 x 22 x 9.5 cm |
| Peso | 5 kg |
| Cor | Preto |

Imagem: Dimensional drawing of the ECTIVE CSI series inverter, indicating its length, width, and height.

Imagem: A comparison table outlining different ECTIVE inverter series and their respective features, including wave type, power, and protection mechanisms.
9. Garantia e Suporte
ECTIVE offers a three-year manufacturer's warranty on its inverters. The specific warranty terms and conditions can be found in the detailed manual (PDF) available in the product information section where you purchased the product.
For technical support or warranty claims, please refer to the contact information provided with your purchase or on the official ECTIVE website.
Imagem: The ECTIVE CSI 15 inverter prominently displaying a "3 Years Warranty" badge, indicating the manufacturer's guarantee.