Protmex PT3374
Manual do Usuário da Estação Meteorológica Sem Fio Protmex PT3374
Model: PT3374 | Brand: Protmex
1. Introdução
Obrigado pela compra.asing the Protmex PT3374 Wireless Weather Station. This multifunctional device provides accurate indoor and outdoor temperature and humidity readings, barometric pressure, and a weather forecast. It also functions as an alarm clock with a colorful display, enhancing your daily life with essential environmental data. Please read this manual carefully before use to ensure proper operation and to fully utilize all features.
2. Produto acabadoview
The Protmex PT3374 consists of a main display unit and a wireless outdoor sensor. Familiarize yourself with the components and their functions.
2.1 Características da unidade principal
- Colorful LCD Display: Shows time, date, indoor/outdoor temperature and humidity, weather forecast, barometric pressure, and moon phase.
- Alarm Clock with Snooze: Set daily alarms with a convenient snooze function.
- Barometer: Displays atmospheric pressure and pressure tendency.
- Weather Forecast: Predicts weather conditions based on barometric pressure changes.
- Comfort Level Indicator: Provides a visual representation of indoor comfort.
- Temperature & Humidity Trend: Shows rising, falling, or steady trends for both indoor and outdoor conditions.
- Ice Alert: Notifies when outdoor temperature approaches freezing.
2.2 Sensor externo sem fio
The compact outdoor sensor wirelessly transmits temperature and humidity data to the main unit.
2.3 Identificação do Componente

Figure 2.1: Main Unit and Wireless Sensor with Labeled Parts
This image shows the front and back of the main weather station unit and the wireless outdoor sensor, with key components labeled for easy identification. Labels include display areas for weather forecasting, barometric pressure, outdoor and indoor temperature/humidity, time/calendar, and moon phase on the front. The back of the main unit shows buttons (DOWN, UP, ALARM, SET, MEMORY, HPA/INHG, ALERT, SNOOZE/LIGHT), a hook hole, battery compartment, support frame, and power supply socket.

Figure 2.2: Protmex PT3374 Weather Station Overview
Uma clara view of the Protmex PT3374 main display unit and its accompanying wireless outdoor sensor. The main unit features a large, colorful display showing various weather parameters and time, while the compact outdoor sensor is designed for remote placement.
3. Configuração
3.1 Desembalagem
Carefully remove all components from the packaging. Ensure you have the main unit, wireless outdoor sensor, and power adapter.
3.2 Instalação da bateria
The main unit can be powered by the included AC adapter or by batteries (for backup). The outdoor sensor requires batteries.
- Unidade principal: Open the battery compartment on the back. Insert 3 x AAA batteries (not included) according to the polarity markings. For continuous backlight, connect the AC power adapter to the power supply socket on the back of the main unit and plug it into a wall outlet.
- Sensor externo: Open the battery compartment. Insert 2 x AA batteries (not included) according to the polarity markings.
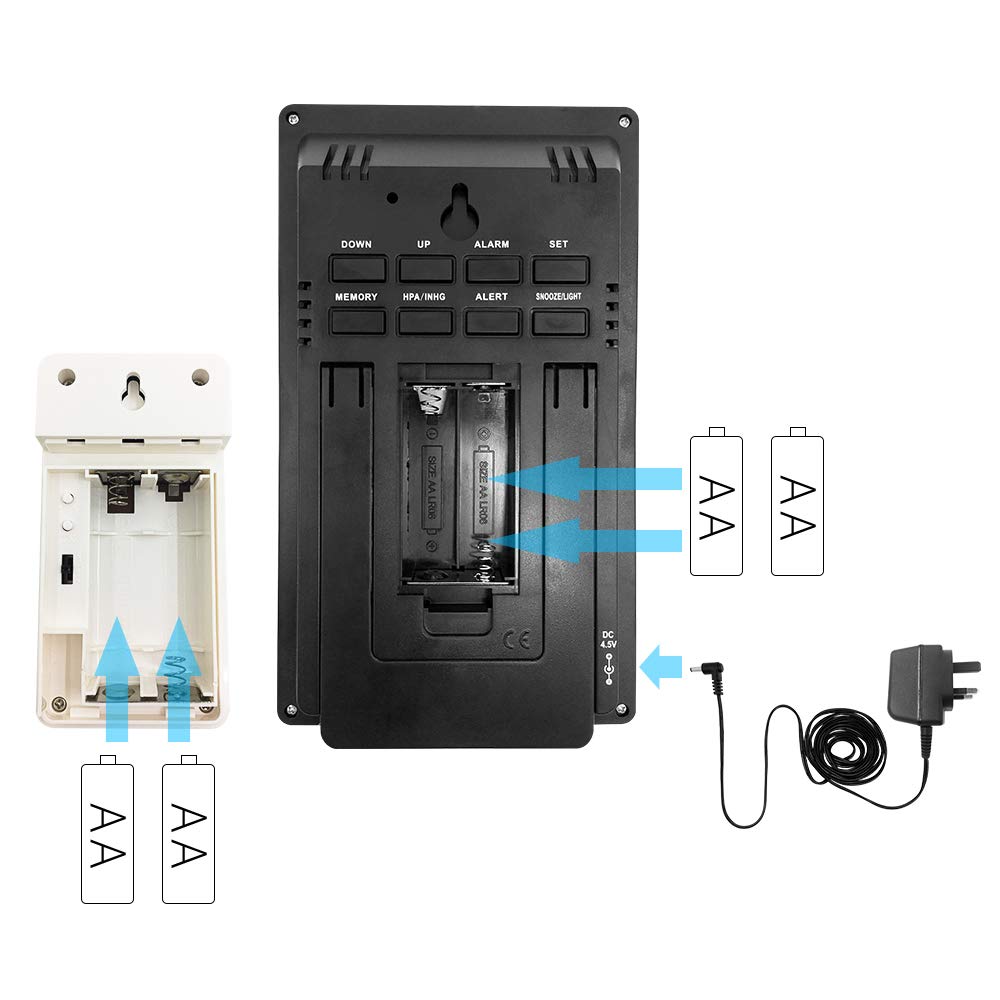
Figura 3.1: Instalação da bateria
This diagram illustrates the correct insertion of AAA batteries into the main unit and AA batteries into the wireless outdoor sensor, showing the battery compartments and polarity indicators.
3.3 Emparelhamento de sensores
After installing batteries in both units, the main unit will automatically search for the outdoor sensor. Ensure both units are within range. If pairing fails, press and hold the "CHANNEL" button on the main unit to initiate a manual search.
3.4 Configurações iniciais
Upon first power-up or after a reset, you may need to set the time, date, and measurement units.
- Press the "SET" button to enter time setting mode.
- Use the "UP" or "DOWN" buttons to adjust values.
- Press "SET" again to confirm and move to the next setting (e.g., 12/24 hour format, hour, minute, year, month, day, temperature unit (°C/°F), pressure unit (hPa/inHg)).
- Press "SET" repeatedly until all settings are confirmed or the unit exits setting mode automatically.
4. Instruções de operação
4.1 Time and Alarm Functions
- Configurando o alarme: Pressione o botão "ALARME" para view alarm time. Press and hold "ALARM" to enter alarm setting mode. Use "UP" or "DOWN" to adjust, and "ALARM" to confirm.
- Ativando/Desativando Alarme: Press "ALARM" repeatedly to toggle the alarm on/off.
- Função soneca: When the alarm sounds, press the "SNOOZE/LIGHT" button to activate snooze. The alarm will sound again after approximately 5 minutes.
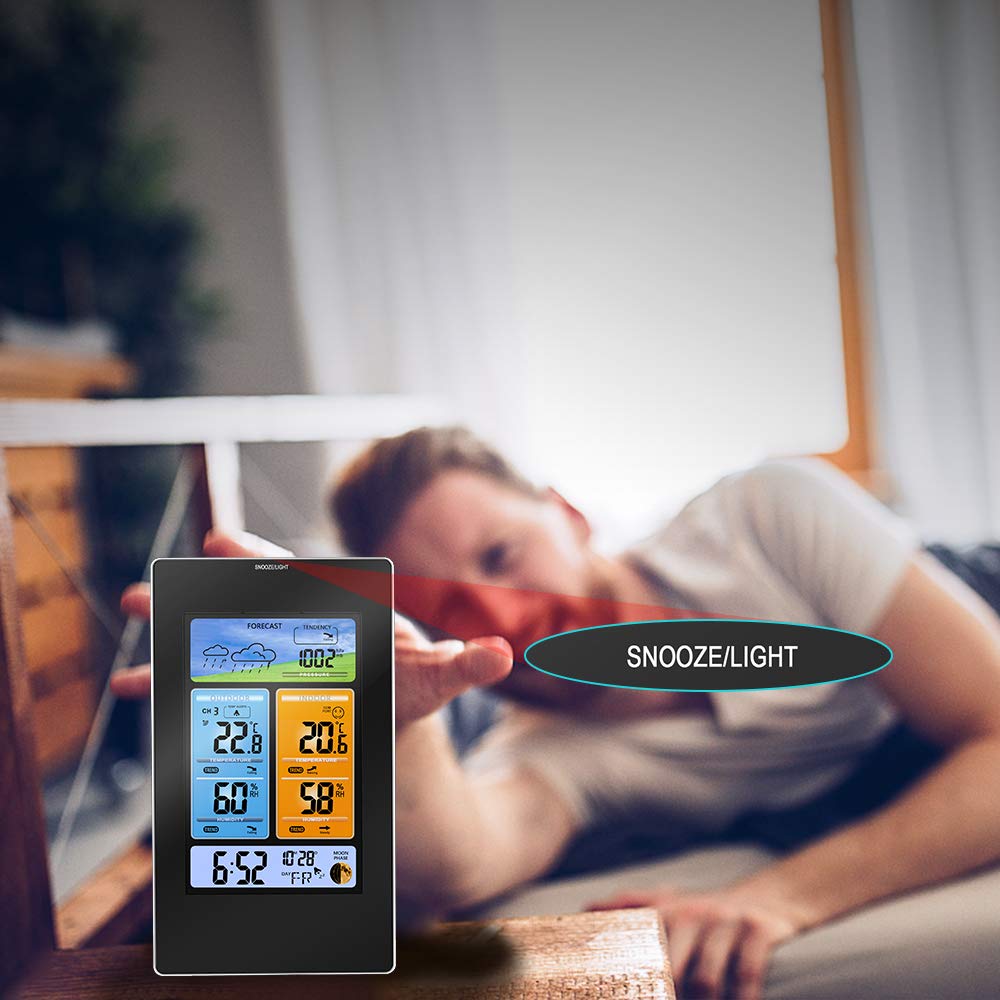
Figure 4.1: Snooze/Light Button Usage
This image demonstrates the use of the "SNOOZE/LIGHT" touch field, typically located at the top of the main unit, for activating the snooze function or temporarily illuminating the display backlight.
4.2 Weather Display and Forecast
The weather station provides a forecast for the next 12-24 hours based on barometric pressure changes.
- Ícones de previsão: The display shows icons for Sunny, Partly Cloudy, Cloudy, Rainy, and Snowy.
- Pressão barométrica: Displays current atmospheric pressure. Press "HPA/INHG" to switch between hPa and inHg units.
- Pressure Tendency: An arrow indicates if the pressure is rising, falling, or steady.

Figure 4.2: Weather Forecast Icons
This image illustrates the various weather forecast icons displayed on the main unit, including sunny, partly cloudy, cloudy, rainy, and snowy conditions, providing a visual prediction of upcoming weather.
4.3 Temperatura e Umidade
- Indoor/Outdoor Readings: The display shows current indoor and outdoor temperature and humidity.
- Indicadores de tendência: Arrows next to temperature and humidity readings indicate if values are rising, falling, or stable.
- Alerta de gelo: An ice crystal icon appears when the outdoor temperature drops to a level indicating potential ice formation (typically below 3°C or 37.4°F).

Figure 4.3: Trend Indicators
This image highlights the trend indicators for temperature and humidity on the main display, showing arrows that signify whether the readings are rising, falling, or remaining steady.

Figure 4.4: Ice Alert Feature
An illustration of the ice alert icon appearing on the display when the outdoor temperature reaches a critical level, warning of potential freezing conditions.
4.4 Indicador de Nível de Conforto
The comfort level indicator provides a quick visual reference for indoor environmental comfort based on temperature and humidity.

Figure 4.5: Comfort Level Indicator
This image shows the comfort level indicator, represented by various facial expressions, which changes based on the indoor temperature and humidity to indicate whether the environment is comfortable, too dry, or too humid.
4.5 Posicionamento do sensor externo
For accurate outdoor readings, place the wireless sensor in a sheltered location away from direct sunlight and precipitation. Ensure it is within the main unit's transmission range (typically up to 60 meters/200 feet in open air).

Figure 4.6: Optimal Outdoor Sensor Placement
This image illustrates the recommended placement of the main unit indoors and the wireless outdoor sensor in a sheltered outdoor location, ensuring optimal signal transmission and accurate readings.
5. Manutenção
- Limpeza: Limpe a unidade principal e o sensor com um pano macio e seco.amp pano. Não use produtos de limpeza abrasivos ou solventes.
- Substituição da bateria: Substitua as pilhas em ambas as unidades quando o indicador de bateria fraca aparecer no visor. Sempre substitua todas as pilhas ao mesmo tempo.
- Armazenar: Se for armazenar o aparelho por um período prolongado, remova todas as baterias para evitar vazamentos.
- Condições ambientais: Evite expor as unidades a temperaturas extremas, luz solar direta ou umidade excessiva.
6. Solução De Problemas
| Problema | Possível causa | Solução |
|---|---|---|
| Sem leitura de temperatura/umidade externa. | Sensor out of range, low sensor batteries, interference. | Move sensor closer to main unit. Replace sensor batteries. Relocate units away from electronic devices. Press and hold "CHANNEL" button on main unit to re-pair. |
| Data/hora incorreta. | Hora incorreta, interrupção de energia. | Manually set time and date (refer to Section 3.4). Ensure AC adapter is connected for continuous power. |
| A tela está escura ou em branco. | Low main unit batteries, AC adapter not connected. | Replace main unit batteries. Connect AC adapter for continuous backlight. |
| Previsão meteorológica imprecisa. | Weather forecast is a prediction, not always 100% accurate. | The forecast is based on barometric pressure trends and may not always match official forecasts. It provides a general indication. |
7. Especificações
| Recurso | Detalhe |
|---|---|
| Número do modelo | PT3374 (Part No: PPT-WS010) |
| Peso do item | 540 g |
| Dimensões da embalagem | 25 x 22.5 x 6 cm |
| Power Type (Main Unit) | Battery (3 x AAA, not included), Power Cord (AC Adapter) |
| Power Type (Outdoor Sensor) | Battery (2 x AA, not included) |
| Classificação de temperatura máxima | 60°C |
| Marca | Protmex |
8. Garantia e Suporte
Protmex products are designed for reliability and performance. For specific warranty details, please refer to the warranty card included with your product or visit the official Protmex website. If you encounter any issues or have questions regarding your PT3374 Weather Station, please contact Protmex customer support for assistance. Contact information can typically be found on the product packaging or the official brand website.
Para obter as informações de suporte mais recentes e as perguntas frequentes, visite: www.protmex.com (Nota: Este é um espaço reservado) URL pois nenhum link de suporte específico foi fornecido nos dados do produto.)