
1. Introdução
This manual provides detailed instructions for the installation, operation, and maintenance of your ASRock B365 PRO4 ATX Motherboard. Please read this manual thoroughly before proceeding with installation to ensure correct setup and to prevent damage to the components.
The ASRock B365 PRO4 motherboard supports 9th and 8th Generation Intel Core Processors, offering a robust platform for personal computing. It features a Digi Power Design with an 8 Power Phase Design, ensuring stable power delivery to the CPU.
2. Informações de segurança
- Desligue sempre a fonte de alimentação antes de instalar ou remover qualquer componente.
- Use uma pulseira antiestática para evitar danos por descarga eletrostática (ESD) em componentes sensíveis.
- Manuseie a placa-mãe pelas bordas para evitar tocar em componentes sensíveis.
- Garanta uma ventilação adequada dentro do gabinete do seu PC para evitar o superaquecimento.
- Mantenha a placa-mãe longe da umidade e de temperaturas extremas.
3. Configuração e instalação
3.1 Conteúdo da embalagem
Verifique se todos os itens estão presentes na embalagem:
- ASRock B365 PRO4 Motherboard
- Guia de instalação rápida
- CD de suporte
- Blindagem de E / S
- 2 x cabos de dados SATA
- 3 x Screws for M.2 Sockets
- 1 x Standoff for M.2 Socket

Image: ASRock B365 PRO4 Motherboard and its included accessories, including the quick installation guide, support CD, I/O shield, SATA cables, and M.2 screws/standoff.
3.2 Layout da placa-mãe
Familiarize yourself with the key components and connectors on the motherboard.

Imagem: Vista de cima para baixo view of the ASRock B365 PRO4 Motherboard, highlighting the CPU socket, RAM slots, PCIe slots, and M.2 slots.

Imagem: Angulada view of the ASRock B365 PRO4 Motherboard, showing the heatsinks and various connectors.
3.3 Instalação da CPU (LGA1151)
- Abra a alavanca do soquete da CPU e levante a placa de carga.
- Alinhe cuidadosamente a CPU com o soquete, certificando-se de que o triângulo dourado na CPU corresponda ao triângulo no soquete.
- Coloque o processador no soquete com cuidado, sem forçar.
- Feche a placa de carga e fixe-a com a alavanca.
3.4 Instalação da memória (RAM)
The motherboard features 4 DDR4 DIMM slots, supporting dual-channel memory up to 64GB.
- Abra as travas em ambas as extremidades do slot DIMM.
- Alinhe o entalhe no módulo de RAM com a chave no slot DIMM.
- Insert the RAM module firmly until the clips snap into place.
3.5 Instalação de dispositivo de armazenamento
The motherboard supports 6 SATA3 ports and 2 Ultra M.2 ports.
- Unidades SATA: Connect SATA data cables to the SATA ports on the motherboard and to your storage devices (HDDs/SSDs). Connect power cables from your power supply to the devices.
- SSDs M.2: Locate the M.2 slots. Insert the M.2 SSD into the slot at an angle, then gently push it down and secure it with the provided screw and standoff.
3.6 Instalação da placa de expansão (PCIe)
The motherboard has 2 PCI-Express 3.0 x16 slots and 2 PCI-Express 3.0 x1 slots.
- Select an appropriate PCIe slot for your expansion card (e.g., graphics card).
- Remova o suporte metálico correspondente do gabinete do seu computador.
- Align the card with the slot and press firmly until it is seated correctly.
- Fixe a placa com um parafuso na caixa do PC.
3.7 Connecting Peripherals to the I/O Panel
O painel de E/S traseiro oferece diversas portas para conectar dispositivos externos.
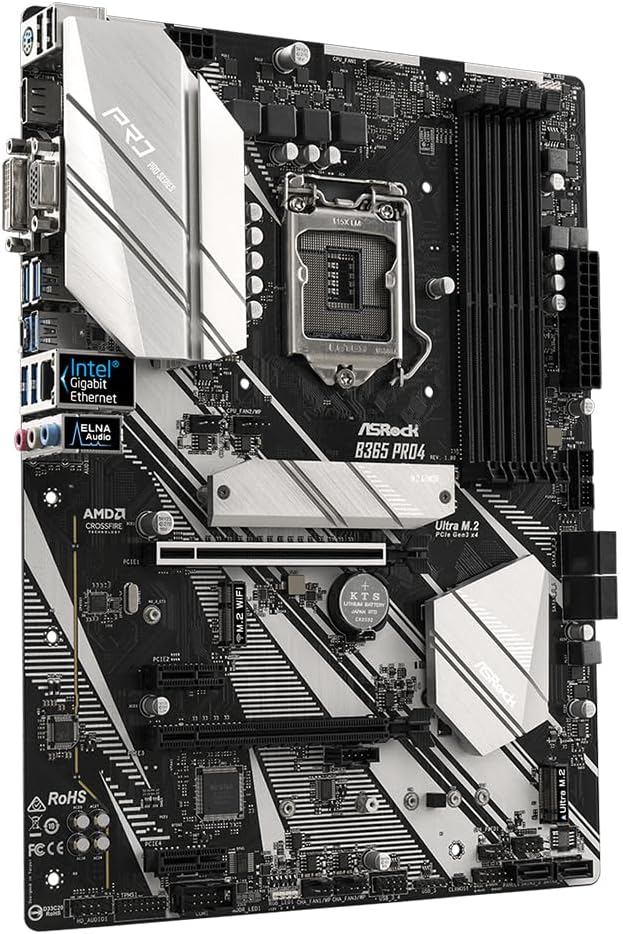
Imagem: Close-up view of the ASRock B365 PRO4 Motherboard's rear I/O panel, showing ports for PS/2, USB 2.0, USB 3.1 Gen 1, VGA, DVI-D, HDMI, LAN, and audio jacks.
- Portas USB: Connect USB devices (keyboard, mouse, external drives) to the available USB 2.0 (5 ports) and USB 3.1 Gen 1 (8 ports, including 1 Type-C rear) ports.
- Saídas de Vídeo: Connect your monitor to the VGA, DVI-D, or HDMI port.
- Porta LAN: Conecte um cabo Ethernet para acesso à rede.
- Conectores de áudio: Connect speakers, headphones, or microphones to the audio jacks.
- Porta PS/2: Connect a PS/2 keyboard or mouse.
4. Instruções de operação
4.1 Primeira inicialização e configuração da BIOS
- After assembling all components, connect the power supply and monitor.
- Power on your system. Press Del or F2 during startup to enter the BIOS/UEFI setup utility.
- Configure boot order, system time, and other necessary settings. Save changes and exit.
- Install your operating system from a bootable USB drive or optical media.
4.2 Instalação do driver
After installing the operating system, install the necessary drivers from the provided Support CD or download the latest versions from the ASRock weblocal. Os principais fatores incluem:
- Drivers de chipset
- Audio Drivers (Realtek ALC892)
- LAN Drivers (Intel I219V Gigabit Ethernet)
- Drivers de placa gráfica (para placa gráfica integrada ou GPU dedicada)
5. Manutenção
- Remoção de poeira: Regularly clean dust from the motherboard and case fans using compressed air. Ensure the system is powered off and unplugged before cleaning.
- Atualizações da BIOS: Confira o ASRock website periodically for BIOS updates. Updates can improve system stability and compatibility. Follow the instructions carefully when updating the BIOS.
- Gerenciamento de cabos: Certifique-se de que os cabos estejam bem encaminhados para melhorar o fluxo de ar e evitar interferências.
6. Solução De Problemas
- Sem energia:
- Check all power connections, including the 24-pin ATX and 8-pin 12V CPU power connectors.
- Certifique-se de que o interruptor da fonte de alimentação esteja na posição LIGADO.
- Nenhuma exibição:
- Verify that the monitor is connected to the correct video output (either integrated graphics or discrete GPU).
- Reinstale a placa gráfica e os módulos de RAM.
- Instabilidade/travamentos do sistema:
- Check RAM modules for proper seating.
- Certifique-se de que o cooler da CPU esteja instalado corretamente e fazendo bom contato.
- Atualize os drivers e a BIOS para as versões mais recentes.
- SSD M.2 não detectado:
- Ensure the M.2 SSD is correctly seated and secured.
- Check BIOS settings to ensure M.2 slots are enabled and configured correctly (SATA vs. PCIe mode).
7. Especificações
| Recurso | Detalhe |
|---|---|
| Soquete da CPU | LGA 1151 |
| Processadores compatíveis | 9th/8th Generation Intel Core Processors (up to 95W) |
| Chipset | Intel B365 |
| Memória | 4 x DDR4 DIMM slots, Dual Channel, Non-ECC, Buffered, Max 64GB (2666/2400/2133 MHz) |
| Slots de expansão | 2 x PCIe 3.0 x16, 2 x PCIe 3.0 x1 |
| Suporte a múltiplos gráficos | AMD Quad CrossFireX and CrossFire Technology |
| Armazenar | 6 x SATA3 ports (RAID 0, 1, 5, 10), 2 x Ultra M.2 ports (PCIe Gen3 x4 & SATA3) |
| Áudio | Realtek ALC892 7.1-Channel HD Audio |
| Rede local | Intel I219V Gigabit Ethernet |
| Portas USB | 8 x USB 3.1 Gen1 (1 Type-C rear, 5 rear, 2 via header), 5 x USB 2.0 (2 rear, 3 via header) |
| Saídas de vídeo | 1 x VGA, 1 x DVI-D, 1 x HDMI |
| Fator de forma | ATX (12.0 x 9.0 inch / 30.5 x 22.9 cm) |
8. Garantia e Suporte
8.1 Informações de garantia
The ASRock B365 PRO4 Motherboard comes with a Garantia limitada de 1 ano. This warranty covers defects in materials and workmanship under normal use. For specific terms and conditions, please refer to the warranty card included with your product or visit the official ASRock website.
Note: Damage caused by improper installation, misuse, unauthorized modifications, or natural disasters is not covered under warranty.
8.2 Suporte Técnico
For technical assistance, driver downloads, BIOS updates, or further troubleshooting, please visit the official ASRock support website:
Você também pode entrar em contato diretamente com o serviço de atendimento ao cliente da ASRock através do site deles. webSite para suporte personalizado.