1. Introdução
The LAUNCH CR319 is a handheld On-Board Diagnostics II (OBD2) code reader designed to assist in diagnosing vehicle engine issues. It provides access to various diagnostic functions to help users identify and clear trouble codes, monitor vehicle performance data, and check emission readiness status. This manual provides detailed instructions for the proper use and maintenance of your CR319 device.
2. Produto acabadoview
2.1 Principais Características
- Funções OBD2 completas: Supports all 10 OBD2 test modes.
- Biblioteca de pesquisa DTC: Built-in database with over 3000 code definitions.
- Suporte multilíngue: Available in English, Portuguese, Russian, Italian, Spanish, French, and German.
- Conecte e use: No batteries or charger required; powered directly from the vehicle's OBD2 port.
- Design compacto: Fácil de manusear e armazenar.
2.2 Componentes do dispositivo
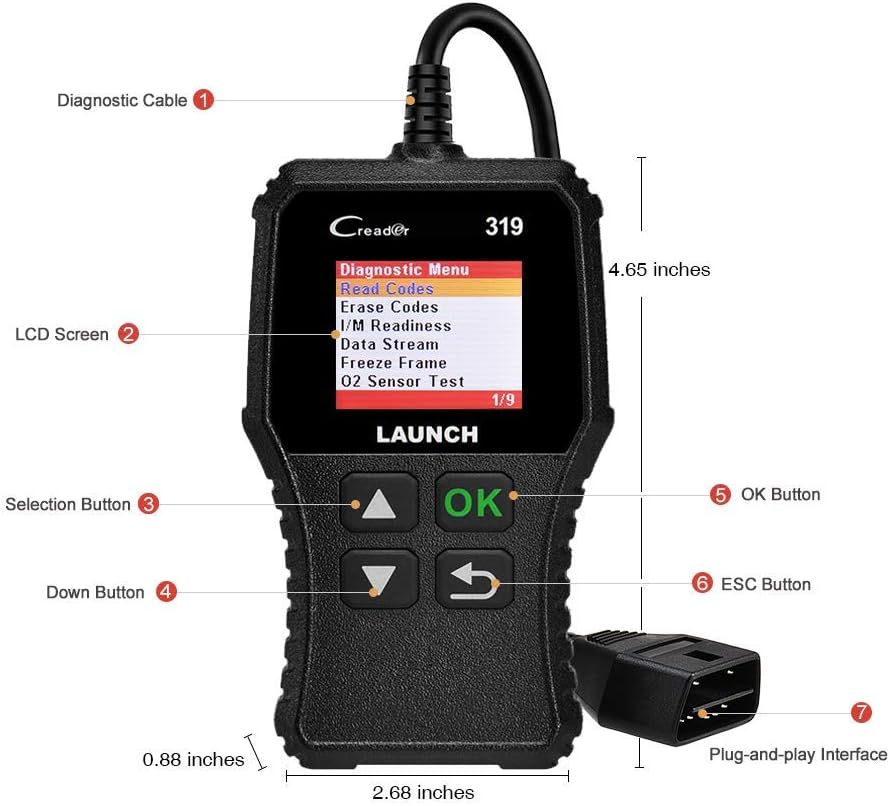
The image above illustrates the main components of the LAUNCH CR319 OBD2 Scanner. Key parts include the Diagnostic Cable (1) for connecting to the vehicle, the LCD Screen (2) for displaying information, Selection Buttons (3) for navigation, the Down Button (4), the OK Button (5) for confirmation, the ESC Button (6) to return to the previous screen, and the Plug-and-Play Interface (7) which is the OBD2 connector.
3. Configuração
- Localize a porta OBD2: A porta OBD2 geralmente está localizada sob o painel, no lado do motorista. Consulte o manual do proprietário do seu veículo caso não consiga encontrá-la.
- Conecte o scanner: Plug the CR319's diagnostic cable connector firmly into the vehicle's OBD2 port. The device will power on automatically.
- Ligue o veículo: Turn the vehicle's ignition to the 'ON' position (engine off) or start the engine, depending on the diagnostic function you intend to perform.
4. Instruções de operação
After connecting the CR319 to your vehicle, the main menu will appear. Use the Up/Down selection buttons to navigate through the options and the OK button to confirm a selection. The ESC button returns to the previous screen.
4.1 Ler códigos
This function retrieves Diagnostic Trouble Codes (DTCs) from the vehicle's computer. These codes indicate specific issues detected by the vehicle's self-diagnostic system.
- No menu principal, selecione 'Diagnose'.
- Selecione 'Read Codes'.
- The scanner will display any stored, pending, or permanent codes along with their descriptions.
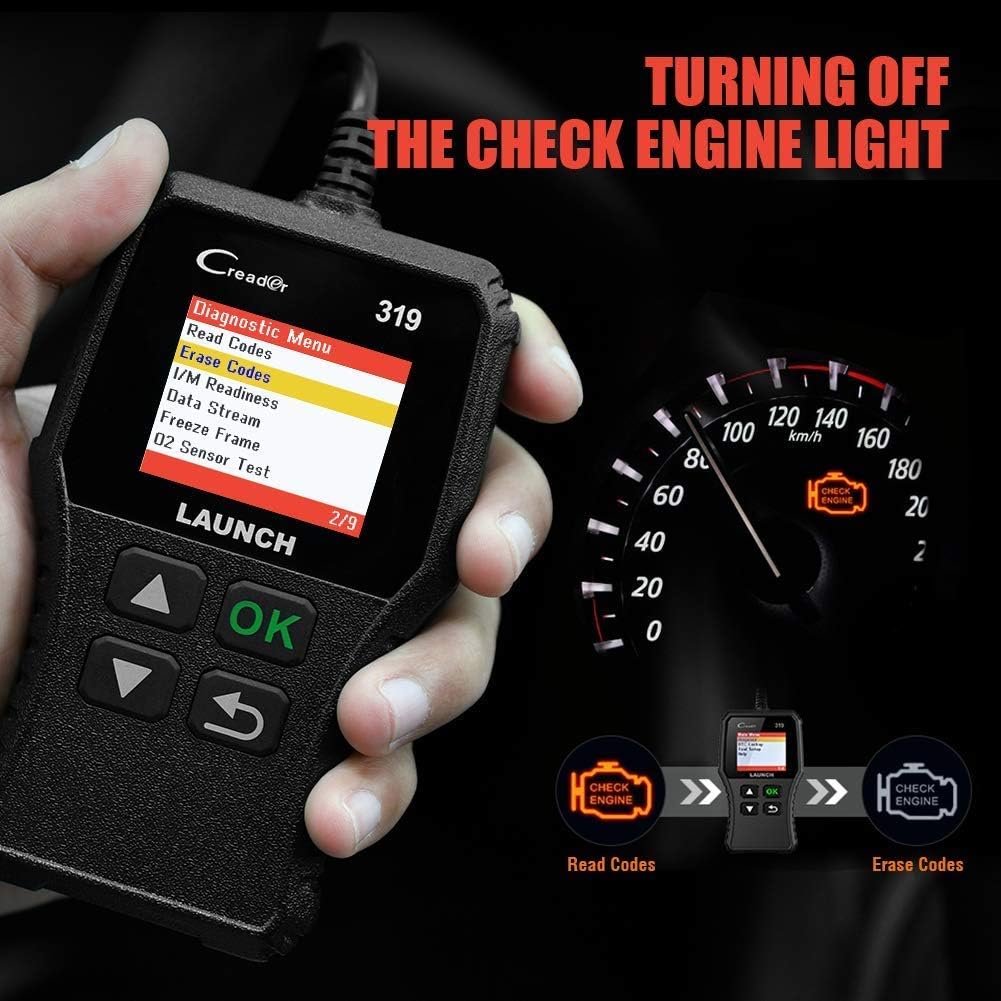
4.2 Códigos claros
This function erases DTCs from the vehicle's computer and turns off the Check Engine Light (MIL). Ensure any underlying issues are resolved before clearing codes, as they may reappear.
- No menu principal, selecione 'Diagnose'.
- Selecione 'Erase Codes'.
- Confirm the action when prompted. The Check Engine Light should turn off.
4.3 Prontidão I / M
Esta função verifica o estado dos sistemas de monitorização relacionados com as emissões do veículo para determinar se estão prontos para um teste de emissões.
- No menu principal, selecione 'Diagnose'.
- Selecione 'I/M Readiness'.
- The screen will display the status of various monitors (e.g., Misfire Monitor, Fuel System Monitor). 'OK' or 'Complete' indicates the monitor has run and passed; 'INC' or 'Incomplete' means the monitor has not yet run or completed its diagnostic cycle.
4.4 Data Stream (Live Data)

This function displays real-time operational data from the vehicle's engine control unit (ECU). This data can include engine RPM, vehicle speed, oxygen sensor readings, coolant temperature, and more.
- No menu principal, selecione 'Diagnose'.
- Selecione 'Data Stream'.
- Use the Up/Down buttons to scroll through the various data parameters.
4.5 Congelar Quadro
When an emission-related fault occurs, the vehicle's computer records a snapshot of operating conditions at the time of the fault. This data is called Freeze Frame data.
- No menu principal, selecione 'Diagnose'.
- Selecione 'Freeze Frame'.
- Review the recorded parameters to understand the conditions under which the fault occurred.
4.6 Pesquisa DTC

This feature allows you to manually enter a Diagnostic Trouble Code and view its definition from the scanner's internal database.
- No menu principal, selecione 'DTC Lookup'.
- Use the navigation buttons to input the desired DTC.
- Imprensa 'OK' para view the code definition.
4.7 Other OBD2 Functions
The CR319 also supports the following OBD2 functions, accessible through the 'Diagnose' menu:
- Teste do sensor O2: Retrieves oxygen sensor monitor test results for the most recently completed tests.
- Teste do sistema EVAP (Modo 8): Inicia um teste do Sistema de Controle de Emissões Evaporativas.
- Teste do monitor de bordo (Modo 6): Recupera resultados de testes para componentes e sistemas do trem de força relacionados a emissões que não são monitorados continuamente.
- Informações do veículo: Exibe o número de identificação do veículo (VIN), o ID de calibração (CALID) e o número de verificação de calibração (CVN).
5. Compatibilidade

The LAUNCH CR319 OBD2 Scanner is compatible with most American, European, and Asian vehicles manufactured from 1996 and newer that are OBDII-compliant. It supports all standard OBDII protocols, including KWP2000, ISO9141, J1850 VPW, J1850 PWM, and CAN (Controller Area Network).
5.1 Supported Vehicles
- 12V Gasoline cars.
- Vehicles compliant with OBDII standards (1996 US-based, 2000 EU-based, and newer Asian cars).
5.2 Not Supported Vehicles
- Diesel cars.
- 24V Heavy duty vehicles.
- Hybrid vehicles.
- Electric vehicles.
6. Especificações
| Recurso | Especificação |
|---|---|
| Modelo | CR319 |
| Mostrar | LCD colorido |
| Vol operacionaltage | 9-18V (via porta OBD2) |
| Protocolos Suportados | KWP2000, ISO9141, J1850 VPW, J1850 PWM, CAN |
| Dimensões (C x L x A) | 1.5 x 6 x 10.8 polegadas |
| Peso | 7.4 onças |
| Temperatura de operação | 0°C a 50°C (32°F a 122°F) |
| Temperatura de armazenamento | -20°C a 70°C (-4°F a 158°F) |
| Idiomas suportados | English, Portuguese, Russian, Italian, Spanish, French, German |
7. Solução De Problemas
7.1 O dispositivo não liga
- Ensure the diagnostic cable is securely connected to the vehicle's OBD2 port.
- Verify the vehicle's ignition is in the 'ON' position or the engine is running.
- Verifique o fusível do veículo correspondente à porta OBD2 (consulte o manual do proprietário do seu veículo).
7.2 Erro de comunicação com o veículo
- Confirm the vehicle is OBDII-compliant (generally 1996 and newer for gasoline vehicles).
- Ensure the diagnostic cable is properly connected.
- Turn off the ignition, wait 10 seconds, then turn it back to 'ON' and try again.
- If possible, test the scanner on another compatible vehicle to rule out a device malfunction.
7.3 Codes Cannot Be Cleared
- Certifique-se de que a ignição do veículo esteja na posição 'LIGADO' (motor desligado).
- If the underlying fault that triggered the code is still present, the code may not clear or will reappear immediately. Address the vehicle's issue first.
8. Manutenção
- Limpeza: Use um pano macio e seco para limpar o dispositivo. Evite produtos de limpeza abrasivos ou solventes.
- Armazenar: Store the scanner in a clean, dry environment away from extreme temperatures and direct sunlight.
- Cuidados com os cabos: Do not pull the cable forcefully or bend it sharply. Inspect the cable for damage before each use.
9. Garantia e Suporte
For warranty information, technical support, or service inquiries, please contact LAUNCH customer support. Refer to the product packaging or the official LAUNCH webPara obter as informações de contato mais atualizadas, acesse o site.