Apexcam TOUR 3
Apexcam Dash Cam User Manual
Modelo: TOUR 3
1. Introdução
Thank you for choosing the Apexcam Dash Cam. This manual provides detailed instructions for the installation, operation, and maintenance of your new dash camera system. Please read this manual thoroughly before use to ensure proper functionality and to maximize your driving safety and recording experience.
The Apexcam Dash Cam is a 1080P Full HD car dash camera featuring a 3-inch IPS display, dual front and waterproof rear lenses, a 170° wide-angle view, WDR technology, Super Night Vision, Parking Monitor, Loop Recording, and Motion Detection capabilities. It is designed to capture critical moments on the road and provide comprehensive surveillance for your vehicle.
2. Conteúdo da embalagem
Verifique se todos os itens listados abaixo estão incluídos no seu pacote:
- Apexcam Dash Cam (Front Unit)
- Câmera Traseira Impermeável
- Ventosa
- Suporte Adesivo
- Carregador de carro
- Cabo USB
- Manual do usuário
- Cabo da câmera traseira
- Screws for Rear Camera Mounting
- Adhesive Pad for Rear Camera
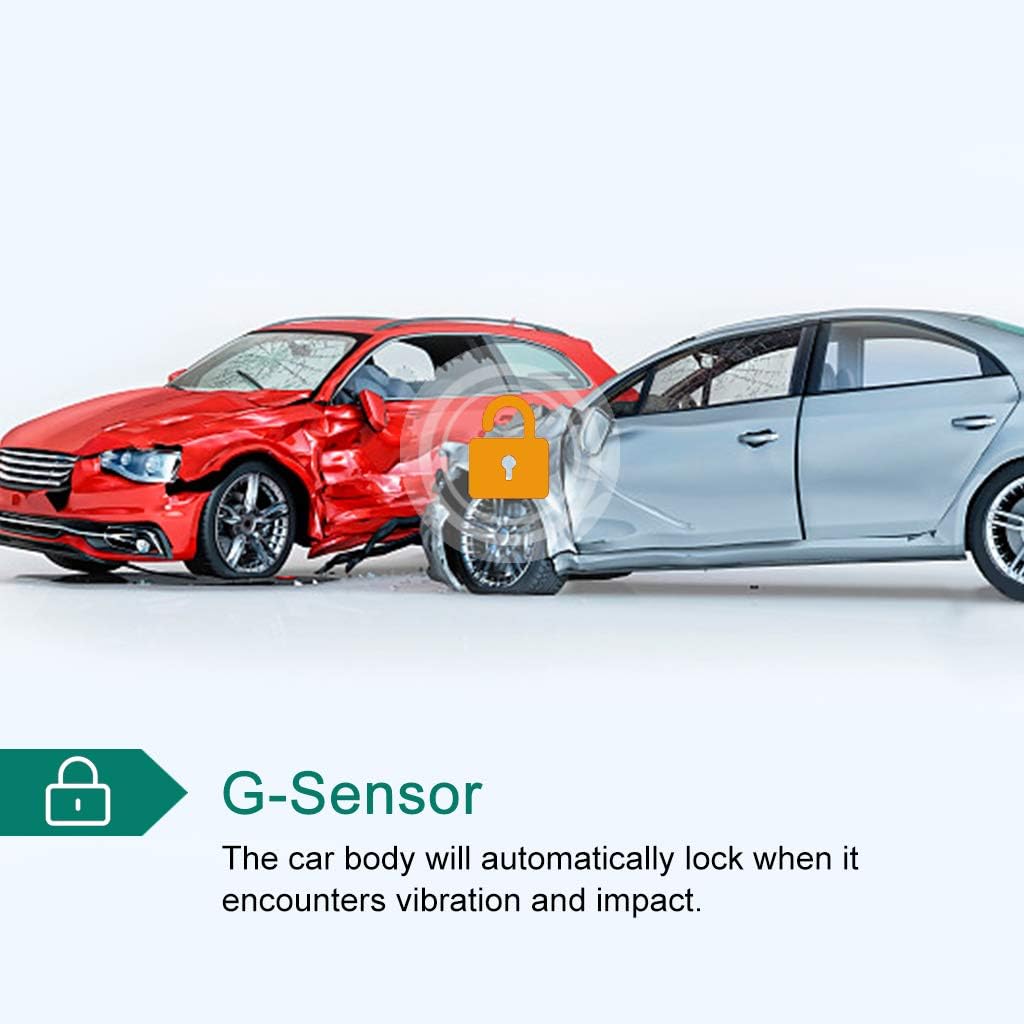
Image: All components included in the Apexcam Dash Cam package.
3. Produto acabadoview
3.1 Principais Características
- 1080P FHD Recording: Captures high-definition video and photos, ensuring clear footage of road details.
- Tela IPS de 3 polegadas: Proporciona uma visão clara e ampla. viewing angle for real-time monitoring and playback.
- Sistema de lentes duplas: Includes a front camera with a 170° wide-angle lens and a waterproof rear camera for comprehensive coverage.
- Sensor G: Automatically detects sudden vibrations or collisions and locks the current video footage para evitar sobrescrever.
- Gravação em loop: Continuously records by overwriting the oldest unlocked files when the memory card is full, ensuring uninterrupted recording.
- Monitoramento de estacionamento 24 horas: Activates recording automatically if a collision or vibration is detected while the vehicle is parked, providing surveillance even when the engine is off.
- WDR (Wide Dynamic Range) Technology: Enhances video quality in varying light conditions, preventing overexposure in bright areas and ensuring clarity in dark areas.
- Super Visão Noturna: Improves low-light performance, making night recordings clearer and enabling better recognition of license plates.

Image: Visual representation of the dash cam's powerful functions.
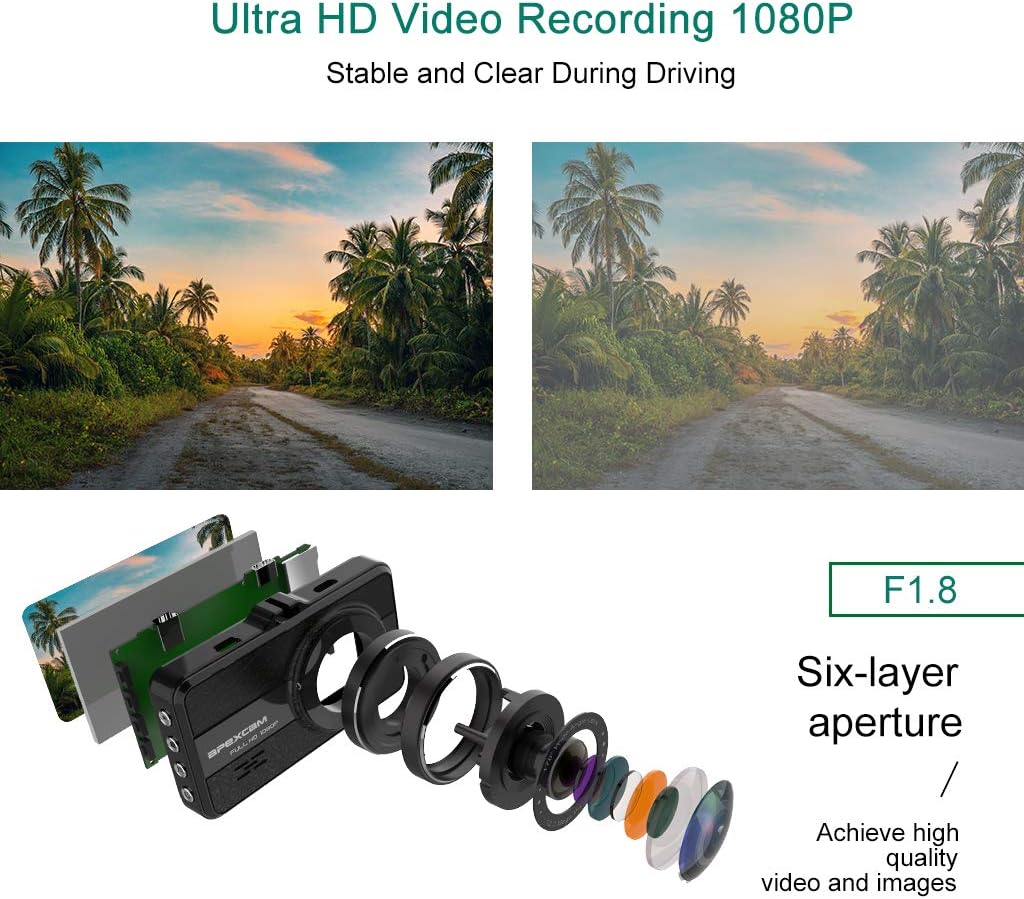
Image: Illustration of the F1.8 six-layer aperture lens for Ultra HD 1080P video recording.
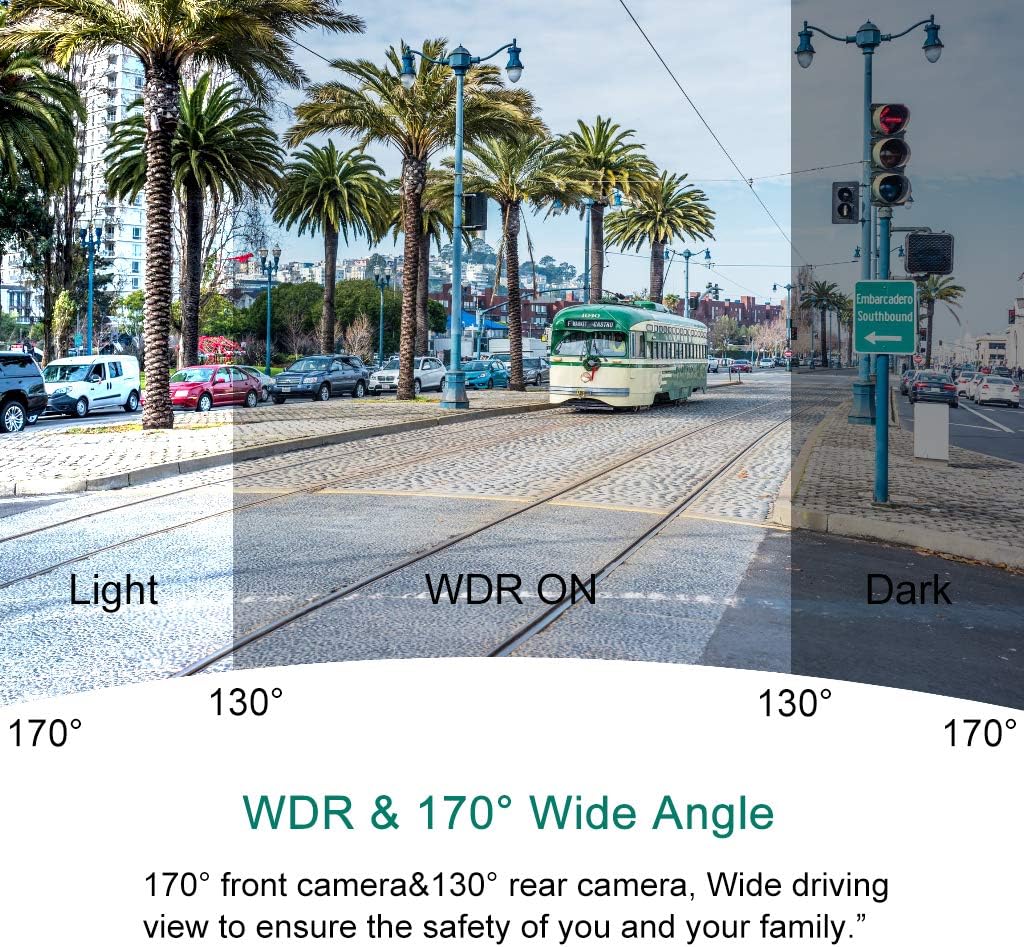
Image: Demonstration of WDR (Wide Dynamic Range) and 170° Wide Angle capabilities, showing improved visibility in varied lighting.

Image: G-Sensor functionality, automatically locking video footage upon detecting vibration or impact.

Image: Parking Monitoring feature, providing 24-hour comprehensive surveillance of the parking environment.

Image: Illustration of the wide viewing angles provided by the 170° front camera and 130° rear camera.
4. Guia de Configuração e Instalação
Follow these steps for proper setup and installation of your dash cam system.
4.1 Configuração inicial
- Insira o cartão Micro SD: Before first use, insert a high-speed Class 10 or higher Micro SD card (not included) into the dash cam's SD card slot. Ensure the card is inserted correctly until it clicks into place.
- Formate o cartão SD: It is highly recommended to format the Micro SD card within the dash cam's settings menu before initial use and periodically thereafter (e.g., monthly) to ensure stable recording performance.
- Carga da bateria: Connect the dash cam to the car charger or a USB power source to fully charge the internal battery before installation.
4.2 Instalação da câmera frontal
- Limpar o para-brisa: Choose a suitable location on your windshield, preferably behind the rearview mirror, where the dash cam will not obstruct your view. Clean the area thoroughly to ensure strong adhesion for the suction cup or adhesive mount.
- Anexar montagem: Secure the suction cup mount or adhesive mount to the cleaned area of the windshield. Ensure it is firmly attached.
- Instale a câmera veicular: Slide the dash cam onto the mount until it clicks into place. Adjust the camera angle to ensure the lens captures the road ahead clearly, with the horizon in the middle of the frame.
4.3 Rear Camera Installation and Wiring
The rear camera provides additional coverage and can assist with parking. Follow the wiring diagram below for proper connection.
- Roteamento do cabo da câmera traseira: Connect the rear camera to the main dash cam unit using the provided cable. Carefully route the cable along the vehicle's headliner, A-pillar, and floor trim to the rear of the vehicle.
- Instalar câmera traseira: Mount the waterproof rear camera on the rear windshield or near the license plate using the adhesive pad or screws. Ensure the camera has a clear view da parte traseira.
- Connect to Reversing Lamp (Opcional): Para exibição automática da traseira view when reversing, connect the red wire from the rear camera cable to the positive lead of your vehicle's reversing lamp. If this connection is not made, the rear view will still be recorded but will not automatically display on the screen when reversing.
- Conecte a energia: Plug the car charger into your vehicle's cigarette lighter socket and connect the other end to the dash cam's power input.
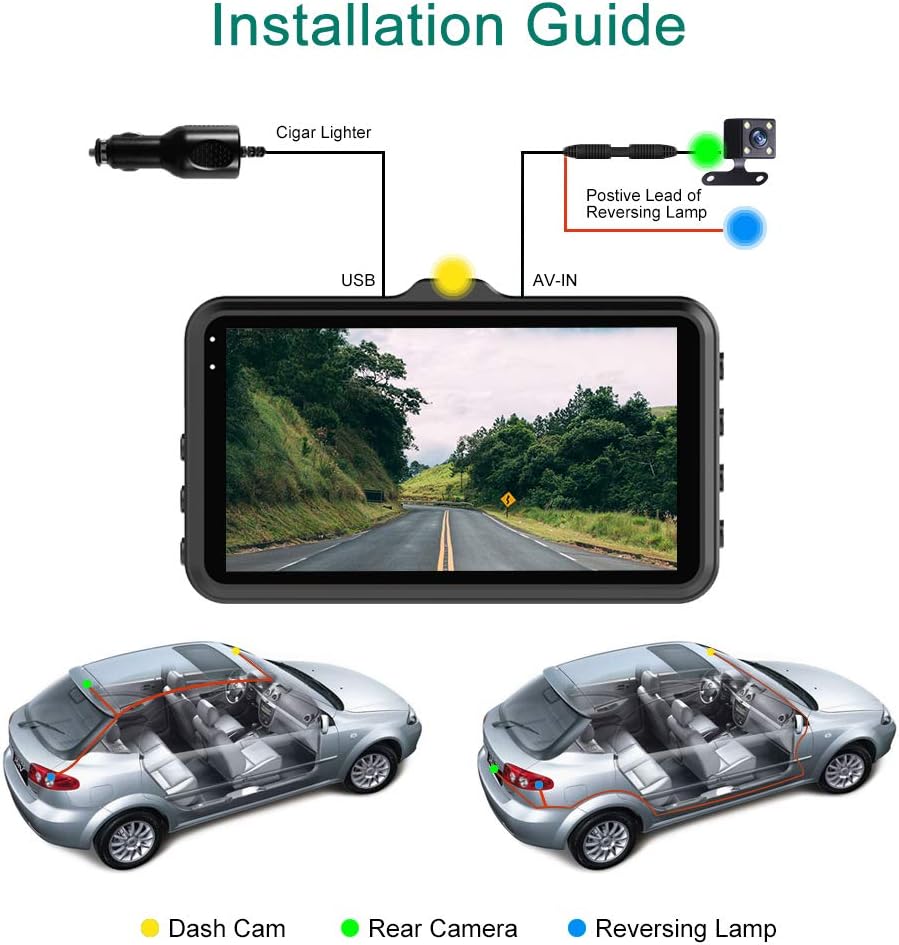
Image: Detailed installation guide showing wiring connections for the front and rear dash cameras.
5. Instruções de operação
5.1 Ligar/Desligar
- Automático: The dash cam will automatically power on and begin recording when your vehicle's engine starts (and power is supplied to the cigarette lighter socket). It will power off automatically a few seconds after the engine is turned off.
- Manual: Press and hold the Power button to manually turn the dash cam on or off.
5.2 Modos de gravação
- Gravação em loop: This feature ensures continuous recording. When the memory card is full, the dash cam will automatically overwrite the oldest unlocked video files. Video segments are typically recorded in 1, 3, or 5-minute intervals (configurable in settings).
- Gravação de emergência (sensor G): Em caso de impacto ou colisão repentina, o sensor G integrado detectará automaticamente o evento e bloqueará o vídeo atual. file, preventing it from being overwritten by loop recording. These locked fileOs arquivos são armazenados em uma pasta separada.
- Monitor de estacionamento: When enabled, the dash cam will automatically turn on and record a short video if it detects a vibration or collision while the vehicle is parked and the engine is off. This feature requires a continuous power supply (e.g., hardwire kit, not included) or the dash cam's internal battery.
5.3 Menu de Navegação
Use the physical buttons on the side or front of the dash cam to navigate through the menu options. Common buttons include:
- Botão de menu: Entra no menu de configurações.
- Botões para cima / para baixo: Navegue pelas opções do menu.
- Botão OK/Confirmar: Seleciona uma opção ou confirma uma configuração.
- Botão de modo: Switches between video recording, photo mode, and playback mode.
5.4 Reprodução
Para review recorded videos or photos:
- Switch the dash cam to Playback Mode using the Mode button.
- Use the Up/Down buttons to browse through the recorded files.
- Press the OK button to play a video or view uma foto.
- Para transferir files to a computer, remove the Micro SD card and insert it into a card reader, or connect the dash cam directly to a computer via USB cable (select "Mass Storage" mode if prompted).
6. Manutenção
- Manutenção do cartão SD: Regularly format your Micro SD card (e.g., once a month) to prevent data corruption and ensure optimal recording performance. Back up any important files antes da formatação.
- Limpeza: Use um pano macio e seco para limpar a lente e a tela da câmera veicular. Evite usar produtos de limpeza abrasivos ou solventes.
- Temperatura: Avoid exposing the dash cam to extreme temperatures for prolonged periods, as this can affect battery life and overall performance.
7. Solução De Problemas
| Problema | Possível causa/solução |
|---|---|
| A câmera veicular não liga. |
|
| A câmera veicular para de gravar ou trava. |
|
| Vídeo footage está desfocado ou pouco nítido. |
|
| Dash cam falls off the windshield. |
|
| A câmera traseira não está funcionando. |
|
8. Especificações
| Recurso | Detalhe |
|---|---|
| Modelo | RODADA 3 |
| Tamanho da tela | 3 polegadas |
| Tipo de exibição | IPS |
| Resolução de vídeo | 1080p Full HD |
| Ângulo da câmera frontal | 170 graus |
| Ângulo da câmera traseira | 130 graus (aprox.) |
| Características especiais | G-Sensor, Loop Recording, Parking Monitor, WDR |
| Armazenar | Micro SD/SD (up to 32GB, Class 10 or higher recommended) |
| Tipo de Bateria | Polímero de lítio (incluído) |
| Conectividade | USB |
| Tipo de montagem | Montagem adesiva, montagem de sucção |
| Tipo de mídia compatível | MOV |
9. Garantia e Suporte
Apexcam products are designed for reliability and performance. For any questions, technical support, or warranty inquiries, please contact our customer service team through the retailer's platform or the official Apexcam website. Tenha em mãos o modelo do seu produto e as informações da compra ao entrar em contato com o suporte.
We are committed to providing excellent customer service and support for your Apexcam Dash Cam.