
1. Introdução e maisview
The ESX INFOTAINMENT VN1015-MA-DAB-4G is an advanced Android-based naviceiver designed for vehicle integration, offering a comprehensive multimedia and navigation experience. This unit features a 10.1-inch anti-glare multi-angle touchscreen, Android operating system, 4G/LTE connectivity, DAB+ digital radio, and Google Maps navigation. It supports Bluetooth hands-free calling and audio streaming, USB and MicroSD media playback, and includes inputs for rearview cameras and auxiliary devices.
Os principais recursos incluem:
- 10.1-inch high-resolution, anti-glare multi-angle touchscreen.
- Android Operating System for versatile app usage.
- Integrated 4G/LTE dongle for mobile internet (requires optional SIM card).
- DAB+ digital radio reception with station logos and AM/FM radio with RDS.
- Google Maps navigation (online and offline capabilities).
- Bluetooth hands-free system with audio streaming.
- Multiple connectivity options: 2x USB ports, 1x MicroSD slot, 1x camera input, 2x video outputs, 1x AUX/video input, 1x AUX/audio input.
- Support for steering wheel controls (optional adapter may be required).
2. Configuração e instalação
Proper installation is crucial for the optimal performance of your ESX VN1015-MA-DAB-4G naviceiver. It is highly recommended that installation be performed by a qualified professional to ensure correct wiring and vehicle compatibility.
2.1. Identificação do componente
Familiarize yourself with the various ports and connections on the rear of the unit before installation.
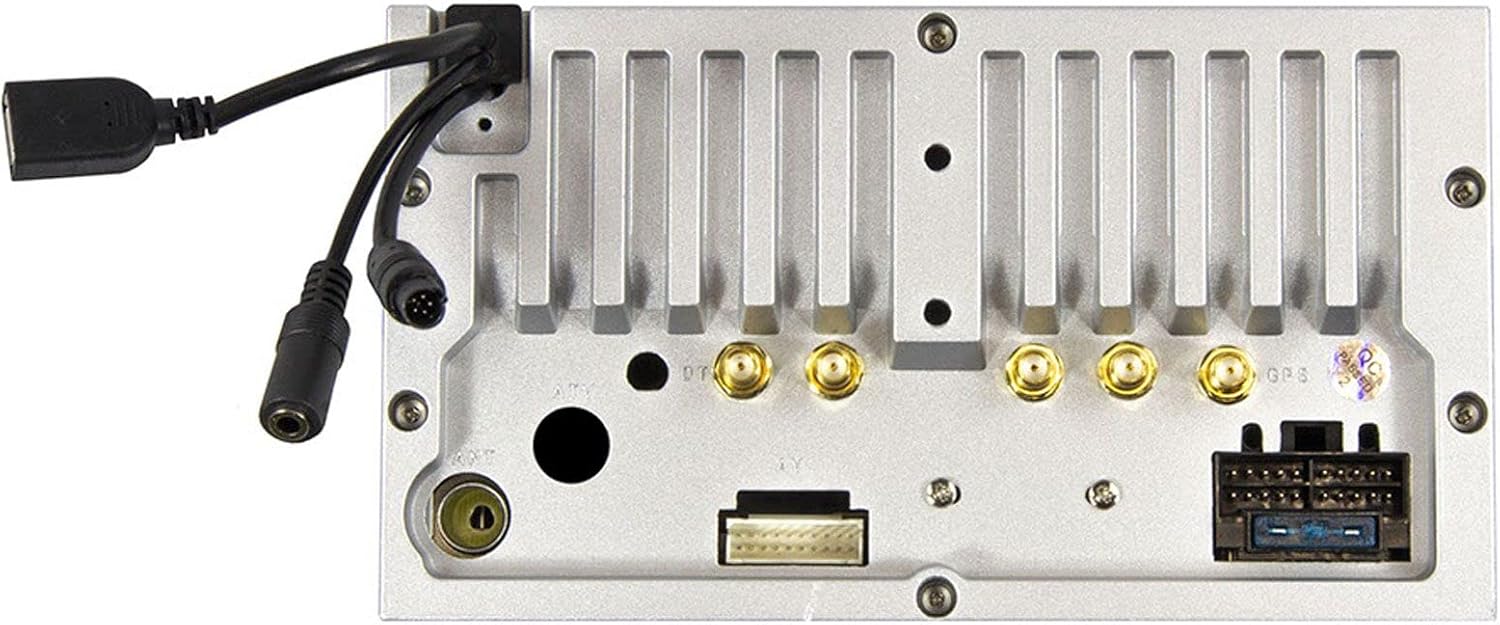
Figura 2.1: Traseira view of the ESX VN1015-MA-DAB-4G unit, illustrating the power harness, antenna inputs, USB ports, and auxiliary connections.
2.2. Conexões de fiação
- Fonte de energia: Connect the main power harness to your vehicle's electrical system, ensuring correct positive, negative, and accessory (ACC) connections.
- Saídas de alto-falante: Connect your vehicle's speakers to the corresponding outputs on the naviceiver.
- Conexões de antena: Connect the FM/AM antenna. For DAB+ digital radio, connect the included DAB+ antenna to the designated port.
- Antena GPS: Conecte a antena GPS e monte-a em um local com boa visibilidade. view do céu para uma recepção de sinal ideal.
- Portas USB: Connect external USB devices for media playback or smartphone connectivity.
- Microfone: Connect the external microphone (VNA-MIC-AND, optional) for improved hands-free call quality.
- Traseiraview Câmera: Conecte uma traseiraview camera to the dedicated camera input. Ensure the reverse trigger wire is correctly connected for automatic display switching.
- Saídas de Vídeo: Utilize the two video outputs for connecting external monitors.
- Entradas AUX: Connect external audio/video sources to the AUX/video and AUX/audio inputs.
- 4G/LTE Dongle: If using mobile internet via 4G/LTE, insert a compatible SIM card into the optional 4G/LTE dongle and connect it to a USB port.
- Controle do volante: If your vehicle supports steering wheel controls, an optional adapter may be required to integrate this functionality.
2.3. Inicialização
After all connections are secure, turn on your vehicle's ignition. The naviceiver should power on. Follow any on-screen prompts for initial setup, such as language selection and time zone.
3. Instruções de operação
This section details the primary functions and operations of your ESX VN1015-MA-DAB-4G naviceiver.
3.1. Controles básicos e interface
The unit features a responsive touchscreen and physical buttons for common functions.

Figura 3.1: The main screen showing the radio interface with frequency display and control buttons.
- Botão de energia: Press and hold to turn the unit on/off. A short press may mute audio or put the unit into standby.
- Controle de volume: Ajuste o nível de saída de áudio.
- Botão Home: Retorna à tela inicial principal do Android.
- Botão Voltar: Navigates back one step in menus or applications.
- Botão da câmera: Direct access to the camera input display (e.g., rearview câmera).
3.2. Android Operating System
The naviceiver runs on an Android operating system, allowing access to various applications and customization options.
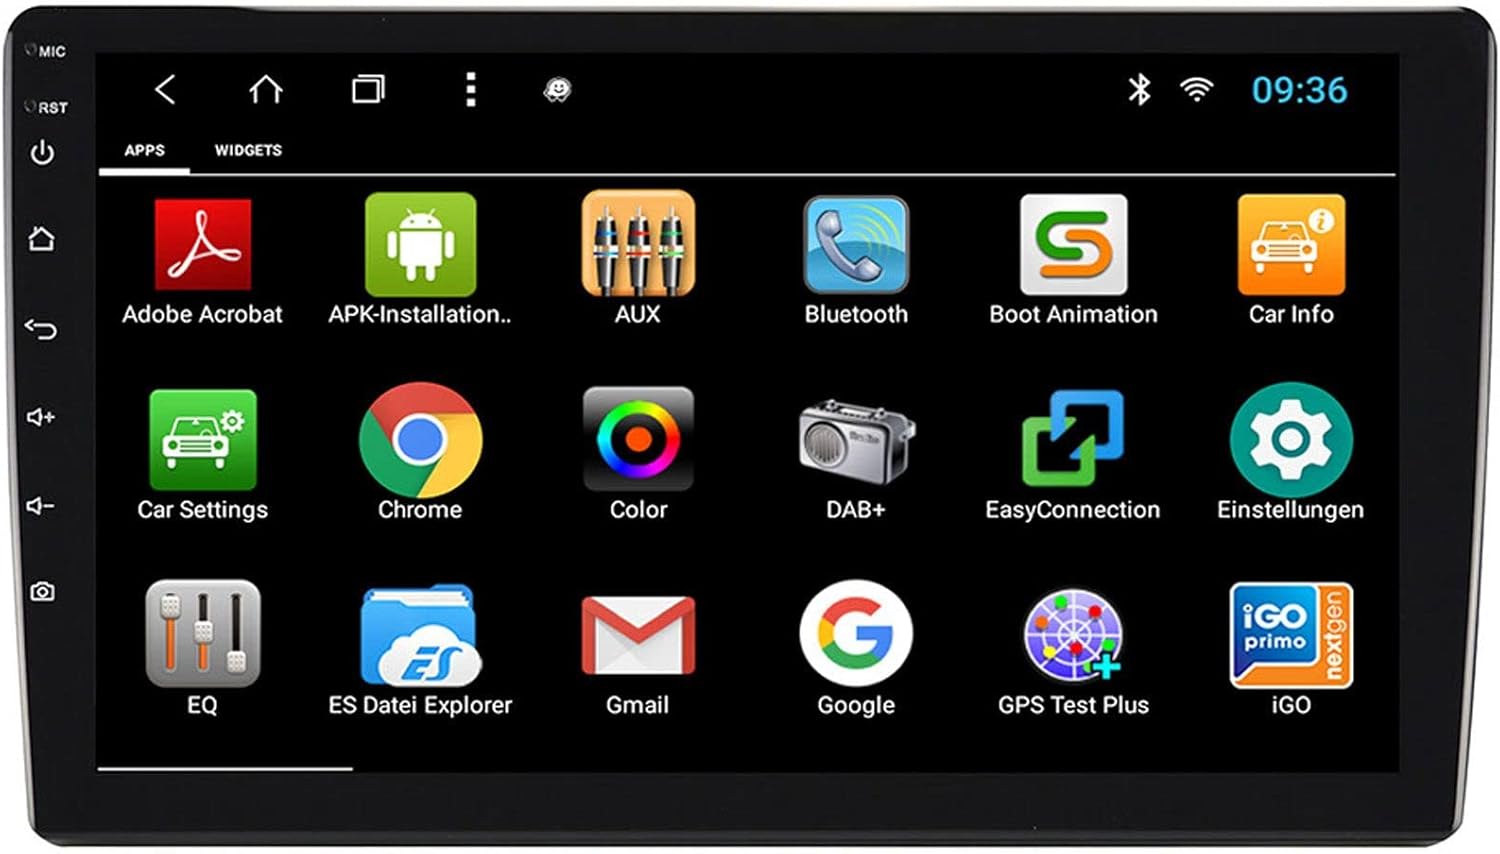
Figura 3.2: The applications screen, displaying various pre-installed and user-installed Android apps.
- App Launcher: Access all installed applications from the app drawer.
- Widgets: Customize your home screen with widgets for quick access to information or functions.
- Configurações: Adjust system settings, network connections, display, audio, and more.
- Conectividade com a Internet: Connect to the internet via a WiFi hotspot (from a compatible smartphone) or by inserting a SIM card into the 4G/LTE dongle.
3.3. Radio Functions (AM/FM/DAB+)
The unit supports both analog and digital radio broadcasts.
- Seleção de banda: Switch between AM, FM, and DAB+ bands.
- Tuning: Manually tune or use the auto-scan function to find available stations.
- Predefinições: Salve suas estações favoritas para acesso rápido.
- RDS (FM): Radio Data System displays station information (e.g., station name, song title).
- DAB+ Features: Enjoy higher quality digital audio and view station logos where available.
3.4. Conectividade Bluetooth
Pair your smartphone for hands-free communication and audio streaming.
- Emparelhamento: Enable Bluetooth on your smartphone and search for the naviceiver. Select the unit and confirm the pairing code.
- Chamadas com viva-voz: Make and receive calls directly from the naviceiver screen.
- Streaming de áudio: Play music from your smartphone wirelessly through the naviceiver.
3.5. Navigation (Google Maps)
Utilize Google Maps for turn-by-turn navigation.

Figura 3.3: The navigation interface showing a map with a selected destination.
- Navegação online: Requires an active internet connection (WiFi hotspot or 4G/LTE).
- Mapas offline: Download maps for specific regions to use navigation without an internet connection.
- Entrada de destino: Enter addresses or points of interest using the touchscreen keyboard.
3.6. Reprodução de mídia
Reproduzir áudio e vídeo files de várias fontes.
- USB: Connect USB drives containing media files.
- Cartão MicroSD: Insert a MicroSD card into the dedicated slot for media or navigation data.
- Formatos suportados: The unit supports a wide range of audio and video formats. Refer to the system settings for a complete list.
3.7. Entrada da câmera
The naviceiver automatically displays the rearview camera feed when the vehicle is in reverse, or manually via the camera button.

Figura 3.4: Traseiraview camera display with dynamic parking guidelines.
- Ativação automática: When connected correctly, the rearview camera image appears automatically when shifting into reverse.
- Diretrizes de estacionamento: Adjustable parking lines assist with maneuvering.
4. Manutenção
Regular maintenance ensures the longevity and optimal performance of your naviceiver.
- Limpeza de tela: Use um pano macio e sem fiapos para limpar suavemente a tela sensível ao toque. Para manchas persistentes, pressione levemente o pano.ampLimpe o pano com água ou um produto de limpeza seguro para telas. Evite produtos químicos agressivos ou materiais abrasivos.
- Atualizações de software: Verifique periodicamente se há atualizações de software disponíveis através das configurações do sistema ou do site do fabricante. webAs atualizações do site podem melhorar o desempenho, adicionar recursos e corrigir erros.
- Cuidados Gerais: Avoid exposing the unit to extreme temperatures, direct sunlight for prolonged periods, or excessive moisture. Ensure all connections remain secure.
5. Solução De Problemas
This section addresses common issues you might encounter with your ESX VN1015-MA-DAB-4G naviceiver.
| Problema | Possível causa | Solução |
|---|---|---|
| A unidade não liga. | Sem alimentação elétrica; Fusível queimado; Fiação incorreta. | Check vehicle's fuse box and the unit's power connections. Ensure ACC wire is receiving power. |
| Nenhum som. | Volume too low; Mute activated; Incorrect speaker wiring; Audio source issue. | Increase volume. Check if mute is active. Verify speaker connections. Try a different audio source. |
| GPS signal loss or inaccurate navigation. | GPS antenna obstructed or disconnected; Outdated maps. | Certifique-se de que a antena GPS esteja desobstruída. view of the sky and is securely connected. Update maps if necessary. |
| Problemas de conexão Bluetooth. | Device not in pairing mode; Interference; Unit not discoverable. | Ensure both devices are in pairing mode. Restart both devices. Check Bluetooth settings on the naviceiver. |
| Tela sensível ao toque sem resposta. | System freeze; Software error. | Perform a soft reset (refer to the unit's specific reset procedure, often a small reset button). If persistent, a factory reset might be needed (data loss may occur). |
| DAB+ radio not receiving stations. | DAB+ antenna not connected or faulty; Poor signal area. | Check DAB+ antenna connection. Ensure the antenna is correctly installed. Try rescanning for stations in a different location. |
If you encounter issues not listed here or if the suggested solutions do not resolve the problem, please contact ESX customer support or your authorized dealer.
6. Especificações
Below are the technical specifications for the ESX VN1015-MA-DAB-4G Naviceiver:
| Recurso | Detalhe |
|---|---|
| Marca | Extensão ESX |
| Modelo | VN1015-MA-DAB-4G |
| Tamanho da tela | 10.1 polegadas (25.6 cm) |
| Tipo de exibição | High-resolution, anti-glare multi-angle touchscreen |
| Sistema operacional | Andróide |
| BATER | 4 GB |
| Memória Flash | 64 GB |
| Conectividade | Bluetooth, USB, 4G/LTE (via dongle), WiFi (via hotspot) |
| Sintonizador de rádio | AM/FM with RDS, DAB+ Digital Radio |
| Navegação | Google Maps (online/offline) |
| Entradas | 1x Camera Input, 1x AUX/Video Input, 1x AUX/Audio Input, 2x USB Ports, 1x MicroSD Slot |
| Saídas | 2x Video Outputs, Pre-amplified outputs (Front/Rear/Subwoofer) |
| Método de controle | Tela sensível ao toque |
| Dispositivos compatíveis | Smartphone |
7. Garantia e Suporte
Your ESX VN1015-MA-DAB-4G naviceiver comes with a Certificate of Authenticity. For specific warranty terms and conditions, please refer to the documentation provided with your purchase or contact your authorized ESX dealer.
For technical support, troubleshooting assistance beyond this manual, or inquiries regarding parts and service, please contact your point of purchase or visit the official ESX webSite com informações de contato do serviço de atendimento ao cliente.