
1. Produto acabadoview
The HOMCOM Model 837-061 shoe cabinet is designed for efficient shoe storage and organization in entryways or hallways. It features three tilt-out compartments for shoes and a side cabinet with a hanging bar for umbrellas or small bags. The top surface can be used for keys, phones, or decorative items.
- Spacious Shoe Storage: Three tilt-out compartments, each accommodating up to 4 pairs of shoes, for a total capacity of 6-12 pairs (depending on shoe size and type).
- Divisores ajustáveis: Each shoe compartment includes a removable and adjustable divider with two positions to customize storage space.
- Armário lateral: A dedicated side cabinet with a door and hanging bar, suitable for umbrellas, small bags, or other accessories.
- Construção durável: Made from resistant engineered wood (MDF) for long-lasting use.
- Segurança antitombamento: Includes an anti-tip safety system to secure the cabinet to the wall, preventing accidental tipping.

Image 1.1: The HOMCOM shoe cabinet, Model 837-061, shown in a typical home entryway with decorative items on top.
2. Informações de segurança
Leia e compreenda todas as instruções de segurança antes da montagem e utilização. O não cumprimento destas instruções pode resultar em ferimentos ou danos ao produto.
- Dispositivo anti-queda: It is mandatory to install the included anti-tip device to secure the cabinet to a wall. This prevents the cabinet from tipping over, especially if children or pets attempt to climb it.
- Capacidade de peso: Do not exceed the maximum supported weight of 15 kg (33 lbs) on the top surface. Overloading can compromise stability.
- Conjunto: Assemble the product on a soft, clean surface to prevent scratches. Ensure all screws and fasteners are tightened securely before use.
- Colocação: Place the cabinet on a flat, level surface to ensure stability.
- Segurança das crianças: Mantenha as peças pequenas e os materiais da embalagem longe do alcance de crianças durante a montagem.

Image 2.1: Illustration of the anti-tip design, showing how to secure the cabinet to the wall for enhanced stability and safety.
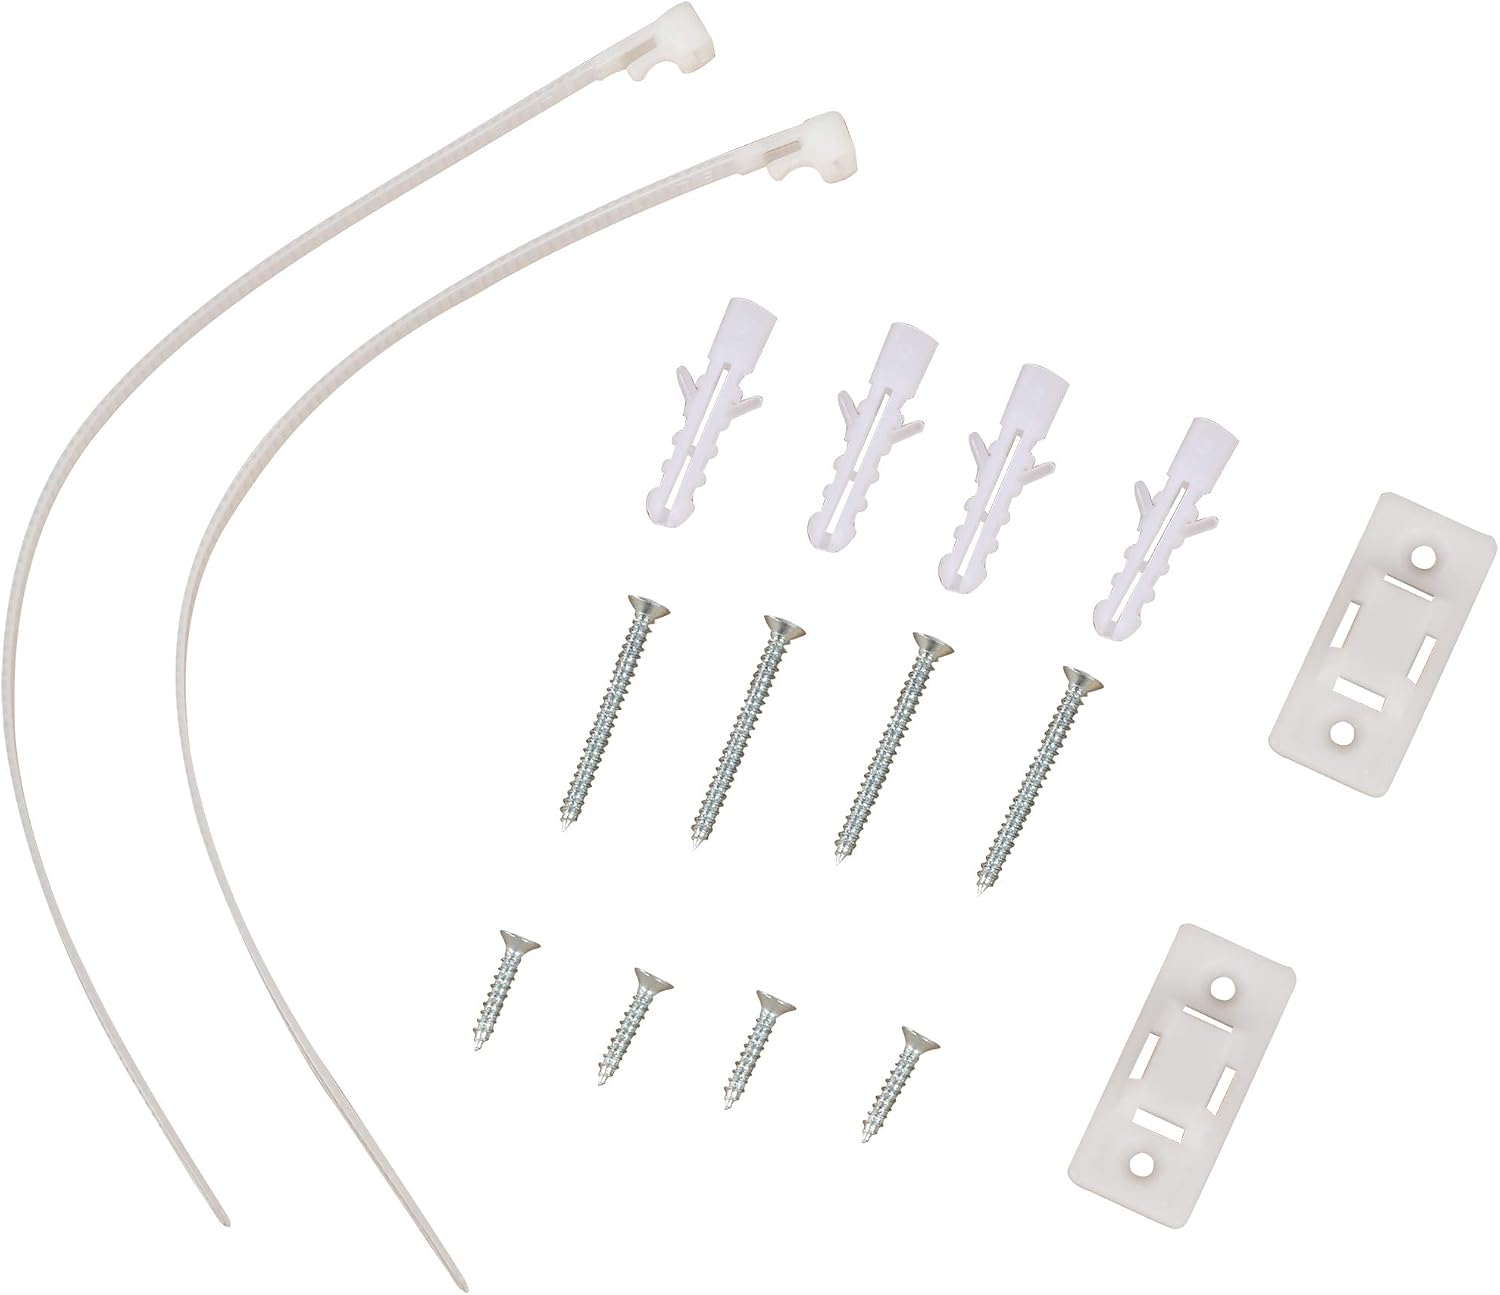
Image 2.2: Detail of the anti-tip bracket installed on the rear panel of the shoe cabinet.
3. Configuração e montagem
This product requires assembly. It is recommended to have two people for assembly. Please ensure all parts are present before beginning.
3.1. Conteúdo da embalagem
Verify that all components and hardware are included in the package. Refer to the parts list in your physical instruction manual for detailed identification.

Image 3.1: All screws, wall anchors, and anti-tip straps included for assembly and secure installation.
3.2. Etapas de Montagem (Diretrizes Gerais)
- Desempacotar e identificar: Carefully unpack all components and lay them out on a soft, clean surface. Identify each part using the provided labels or diagrams.
- Montar a estrutura principal: Begin by connecting the main side panels and base using the designated screws and dowels. Ensure connections are snug but do not overtighten initially.
- Install Shoe Compartments: Attach the mechanisms for the tilt-out shoe compartments to the interior of the cabinet. Insert the adjustable dividers into the desired positions.
- Instalar portas: Secure the three tilt-out doors to their respective mechanisms. Attach the side cabinet door using hinges.
- Install Side Cabinet Bar: Place the hanging bar inside the side cabinet.
- Aperto final: Once all components are in place, carefully tighten all screws to ensure structural integrity.
- Instale o dispositivo anti-tombamento: Attach the anti-tip brackets to the top rear of the cabinet. Secure the straps to a wall stud or use appropriate wall anchors (provided) to prevent tipping.
Note: For detailed, step-by-step assembly instructions, please refer to the printed manual included with your product.
4. Instruções de operação
4.1. Storing Shoes
To store shoes, gently pull the handle of a tilt-out compartment. The door will tilt forward, revealing the internal shelves. Place shoes on the shelves, ensuring they fit within the compartment's depth and height. Push the door back until it closes securely.

Image 4.1: The shoe cabinet with all three tilt-out compartments open, demonstrating the three-level hanging shelves and capacity for up to 12 pairs of regular-sized shoes.
4.2. Adjusting Dividers
Each tilt-out compartment features an adjustable divider. To adjust, open the compartment door. The divider can be moved between two positions or removed entirely to accommodate different shoe sizes or types (e.g., boots, high heels). Carefully lift and reposition the divider as needed.

Imagem 4.2: Um close-up view illustrating the adjustable divider mechanism within a shoe compartment, allowing for flexible storage configurations.
4.3. Using the Side Cabinet
The side cabinet provides additional storage. Open the door to access the interior, which includes a hanging bar. This space is ideal for storing umbrellas, small bags, or other entryway essentials.
5. Manutenção
Proper maintenance will ensure the longevity and appearance of your HOMCOM shoe cabinet.
- Limpeza: Limpe as superfícies com um pano macio, damp pano. Evite usar produtos químicos agressivos, produtos de limpeza abrasivos ou umidade excessiva, pois podem danificar o acabamento da madeira engenheirada.
- Pó: Limpe regularmente o armário com um pano seco e macio para evitar o acúmulo de poeira.
- Derramamentos: Limpe imediatamente qualquer líquido derramado para evitar danos causados pela umidade ou manchas.
- Verificação de hardware: Verifique periodicamente todos os parafusos e fixadores para garantir que permaneçam apertados. Reaperte-os, se necessário.
- Evite luz solar direta: A exposição prolongada à luz solar direta pode causar desbotamento ou descoloração do acabamento da madeira.
- Controle de umidade: Mantenha a temperatura e a umidade do ambiente estáveis para evitar que a madeira deforme ou rache.

Image 5.1: A close-up showing the layers of engineered wood (MDF) used in the construction of the cabinet, highlighting its natural and resistant properties.
6. Solução De Problemas
Caso encontre algum problema com seu armário de sapatos, consulte os problemas e soluções comuns a seguir:
- O gabinete sente-se instável:
- Certifique-se de que o armário esteja colocado em uma superfície plana e nivelada.
- Verifique se todos os parafusos de montagem estão bem apertados.
- Confirm the anti-tip device is correctly installed and anchored to the wall.
- Tilt-out doors do not close properly:
- Check if shoes are obstructing the closing mechanism.
- Ensure the internal dividers are correctly positioned and not interfering with the door.
- Verify that the door hinges and mechanisms are properly aligned and tightened.
- Side cabinet door is misaligned:
- Adjust the hinges if they are adjustable.
- Certifique-se de que o gabinete esteja nivelado.
- Peças em falta ou componentes danificados:
- Contact HOMCOM customer service with your model number and a description of the issue.
7. Especificações
| Marca | COMISSÃO HOMOLÓGICA |
| Número do modelo | 837-061 |
| Material | Madeira engenheirada (MDF) |
| Cor | Natural |
| Dimensões gerais (C x L x A) | 79 cm x 26 cm x 120 cm (31.1" x 10.2" x 47.2") |
| Max. Weight Capacity (Top Surface) | 15 kg (33 libras) |
| Capacidade do calçado | 6-12 pairs (depending on shoe size/type) |
| Montagem necessária | Sim |

Image 7.1: Detailed dimensions of the shoe cabinet: 79 cm width, 26 cm depth, and 120 cm height.
8. Garantia e Suporte
For warranty information, product support, or to order replacement parts, please contact HOMCOM customer service. Refer to your purchase documentation or the HOMCOM official website para detalhes de contato.
Por favor, tenha em mãos o número do modelo (837-061) e a data da compra ao entrar em contato com o suporte.