1. Introdução
Obrigado pela compra.asing the HBX 1/18 4WD RTR RC Off-Road Buggy. This manual provides essential information for the safe operation, setup, maintenance, and troubleshooting of your RC vehicle. Please read this manual thoroughly before operating the product to ensure optimal performance and longevity.
2. Precauções de segurança
- Always operate the RC car in open areas away from people, pets, and obstacles.
- Avoid operating near water bodies unless specifically designed for waterproof use, and ensure proper drying after use in wet conditions.
- Mantenha os dedos, cabelos e roupas largas longe das peças móveis.
- Não toque no motor imediatamente após o uso, pois ele pode estar quente.
- Ensure batteries are charged correctly and never leave charging batteries unattended.
- Store the RC car and its components in a cool, dry place when not in use.
3. Conteúdo da embalagem
Verifique se todos os itens estão presentes no seu pacote:
- Carro RC x 1
- 2.4G Remote Control x 1
- 7.4V / 850mAh Lithium Polymer Battery x 2
- Carregador USB x 1
- R Clips x 4
- Manual de instruções x 1
- Chave de fenda x 1
- DIY Sticker Set x 1

Image: All components included in the HBX 1/18 4WD RTR RC Off-Road Buggy package.
4. Configuração
4.1 Carregamento da bateria
- Connect the provided USB charger to a suitable USB power source.
- Connect the 7.4V / 850mAh Lithium Polymer battery to the USB charger.
- Allow the battery to charge fully. The indicator light on the charger will change (e.g., from red to green) when charging is complete.
- Each battery provides approximately 20 minutes of operation, for a total of 40 minutes with both included batteries.

Image: High discharge batteries and USB charger.
4.2 Instalação da bateria (veículo)
- Certifique-se de que o carro de controle remoto esteja desligado.
- Localize o compartimento da bateria no chassi.
- Insert a fully charged 7.4V / 850mAh Lithium Polymer battery into the compartment.
- Fixe a tampa da bateria.
4.3 Instalação da bateria do controle remoto
- Abra o compartimento da bateria no controle remoto.
- Insert the required batteries (not specified in JSON, typically AA) according to polarity markings.
- Feche o compartimento da bateria.
4.4 Emparelhamento do controle remoto
- Ligue o carrinho de controle remoto.
- Ligue o controle remoto.
- The remote control and car should automatically pair. An indicator light on both devices will confirm successful pairing.
5. Instruções de operação
5.1 Controles Básicos
- Acionador do acelerador: Puxe para avançar, empurre para frear/dar ré.
- Volante: Vire à esquerda para virar à esquerda, vire à direita para virar à direita.
5.2 modos de velocidade
The RC car features two speed modes: low speed and high speed. This allows for a wide range of users, from children to advanced hobbyists. Refer to your remote control for the speed mode switch.
5.3 Desempenho em todos os terrenos
This RC buggy is designed for various terrains, including sand, grass, 45° slopes, rocks, and marble surfaces. Its independent suspension system and large TPR rubber tires provide excellent shock resistance and grip.
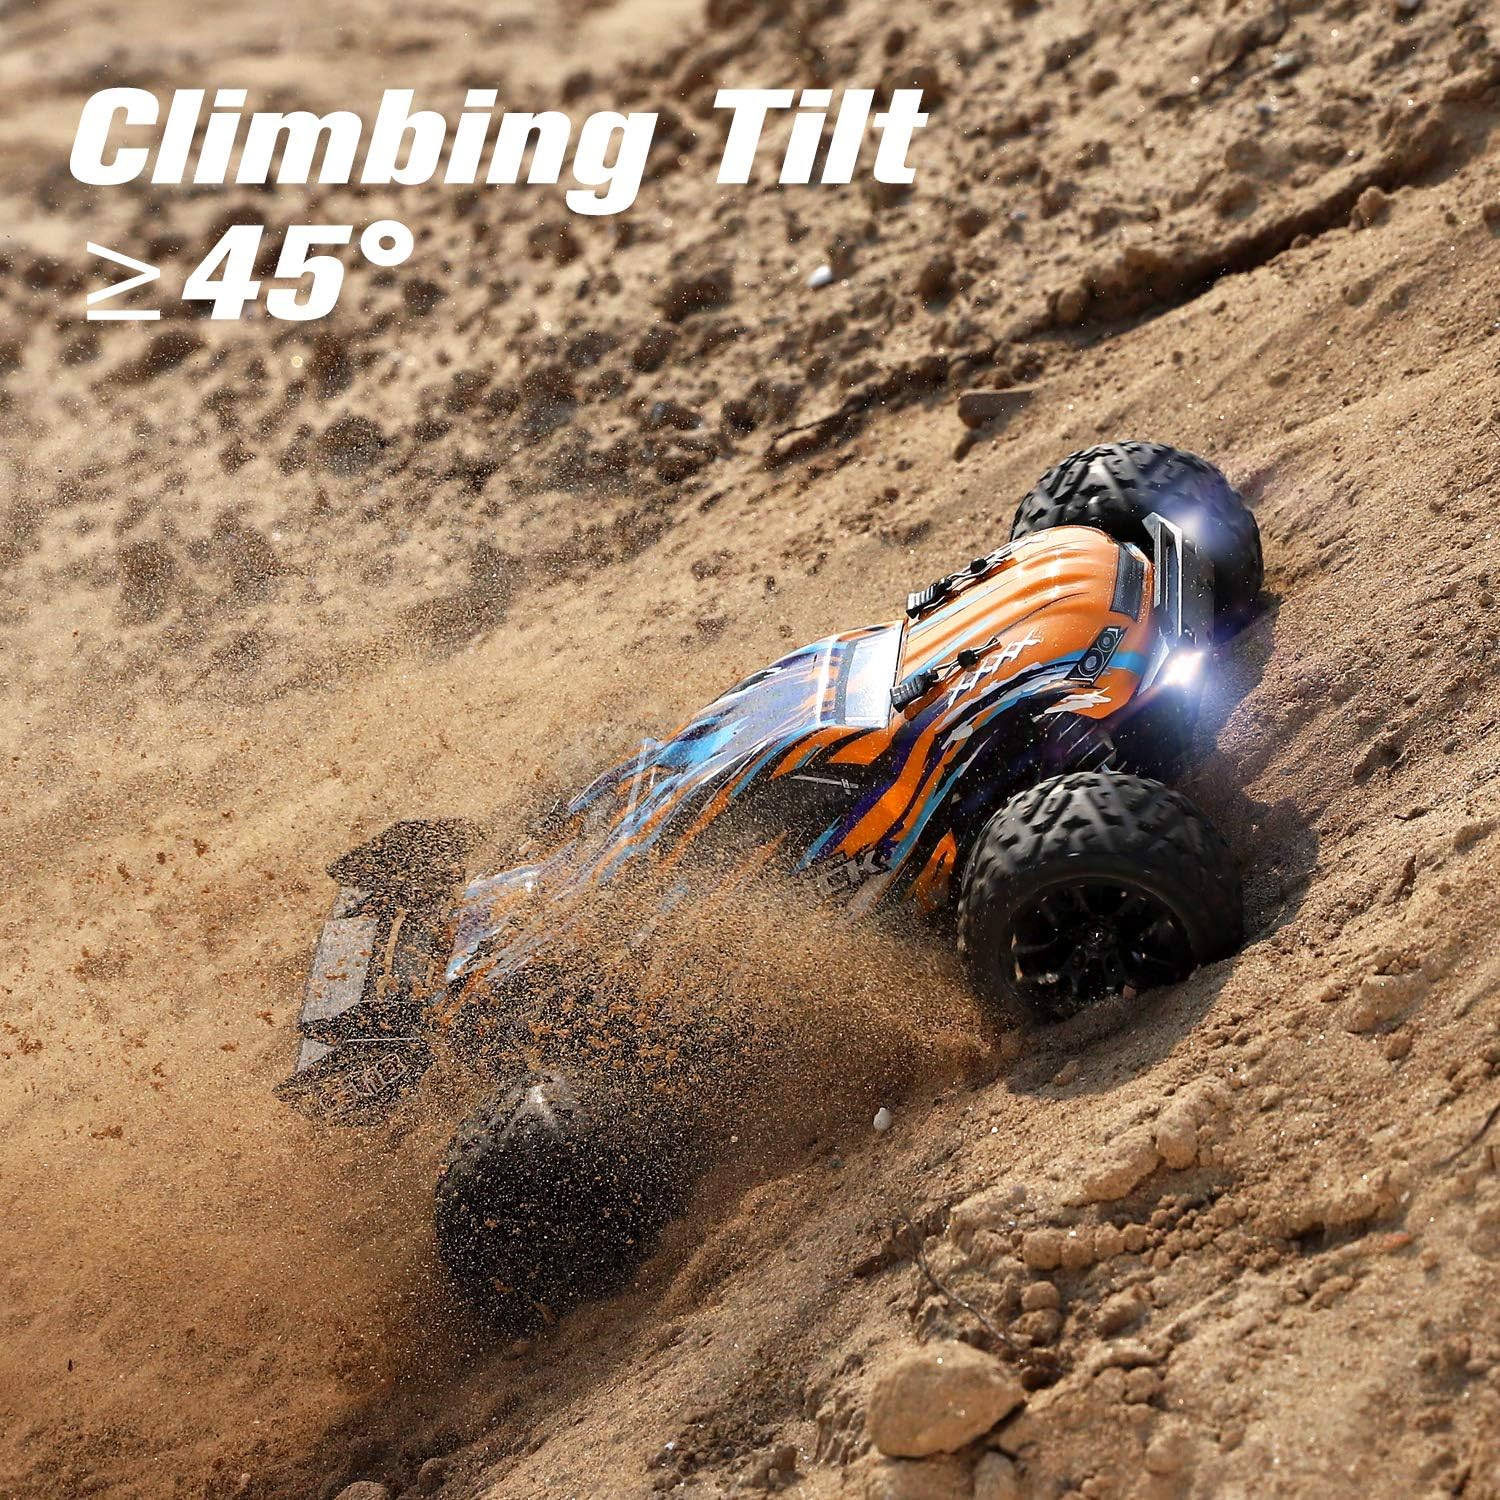
Image: The RC car demonstrating its climbing capability on a sandy incline.

Image: The RC car reaching its maximum speed of 40 km/h on sand.

Image: The RC car's versatility across various terrains, including wet conditions.
6. Manutenção
6.1 Limpeza
Although the RC car features a waterproof system (IPX4), it is recommended to clean and dry the car thoroughly after use, especially after running in wet or muddy conditions, to ensure long-term performance.
6.2 Verificações de componentes
- Regularly inspect tires for wear and tear.
- Check the shock absorbers and suspension system for any damage or loose connections.
- Certifique-se de que todos os parafusos e fixadores estejam bem apertados.
- Keep the motor and electronic speed controller (ESC) free from dirt and debris.
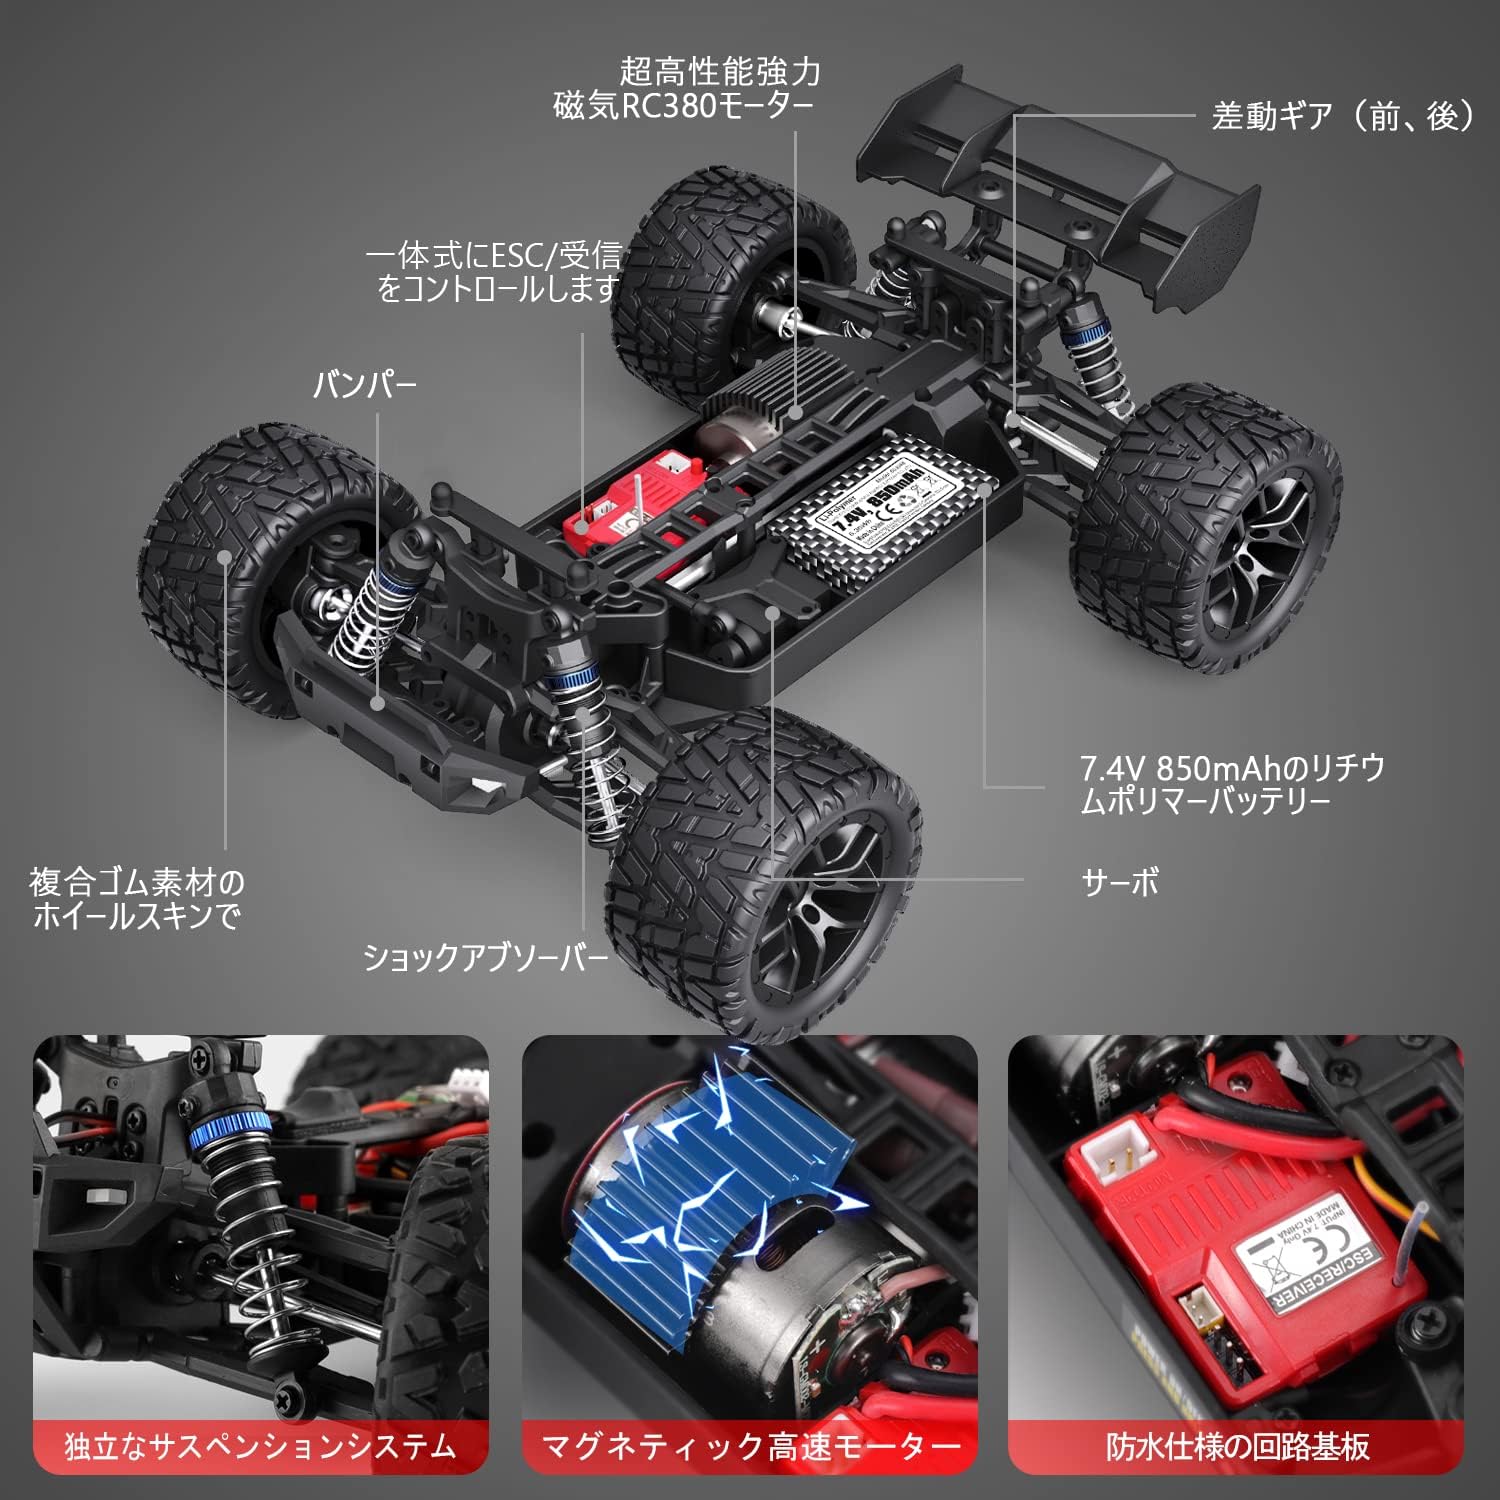
Image: Internal structure and key components of the RC car.
7. Solução De Problemas
Caso encontre algum problema, consulte os problemas e soluções comuns a seguir:
| Problema | Possível causa | Solução |
|---|---|---|
| O carro não responde ao controle remoto. | Bateria fraca no carro ou no controle remoto; não emparelhado; interruptor de energia desligado. | Charge batteries; re-pair remote; ensure power switches are on. |
| Velocidade ou potência reduzida. | Low battery; motor overheating; debris in drivetrain. | Charge battery; allow motor to cool; clean drivetrain. |
| Problemas na direção. | Damaged servo; loose steering components. | Inspect and replace servo if necessary; tighten steering linkages. |
| Car stops unexpectedly. | Overheat protection activated; low battery. | Allow car to cool down; charge battery. |
8. Especificações
| Recurso | Detalhe |
|---|---|
| Marca | HAIBOXE |
| Modelo | 18858GM |
| Escala | 1:18 |
| Sistema de acionamento | 4xXNUMX |
| Motor | RC380 Brushed Motor |
| Velocidade Máxima | 40 km/h |
| Frequência de controle remoto | 2.4 GHz |
| Faixa de controle | 60-80 metros |
| Bateria | 7.4V / 850mAh Lithium Polymer (x2 included) |
| Tempo de operação | Aproximadamente 20 minutos por bateria |
| Classificação à prova d'água | IPX4 (Water-resistant electronics) |
| Tipo de material | TPR, Rubber |
| UPC | 751433167616 |
9. Garantia e Suporte
This product comes with a warranty card. If you have any questions or encounter problems, please contact customer service. You can typically reach support by navigating to your order history and selecting 'Contact Seller' for your RC car purchase. Please ensure you read the instruction manual carefully before use to enjoy the full operating experience.