
1. Introdução
This manual provides detailed instructions for the installation, operation, and maintenance of your Vetroo V5 CPU Air Cooler. The Vetroo V5 is designed to provide efficient cooling for your processor with its 5 direct-contact heat pipes, 120mm FDB PWM fan, and addressable RGB lighting. It supports a wide range of Intel and AMD sockets, ensuring broad compatibility for various PC builds.
2. Informações de segurança
Please read and understand all safety instructions before installing or operating this product. Failure to do so may result in damage to the product, your computer components, or personal injury.
- Always disconnect your computer from the power source before performing any installation or maintenance.
- Handle components with care to avoid damage. CPU coolers may have sharp edges.
- Wear an anti-static wrist strap or frequently touch a grounded metal object to prevent electrostatic discharge (ESD) damage to sensitive components.
- Ensure all cables are connected correctly and securely to prevent electrical shorts or malfunction.
- Mantenha fora do alcance de crianças.
3. Conteúdo da embalagem
Verify that all items are present in your package. If any parts are missing or damaged, please contact customer support.
- Vetroo V5 Heatsink
- 120mm PWM ARGB Fan
- Intel Mounting Brackets (LGA 1851/1700/1200/115X)
- Suportes de montagem AMD (AM5/AM4)
- Placa traseira universal
- Parafusos e espaçadores de montagem
- Pasta Térmica
- Clipes de fãs
- Manual do usuário

Figura 1: Explodiu view showing the heatsink, fan, mounting hardware, and screws included with the Vetroo V5 CPU Air Cooler.
4. Especificações
| Recurso | Especificação |
|---|---|
| Número do modelo | V5-WT |
| Dimensões do produto (C x L x A) | 14.8 x 12.8 x 7.5 cm |
| Peso do item | 761 gramas |
| Tubos de calor | 5 Direct Contact |
| Tamanho do ventilador | 120 mm |
| Tipo de ventilador | FDB PWM ARGB |
| Velocidade do ventilador | 800-1700 RPM (±10%) |
| Fluxo de ar | 52 CFM |
| Nível de ruído | 30.8 dB (Máx.) |
| Volumetage | 12V |
| O quetage (TDP) | 150 W |
| Conector de energia | 4-pin PWM (Fan), 3-pin ARGB (Lighting) |
| Material | Aluminum (Fins), Copper (Base) |
| Compatibilidade | Intel LGA 1851/1700/1200/115X, AMD AM5/AM4 |
| UPC | 609015786611 |

Figura 2: Physical dimensions of the Vetroo V5 CPU Air Cooler.
5. Configuração e instalação
Before beginning installation, ensure your computer is powered off and unplugged. Refer to your motherboard manual for specific CPU socket information.
5.1 Preparação Geral
- Remove your existing CPU cooler. Clean any old thermal paste from the CPU surface using isopropyl alcohol and a lint-free cloth.
- Identify your CPU socket type (Intel LGA or AMD AM).
5.2 Intel LGA Installation (1851/1700/1200/115X)
- Place the universal backplate behind the motherboard, aligning the holes with the CPU socket mounting holes.
- Insira os espaçadores Intel apropriados pela frente da placa-mãe, aparafusando-os na placa traseira.
- Attach the Intel mounting brackets to the standoffs using the provided screws. Ensure they are securely fastened.
- Aplique uma pequena quantidade de pasta térmica (um ponto do tamanho de uma ervilha ou uma linha fina) no centro do dissipador de calor integrado (IHS) da CPU.
- Carefully place the heatsink onto the CPU, aligning the mounting holes on the heatsink base with the mounting brackets.
- Secure the heatsink to the mounting brackets using the spring-loaded screws, tightening them in an alternating diagonal pattern until snug. Do not overtighten.
5.3 AMD AM Installation (AM5/AM4)
- Remove the plastic retention clips from the motherboard's stock AMD backplate. Keep the stock backplate in place.
- Screw the appropriate AMD standoffs into the stock backplate's mounting holes.
- Attach the AMD mounting brackets to the standoffs using the provided screws. Ensure they are securely fastened.
- Aplique uma pequena quantidade de pasta térmica (um ponto do tamanho de uma ervilha ou uma linha fina) no centro do dissipador de calor integrado (IHS) da CPU.
- Carefully place the heatsink onto the CPU, aligning the mounting holes on the heatsink base with the mounting brackets.
- Secure the heatsink to the mounting brackets using the spring-loaded screws, tightening them in an alternating diagonal pattern until snug. Do not overtighten.
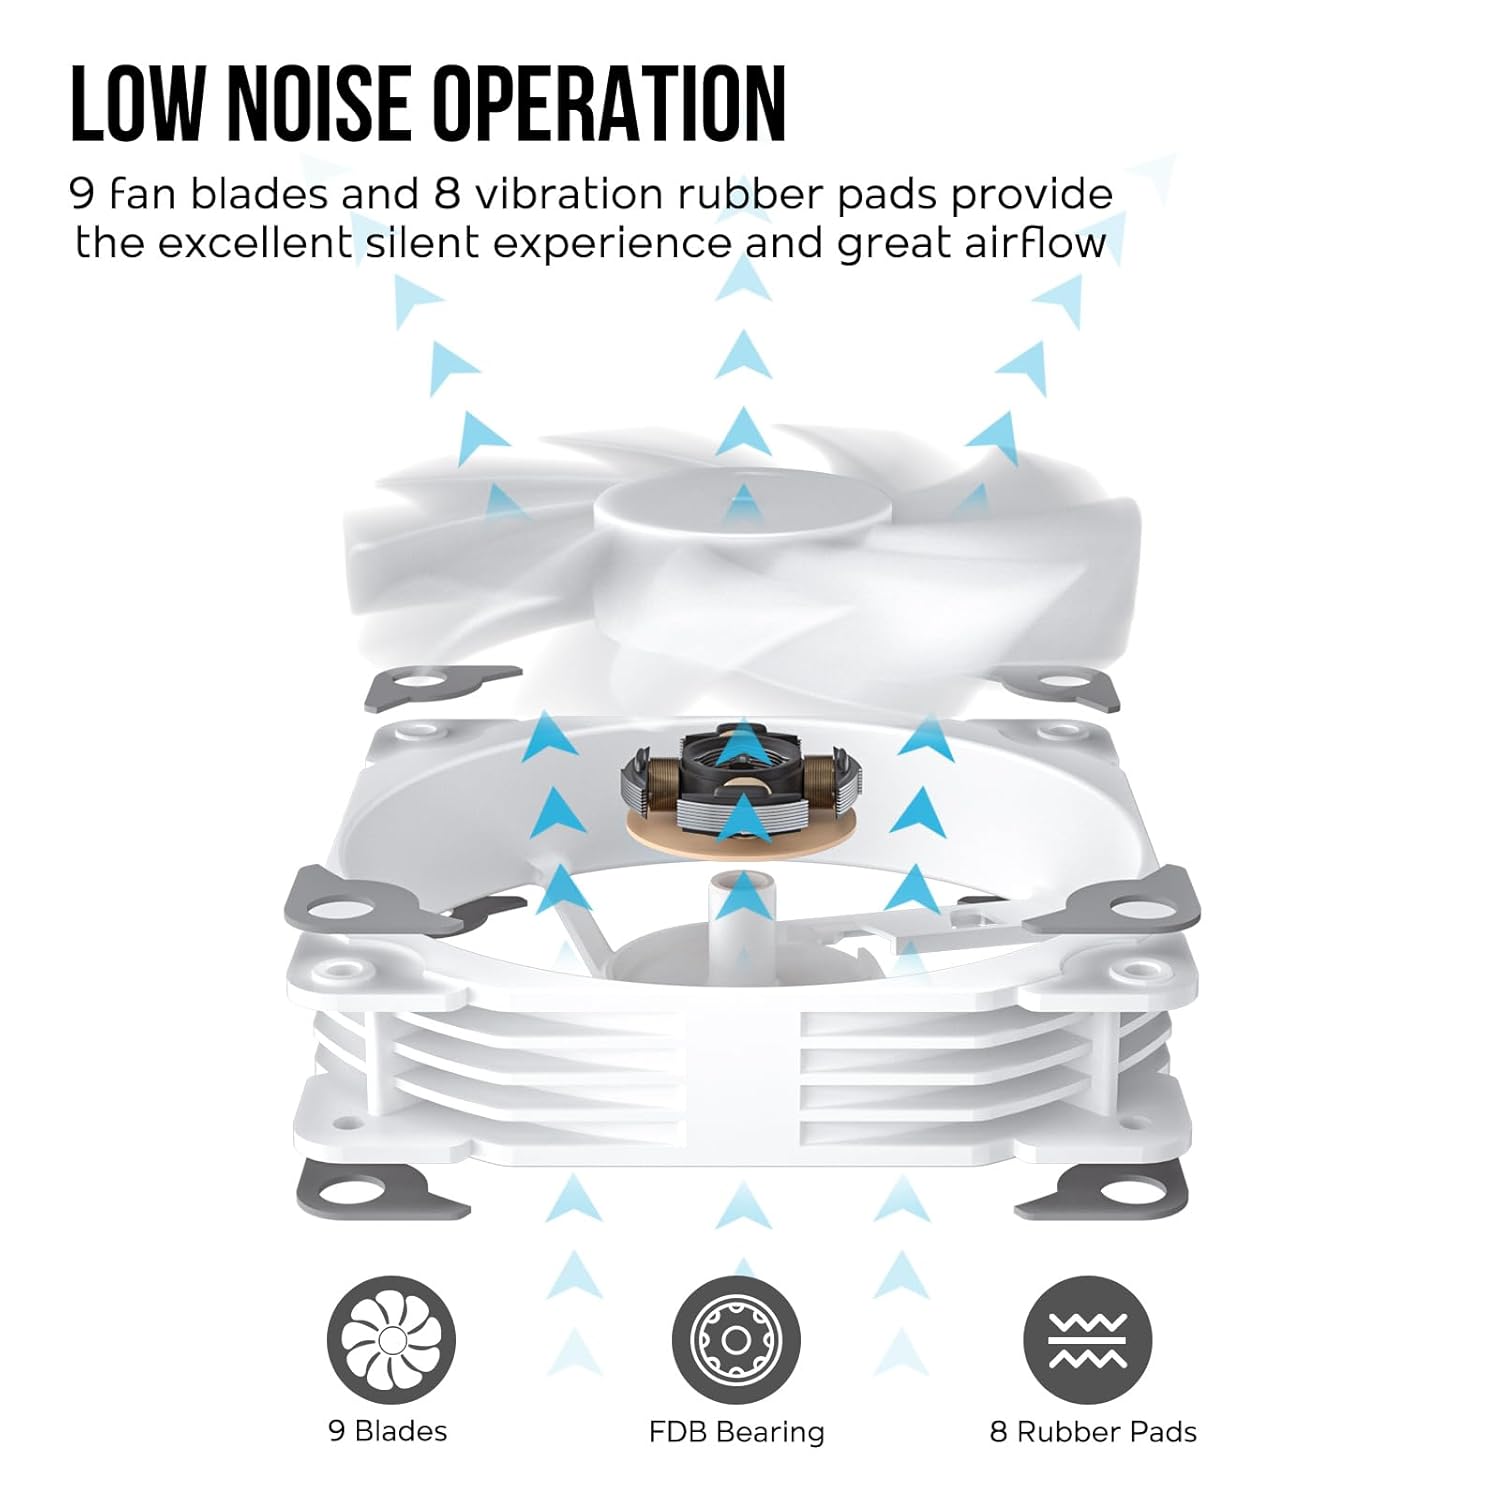
Figura 3: Mounting bracket compatibility for AMD and Intel sockets.
5.4 Fan Attachment and Cable Connection
- Attach the 120mm fan to the heatsink using the provided fan clips. Ensure the fan is oriented to blow air through the heatsink towards the rear or top of your PC case.
- Connect the 4-pin PWM fan cable to an available CPU_FAN header on your motherboard.
- Connect the 3-pin ARGB cable to a 5V 3-pin addressable RGB header on your motherboard. Do not connect to a 12V 4-pin RGB header, as this will damage the LEDs.

Figura 4: Correct connection for ARGB lighting to a 5V 3-pin header.

Figura 5: The Vetroo V5 CPU Air Cooler installed in a typical PC build.
6. Instruções de operação
6.1 PWM Smart Control
The 4-pin PWM fan automatically adjusts its speed based on CPU temperature, providing optimal cooling performance while minimizing noise. You can typically configure fan curves in your motherboard's BIOS/UEFI settings or through motherboard-specific software.

Figura 6: PWM control allows dynamic fan speed adjustment between 800-1700 RPM for quiet operation.
6.2 ARGB Lighting Synchronization
The addressable RGB lighting can be synchronized with your motherboard's RGB software (e.g., ASUS Aura Sync, MSI Mystic Light Sync, Gigabyte RGB Fusion, ASRock Polychrome Sync) via the 5V 3-pin ARGB header. This allows for customizable lighting effects to match your system's aesthetic.
6.3 Excellent Thermal Performance
The Vetroo V5 features 5 direct-contact heat pipes, high-density aluminum fins, and a larger copper base to maximize heat transfer from your CPU, ensuring efficient cooling even under heavy loads.

Figura 7: Design features for excellent thermal conductivity, including 5 heat pipes.
6.4 Operação com baixo ruído
Equipped with 9 fan blades, a Fluid Dynamic Bearing (FDB), and 8 vibration-dampening rubber pads, the fan operates quietly while providing substantial airflow for effective cooling.

Figura 8: Fan design elements contributing to low noise and efficient airflow.
7. Manutenção
A manutenção regular ajuda a garantir o desempenho ideal e a prolongar a vida útil do seu cooler de CPU.
- Remoção de poeira: Periodically clean dust from the heatsink fins and fan blades using compressed air or a soft brush. Ensure the fan is not spinning during cleaning to prevent damage to the motor.
- Pasta térmica: Reapply thermal paste if you remove the cooler from the CPU or if you notice a significant increase in CPU temperatures over time.
- Inspeção do ventilador: Check the fan for any signs of wear, unusual noises, or obstructions.
8. Solução De Problemas
If you encounter issues with your Vetroo V5 CPU Air Cooler, refer to the following common problems and solutions:
| Problema | Possível causa | Solução |
|---|---|---|
| Altas temperaturas da CPU | Incorrect thermal paste application, poor heatsink contact, insufficient airflow in case, fan not spinning. | Reapply thermal paste, ensure heatsink is securely mounted, check fan connection, improve case airflow. |
| Ventilador não gira | Cabo da ventoinha desconectado, conector da ventoinha com defeito, falha da ventoinha. | Check 4-pin PWM cable connection to CPU_FAN header, try a different fan header, contact support if fan is faulty. |
| Iluminação ARGB não está funcionando | ARGB cable disconnected, connected to wrong header (12V RGB), motherboard software issue. | Ensure 3-pin ARGB cable is connected to a 5V 3-pin ARGB header, check motherboard RGB software settings, ensure power to ARGB header. |
| Ruído excessivo do ventilador | Dust buildup, fan rubbing against cables, fan bearing issue. | Clean fan blades and heatsink, ensure no cables are obstructing fan, contact support if bearing noise persists. |
9. Garantia e Suporte
Vetroo products are manufactured to high-quality standards. This product is covered by a limited manufacturer's warranty against defects in materials and workmanship. The warranty period may vary by region and retailer.
For warranty claims, technical support, or any questions regarding your Vetroo V5 CPU Air Cooler, please contact your retailer or visit the official Vetroo webSite com recursos de suporte e informações de contato.
Guarde o comprovante de compra para fins de garantia.