Introdução
This manual provides essential instructions for the installation, operation, and maintenance of your VANBAR 2.5K Rear Camera, designed for use with VANBAR DC209 and DC209pro dash cam models. Please read this manual thoroughly before use to ensure proper functionality and longevity of the product.
Produto acimaview
The VANBAR 2.5K Rear Camera is an accessory designed to extend the recording capabilities of compatible VANBAR dash cam systems. It captures high-resolution video from the rear of your vehicle, providing comprehensive coverage. The camera comes with a 5.5-meter cable for flexible installation.
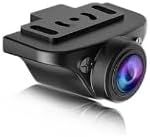
Figura 1: The VANBAR 2.5K Rear Camera unit. This compact camera is designed to be mounted at the rear of a vehicle to record footage, connecting to a compatible main dash camera unit via its cable.
Configuração e instalação
- Preparação: Ensure your vehicle's engine is off and the main dash cam unit (DC209 or DC209pro) is powered down.
- Montagem da câmera traseira:
- Identify a suitable location on your rear windshield that provides a clear view and does not obstruct the driver's vision.
- Clean the mounting surface thoroughly to ensure optimal adhesion for the adhesive mount.
- Attach the rear camera to the chosen location using the adhesive mount. Adjust the camera angle for the desired field of view.
- Roteamento de cabos:
- Carefully route the 5.5-meter camera cable from the rear camera to the location of your main dash cam unit.
- Tuck the cable neatly along the vehicle's headliner, A-pillars, or under floor mats to keep it out of sight and prevent interference with vehicle operation.
- Use cable clips or ties if necessary to secure the cable.
- Conectando à unidade principal:
- Locate the dedicated rear camera input port on your VANBAR DC209 or DC209pro dash cam.
- Connect the rear camera cable securely into this port.
- Teste: Power on your main dash cam unit. The rear camera feed should appear on the dash cam's display. Adjust the camera angle if needed.
Instruções de operação
The VANBAR 2.5K Rear Camera operates in conjunction with your main VANBAR DC209 or DC209pro dash cam unit. Once properly installed and connected, it will automatically begin recording when the main unit is powered on and recording. Refer to your main dash cam's instruction manual for specific settings related to dual-channel recording, viewing rear camera footage, and playback options.
- Gravação Automática: The rear camera records simultaneously with the front camera of your main dash cam.
- Modos de exibição: Your main dash cam may offer various display modes, such as front-only, rear-only, or picture-in-picture views. Consult your main unit's manual to switch between these modes.
- File Armazenar: Câmera traseira footage is typically stored on the same memory card as the front camera footage, often in separate folders or as combined files.
Manutenção
- Limpeza da lente: Regularly clean the camera lens with a soft, lint-free cloth to ensure clear video quality. Avoid abrasive materials or harsh chemicals.
- Inspeção de cabos: Periodically check the camera cable for any signs of wear, damage, or loose connections. Ensure it remains securely tucked away.
- Segurança de montagem: Verify that the camera remains firmly attached to its mounting surface. Re-secure if necessary.
- Considerações sobre temperatura: Avoid exposing the camera to extreme temperatures for prolonged periods, as this can affect its performance and lifespan.
Solução de problemas
| Problema | Possível causa | Solução |
|---|---|---|
| No rear camera display/recording. |
|
|
| Qualidade de vídeo ruim da câmera traseira. |
|
|
| O cabo parece estar danificado. |
|
|
Especificações
| Recurso | Detalhe |
|---|---|
| Marca | VANBAR |
| Número do modelo | dc2k |
| Compatibilidade | VANBAR DC209, DC209pro Dash Cams |
| Resolução | 2.5K (as per product description) |
| Comprimento do cabo | 5.5 metros |
| Tipo de montagem | Suporte Adesivo |
| Screen Size (Main Unit) | 5.5 inches (referring to compatible main unit display) |
| Uso da bateria | No (powered by main dash cam) |
Informações de garantia
VANBAR products are manufactured to high-quality standards. For specific warranty terms and conditions, please refer to the warranty card included with your main VANBAR dash cam unit or visit the official VANBAR website. Guarde o comprovante de compra para solicitações de garantia.
Suporte ao cliente
If you encounter any issues or have questions regarding your VANBAR 2.5K Rear Camera, please contact VANBAR customer support through the following channels:
- Website: Visit the official VANBAR webSite com perguntas frequentes, recursos de suporte e formulários de contato.
- E-mail: Refer to your product packaging or main dash cam manual for the customer support email address.
- Varejista on-line: For purchase-related inquiries, you may contact the retailer where the product was purchased.