OQIMAX B0BVFJHTLX
Manual do Usuário do Despertador com Projeção OQIMAX
Model: B0BVFJHTLX
1. Introdução
This manual provides detailed instructions for the OQIMAX Projection Alarm Clock. This device features a 180° adjustable projection, a 7.8-inch LED mirror display with adjustable brightness, multiple alarm modes with snooze, and displays indoor temperature and humidity. Please read this manual thoroughly before use to ensure proper operation and to maximize the product's functionality.
2. Conteúdo da embalagem
Verifique se todos os itens listados abaixo estão incluídos em seu pacote:
- 1 x OQIMAX Projection Alarm Clock
- 1 x 1.5m USB Cable (Power adapter not included)
- 1 x CR2032 Button Battery (Integrated for memory function)
- 1 x Guia do usuário
3. Produto acabadoview
Familiarize yourself with the alarm clock's components and controls.

Imagem 3.1: Frente e Traseira View of the Alarm Clock with Labeled Controls. This image illustrates the location of the alarm clock buttons (MODE, ALARM, SNOOZE/LIGHT, PROJECT, UP, DOWN), the projection lamp, speaker, power port, and the detachable stand.
Controls and Display Elements:
- Botão MODE: Used to switch between time, alarm, and temperature/humidity display modes.
- Botão de alarme: Used to set and activate alarms.
- Botão SONECA/LUZ: Activates snooze during an alarm; adjusts display brightness.
- PROJECT Button: Activates and adjusts projection brightness.
- Botão PARA CIMA: Increases values during setting; switches temperature units.
- Botão PARA BAIXO: Decreases values during setting; switches 12/24 hour format.
- Projeção Lamp: Emits time projection.
- Palestrante: Emits alarm sound.
- Porta de alimentação: Entrada USB-C para alimentação.
- Detachable Stand: Provides stable base for the clock.

Imagem 3.2: Product Dimensions and Key Features. This image shows the overall dimensions of the alarm clock and highlights its main features: projection function, 4-level brightness, temperature/humidity display, time & alarm, 12/24H format, and snooze.
4. Configuração
4.1 Conexão de Energia
The alarm clock requires continuous power via a USB cable. Connect the provided 1.5m USB cable to the power port on the back of the alarm clock and plug the other end into a USB power adapter (not included) or a powered USB port.
Observação: The screen will turn off if the USB power cable is disconnected. The integrated CR2032 button battery serves as a backup to save time and alarm settings during power interruptions, but it does not power the display or projection.
4.2 Preparação Inicial
Before first use, remove any protective film from the display mirror surface.
5. Instruções de operação
5.1 Definição da hora
- In time display mode, press and hold the MODO Pressione o botão até que os dígitos da hora comecem a piscar.
- Use o UP or ABAIXO botões para ajustar a hora.
- Pressione o MODO button again to switch to minute setting. Use UP or ABAIXO para ajustar os minutos.
- Imprensa MODO Para confirmar e sair da configuração de tempo.
5.2 Configurando o Alarme
The clock supports three alarm modes.

Imagem 5.1: Three Alarm Modes. This image shows the display for setting alarms for Monday-Friday, Monday-Saturday, and Everyday.
- Pressione o ALARME button to enter alarm setting mode. The alarm icon will appear.
- Pressione e segure o ALARME Pressione o botão até que os dígitos da hora comecem a piscar.
- Use o UP or ABAIXO botões para definir a hora do alarme desejada.
- Imprensa ALARME again to set the minutes. Use UP or ABAIXO para ajustar.
- Imprensa ALARME Selecione novamente o modo de alarme:
- 1-5: Segunda a sexta
- 1-6: Segunda a sábado
- 1-7: Diariamente
- Imprensa ALARME para confirmar e sair da configuração do alarme.
- Para ativar/desativar um alarme, pressione rapidamente o botão. ALARME button. The alarm icon will indicate its status.
5.3 Função de soneca
Quando o alarme tocar, pressione o SNOOZE / LIGHT button to activate the snooze function. The alarm will pause and sound again after the set snooze duration.
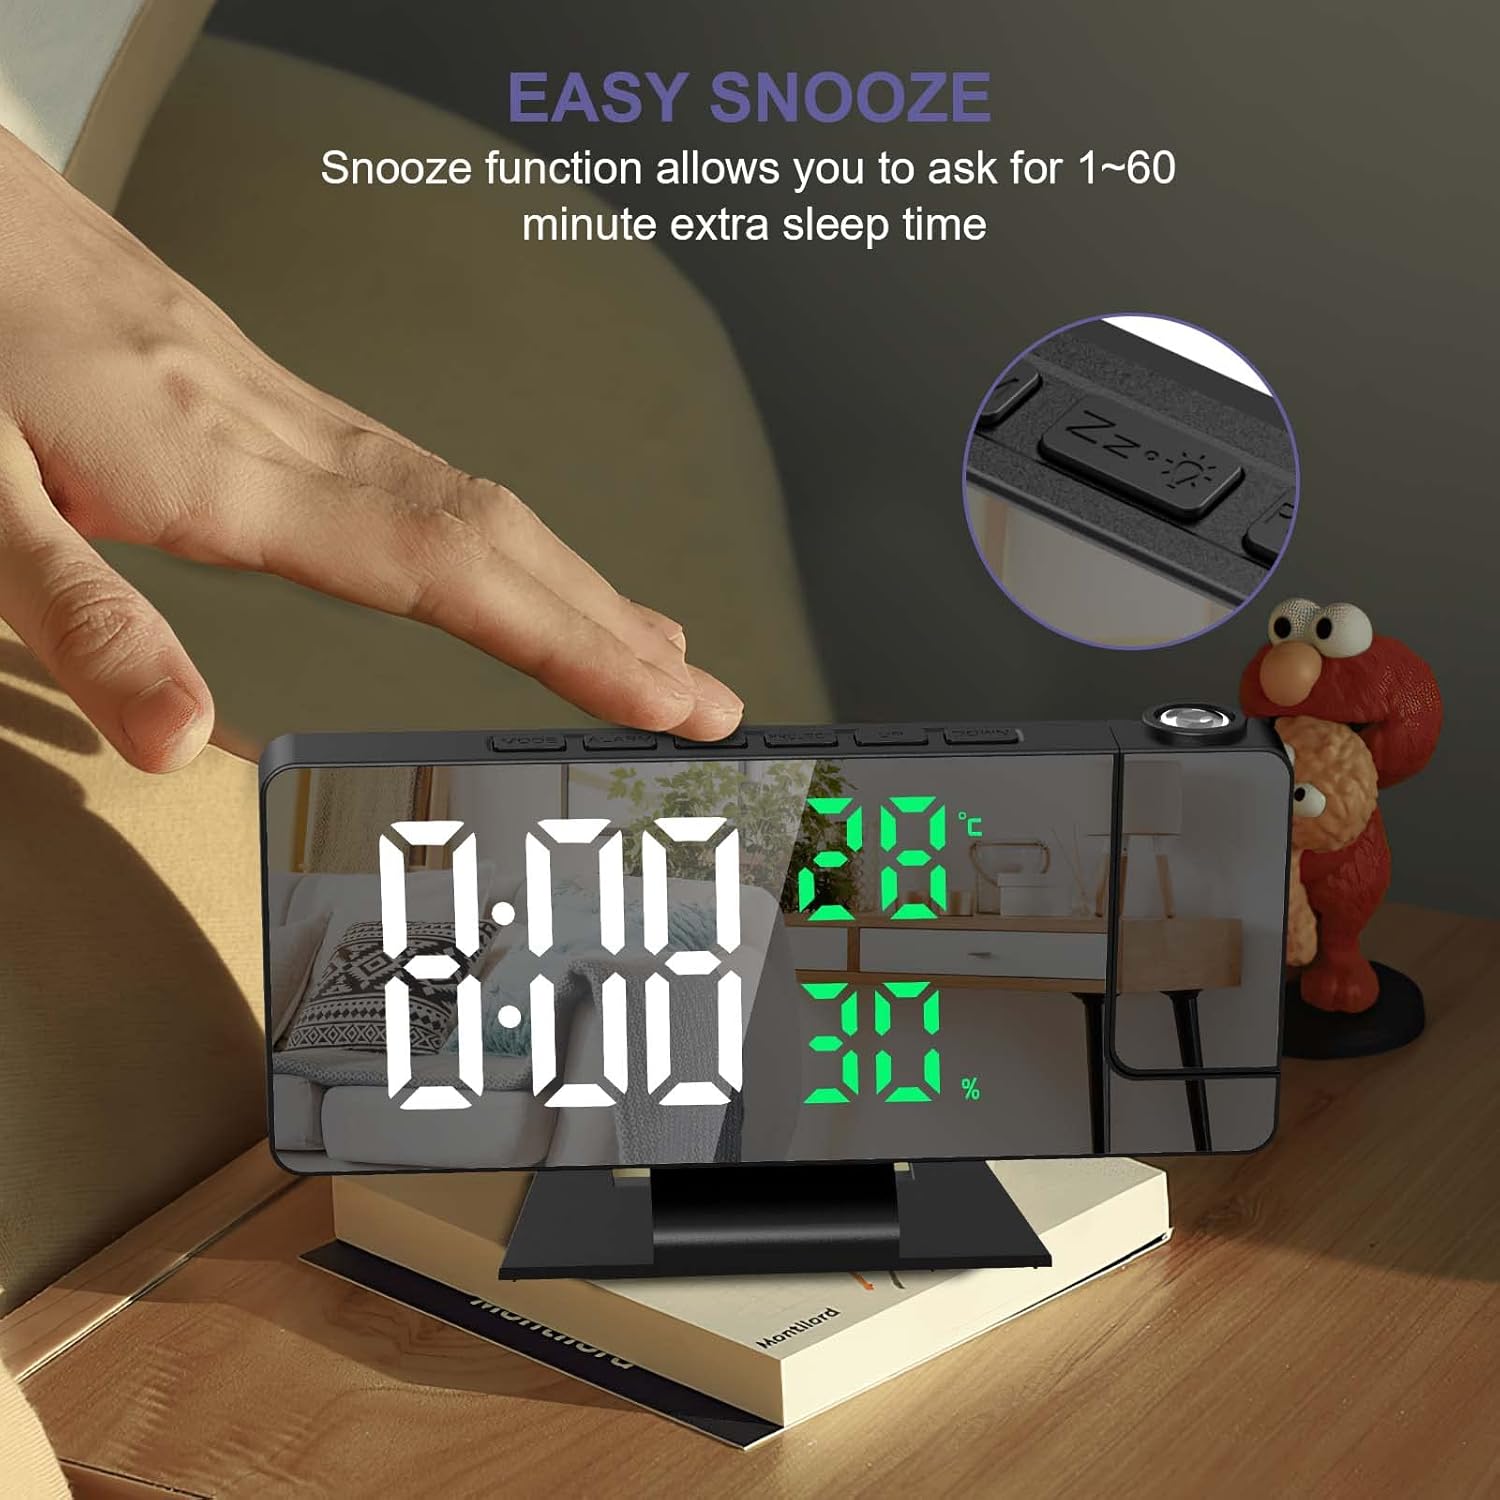
Imagem 5.2: Easy Snooze Function. This image shows a hand pressing the snooze button on the alarm clock, indicating the function allows for 1-60 minutes of extra sleep.
To adjust the snooze duration (default 5 minutes):
- While in alarm setting mode (after setting time and alarm mode), press ALARME again to enter snooze duration setting.
- Use o UP or ABAIXO buttons to set the snooze duration between 1 and 60 minutes.
- Imprensa ALARME para confirmar.
5.4 Configurações de projeção
O despertador pode projetar a hora em uma parede ou no teto.
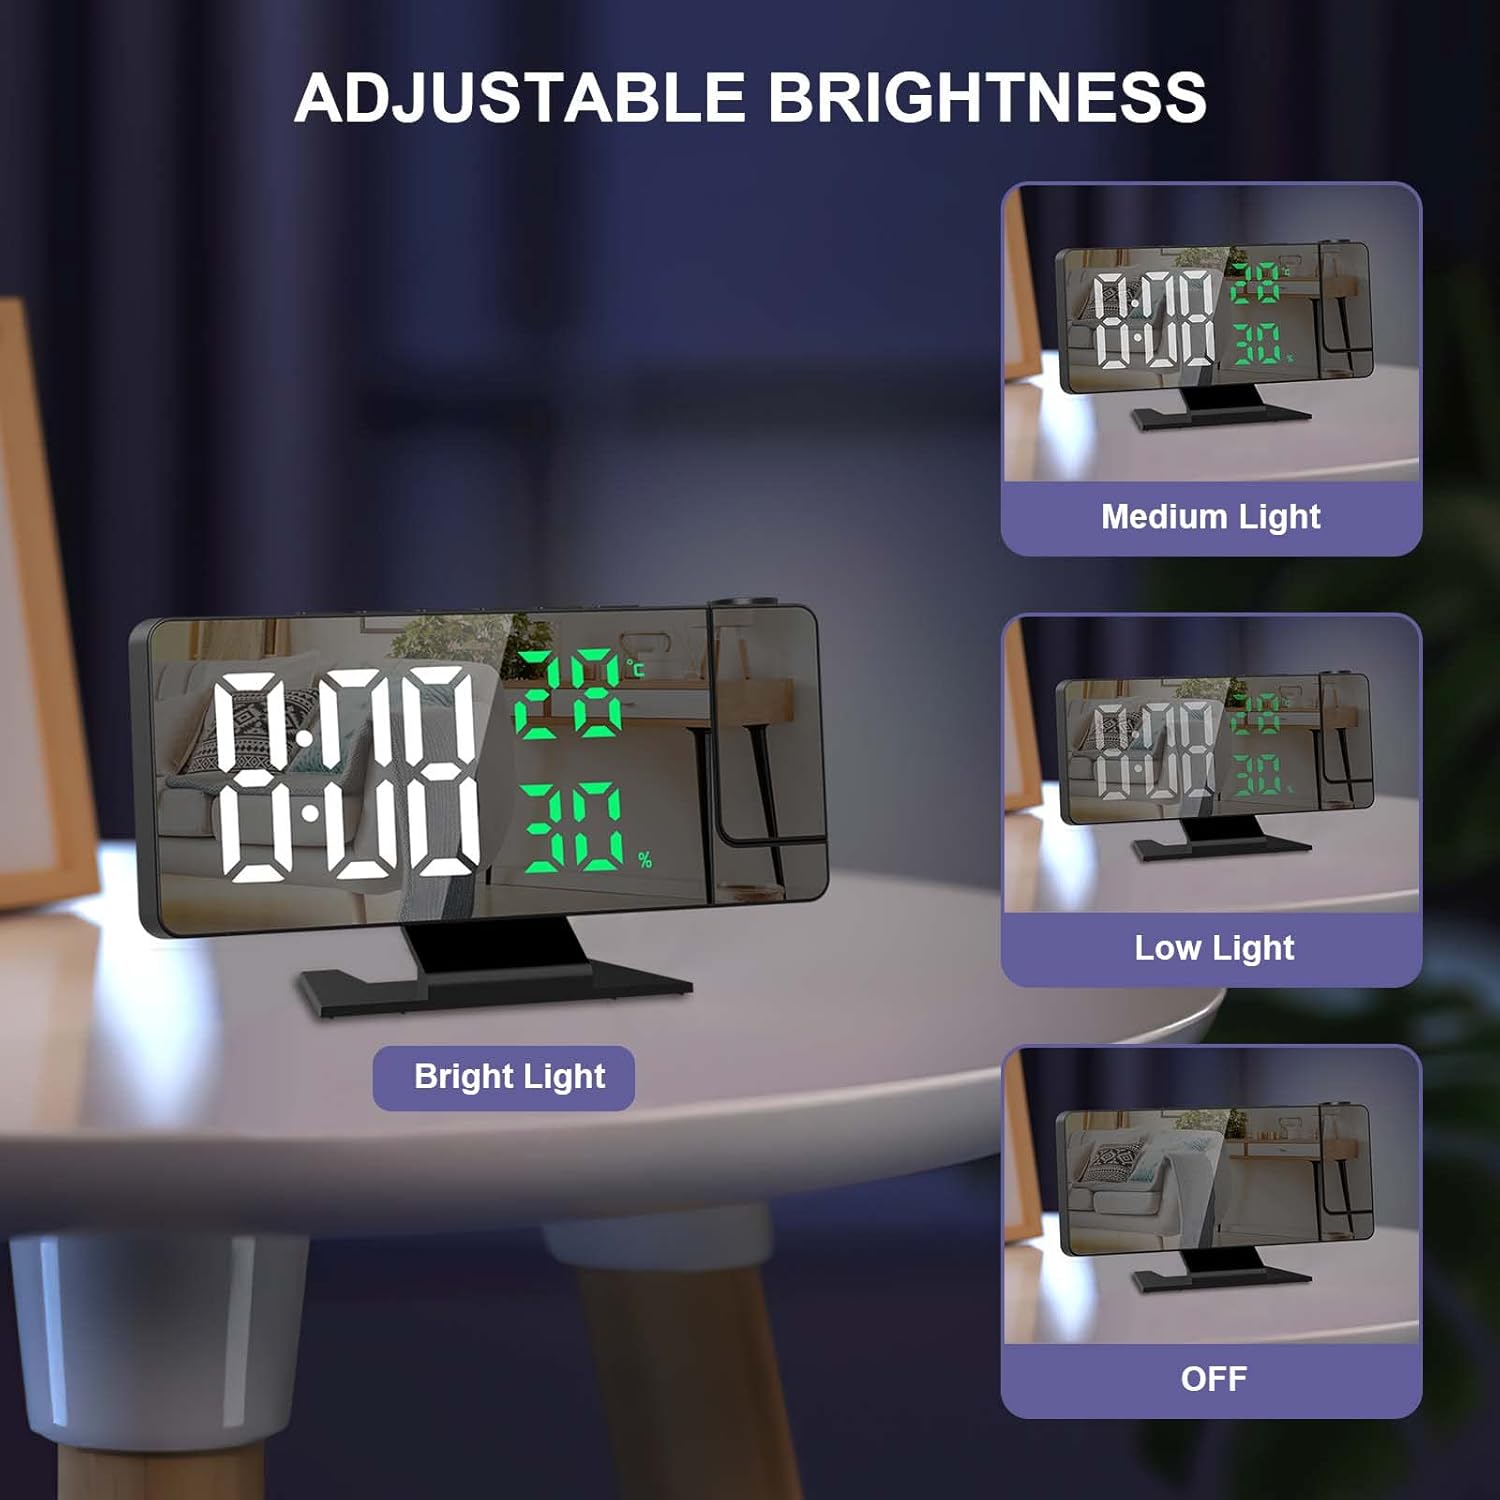
Imagem 5.3: 180° Projection and Brightness Levels. This image demonstrates the 180-degree adjustable projection angle and the three available projection brightness levels.
- Ajustando o ângulo de projeção: The projection arm can be rotated 180° to direct the time display as needed.
- Ajustando o brilho da projeção: Pressione o PROJETO button repeatedly to cycle through 3 brightness levels (High, Medium, Low) or turn the projection off.
- Distância de projeção: Optimal projection distance is between 0.5 to 5 meters (1.6 to 16 feet).
- Observação: The projection function is most effective in dark environments. The projection can only be oriented towards the back of the alarm clock. If projected towards the front, the numbers will appear inverted.
5.5 Brilho da tela
The 7.8-inch LED display has four adjustable brightness levels.
Imagem 5.4: Adjustable Display Brightness. This image illustrates the four display brightness options: Bright Light, Medium Light, Low Light, and OFF.
- Pressione o SNOOZE / LIGHT button (when alarm is not sounding) to cycle through the 4 brightness levels: High, Medium, Low, and OFF.
- Modo noturno automático: The screen automatically dims from 18:00 (6 PM) to 5:59 (5:59 AM) to avoid disturbing sleep.
5.6 Visor de temperatura e umidade
The alarm clock displays real-time indoor temperature and humidity.
- Faixa de temperatura: -10°C to 50°C (14°F to 122°F), with an error margin of ±1°C.
- Faixa de umidade: 20% to 95%, with an error margin of ±5%.
- Para alternar entre Celsius (°C) e Fahrenheit (°F), pressione o ABAIXO button while in temperature display mode.
5.7 Formato 12/24 horas
Para alternar entre os formatos de 12 e 24 horas, pressione o botão ABAIXO button while in time display mode (not in setting mode).
5.8 portas de carregamento USB
The alarm clock includes a USB port that can be used to charge smartphones or tablets.
6. Manutenção
- Limpe a tela e casinLimpe com um pano macio e seco. Evite produtos de limpeza abrasivos ou solventes.
- Mantenha o dispositivo longe da luz solar direta, temperaturas extremas e alta umidade.
- Ensure the ventilation holes on the back are not obstructed.
7. Solução De Problemas
| Problema | Possível causa | Solução |
|---|---|---|
| A tela está desligada. | The alarm clock is not connected to power. | Ensure the USB cable is securely connected to a power source. The display requires continuous USB power. |
| A projeção está de cabeça para baixo. | The projection is oriented incorrectly. | The projection can only be correctly displayed when oriented towards the back of the alarm clock. Adjust the clock's position or the projection arm accordingly. |
| Settings are lost after power disconnection. | Backup battery is not functioning or depleted. | Ensure the integrated CR2032 button battery is correctly installed and functional. This battery saves settings during temporary power loss. |
| Projection is unclear or too dim. | Ambient light is too bright; projection distance is too far. | The projection function works best in dark environments. Adjust the projection brightness using the PROJETO button. Ensure the projection distance is within 0.5 to 5 meters. |
| Buttons produce a loud beep, and volume is not adjustable. | This is a design characteristic of the product. | The button beep volume is not adjustable on this model. |
8. Especificações
| Recurso | Detalhe |
|---|---|
| Marca | OQIMAX |
| Modelo | B0BVFJHTLX |
| Dimensões do produto | 11 x 3.81 x 3.5 cm |
| Tamanho da tela | 7.8 polegadas |
| Cor | White and Green Numbers |
| Estilo | Moderno |
| Material | Metal |
| Forma | Retangular |
| Fonte de energia | USB Powered (Battery for memory function only) |
| Tipo de exibição | Digital |
| Características especiais | Alarm, Projection, Temperature Display, Humidity Display, Snooze, USB Charging Port |
| Peso do item | 230 gramas |
| Faixa de temperatura | -10°C~50°C (14°F~122°F) ±1°C |
| Faixa de umidade | 20%~95% ±5% |
9. Garantia e Suporte
For any questions regarding product operation, functionality, or if the product is defective or damaged, please contact OQIMAX customer support. We are committed to resolving any issues you may encounter.
Consulte a documentação de compra para obter detalhes específicos sobre a garantia e informações de contato.