Introdução
This user manual provides detailed instructions for the safe and efficient operation of your AFU 67.2V 10A Li-ion Battery Smart Charger. Please read this manual thoroughly before using the product and retain it for future reference.
Conteúdo da embalagem

Image: Contents of the AFU Smart Charger package, including the charger unit, power cable, operating manual, and spare fuses.
- 1x AFU 67.2V 10A Smart Charger (Model: AF800-67210B-C13)
- 1x US Standard Power Cable
- 1x manual de operação
- 2 fusíveis sobressalentes
Características do produto
- OLED Charging Display: Provides real-time information on voltage, current, temperature, and power.
- Três-stage Carregamento Inteligente: Utilizes Constant Current (CC), Constant Voltage (CV), and Trickle charging modes for optimal battery health and full charge.
- Robust Aluminum Casing: Durable and aids in heat dissipation.
- Ventoinha de resfriamento integrada: Ensures efficient heat management during operation.
- Indicadores LED: Clearly shows power status and charging progress.
- Recursos de proteção múltipla: Inclui sobrevol.tage, overcurrent, short circuit, and reverse protection for enhanced safety.
- Desligamento automático: Charger automatically stops charging when the battery is fully charged.

Imagem: Frente view of the AFU Smart Charger, highlighting the OLED display and charging indicators.

Image: Visual representation of the charger's multiple protection features, including super heat dissipation, overvoltage, overcurrent, short circuit, balance function, voltage protection, anti-protection, and temperature protection.
Especificações
| Nome do produto | Carregador 67.2V 10A |
| Modelo | AF800-67210B-C13 |
| Dimensões | 170 x 90 x 63 mm (6.7 x 3.54 x 2.48 polegadas) |
| Peso | Aproximadamente 1.17 kg (2.57 libras) |
| Cor / Material | Black/Aluminum Case |
| Tipo de bateria adequado | 16S 60V Lithium Battery Pack |
| Entrada CA | 100~120Vca, 50~60Hz |
| Volume de saídatage | 67.2 Volts (CC) |
| Corrente de saída | 10 Amp |
| Proteção da bateria | SCP (Short Circuit Protection), OVP (Overvoltage Protection), OCP (Overcurrent Protection), OTP (Over Temperature Protection) |
| Modo de carregamento | Constant Current - Constant Voltage - Trickle (three-stage intelligent charging) |
| Eficiência de carregamento | ≥85% |
| Temperatura de trabalho | -20 ℃ ~ +40 ℃ (-4°F ~ +104°F) |
| Temperatura de armazenamento | -40 ℃ ~ +70 ℃ (-40°F ~ +158°F) |
| Conector DC | C13 N+L- Plug (default) |

Image: Diagram illustrating the dimensions (6.7 x 3.54 x 2.48 inches) and weight (3.1 lbs) of the AFU Smart Charger.
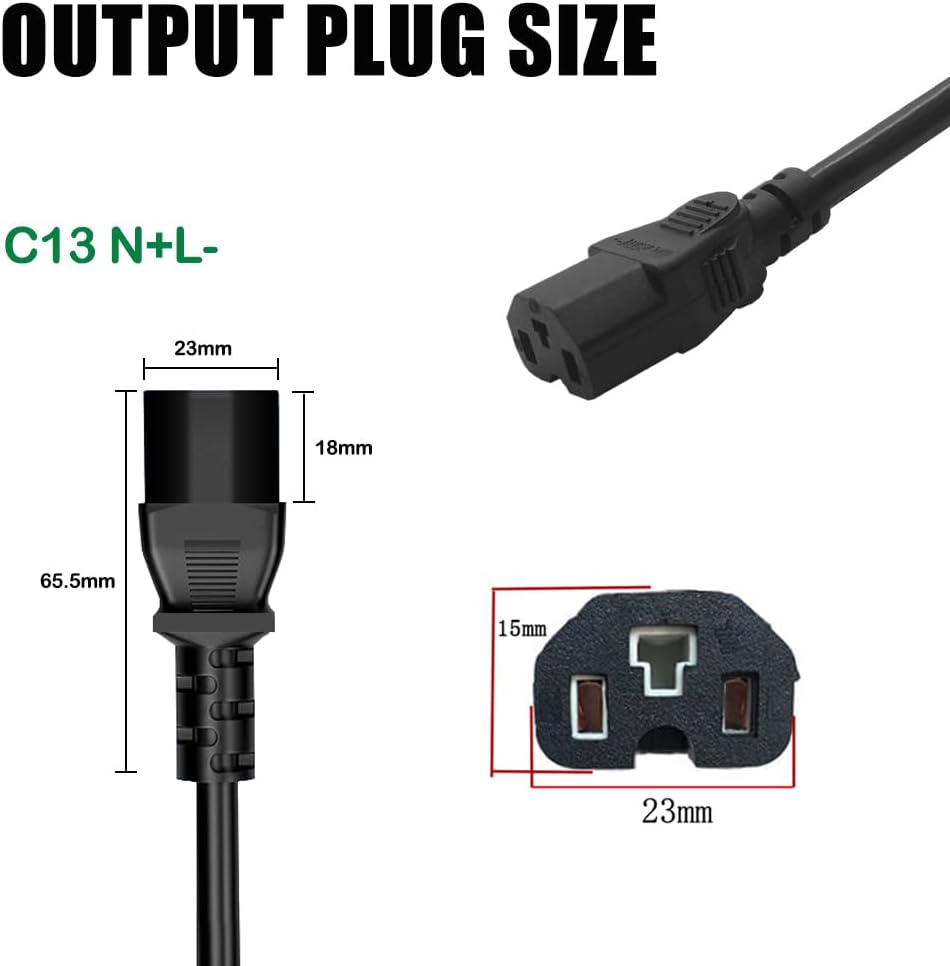
Imagem: Detalhada view of the C13 N+L- output plug, including its dimensions.
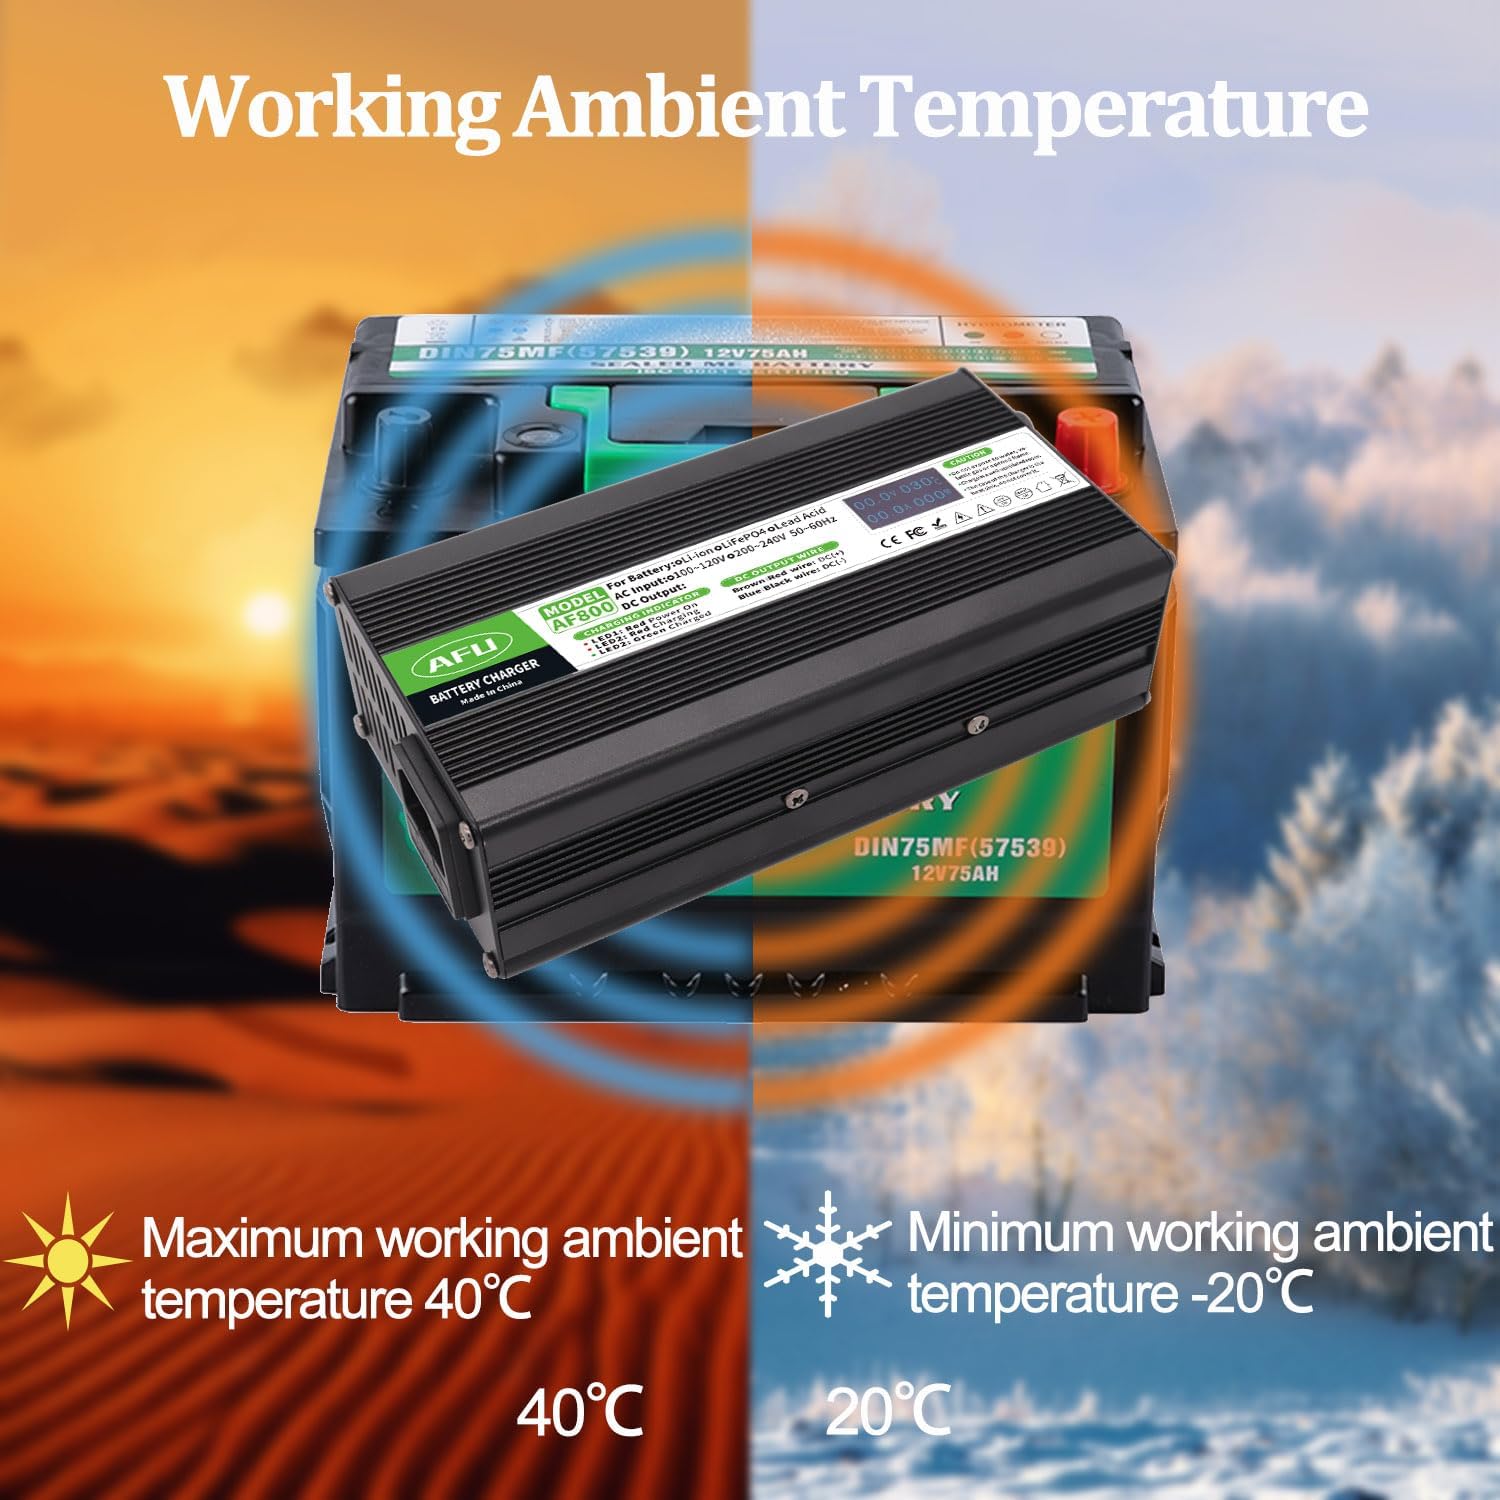
Image: Illustration of the charger's optimal working ambient temperature range, from -20°C to +40°C.
Configurar
Before initial use, ensure all components listed in the "Package Contents" section are present and undamaged. Place the charger on a stable, flat surface in a well-ventilated area, away from direct sunlight, heat sources, and moisture.
Conectando o cabo de alimentação
- Locate the AC input interface on the charger (typically at the back).
- Connect the provided US standard power cable to the AC input interface of the charger.
- Certifique-se de que a conexão seja firme e segura.
Vídeo: Um excessoview of the AFU Smart Charger, demonstrating its components, dimensions, and the process of connecting the power cable and observing the OLED display and LED indicators during operation.
Instruções de operação
Follow these steps carefully to charge your 16S 60V Lithium Battery Pack:
- Connect to Battery First: Before connecting the charger to AC power, ensure the DC output terminal of the charger is securely connected to the battery's charging socket.
- Conecte à energia CA: After the DC terminal is connected to the battery, plug the AC power cord into a standard 100-120Vac, 50-60Hz wall outlet.
- Carregamento do monitor: Observe the LED indicators and the OLED display for charging status.
- Desconecte após o carregamento: Once charging is complete (LED 2 turns green), first unplug the AC power cord from the wall outlet, and then unplug the DC terminal from the battery.
- Armazenar: When not in use or after charging, always unplug both the DC terminal from the battery and the AC terminal from the wall outlet.
Guia de Indicadores LED
- LED 1 (Red): Indica que o carregador está ligado.
- LED 2 (Red): Indica que a bateria está sendo carregada no momento.
- LED 2 (Flashing Red): Indicates that the battery is nearing a full charge.
- LED 2 (Green): Indicates that the battery has been fully charged.
Informações da tela OLED
The OLED display provides real-time data during the charging process:
- Volumetage (v): Displays the current charging voltage.
- Atual (A): Displays the current charging ampera.
- Temperatura (°C): Displays the internal temperature of the charger.
- Potência (W): Displays the current charging power in watts.
Manutenção
- Limpeza: Regularly wipe the charger's exterior with a soft, dry cloth. Do not use abrasive cleaners or solvents.
- Ventilação: Ensure the cooling fan and ventilation slots are free from dust and debris to maintain optimal heat dissipation.
- Armazenar: Store the charger in a cool, dry place when not in use, away from extreme temperatures and humidity.
- Substituição de fusíveis: If the charger stops functioning, check the fuse. Refer to the "Troubleshooting" section for instructions on replacing the fuse.
Solução de problemas
| Problema | Possível causa | Solução |
|---|---|---|
| Charger not powering on (LED 1 off) | No AC power; Loose power cable; Blown fuse. | Check wall outlet and power cable connection. Replace fuse if necessary (refer to fuse replacement instructions below). |
| LED 2 remains red, battery not charging | DC connector not properly connected to battery; Battery fault. | Ensure DC connector is firmly seated. Check battery for issues. |
| O carregador fica excessivamente quente. | Ventilação deficiente; Sobrecarga. | Ensure charger is in a well-ventilated area. Clear any obstructions from cooling fan/vents. Ensure battery is compatible. |
| OLED display is blank or erratic | Power issue; Internal fault. | Verifique a ligação elétrica. Se o problema persistir, entre em contato com o suporte ao cliente. |
Substituição de fusíveis
The charger is equipped with a replaceable fuse for protection. If the charger fails to power on, the fuse may need replacement.
- Desconecte a energia: Ensure the charger is completely disconnected from both the AC power outlet and the battery.
- Locate Fuse Holder: The fuse holder is typically located near the DC output wire on the charger. It is a small, circular cap that can be unscrewed.
- Remova o fusível antigo: Unscrew the fuse holder cap. Carefully remove the old fuse.
- Insira o novo fusível: Insert one of the provided spare fuses into the fuse holder.
- Secure Fuse Holder: Screw the fuse holder cap back into place firmly.
- Test Charger: Reconnect the charger to the battery and then to AC power to test its functionality.
Informações importantes de segurança
- Somente para uso interno: This charger is designed for indoor use. Do not expose to water, rain, or excessive humidity.
- Ventilação: Always operate the charger in a well-ventilated area. Do not cover the charger or block its ventilation openings.
- Materiais Inflamáveis: Do not use the charger near flammable or combustible materials.
- Compatibilidade da bateria: Only use this charger with compatible 16S 60V Lithium Battery Packs. Using it with incompatible batteries may cause damage or injury.
- Ordem de conexão: Always connect the DC terminal to the battery first, then the AC power. When disconnecting, unplug AC power first, then the DC terminal.
- Nenhuma peça que possa ser reparada pelo usuário: Do not attempt to open or repair the charger. Refer all servicing to qualified personnel.
- Crianças e animais de estimação: Mantenha o carregador fora do alcance de crianças e animais de estimação.
- Dano: Do not use the charger if the power cord, plug, or charger casing está danificado.
Cuidado: Do not expose to water, volatile gas or opened flame. Charge in a well-ventilated room. The case of the charger is the heat sink, do not cover it.
Garantia e Suporte
For warranty information or technical support, please contact AFU customer service through the retailer where you purchased the product or visit the official AFU Store on Amazon:
Please have your product model number (AF800-67210B-C13) and purchase details ready when contacting support.