
WLJBIDET O7L-Side panel (Elongated)
WLJBIDET Smart Bidet Toilet Seat User Manual
Model: O7L-Side panel (Elongated)
Brand: WLJBIDET
1. Introdução
Thank you for choosing the WLJBIDET Smart Bidet Toilet Seat. This manual provides essential information for the safe and efficient operation, installation, and maintenance of your new bidet seat. Please read this manual thoroughly before installation and use, and retain it for future reference.
2. Informações de segurança
Para garantir o funcionamento seguro e evitar danos, observe as seguintes precauções:
- Ensure the bidet seat is connected to a grounded electrical outlet.
- Do not immerse the unit in water or spray water directly onto the electrical components.
- Mantenha o cabo de alimentação longe de superfícies aquecidas.
- Não tente desmontar ou reparar a unidade por conta própria. Contate pessoal qualificado para assistência técnica.
- Desligue o aparelho da tomada antes de limpá-lo ou realizar qualquer manutenção.
- Este aparelho não se destina ao uso por pessoas (incluindo crianças) com capacidades físicas, sensoriais ou mentais reduzidas, ou com falta de experiência e conhecimento, a menos que tenham recebido supervisão ou instruções sobre o uso do aparelho de uma pessoa responsável pela sua segurança.
3. Recursos do Produto
The WLJBIDET Smart Bidet Toilet Seat is designed to provide a comfortable and hygienic experience with its advanced features:
- Vários modos de limpeza: Offers customizable warm water washing from 92℉ to 102℉. Includes posterior wash, feminine wash, child-friendly wash, and one-touch automatic cleaning.
- Bico autolimpante: The nozzle automatically cleans itself before and after each use for enhanced hygiene.
- Adjustable Nozzle Position: Tailor your cleaning experience with adjustable nozzle positions and oscillating wash functionality. The nozzle remembers your last setting.
- Assento de vaso sanitário aquecido: Provides soothing warmth with adjustable, consistently warm temperature settings, eliminating discomfort from cold seats.
- Secagem com ar quente: Integrated warm air dryer gently dries you after washing, reducing the need for toilet paper. Adjustable drying temperatures ensure maximum comfort.
- Tampa de fechamento suave: The toilet lid and seat close silently, preventing slamming and ensuring a quiet environment.
- Luz noturna LED: A soft-glow nightlight makes midnight trips to the bathroom more convenient without harsh overhead lighting.


4. Guia de instalação
4.1 antes da instalação
Before replacing your old toilet seat, please measure your toilet size to ensure compatibility. This model is designed for elongated toilets.

4.2 Etapas de instalação
Siga estas etapas para uma instalação correta:
- Preparação: Turn off the water supply to your toilet and flush to empty the tank. Disconnect the existing water supply line from the toilet tank.
- Remove Old Seat: Remova o assento sanitário existente.
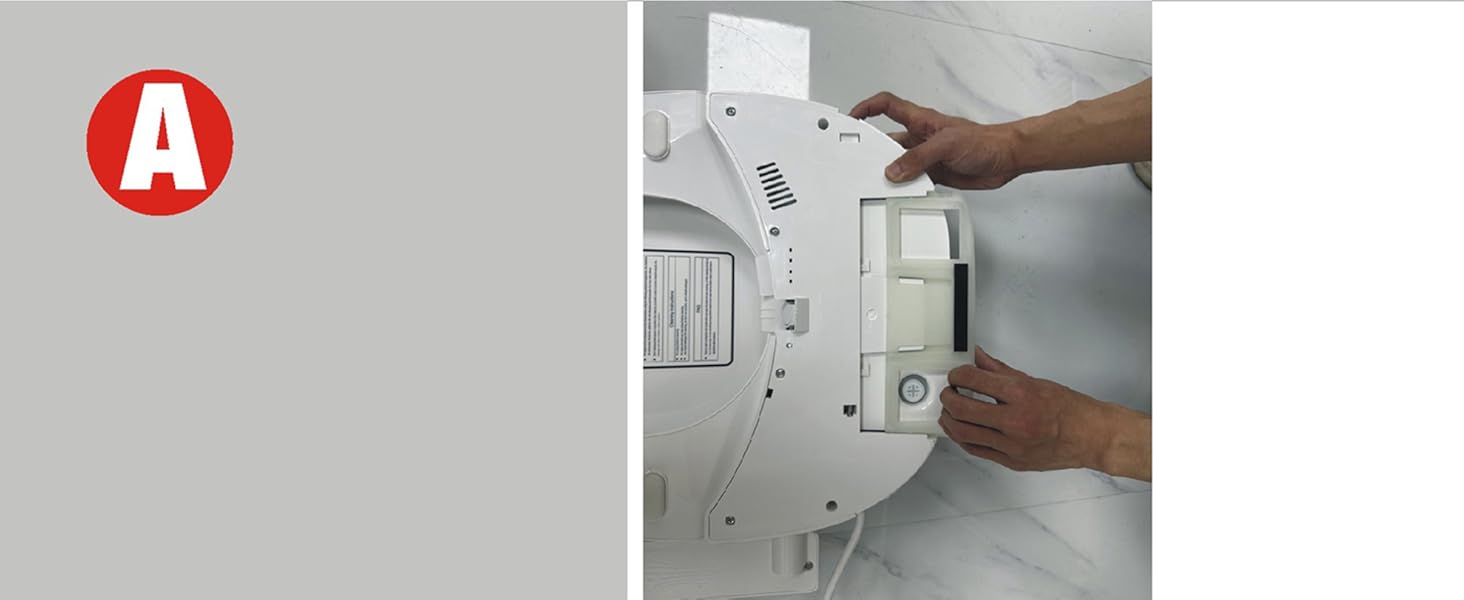
- Instale a placa de montagem: Attach the bidet seat mounting plate to the toilet bowl using the provided hardware. Ensure it is securely fastened.
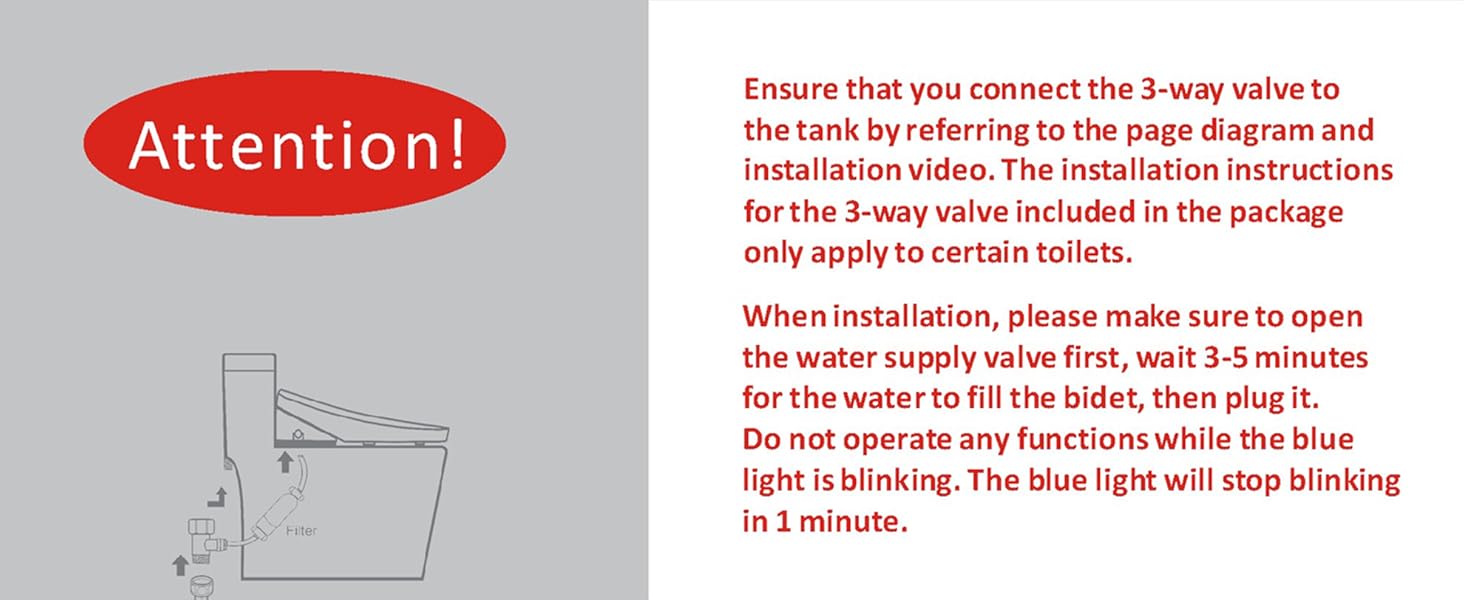
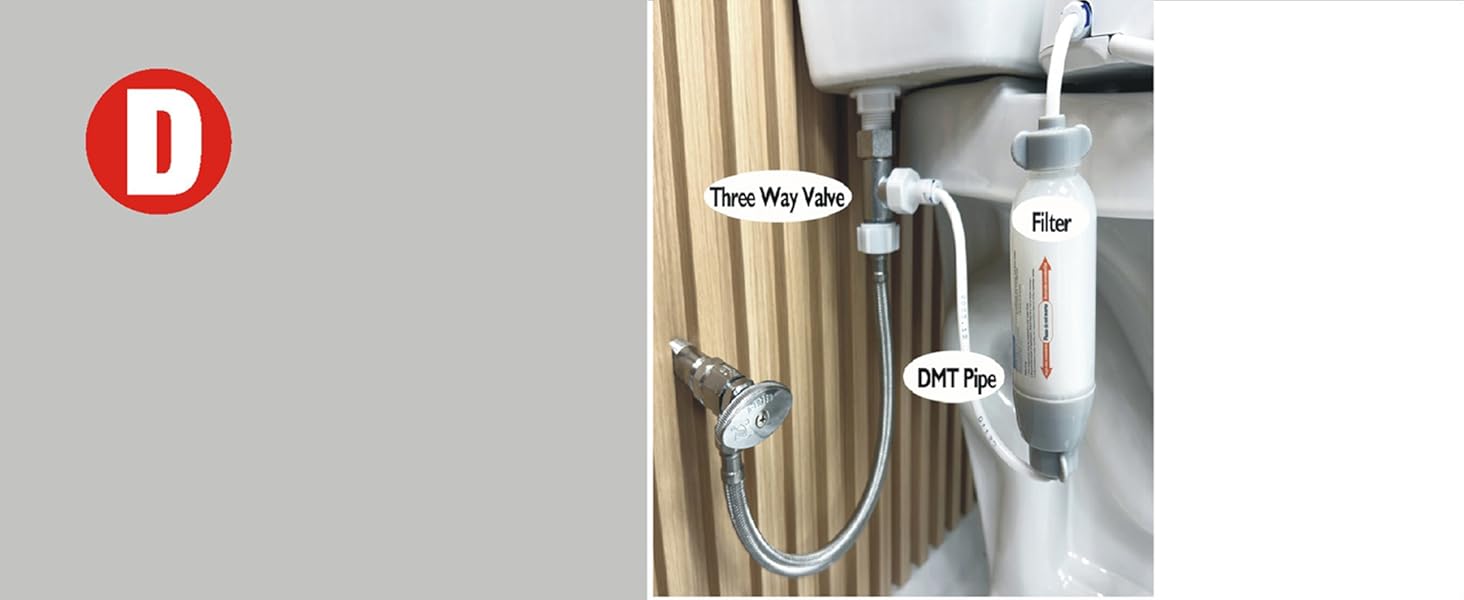
- Conectar o abastecimento de água: Connect the provided 3-way valve to the toilet's water supply line and the toilet tank. Then, connect the bidet seat's water supply hose (DMT Pipe) to the 3-way valve. Ensure all connections are tight to prevent leaks.
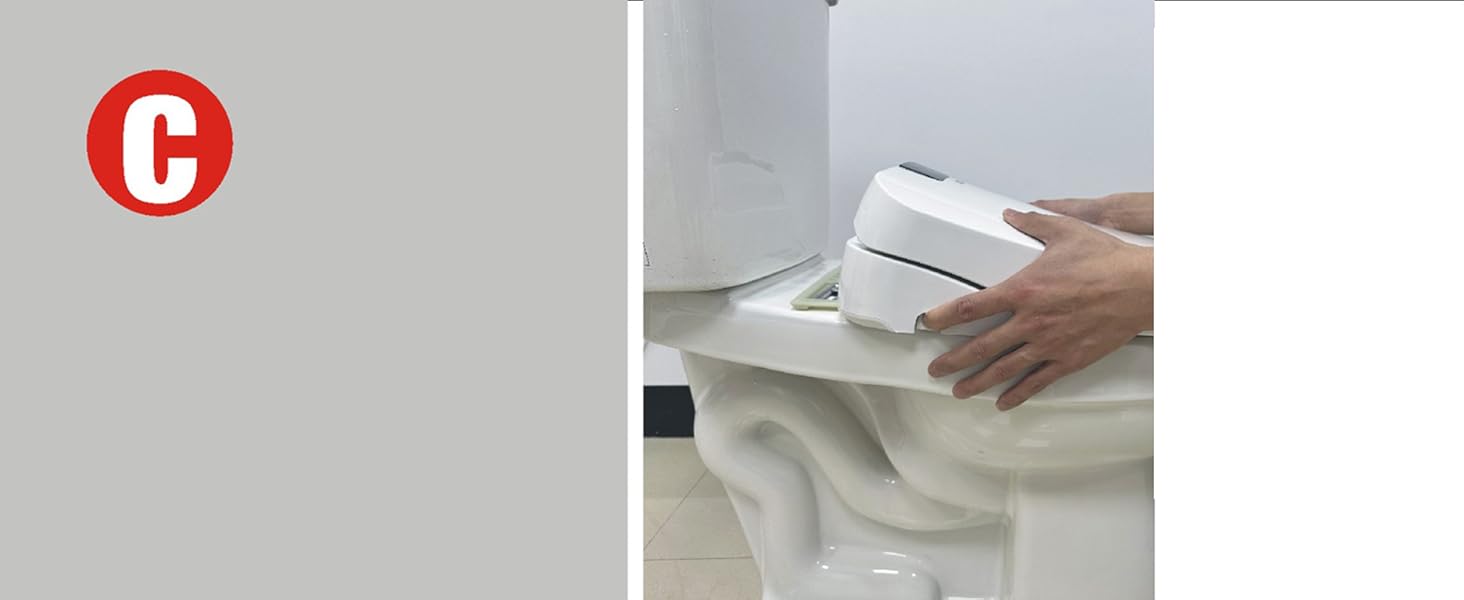
- Fixar assento de bidê: Slide the bidet seat onto the installed mounting plate until it clicks into place.
- Conecte a energia: Ligue o assento do bidê a uma tomada elétrica aterrada.
- Restabelecer o abastecimento de água: Slowly turn on the water supply to the toilet.
Nota importante de instalação:
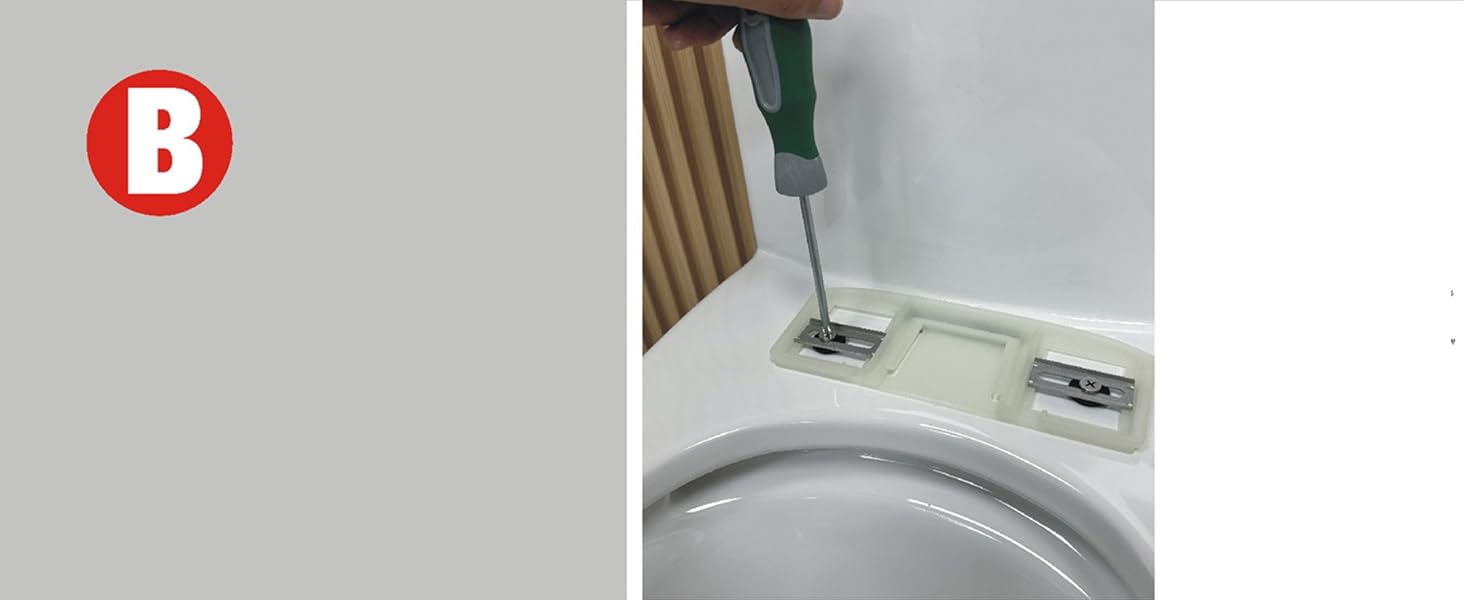
Ensure that you connect the 3-way valve to the tank by referring to the page diagram and installation video (if available). The installation instructions for the 3-way valve included in the package only apply to certain toilets. When installation is complete, please make sure to open the water supply valve first, wait 3-5 minutes for the water to fill the bidet, then plug it in. Do not operate any functions while the blue light is blinking. The blue light will stop blinking in approximately 1 minute.
5. Instruções de operação
The WLJBIDET Smart Bidet Toilet Seat is operated via a convenient side control panel. Refer to the icons on the panel for specific functions.
5.1 Funções Básicas
- Lavagem Traseira: Activates the posterior cleaning function.
- Lavagem feminina: Activates the gentle feminine cleaning function.
- Lavagem oscilante: Move o bocal para frente e para trás para uma área de limpeza mais ampla.
- Autolimpeza do bico: Initiates an automatic cleaning cycle for the nozzle.
- Parar: Stops any active washing or drying function.
5.2 Temperature and Position Adjustment
- Temperatura da água: Adjust the water temperature for washing (92℉ to 102℉).
- Temperatura do assento: Adjust the heated seat temperature (92℉, 98℉, 104℉, or off).
- Air Drying Temperature: Adjust the warm air dryer temperature (multiple levels).
- Posição do bico: Adjust the nozzle's forward or backward position for optimal cleaning.
5.3 recursos especiais
- Child-Friendly Wash: A gentle wash setting suitable for children.
- One-Touch Automatic Cleaning: Initiates a pre-programmed cleaning cycle.
- Luz noturna: Activates the soft LED night light for visibility in the dark.
6. Manutenção
A manutenção regular garante a longevidade e o funcionamento higiênico do seu assento de bidê.
6.1 Limpando o Bico
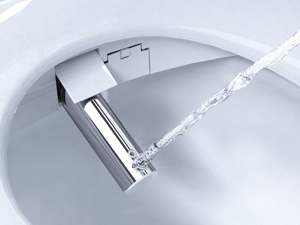
The nozzle performs a self-cleaning cycle automatically. For additional cleaning, you can manually activate the nozzle cleaning function or gently wipe the nozzle with a soft cloth and mild detergent when it is extended.
6.2 Limpeza Geral
Limpe a parte externa do assento do bidê com um pano macio e seco.amp cloth and a mild, non-abrasive cleaner. Do not use harsh chemicals, abrasive cleaners, or brushes that could scratch the surface. Ensure the unit is unplugged before cleaning.
7. Solução De Problemas
Se você tiver problemas com o assento do bidê, consulte as etapas de solução de problemas comuns a seguir:
| Problema | Possível causa | Solução |
|---|---|---|
| No power/Unit not working | Não está conectado à tomada; Problema na tomada; Disjuntor desarmado. | Ensure power cord is securely plugged in. Check the power outlet with another device. Reset the circuit breaker if tripped. |
| Sem jato de água ou com jato fraco. | Water supply valve closed; Filter clogged; Nozzle blocked. | Ensure water supply valve is fully open. Clean the water filter. Clean the nozzle. |
| Water not warm | Water heater setting too low; Heater malfunction. | Adjust water temperature setting. If issue persists, contact customer support. |
| Assento não aquecido | Heated seat setting too low; Sensor issue. | Adjust seat temperature setting. Ensure proper contact with the seat sensor. |
| Air dryer not working or weak | Air dryer setting too low; Air vent blocked. | Adjust air dryer temperature setting. Check for any obstructions in the air vent. |
| Vazamento | Conexões soltas; Vedações danificadas. | Check all water connections and tighten if necessary. If leaks persist, contact customer support. |
If the problem persists after attempting these solutions, please contact WLJBIDET customer support for assistance.
8. Especificações
| Especificação | Detalhe |
|---|---|
| Modelo | O7L-Side panel (Elongated) |
| Fabricante | WLJBIDET |
| Dimensões do produto | 51.05 x 44.45 x 13.97 cm |
| Peso do item | 5.47 kg |
| Tamanho | alongado |
| Cor | Branco |
| Material | Aço inoxidável |
| Forma | Oval |
| Volumetage | 120 Volts |
| O quetage | 1300 watts |
| Modo de operação | Automático |
9. Garantia e Suporte
For warranty information and customer support, please refer to the documentation included with your product or visit the official WLJBIDET webGuarde o comprovante de compra como prova para eventuais solicitações de garantia.
Ask a question about this manual
Ask about setup, troubleshooting, compatibility, parts, safety, or missing instructions. Manuals+ will review the question and use this page’s manual context to help answer it.