1. Introdução
Obrigado pela compra.asing the JAPANNEXT JN-IPS321UHD 32-inch 4K UHD IPS Monitor. This monitor is designed to provide a high-quality visual experience with its 3840x2160 resolution, wide viewing angles, and HDR support. This manual will guide you through the setup, operation, maintenance, and troubleshooting of your new monitor to ensure optimal performance and longevity.
2. Informações de segurança
Please read and follow these safety guidelines carefully before using the monitor:
- Não exponha o monitor à chuva, umidade ou temperaturas extremas.
- Garanta ventilação adequada ao redor do monitor para evitar superaquecimento.
- Utilize apenas o adaptador de energia fornecido com o monitor.
- Evite colocar objetos pesados sobre o cabo de alimentação.
- Não tente desmontar ou reparar o monitor por conta própria. Encaminhe todos os serviços de manutenção a pessoal qualificado.
- Limpe a tela com um pano macio e sem fiapos. Evite usar produtos químicos agressivos.
3. Conteúdo da embalagem
Verifique se todos os itens estão presentes na embalagem:
- JAPANNEXT JN-IPS321UHD Monitor
- Suporte de Monitor
- Cabo HDMI
- Cabo DisplayPort
- Cabo de energia
- Adaptador de energia
- Manual do usuário
- Cartão de garantia
- Controle remoto (pilhas não incluídas)
4. Configuração
4.1 Fixação do suporte
Carefully place the monitor face down on a soft, clean surface to prevent scratches. Attach the stand base to the stand neck, then secure the assembled stand to the back of the monitor using the provided screws.
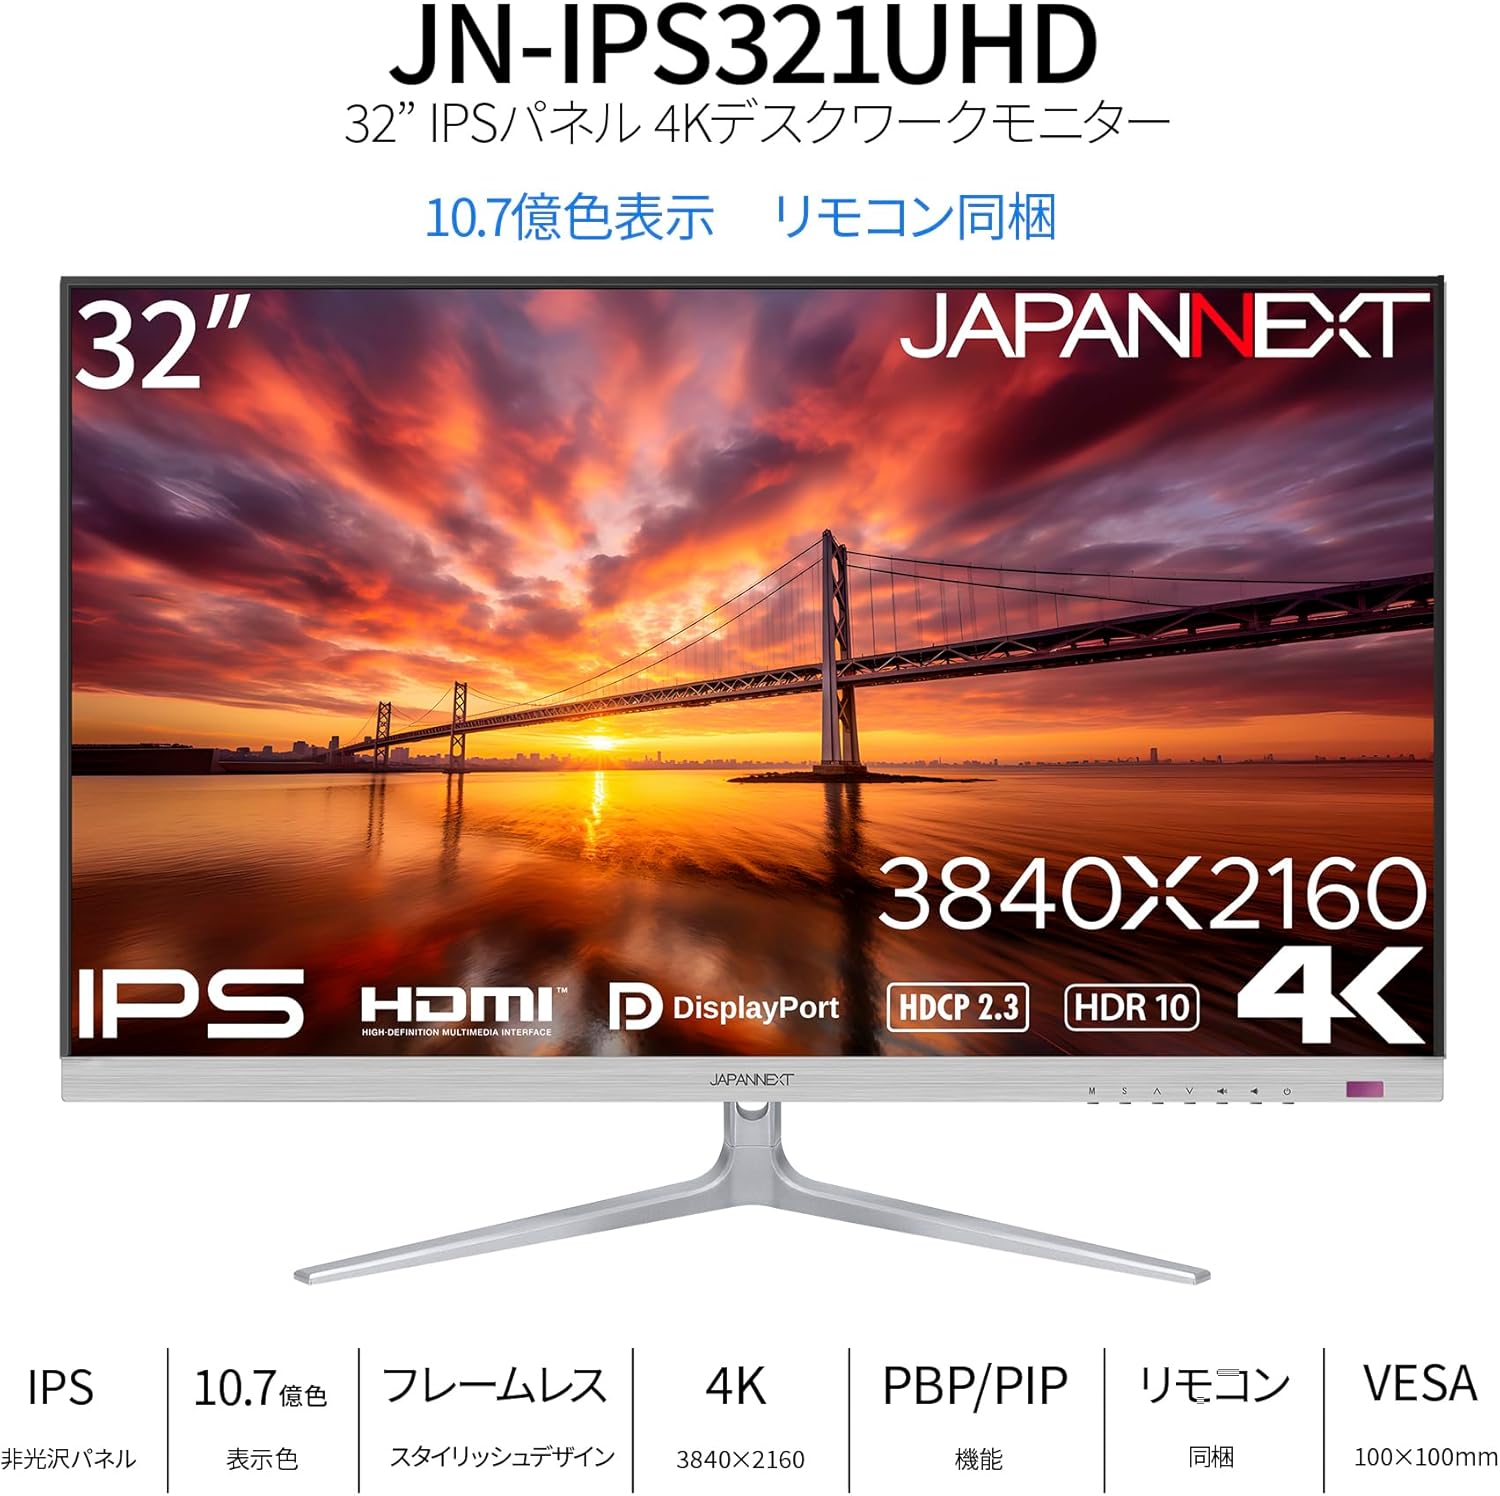
Imagem: Frente view of the monitor with its attached stand.
4.2 Instalação de suporte VESA (Opcional)
The monitor supports a 100x100mm VESA mount. If you prefer to mount the monitor on a wall or an alternative stand, remove the factory stand and attach your VESA-compatible mounting bracket. Ensure the mounting screws are of appropriate length to avoid damaging internal components.

Imagem: Traseira view of the monitor, highlighting the VESA mount area and input ports.
4.3 cabos de conexão
Connect the power adapter to the monitor's power port and then to a power outlet. Connect your video source (PC, game console, etc.) to one of the available input ports (HDMI or DisplayPort) on the monitor. If desired, connect external speakers or headphones to the audio output port.
Image: Close-up of the monitor's input panel, showing Audio Out, DisplayPort 1.4 (x2), HDMI 2.1 (x2), and Power Port.
5. Operando o monitor
5.1 Ligar/Desligar
Press the power button on the monitor or the remote control to turn the monitor on or off. The power indicator light will show the monitor's status (e.g., blue for on, amber for standby).
5.2 Seleção de entrada
Use the input selection button on the monitor or the remote control to cycle through the available input sources (HDMI 1, HDMI 2, DisplayPort 1, DisplayPort 2). The monitor will automatically detect an active signal.
5.3 Menu de exibição na tela (OSD)
Access the OSD menu using the buttons on the monitor or the remote control to adjust various settings such as brightness, contrast, color temperature, and picture modes. Navigate through the menu using the directional buttons and confirm selections with the OK/Enter button.
5.4 Picture-by-Picture (PBP) and Picture-in-Picture (PIP)
The monitor supports PBP and PIP functions, allowing you to display content from multiple input sources simultaneously. Refer to the OSD menu for options to configure these modes, including layout and source selection. PBP mode can display up to two input images side-by-side, while PIP mode displays one input as a smaller window over another main input.
5.5 modos de jogo
The monitor features a dedicated Game Mode to optimize visual settings for gaming. This mode can enhance visibility in dark areas and improve response times. Activate and configure Game Mode through the OSD menu.

Image: Monitor screen showing a game with the 'Picture Mode' menu, including FPS and Game options.
5.6 Recursos de áudio
The monitor includes built-in 2W x 2 stereo speakers for audio output. You can adjust the volume through the OSD menu or the remote control. For higher quality audio, connect external speakers or headphones to the audio output port.

Image: Monitor displaying a music scene, illustrating the integrated speakers.
Suporte a HDR 5.7
The monitor supports High Dynamic Range (HDR) content, providing a wider range of colors and contrast for a more immersive viewing experience. Ensure your connected device and content also support HDR for this feature to function.
5.8 Blue Light Reduction
To reduce eye strain during prolonged use, the monitor features a blue light reduction mode. This setting can be adjusted or enabled/disabled via the OSD menu.
6. Manutenção
6.1 Limpando o Monitor
Before cleaning, ensure the monitor is turned off and unplugged from the power outlet. Use a soft, dry, lint-free cloth to gently wipe the screen and exterior surfaces. For stubborn marks, lightly dampen the cloth with water. Avoid using alcohol, ammonia, or abrasive cleaners, as these can damage the screen or finish.
6.2 Cuidados Gerais
Keep the monitor away from direct sunlight, heat sources, and areas with high humidity. Do not block the ventilation openings. When moving the monitor, handle it carefully to avoid impact or damage.
7. Solução De Problemas
Caso encontre problemas com seu monitor, consulte os problemas e soluções comuns a seguir:
- Sem energia: Certifique-se de que o cabo de alimentação esteja firmemente conectado tanto ao monitor quanto à tomada. Verifique se o adaptador de energia está funcionando corretamente.
- Sem Sinal: Verify that the video cable (HDMI or DisplayPort) is properly connected to both the monitor and your source device. Ensure the correct input source is selected on the monitor.
- Imagem tremeluzente ou distorcida: Check the video cable for damage. Try a different cable or input port. Ensure your source device's display resolution and refresh rate are compatible with the monitor's specifications.
- Sem som nas caixas de som: Check the volume settings on both the monitor and your source device. Ensure the audio cable (if used) is properly connected.
- Controle remoto não funciona: Verifique as pilhas do controle remoto. Certifique-se de que não haja obstruções entre o controle remoto e o receptor de infravermelho do monitor.
Se o problema persistir após seguir esses passos, entre em contato com o suporte ao cliente.
8. Especificações
Below are the detailed technical specifications for the JAPANNEXT JN-IPS321UHD monitor:

Image: Detailed specifications table for the monitor.
| Recurso | Especificação |
|---|---|
| Número do modelo | JN-IPS321UHD |
| Tamanho da tela | 32 polegadas |
| Tipo de painel | IPS (AHVA) |
| Resolução | 3840 x 2160 (4K UHD) |
| Proporção da tela | 16:9 |
| Taxa de atualização | 60Hz |
| Tempo de resposta | 12 ms (máx.) |
| Brilho | 300 cd/m² |
| Taxa de contraste | 1000:1 |
| Viewângulo de engate | H: 178 ° V: 178 ° |
| Suporte de cor | 1.07 billion colors, sRGB:96% |
| Suporte HDR | HDR10 |
| Suporte HDCP | HDCP 2.3 |
| Entradas | HDMI 2.1 x2 (60Hz), DisplayPort 1.4 x2 (60Hz) |
| Saída de áudio | Sim |
| Oradores | 2W x 2 |
| Montagem VESA | 100x100mm |
| Dimensões (com suporte) | 725 mm x 505 mm x 207 mm |
| Dimensões (sem suporte) | 725 mm x 432 mm x 51 mm |
| Peso (produto) | 8.9 kg |
| Consumo de energia | 47W (typical), 1W (standby) |
9. Garantia e Suporte
Your JAPANNEXT JN-IPS321UHD monitor comes with a warranty. Please refer to the included warranty card for detailed terms and conditions, including the warranty period and coverage. Keep your proof of purchase for warranty claims.
For technical assistance, troubleshooting beyond this manual, or warranty inquiries, please contact JAPANNEXT customer support. Contact information can typically be found on the official JAPANNEXT webno site ou no cartão de garantia fornecido com o produto.