
1. Introdução
This manual provides detailed instructions for the installation, operation, and maintenance of the Elitech Cold Storage Temperature Controller series. These controllers are designed for precise temperature management in various cold storage applications, ensuring optimal conditions for stored goods. Please read this manual thoroughly before installation and operation to ensure safe and efficient use.
2. Precauções de segurança
- Certifique-se de que toda a fiação seja feita por um eletricista qualificado, de acordo com as normas elétricas locais.
- Desligue a energia antes de realizar qualquer instalação, fiação ou manutenção.
- Não utilize o controlador em ambientes com excesso de umidade, poeira ou gases corrosivos.
- Verifique o volume da fonte de alimentaçãotage matches the controller's specifications.
- Keep the device away from strong electromagnetic interference.
3. Produto acabadoview
The Elitech temperature controller features a clear digital display, intuitive buttons for parameter setting, and robust construction for reliable performance in demanding environments. It typically includes inputs for temperature sensors and outputs for controlling refrigeration, defrost, and fan operations.
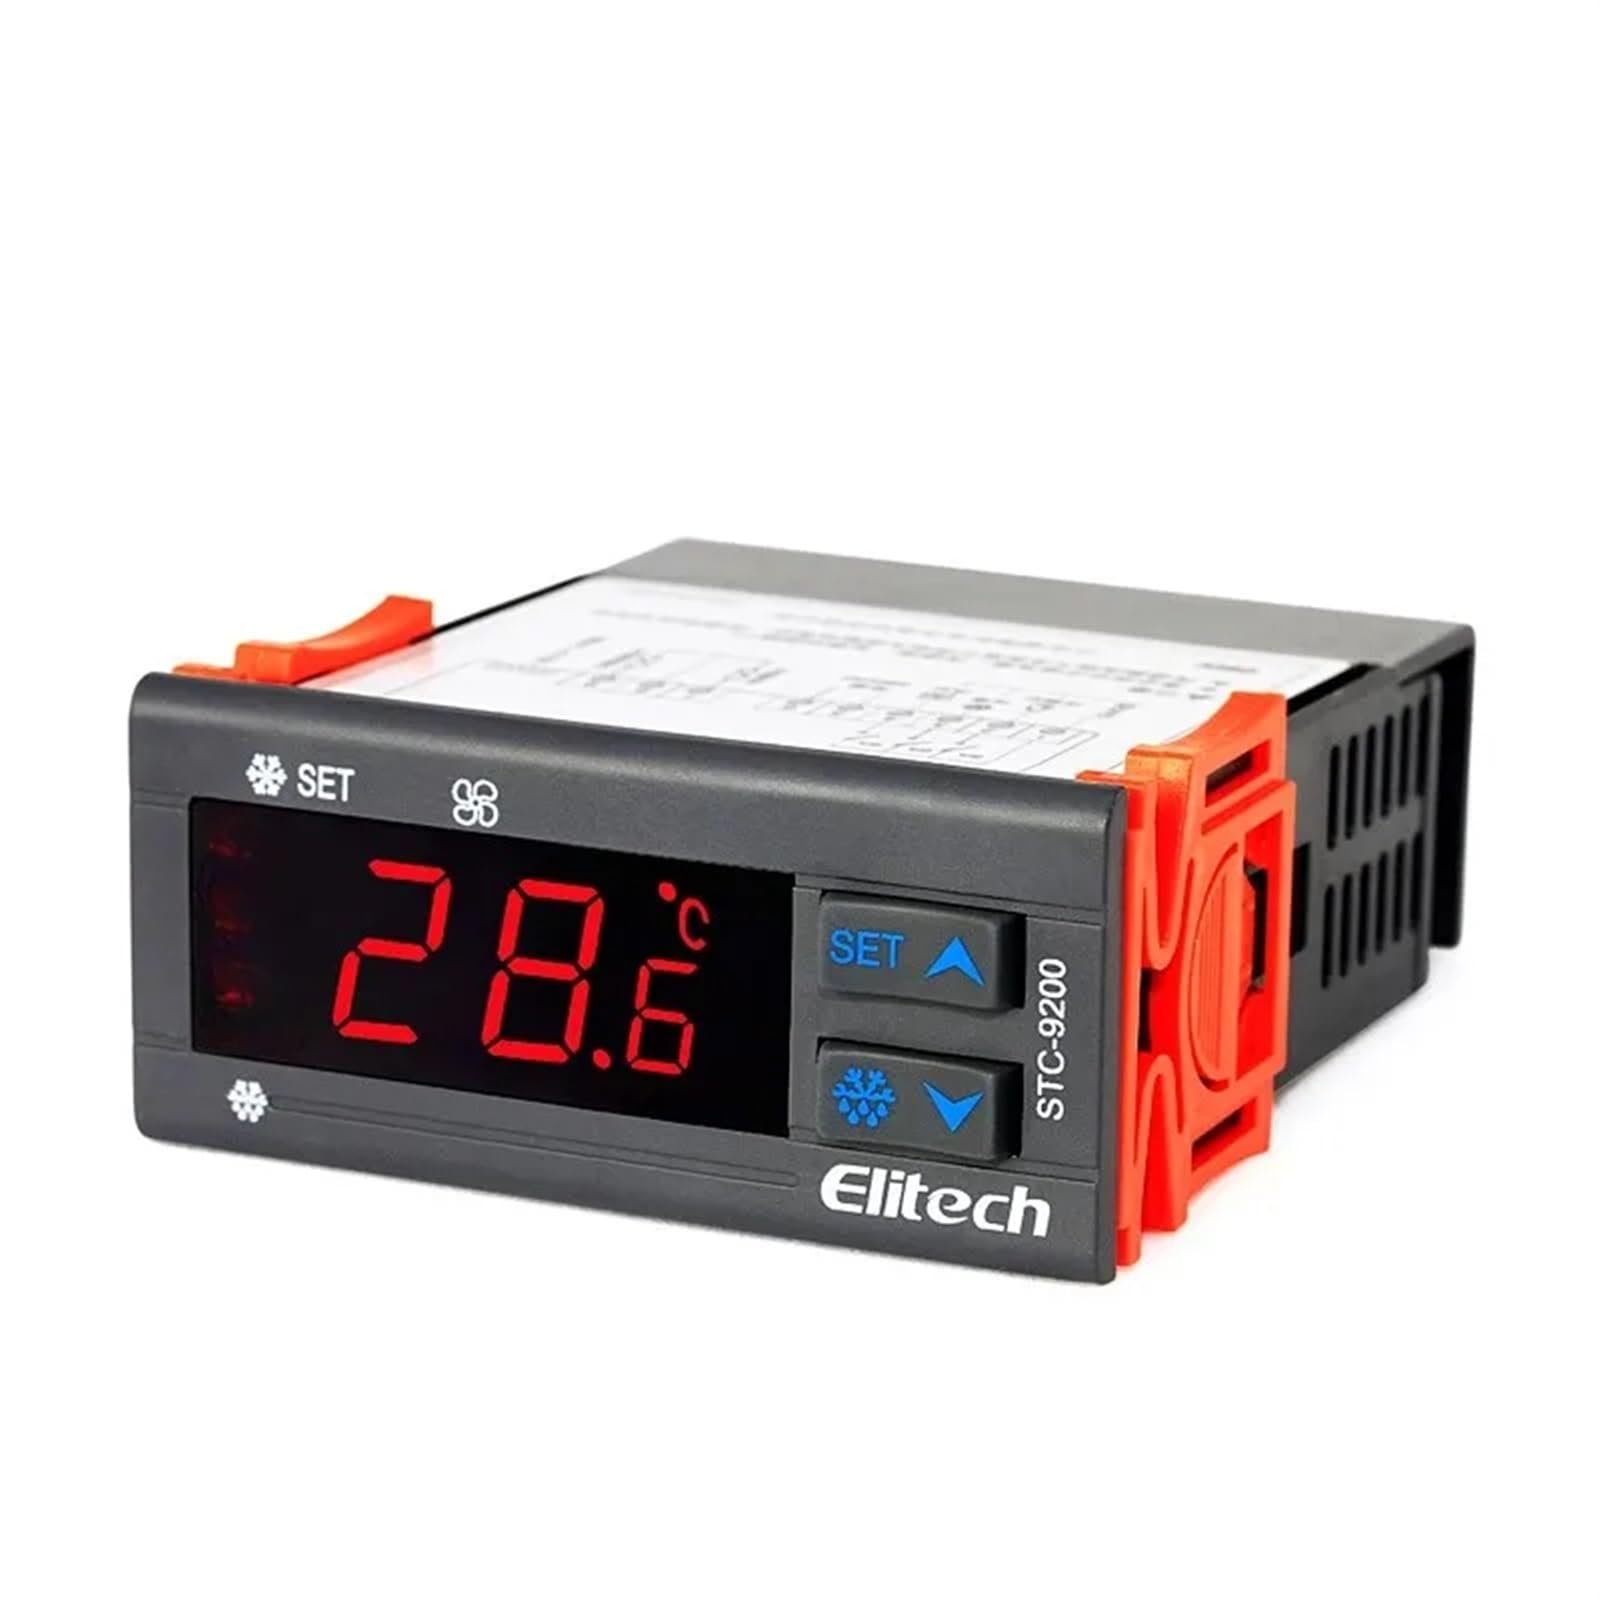
Figura 1: Frente view of an Elitech temperature controller (model EK-3010 shown). This image displays the digital display, control buttons (Up, OK/Set, Down), and indicators for various functions like refrigeration, defrost, and fan operation. The display shows a temperature reading of -44.5.
4. Especificações
| Recurso | Descrição |
|---|---|
| Fonte de energia | AC 220V ±10%, 50/60Hz (Typical, may vary by model) |
| Faixa de medição de temperatura | -50°C a 99°C (-58°F a 210°F) (Típico) |
| Faixa de controle | -40°C a 70°C (-40°F a 158°F) (Típico) |
| Resolução | 0.1°C / 1°F |
| Tipo de sensor | NTC sensor (Typical) |
| Relay Output Capacity | Compressor: 10A/250VAC; Defrost: 10A/250VAC; Fan: 10A/250VAC (Typical) |
| Temperatura de operação | 0°C a 60°C (32°F a 140°F) |
| Temperatura de armazenamento | -30°C a 75°C (-22°F a 167°F) |
| Humidade relativa | 20% a 85% (sem condensação) |
Note: Specifications may vary slightly between different models (STC-9200, STC-8080A, STC-200, STC-9100, STC-1000X, EK-3020). Refer to the specific model's packaging or label for precise details.
5. Configuração e instalação
5.1 Montagem
- Choose a suitable location for mounting the controller, away from direct heat sources, moisture, and vibrations.
- Assegure-se de que haja ventilação adequada ao redor da unidade.
- Cut a rectangular opening in the panel according to the controller's dimensions (refer to the product diagram for exact measurements).
- Insert the controller into the opening and secure it using the provided mounting clips.
5.2 fios
AVISO: Certifique-se de que a energia esteja desligada antes de fazer a fiação.
- Fonte de energia: Connect the main power supply (L and N) to the designated terminals on the controller.
- Sensor de temperatura: Connect the NTC temperature sensor to the sensor input terminals. Ensure correct polarity if applicable. The sensor should be placed in the area where temperature needs to be monitored and controlled.
- Compressor Output: Connect the compressor's power line to the compressor relay output terminals.
- Defrost Heater Output: Connect the defrost heater's power line to the defrost relay output terminals.
- Saída do ventilador: Connect the evaporator fan's power line to the fan relay output terminals.
Refer to the wiring diagram printed on the side of the controller or in the specific model's manual for precise terminal connections.
6. Instruções de operação
6.1 Ligar/Desligar
- To power on, connect the main power supply. The display will show the current temperature.
- To power off, disconnect the main power supply.
6.2 Viewtemperatura ing
The current measured temperature is continuously displayed on the front panel.
6.3 Parâmetros de configuração
The controller allows adjustment of various parameters such as setpoint temperature, differential, defrost cycle, and fan operation. The exact procedure may vary slightly by model, but generally follows these steps:
- Pressione e segure o DEFINIR / OK button for 3-5 seconds to enter parameter setting mode.
- Use o UP e ABAIXO buttons to navigate through the parameter codes (e.g., F1, F2, P1, P2).
- Imprensa DEFINIR / OK para view o valor do parâmetro selecionado.
- Use o UP e ABAIXO botões para ajustar o valor.
- Imprensa DEFINIR / OK again to confirm the new value and move to the next parameter, or press and hold DEFINIR / OK to save all changes and exit the setting mode.
Os parâmetros comuns incluem:
- Ponto de ajuste (PA): A temperatura desejada.
- Differential (Hy): The temperature difference between the set point and the turn-on/off temperature.
- Defrost Cycle (Id): Interval between defrost cycles.
- Defrost Duration (Ed): Length of the defrost cycle.
- Fan Control (Fc): Settings for fan operation during refrigeration and defrost.
7. Manutenção
7.1 Limpeza
- Regularly clean the front panel with a soft, damp pano. Não use produtos de limpeza abrasivos ou solventes.
- Certifique-se de que as aberturas de ventilação estejam livres de poeira e detritos para evitar o superaquecimento.
7.2 Sensor Check
- Periodically inspect the temperature sensor and its wiring for any damage or corrosion.
- Ensure the sensor is securely placed and making proper contact.
8. Solução De Problemas
| Problema | Possível causa | Solução |
|---|---|---|
| Display shows "EE" or "HH" | Erro no sensor ou temperatura fora da faixa ideal. | Check sensor connection and wiring. Replace sensor if damaged. Ensure temperature is within operating range. |
| Controlador não liga | Sem fonte de alimentação ou fiação incorreta. | Verifique a conexão de energia e a voltagem.tage. Check wiring according to diagram. |
| Compressor não está funcionando | Temperature not reaching set point, compressor delay, or wiring issue. | Check set point and differential. Wait for compressor delay. Verify compressor wiring. |
| Leitura de temperatura imprecisa | Sensor placement, sensor damage, or calibration needed. | Relocate sensor to a representative area. Check sensor for damage. Refer to manual for calibration procedure if available. |
9. Garantia e Suporte
Elitech products are typically covered by a limited warranty against defects in materials and workmanship. The warranty period and terms may vary by region and specific product model. Please retain your purchase receipt as proof of purchase.
For technical support, warranty claims, or service inquiries, please contact your authorized Elitech distributor or visit the official Elitech website for contact information. When contacting support, please have your product model number and purchase date available.