
1. Introdução
This manual provides detailed instructions for the installation, operation, and maintenance of your virtavo Wireless Solar Security Camera Outdoor, Model LJH10. This camera features 2K QHD resolution, starlight color night vision, PIR motion detection, two-way audio, and is powered by an integrated solar panel and rechargeable battery, ensuring continuous outdoor surveillance without the need for frequent charging or complex wiring.
2. O que está na caixa
Verifique se todos os componentes estão presentes antes de prosseguir com a instalação.
- virtavo Wireless Solar Security Camera (Model LJH10)
- Suporte de montagem
- Cabo de carregamento USB
- Parafusos e âncoras de parede
- Manual do usuário

Image: The virtavo Wireless Solar Security Camera, showing the main unit with its integrated solar panel and mounting accessories.
3. Produto acabadoview
3.1 Componentes da câmera
Familiarize-se com as diferentes partes da sua câmera de segurança:
- Lente: Captures 2K QHD video.
- LEDs IR: Provide infrared illumination for night vision.
- Sensor PIR: Detects motion based on heat signatures.
- Microfone: Captura áudio para comunicação bidirecional.
- Palestrante: Permite comunicação de áudio bidirecional.
- Painel solar: Recharges the internal battery using sunlight.
- Porta de carregamento USB: Para carregamento inicial ou alimentação suplementar.
- Slot para cartão SD: Supports local storage up to 256GB (SD card not included).
- Botão de reinicialização: Utilizado para restaurar as configurações de fábrica da câmera.
- Interruptor de alimentação: Liga ou desliga a câmera.

Imagem: Um close-up view of the camera's underside, highlighting the SD card slot, USB charging port, and power switch for secure local storage and device management.
4. Configuração
4.1 Carregamento Inicial
Before first use, fully charge the camera using the provided USB cable and a 5V/2A power adapter (not included). A full charge typically takes 6-8 hours. The indicator light will show charging status.
4.2 Instalação do aplicativo e criação de conta
- Download the 'HOME V' app from your smartphone's app store (iOS or Android).
- Abra o aplicativo e siga as instruções na tela para criar uma conta e fazer login.
4.3 Conectando-se ao Wi-Fi
- Ligue a câmera usando o botão liga/desliga.
- In the 'HOME V' app, tap '+' to add a new device.
- Select your camera model and follow the app's instructions to connect the camera to your 2.4GHz Wi-Fi network. Ensure your phone is connected to the same 2.4GHz Wi-Fi network during setup.
- Escaneie o código QR exibido no seu telefone com a lente da câmera quando solicitado.
4.4 Montagem da câmera
Escolha um local com ampexposição à luz solar para o painel solar e um ambiente claro view of the area you wish to monitor. The camera is weatherproof for outdoor use.

Image: An illustration demonstrating the simple process of attaching the solar panel to the camera for an easy, integrated setup.
4.4.1 Instalação completa
For integrated setup, attach the solar panel directly to the top of the camera. Use the mounting bracket to secure the camera to a wall or other flat surface using the provided screws and wall anchors. Ensure the solar panel faces the sun for optimal charging.
4.4.2 Split Installation
If direct sunlight is not available at the camera's desired location, use the extra-long 5ft cable to mount the solar panel separately. This allows you to place the camera in a shaded area while positioning the solar panel in a sunny spot. Secure both the camera and the solar panel using their respective mounting hardware.

Image: This image illustrates the flexible installation options, showing both an all-in-one setup and a split setup where the solar panel is mounted separately from the camera using an extended cable.
5. Instruções de operação
5.1 Ao vivo View e Gravação
Open the 'HOME V' app to access the live feed from your camera. You can manually record video or capture screenshots directly from the live view interface. Foo gravadotage pode ser reviewed in the app's playback section.
5.2 Detecção de Movimento e Alertas
The camera utilizes PIR (Passive Infrared) motion detection to identify heat signatures, reducing false alarms. When motion is detected, the camera will automatically record and send instant notifications to your smartphone.

Image: A visual representation of the PIR motion detection range, showing how the camera detects movement within a specified area, distinguishing between relevant and irrelevant motion.
5.2.1 Custom Detection Zones
Within the 'HOME V' app settings, you can define specific areas within the camera's view where motion detection should be active. This helps to focus monitoring on critical zones and further minimize unwanted alerts.
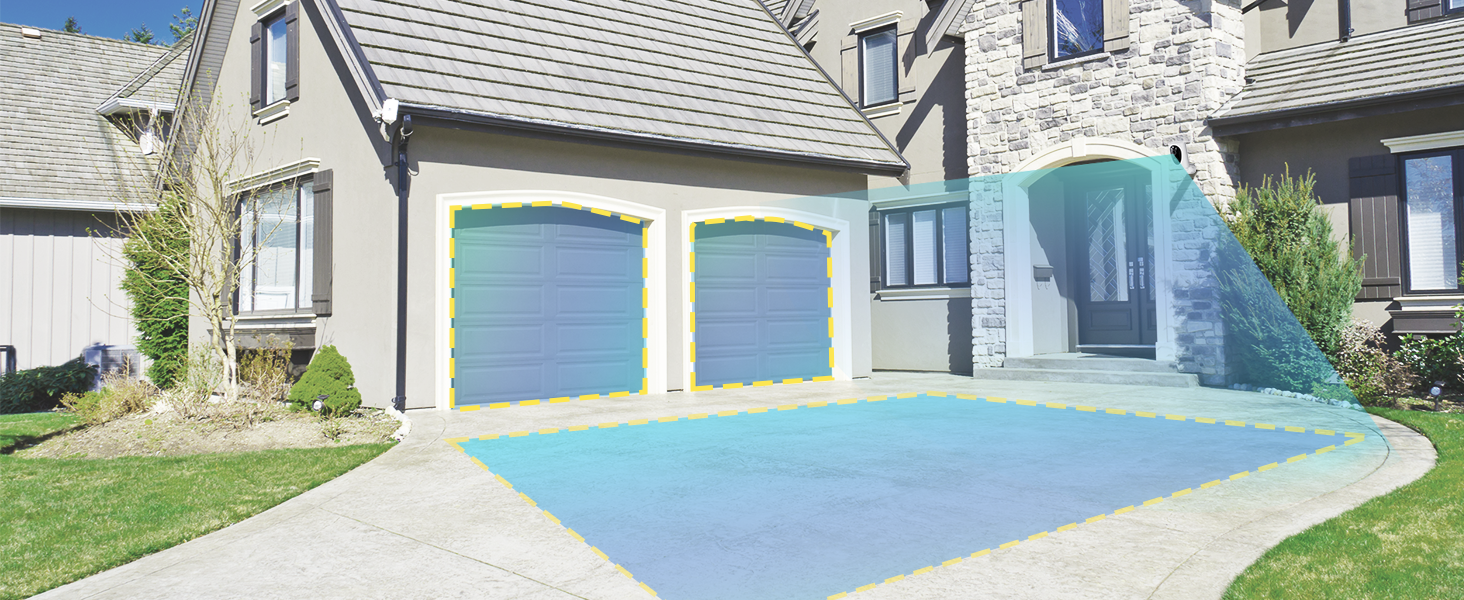
Image: A screenshot or illustration showing the 'HOME V' app interface where users can draw and define custom motion detection zones within the camera's field of view.
5.2.2 Instant Notifications
Upon detecting motion, the camera sends immediate alerts to your smartphone, allowing you to view the event in real-time or review foo gravadotage.
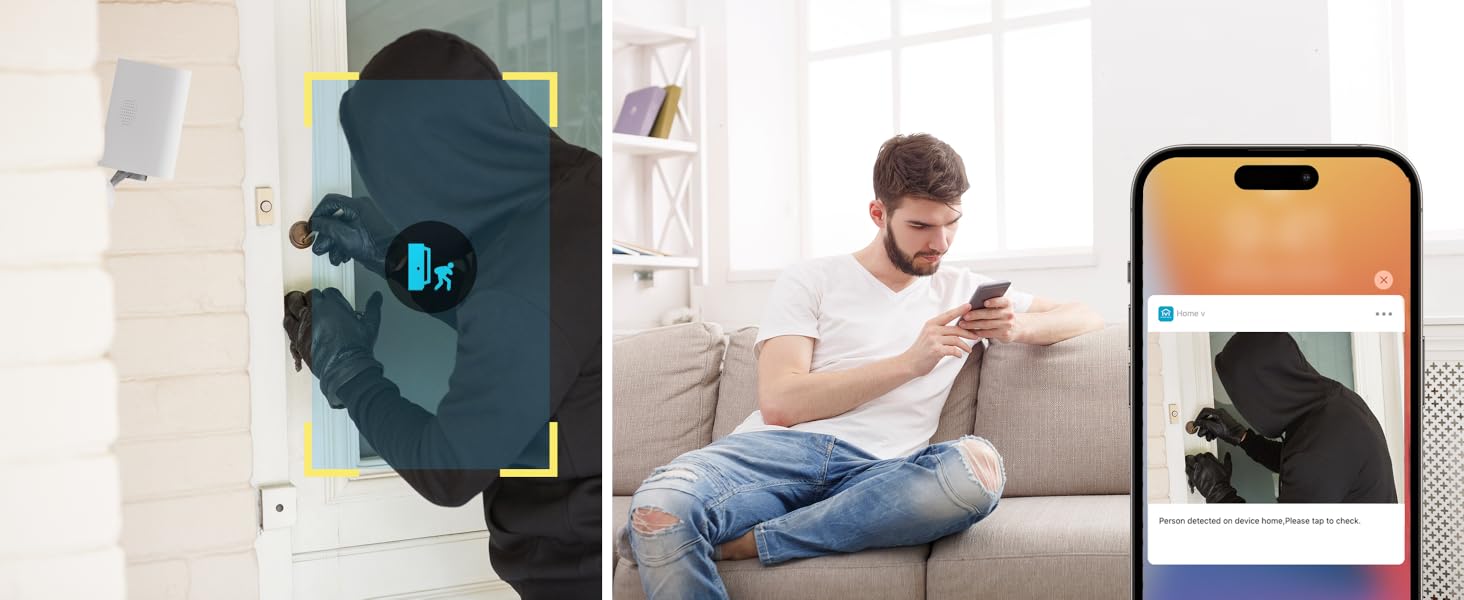
Image: A visual depicting a smartphone receiving an instant notification from the camera, showing a preview of the detected activity, such as a person approaching a door.
5.3 Visão noturna
The camera features 2K Starlight Color Night Vision, utilizing a wide F1.6 aperture and 3.0mm focal length for vivid, color-rich images in low-light conditions. Additionally, two high-intensity IR LEDs provide clear black-and-white night viewing when starlight is insufficient.

Image: A split image comparing the camera's starlight color night vision (top) with traditional black-and-white infrared night vision (bottom), demonstrating enhanced clarity and color retention in low light.
Áudio bidirecional 5.4
The integrated microphone and speaker allow for two-way communication through the 'HOME V' app. You can listen to audio from the camera's location and speak through the camera to communicate with visitors or deter intruders.

Image: An illustration showing a person speaking into their phone, with their voice being projected through the camera to a person at the camera's location, demonstrating the two-way audio function.
5.5 Opções de armazenamento
The camera offers flexible storage solutions for your recorded footage.
5.5.1 Armazenamento local (cartão SD)
The camera supports a Micro SD card (not included) up to 256GB for continuous recording, even if your internet connection is interrupted. Insert the SD card into the designated slot on the camera. Footage is encrypted for privacy.
Image: A close-up of the camera's SD card slot with a Micro SD card inserted, illustrating the local storage capability.
5.5.2 Armazenamento em Nuvem
Optional cloud storage plans are available through the 'HOME V' app, offering features such as 7-day video history, smart AI detection (for people, vehicles, and animals), and alerts with image previews. Cloud storage provides an additional layer of security for your recordings.

Image: A graphic comparing the basic no-fee local storage option (supporting up to 256GB SD card) with the optional cloud storage 'HOME PLAN', detailing its features like 7-day video history and AI detection.
5.6 Compartilhamento de dispositivos
You can share access to your camera's live feed and recordings with family members or trusted individuals through the 'HOME V' app. This allows multiple users to monitor the property simultaneously.

Image: A collage showing various individuals (family members) using their smartphones and tablets to access the camera's live feed, illustrating the device sharing feature.
6. Manutenção
6.1 Cuidados com os Painéis Solares
To ensure optimal charging efficiency, regularly clean the surface of the solar panel to remove dust, dirt, or debris. Use a soft, damp cloth. Avoid abrasive cleaners that could scratch the panel.
6.2 Gerenciamento de bateria
The camera is equipped with a 4400 mAh rechargeable battery. While the solar panel provides continuous charging, prolonged periods of low sunlight or high activity may require supplemental charging via the USB port. Monitor battery levels through the 'HOME V' app.
6.3 Resistência às intempéries
The virtavo camera is designed to be weatherproof, capable of withstanding various outdoor conditions. Ensure all ports are securely sealed after charging or accessing the SD card slot to maintain its weather resistance.

Image: The virtavo solar security camera mounted outdoors during rainfall, demonstrating its weatherproof construction and durability in various environmental conditions.
7. Solução De Problemas
- Camera is offline:
Ensure the camera is powered on and fully charged. Check your Wi-Fi connection and signal strength. Try restarting your router and the camera. If the issue persists, try re-pairing the camera with the app. - A detecção de movimento não está funcionando:
Verify that motion detection is enabled in the app settings. Check the sensitivity level and adjust if necessary. Ensure there are no obstructions blocking the PIR sensor. Review custom detection zones to ensure the area of interest is covered. - Visão noturna deficiente:
Ensure the camera lens is clean. Check if the IR LEDs are functioning correctly (they may emit a faint red glow in the dark). Ensure there are no reflective surfaces close to the camera that could cause glare. - Não é possível conectar-se ao Wi-Fi:
Confirm your Wi-Fi network is 2.4GHz. Ensure your Wi-Fi password is correct. Move the camera closer to the router to improve signal strength. Reset the camera and attempt the connection process again. - Battery draining fast:
Ensure the solar panel is receiving adequate direct sunlight. Reduce motion detection sensitivity or frequency of recordings if activity is very high. Frequent live view access also consumes battery power. Consider supplemental USB charging during extended cloudy periods.
8. Especificações
| Nome do modelo | LJH10 |
| Uso interno/externo | Ar livre |
| Resolução de captura de vídeo | 2K QHD |
| Características especiais | 2-Way Audio, Starlight Color Night Vision, PIR Motion Detection, Weatherproof |
| Fonte de energia | Solar Powered, Rechargeable Battery (4400 mAh) |
| Tecnologia de Conectividade | Sem fio (Wi-Fi de 2.4 GHz) |
| Dispositivos compatíveis | Smartphone (iOS, Android) |
| Tipo de controlador | 'HOME V' App |
| Tipo de montagem | Montagem na parede |
| Opções de armazenamento | Micro SD Card (up to 256GB, not included), Cloud Storage (optional subscription) |
| Dimensões do item (C x L x A) | 2.7 x 1.3 x 3.2 polegadas |
| Peso do item | 13.1 onças (0.37 quilogramas) |
| Formato de captura de vídeo | MP4 |
9. Garantia e Suporte
For warranty information, technical support, or customer service inquiries, please refer to the contact information provided on the virtavo official website or within the 'HOME V' app. Keep your purchase receipt for warranty claims.