SPH-P500242-031
Clarion 1 Light Black Clear Glass Transitional Pendant
Model: SPH-P500242-031
Informações importantes de segurança
Please read and understand all instructions before beginning installation. Failure to do so may result in electric shock, fire, or other injuries that could be fatal or cause property damage. All wiring connections must be in accordance with local codes and ordinances. If you are unsure about any part of these instructions, consult a qualified electrician.
- Desligue a eletricidade na caixa de fusíveis principal ou no disjuntor antes da instalação.
- Não instale esta luminária em locais úmidos.
- Certifique-se de que todas as conexões elétricas estejam seguras e devidamente isoladas.
- Use apenas o tipo de lâmpada e a água especificadostage.
- Este acessório foi projetado apenas para uso interno.
Conteúdo da embalagem
Desembale cuidadosamente sua nova luminária e disponha todas as peças em uma área livre. Certifique-se de que todos os componentes listados abaixo estejam presentes antes de descartar os materiais da embalagem.
- Placa de montagem
- Dossel
- Downrod(s)
- Corpo da luminária com soquete
- Cortina de vidro transparente
- Acessórios de montagem (parafusos, conectores de fio)
Ferramentas necessárias (não incluídas)
- Chave de fenda Phillips
- Chave de fenda de cabeça chata
- Alicates de decapagem de fios
- Alicate
- Fita isolante
- Escada
Configuração e instalação
This section provides step-by-step instructions for installing your pendant light. It is recommended to have a second person assist with installation.
Passo 1: Prepare-se para a instalação
- Desligue a alimentação: Locate the circuit breaker or fuse box and turn off the power to the junction box where you will be installing the fixture.
- Remove existing fixture: If replacing an old fixture, carefully remove it and disconnect all wiring.
- Unpack components: Remove all parts from the packaging and inspect for any damage.
Etapa 2: prenda a placa de montagem
- Fixe a placa de montagem à caixa de junção utilizando os parafusos de montagem fornecidos. Certifique-se de que a placa esteja firmemente fixada.
Step 3: Assemble Downrod and Fixture Body
- Determine the desired hanging height. Connect the appropriate downrod(s) to the fixture body and then to the canopy. Thread the fixture wires through the downrod(s) and canopy.
Etapa 4: Faça as conexões elétricas
Refer to the image below for a visual guide to the pendant's design. Note that the actual product features a black finish, while the image illustrates the overall structure.
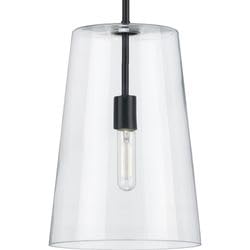
Image: Illustrative example of the Clarion 1 Light Pendant design. The actual product features a black finish.
- Conecte o preto fio da luminária para o preto Conecte o fio (fase) da caixa de junção usando um conector de fios.
- Conecte o branco fio da luminária para o branco Conecte o fio neutro da caixa de junção usando um conector de fios.
- Conecte o chão wire from the fixture (usually bare copper or green) to the chão wire from the junction box and to the mounting plate's ground screw.
- Coloque cuidadosamente todos os fios na caixa de junção.
Step 5: Secure Canopy and Glass Shade
- Align the canopy with the mounting plate and secure it with the provided screws.
- Carefully attach the clear glass shade to the fixture body according to the design. Ensure it is stable and secure.
Passo 6: Instale a lâmpada
- Screw in one A19 medium base bulb (not included) into the socket. Do not exceed the maximum wattage de 60 Watts.
Etapa 7: Restaurar energia
- Return to the main fuse box or circuit breaker and turn the power back on. Test the light fixture.
Instruções de operação
This pendant light is designed for simple operation.
- Ligar/desligar: Controle a luz usando um interruptor de parede padrão conectado ao circuito da luminária.
- Tipo de lâmpada: Uses one A19 medium base bulb.
- O quetage: Maximum 60 Watts.
- Regulável: The fixture is dimmable when used in conjunction with a dimmable bulb and a compatible dimmer switch (both sold separately).
Manutenção
A manutenção regular ajudará a preservar a aparência e a funcionalidade da sua luminária pendente.
- Limpeza: Always turn off the power before cleaning. Wipe the fixture with a soft, dry cloth. Do not use abrasive cleaners, solvents, or polishes as they may damage the finish.
- Sombra de vidro: The clear glass shade can be gently wiped with a damp pano e depois seque com um pano macio e sem fiapos.
- Substituição de lâmpada: Ensure the power is off and the bulb has cooled before attempting to replace it. Screw in a new A19 medium base bulb, not exceeding 60 Watts.
Solução de problemas
If you experience issues with your pendant light, refer to the following common problems and solutions.
| Problema | Possível causa | Solução |
|---|---|---|
| A luz não acende | Sem energia para o dispositivo elétrico Conexões de fios soltos Lâmpada com defeito | Verifique o disjuntor/fusível. Certifique-se de que todas as conexões dos fios estejam seguras (desligue a energia primeiro). Substitua a lâmpada por uma nova. |
| A luz pisca | Conexões de fios soltos Tipo de lâmpada incorreto Interruptor dimmer incompatível | Verifique as conexões dos fios (desligue a energia primeiro). Ensure bulb is correct type and wattage. If using a dimmer, ensure it is compatible with LED/dimmable bulbs. |
| A sombra do vidro está solta | A cobertura não está devidamente fixada. | Carefully re-secure the glass shade to the fixture body. |
Se o problema persistir após tentar essas soluções, entre em contato com o suporte ao cliente.
Especificações
| Recurso | Detalhe |
|---|---|
| Número do modelo | SPH-P500242-031 |
| Marca | Genérico |
| Cor | Black (with Clear Glass) |
| Lamp Tipo | A19 (Medium Base) |
| Max Wattage | 60 Watts |
| Regulável | Yes (with dimmable bulb and compatible dimmer) |
| Classificação Energy Star | Não |
| Dimensões | 10.5 polegadas (diâmetro) x 15.87 polegadas (altura) |
Garantia e Suporte
Este produto vem com um Garantia do fabricante de 1 anos a partir da data da compra, cobrindo defeitos de materiais e de fabricação.
For warranty claims, technical assistance, or replacement parts, please contact the retailer or manufacturer directly. Keep your proof of purchase for warranty validation.
Ask a question about this manual
Ask about setup, troubleshooting, compatibility, parts, safety, or missing instructions. Manuals+ will review the question and use this page’s manual context to help answer it.