
1. Introdução
This manual provides essential information for the safe and efficient operation of your Aninerel 3600W Solar Inverter Charger, Model ANJ-3600W-LV. This device is a pure sine wave hybrid inverter designed to convert DC 48V to AC 110V, featuring a built-in 80A MPPT solar charge controller. It supports various battery types, including battery-less operation, and offers flexible charging and output modes for diverse energy requirements. Please read this manual thoroughly before installation and use.

Figure 1: Aninerel 3600W Solar Inverter Charger and Wi-Fi module.
2. Informações de segurança
Observe as seguintes precauções de segurança para evitar ferimentos e danos ao inversor ou aos equipamentos conectados.
- A instalação deve ser realizada por pessoal qualificado, de acordo com as normas elétricas locais.
- Ensure all power sources (PV, battery, AC grid) are disconnected before installation or maintenance.
- Não desmonte o inversor. Não existem peças internas que possam ser reparadas pelo usuário.
- Avoid exposing the inverter to rain, snow, liquids, or excessive dust.
- Garanta ventilação adequada ao redor do inversor para evitar superaquecimento.
- Connect the inverter to a proper ground.
- Verify correct polarity when connecting batteries and PV arrays.
- This inverter is designed for single-phase (120V) output and does not support parallel operation for increased power or split-phase configurations.

Figura 2: Características de proteção do inversor.
3. Recursos do Produto
The Aninerel 3600W Solar Inverter Charger offers a range of features for efficient power management:
- Design tudo em um: Combines a 3.6KW pure sine wave inverter, a 40A battery charger, and an 80A MPPT solar charge controller.
- Alto consumo de energia fotovoltaica: Supports a maximum PV open circuit voltage de 300 VCC.
- Compatibilidade da bateria: Compatible with 48V AGM/Sealed, Gel, Flooded, and Lithium batteries. Also supports battery-less operation.
- Modos de carregamento flexíveis: Offers Hybrid Charging, Utility Priority Charging, Solar Priority Charging, and Only Solar Charging.
- Vários modos de saída: Includes Utility Priority, Solar and Utility Hybrid, Solar Priority, and Inverter Priority.
- Time-Slot Function: Allows setting specific charging and discharging periods to optimize energy usage based on local tariffs.
- Interfaces de comunicação: Supports CAN, USB, and RS485 for communication with compatible batteries and monitoring systems.
- Proteção abrangente: Features PV input over-voltage/current protection, AC input over-voltagproteção e, bateria over-voltagproteção e proteção contra sobrecarga.

Figure 3: Key Features of the Aninerel Hybrid Solar Inverter Charger.
4. Componentes e portas do produto
Familiarize yourself with the inverter's components and connection ports before installation.

Figure 4: Inverter Front and Side Panel Overview with Labeled Ports.
- Luz indicadora
- Tela LCD
- Touch Keys (ESC, UP, DOWN, ENTER)
- Protetor de sobrecarga
- Grounding Screw Hold
- Porta de saída AC
- Wi-Fi Port (Optional)
- Porta de entrada CA
- RS485-2 Communication Port
- RS485-1 Communication Port
- Porta de comunicação USB
- Ventilador de refrigeração
- Chave basculante ON / OFF
- Porta de contato seco
- Current Sharing Port (for parallel module only, not supported by this model)
- Parallel Communication Port (for parallel module only, not supported by this model)
- Porta da bateria
- Porta PV
Observação: This specific model (ANJ-3600W-LV) does not support parallel operation. Therefore, ports 15 and 16 are not applicable for this unit.
5. Configuração e instalação
A instalação correta é crucial para o desempenho e a segurança do inversor.
5.1 Desembalagem e Inspeção
- Open the package and verify all accessories are present as shown in Figure 5.
- Inspect the inverter for any physical damage. Contact your dealer immediately if any damage is found.

Figure 5: Product Accessories.
5.2 Montagem do inversor
- Choose a suitable location: indoors, protected from direct sunlight, rain, and dust.
- Ensure adequate clearance around the inverter for proper airflow (at least 20 cm on all sides).
- Mount the inverter vertically on a sturdy wall using appropriate fasteners.
5.3 Conexões de Fiação
Follow the wiring diagram carefully. All wiring should be done by a qualified electrician.

Figure 6: Typical Wiring Diagram.
- Conexão da bateria: Connect the 48V battery bank to the BAT+ and BAT- terminals. Ensure correct polarity. Recommended cable: 2 AWG/25 mm². Recommended fuse: 150A.
- Conexão do conjunto fotovoltaico: Connect solar panels to the PV+ and PV- terminals. Max PV input power: 4000W. Max PV open circuit voltage: 300Vdc. MPPT voltage range: 80Vdc-300Vdc. Recommended cable: 10 AWG/6 mm². Connect solar modules in series.
- Conexão de entrada CA: Connect the AC grid or generator to the AC Input port. Max AC input voltage: 300VAC. Max AC charging current: 80A. Recommended cable: 10 AWG/6 mm². Recommended breaker: 63A.
- Conexão de saída CA: Connect your AC loads to the AC Output port. AC output power: 3600W. AC output voltage: 110V / 120V. Recommended cable: 10 AWG/6 mm². Recommended breaker: 63A.
- Aterramento: Connect the grounding screw to a reliable earth ground.
Importante: Double-check all connections before powering on the inverter. Incorrect wiring can cause severe damage.
6. Instruções de operação
Once installed, you can configure and operate your inverter using the LCD display and touch keys.
6.1 Inicialização
- Ensure all wiring is secure and correct.
- Ligue o disjuntor da bateria.
- Turn on the PV array breaker (if connected).
- Ligue o disjuntor de entrada CA (se estiver conectado).
- Flip the ON/OFF rocker switch on the inverter to the "ON" position.
- The LCD screen will light up, and the inverter will perform a self-test.
Tela LCD de 6.2 polegadas e configurações
Use the ESC, UP, DOWN, and ENTER buttons to navigate the LCD menu and adjust settings. Refer to the detailed manual for specific menu options.
6.3 Charging Priority Modes
These settings determine how your battery bank is charged from available power sources.

Figure 7: Charger Source Priority Options.
- Solar First AC Input Next: Solar panels prioritize charging the battery. AC input charges only if solar power is insufficient.
- Solar and AC Input Simultaneously: Both solar energy and utility power charge the battery bank at the same time.
- Somente Solar: Solar energy is the exclusive charging source, regardless of AC input availability.
6.4 Output Source Priority Modes
These settings determine which power source the inverter uses to supply connected appliances.

Figure 8: Output Source Priority Options.
- Energia solar em primeiro lugar: Prioritizes powering appliances from solar. If solar is insufficient, AC input will supplement.
- AC primeiro: Redirects AC input to power all appliances and uses solar and batteries only when AC input is unavailable.
- DC Priority (Solar and Battery First): Prioritizes solar power. If solar is insufficient, the battery bank supplies power. AC input powers only when battery voltage drops to a programmable value.
6.5 Configuração do tipo de bateria
The inverter is compatible with various 48V battery types. Ensure the correct battery type is selected in the settings for optimal charging and discharge management.

Figure 9: Supported Battery Types.
- AGM/Sealed
- Gel
- Inundado
- Lítio
- User Mode (for custom battery parameters)
The inverter also supports battery-free operation. For lithium batteries, the shore power and photovoltaic can activate dormant lithium batteries.
7. Wi-Fi Monitoring
The inverter comes with an optional Wi-Fi module for remote monitoring.
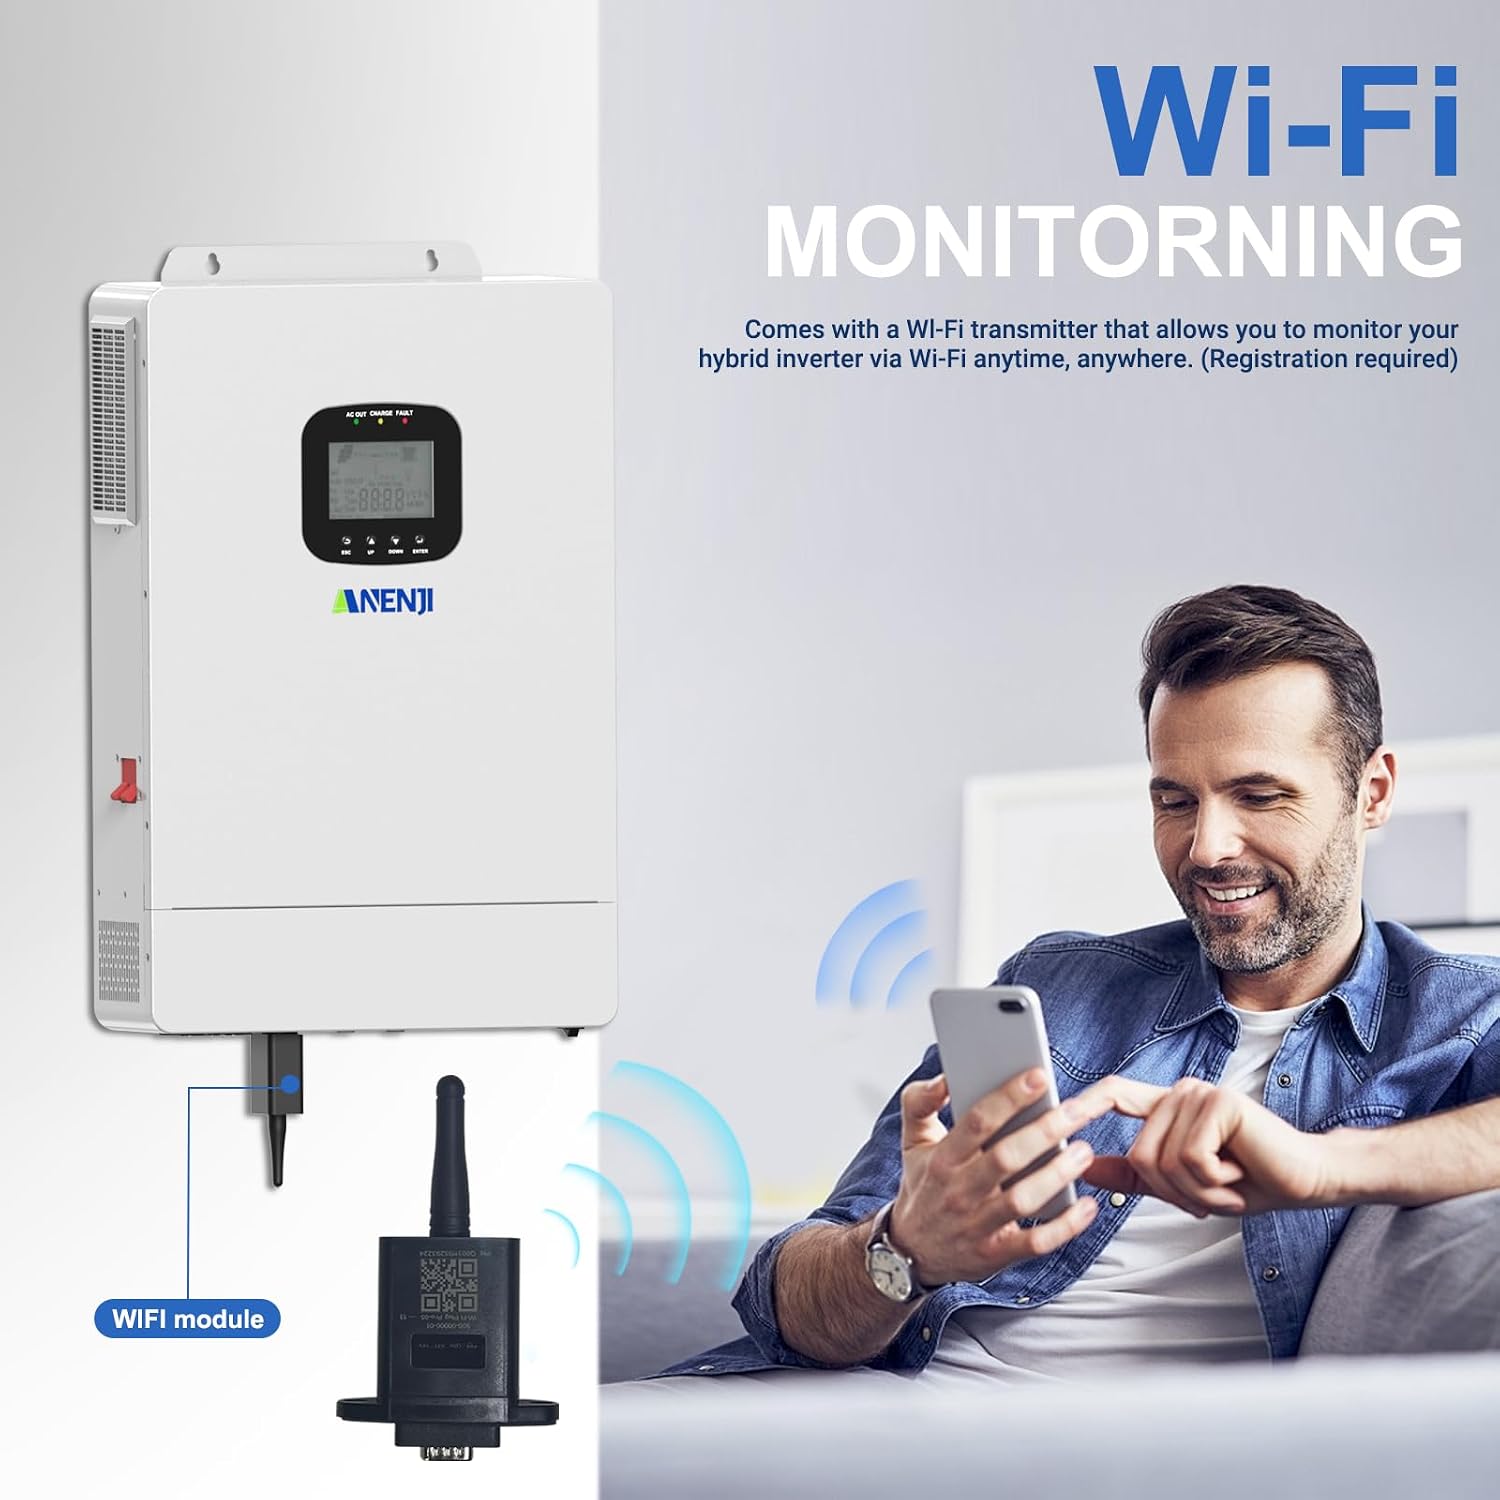
Figure 10: Wi-Fi Monitoring Setup.
- Connect the Wi-Fi module to the designated Wi-Fi port on the inverter.
- Download the compatible monitoring application to your smartphone or tablet.
- Follow the app's instructions to register your device and connect it to your local Wi-Fi network.
- Once connected, you can monitor the inverter's status, energy production, and consumption in real-time from anywhere.
Observação: Refer to the Wi-Fi module's separate instruction guide for detailed setup procedures, as app names and connection steps may vary.
8. Manutenção
A manutenção regular garante a longevidade e o desempenho ideal do seu inversor.
- Limpeza: Limpe periodicamente a parte externa do inversor com um pano seco e macio. Certifique-se de que as aberturas de ventilação estejam livres de poeira e detritos.
- Conexões: Verifique anualmente todas as conexões elétricas para garantir que estejam bem apertadas e apresentem sinais de corrosão.
- Ambiente: Assegurar que o ambiente operacional permaneça dentro das faixas de temperatura e umidade especificadas.
- Inspeção da bateria: Se estiver usando baterias de chumbo-ácido, verifique os níveis de eletrólito e as condições dos terminais conforme as instruções do fabricante da bateria.
Desligue sempre todas as fontes de energia antes de realizar qualquer manutenção.
9. Solução De Problemas
Esta seção fornece soluções para problemas comuns. Para problemas não listados aqui, entre em contato com o suporte ao cliente.
| Problema | Possível causa | Solução |
|---|---|---|
| O inversor não liga. | Sem conexão de bateria, bateria fraca.tage, ON/OFF switch off, blown fuse/breaker. | Verifique as conexões da bateria e voltage. Ensure ON/OFF switch is on. Check and replace fuses/reset breakers. |
| Sem saída AC. | Overload, short circuit, low battery, inverter fault. | Reduce load. Check for short circuits in wiring. Check battery voltage. Consult LCD error codes. |
| PV not charging batteries. | No sunlight, PV array disconnected, incorrect PV voltage, MPPT controller fault. | Check sunlight conditions. Verify PV connections and voltage. Ensure PV input is within operating range. |
| Wi-Fi module not connecting. | Incorrect app, poor Wi-Fi signal, incorrect setup steps. | Ensure correct app is used. Check Wi-Fi signal strength. Re-follow Wi-Fi module setup instructions carefully. |
10. Especificações
Key technical specifications for the Aninerel 3600W Solar Inverter Charger (Model ANJ-3600W-LV):
- Nome do modelo: ANJ-3600W-LV
- Potência de saída nominal: 3600 Watts
- Potência máxima de pico: 7200 VA
- Vol de entradatage (DC): 48 Volts
- Volume de saídatage (AC): 110V / 120V (Single Phase)
- Máx. Vol. Circuito Aberto PVtage: 300 Vdc
- Vol. operacional fotovoltaicotage Faixa: 80 - 300 Vdc
- Volume MPPTtage Faixa: 90 - 260 Vdc
- Max. AC Charging Current: 80A
- Bateria Voltage Faixa: 40 - 60 Vdc
- Peso do item: 19.36 libras
- Dimensões da embalagem: 19.57 x 14.17 x 7.09 polegadas
- Fabricante: Shenzhen Anenji Energy Technology Co.,Ltd
11. Garantia e Suporte
For warranty information, technical assistance, or customer support, please contact Aninerel directly.

Figure 11: Aninerel Customer Support Contact Information.
- E-mail: anenji168@outlook.com
- Telefone: +86 188 0375 9233
- Support Hours (PDT): 9h às 6h
Please have your model number (ANJ-3600W-LV) and purchase date ready when contacting support.