
1. Introdução
The Fanvil V66-Pro is a professional IP phone designed for modern business communication. It features a 7-inch adjustable touch screen, supports 20 SIP lines, and includes built-in 2.4G/5G Wi-Fi (Wi-Fi 6) and a wireless Bluetooth handset. This manual provides detailed instructions for the proper installation, configuration, and operation of your Fanvil V66-Pro IP Phone.
2. Conteúdo da embalagem
Verify that all items are present in your package. If any item is missing or damaged, contact your vendor immediately.
- Fanvil V66-Pro IP Phone Unit
- Fone sem fio Bluetooth
- Cabo do telefone
- Cabo Ethernet
- Adaptador de energia
- Suporte de mesa
- Guia de instalação rápida
3. Excesso Físicoview
Familiarize yourself with the components of your Fanvil V66-Pro IP Phone.
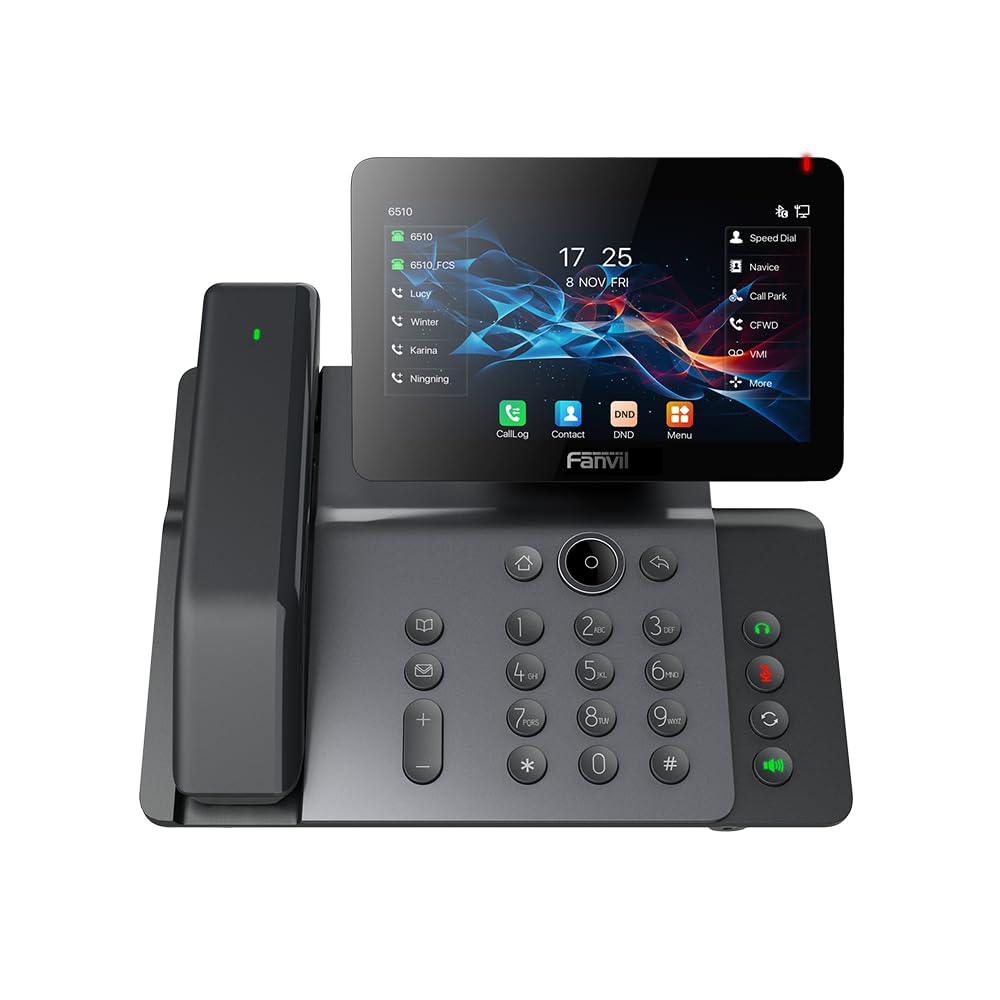
Figure 3.1: Fanvil V66-Pro IP Phone with its wireless Bluetooth handset shown separately.
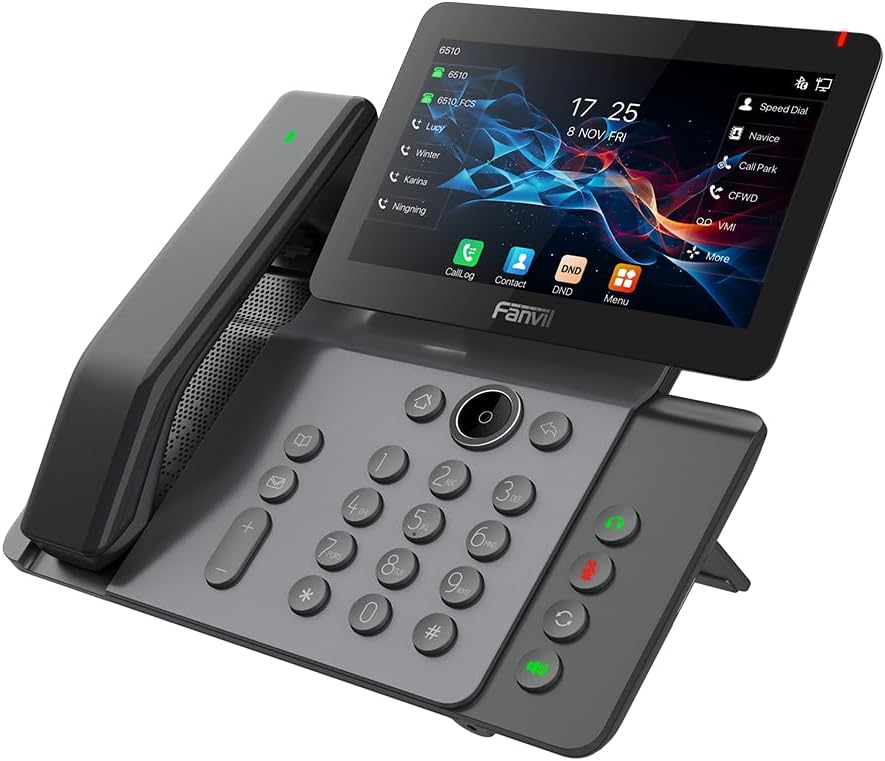
Figura 3.2: Frente view of the Fanvil V66-Pro IP Phone with the handset attached to the main unit.
3.1 Componentes principais
- Adjustable Touch Screen: 7-inch color display for navigation and information.
- Teclado: Standard numeric and function keys for dialing and control.
- Wireless Bluetooth Handset: For cordless communication.
- Viva voz: Integrated speaker and microphone for hands-free calls.
- Teclas de função: Dedicated buttons for common features like message, hold, transfer, and conference.
- Portas: Ethernet ports (LAN/PC), Power port, USB port, Headset port.
4. Configuração
4.1 Montagem do telefone
- Attach the desk stand to the main phone unit.
- Connect the coiled handset cord to the main unit and the wired handset (if using a wired handset). For the wireless Bluetooth handset, ensure it is placed on the charging cradle.
4.2 Conexão à rede e à energia
- Conexão de rede: Connect one end of the Ethernet cable to the LAN port on the back of the phone and the other end to your network switch or router. If connecting a PC, use the PC port on the phone.
- Conexão de energia: Connect the power adapter to the power port on the phone and then plug it into an electrical outlet. The phone will automatically power on.
4.3 Initial Boot-Up and Configuration
Upon first power-up, the phone will display a boot-up sequence. Once complete, it will attempt to obtain network settings via DHCP. If your network requires static IP configuration or specific SIP server details, these can be configured via the phone's menu or a web interface. Consult your network administrator for specific settings.
5. Instruções de operação
5.1 Fazendo e recebendo chamadas
- Fazer uma ligação: Pick up the handset, press the speakerphone button, or press a line key. Dial the number and press the Dial soft key or #.
- Para atender uma chamada: Pick up the handset, press the speakerphone button, or press the Answer soft key.
- Para encerrar uma chamada: Hang up the handset, press the speakerphone button again, or press the End Call soft key.
5.2 Usando a tela sensível ao toque
The 7-inch touch screen allows for intuitive navigation. Tap icons to access features like Call Log, Contacts, DND (Do Not Disturb), and Menu. Swipe gestures may be supported for additional screens or options.
5.3 recursos básicos de chamada
- Segurar: Durante uma chamada ativa, pressione o Segurar tecla de função. Pressione-a novamente para retomar a chamada.
- Transferência: Durante uma chamada ativa, pressione o Transferir tecla programável. Disque o número para o qual deseja transferir a ligação e, em seguida, pressione a tecla. Transferir soft key again (blind transfer) or wait for the party to answer and then press Transferir (transferência assistida).
- Conferência: Durante uma chamada ativa, pressione o Conferência soft key. Dial the second party's number and wait for them to answer. Press the Conferência Pressione a tecla de atalho novamente para participar de todas as sessões.
5.4 Wi-Fi and Bluetooth Setup
- Wi-fi: Navigate to the phone's menu, select 'Settings' > 'Wi-Fi'. Enable Wi-Fi, scan for available networks, select your network, and enter the password if required.
- Bluetooth: Navigate to the phone's menu, select 'Settings' > 'Bluetooth'. Enable Bluetooth. For the wireless handset, ensure it is charged and in pairing mode. Select the handset from the discovered devices list to pair.
6. Manutenção
6.1 Limpando o Dispositivo
Use a soft, dry cloth to clean the phone's surface and screen. Avoid using liquid cleaners or abrasive materials, as they may damage the device. For stubborn marks, a slightly damp cloth with water may be used, ensuring no moisture enters openings.
6.2 Atualizações de Software
Periodically check for firmware updates to ensure optimal performance and access to new features. Updates can typically be performed via the phone's web interface or through your service provider's provisioning system. Consult your network administrator or service provider for guidance on updates.
7. Solução De Problemas
7.1 Sem tom de discagem
- Check all cable connections (Ethernet, power, handset).
- Ensure the phone is powered on and the screen is active.
- Verifique a conectividade da rede.
- Contact your service provider to confirm SIP registration status.
7.2 Cannot Connect to Network
- Ensure the Ethernet cable is securely connected to the LAN port and your network.
- Check if your network switch or router is functioning correctly.
- If using Wi-Fi, verify the correct network is selected and the password is entered accurately.
- Reinicie o telefone e o seu equipamento de rede.
7.3 Problemas de exibição
- If the screen is blank, ensure the phone is powered on.
- Adjust screen brightness settings in the phone's menu.
- Reinicie o telefone.
8. Especificações
| Recurso | Detalhe |
|---|---|
| Dimensões do produto | 9 x 7 x 5.6 polegadas |
| Peso do item | 3.3 libras |
| ASIN | B0DYKWF779 |
| Fabricante | Fanvil |
| Cor | preto |
| Tipo de telefone | Corded |
| Material | Metal, Plástico |
| Fonte de energia | Elétrico com fio |
| Tipo de sistema de atendimento | Digital |
| Dispositivos compatíveis | VoIP Services, Traditional Phone Networks |
| Capacidade de chamada em conferência | Básico |
| Operação Multilinhas | Operação com múltiplas linhas |
9. Informações de garantia
Fanvil products are typically covered by a limited manufacturer's warranty. The specific terms and duration of the warranty may vary by region and retailer. Please refer to the warranty card included with your product or visit the official Fanvil website for detailed warranty information. Keep your purchase receipt as proof of purchase for warranty claims.
10. Suporte
For technical assistance, product inquiries, or further support, please contact your vendor or visit the official Fanvil support website:
Fanvil Oficial Website: www.fanvil.com
You may find FAQs, firmware downloads, and additional documentation on their support pages.