
1. Introdução
This manual provides detailed instructions for the installation, operation, and maintenance of your ANNKE AU-DT81DX200-V1 4K 8-Channel Digital Video Recorder (DVR). This DVR is designed for security surveillance systems, offering 4K (8MP) high-definition live viewing and recording capabilities. It features advanced H.265+ video compression, AI human/vehicle detection, and supports various camera types for flexible integration.

Image 1.1: The ANNKE 4K 8CH DVR connected to a display, illustrating its 4K Ultra HD video capability.
2. Conteúdo da embalagem
Verify that all items listed below are included in your package. If any items are missing or damaged, contact ANNKE customer support.
- 1x ANNKE 4K 8CH DVR with 2TB Hard Drive
- 1x 5.9 ft/1.8 m HDMI Cable
- 1x 3.2 ft/1 m Ethernet Cable
- 1x Adaptador de energia
- 1x Rato USB
- 1x Manual do Usuário (este documento)
- 1 adesivo de parede

Image 2.1: Visual representation of all components included in the ANNKE 4K 8CH DVR package.
3. Sistema encerradoview
The ANNKE AU-DT81DX200-V1 DVR is a hybrid 5-in-1 system, supporting various camera technologies. It can operate in two primary modes:
- Modo DVR: Supports up to 8 BNC (TVI/AHD/CVI/CVBS) cameras and an additional 4 IP cameras.
- NVR Mode: Can be configured to support up to 12 IP cameras exclusively.
This flexibility allows for integration with existing analog systems while providing options for future IP camera expansion.
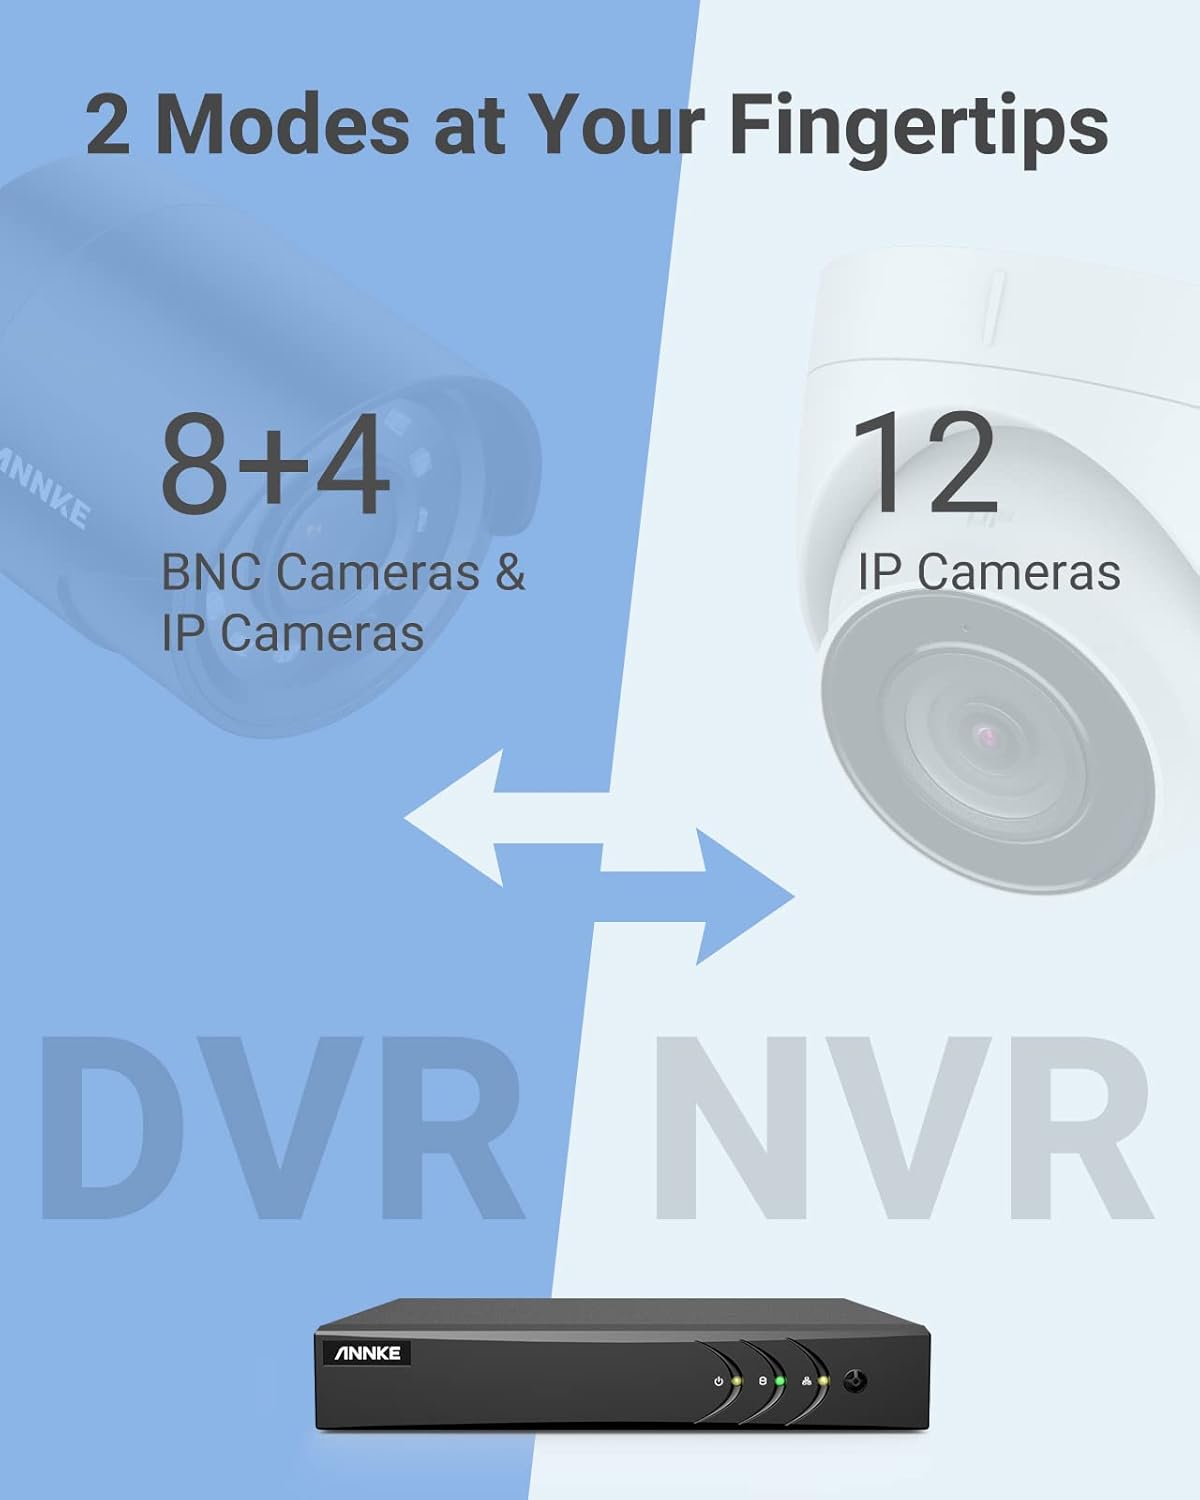
Image 3.1: Illustration of the DVR's dual operational modes, supporting both BNC and IP cameras or IP cameras exclusively.
4. Guia de instalação
4.1 Configuração Física
- Conectar câmeras: Connect your security cameras to the BNC video input ports on the back of the DVR. For IP cameras, connect them to your network switch/router, and ensure the DVR is also connected to the same network via the Ethernet cable.
- Conectar monitor: Conecte um monitor à porta de saída HDMI ou VGA do DVR usando o cabo HDMI fornecido ou um cabo VGA (não incluído).
- Conectar mouse USB: Conecte o mouse USB a uma das portas USB do DVR.
- Conecte a energia: Conecte o adaptador de energia à entrada de energia do DVR e, em seguida, ligue-o a uma tomada elétrica. O DVR ligará automaticamente.
4.2 Configuração Inicial
Ao ser ligado pela primeira vez, o DVR irá guiá-lo por um assistente de configuração inicial. Siga as instruções na tela para:
- Defina uma senha forte para a conta de administrador.
- Configure as definições de rede (o DHCP é recomendado para a maioria dos utilizadores).
- Defina data e hora.
- Scan and add IP cameras if applicable.
5. Operando o DVR
5.1 Ao vivo View
Após a configuração inicial, o DVR exibirá a transmissão ao vivo. view from connected cameras. Use the USB mouse to navigate the interface. Right-click to access the main menu.
5.2 Gravação
The DVR is pre-configured for continuous recording. You can customize recording schedules, motion-triggered recording, or alarm-triggered recording via the main menu under Registro > Agendamento.
5.3 Reprodução
Para review foo gravadotage:
- Do show view, clique com o botão direito do mouse e selecione Reprodução.
- Select the desired camera(s) and date.
- Use the timeline to navigate through recordings. Events (like motion detection) are often marked on the timeline for quick access.

Image 5.1: The DVR's playback interface, demonstrating how to locate and review recorded events on a timeline.
6. Recursos avançados
6.1 Detecção de Humanos/Veículos por IA
The DVR incorporates deep learning-based motion detection 2.0, which can differentiate between human and vehicle movements. This significantly reduces false alarms caused by environmental factors such as leaves or light changes.
- Configuração: Enable and configure AI detection for each analog channel via the main menu under AI > Motion Detection 2.0.
- Smart Events: Supports line crossing and intrusion detection for specific areas.
- Alertas: Configure the DVR to send app push notifications, email alerts, or trigger a buzzer when human or vehicle motion is detected.
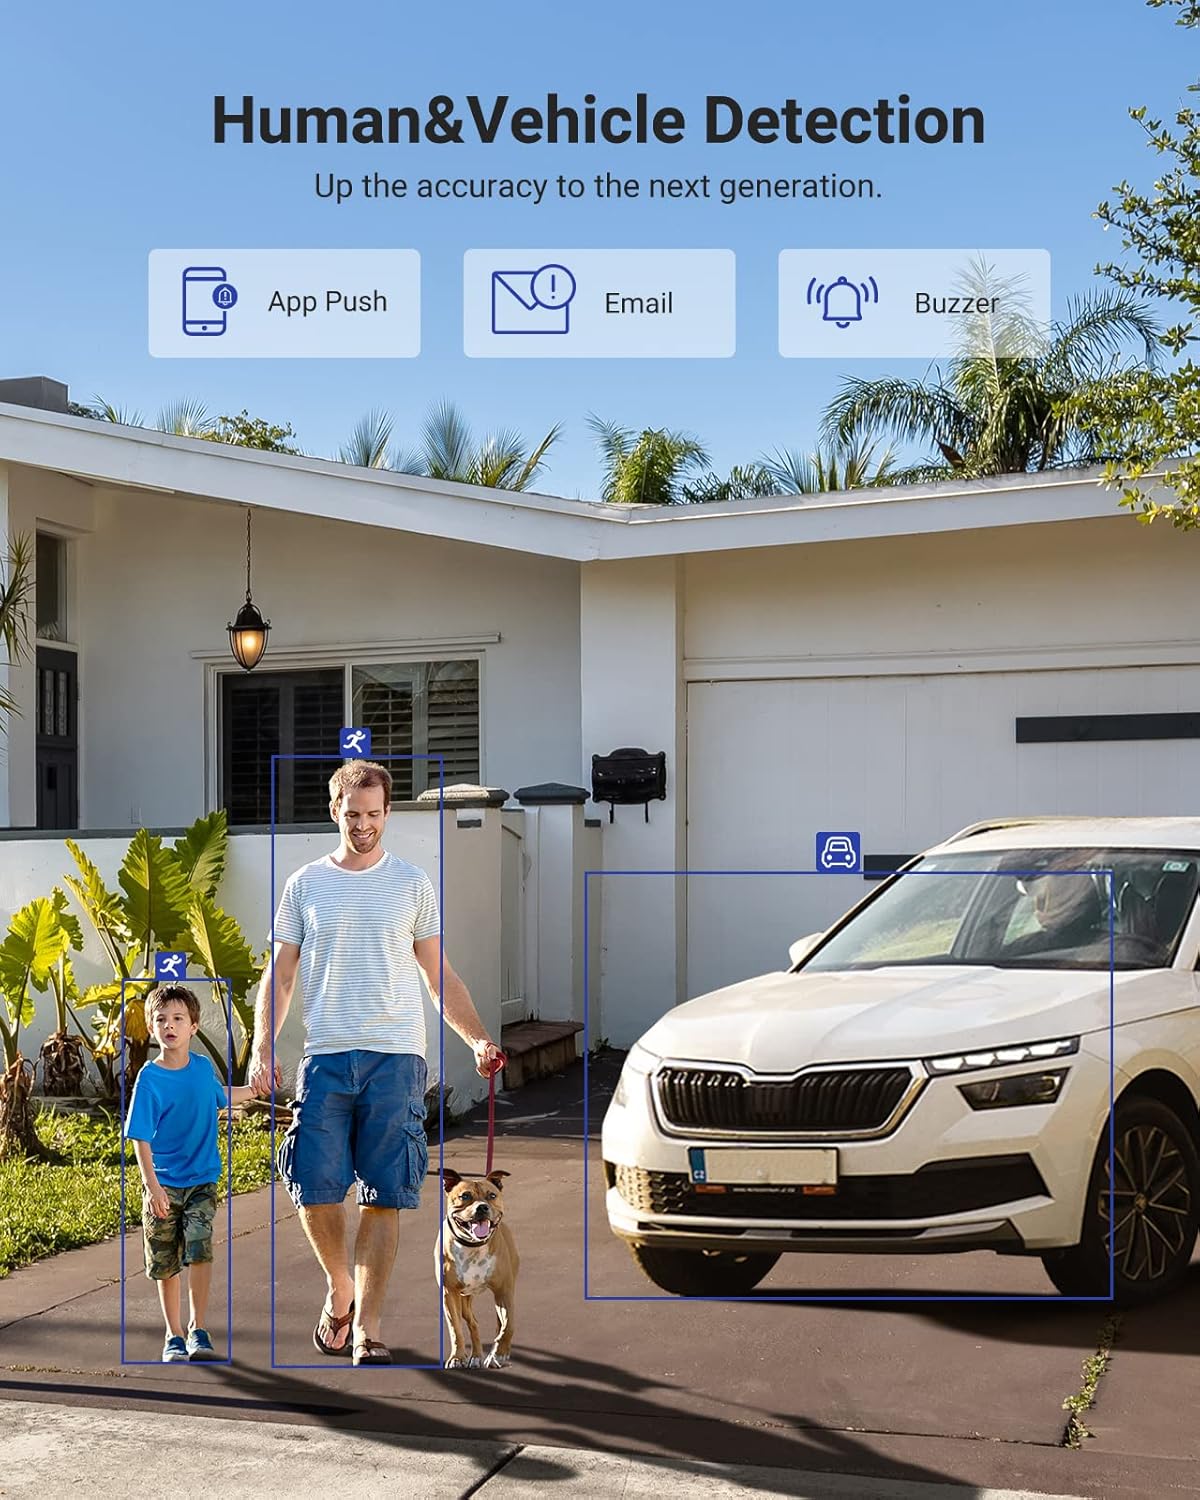
Image 6.1: Visual demonstration of the AI human and vehicle detection capability, showing how the system identifies and distinguishes between people and vehicles.
6.2 Acesso Remoto
Access your DVR remotely from anywhere using the ANNKE Vision App or a web navegador.
- ANNKE Vision App: Download the app from the App Store (iOS) or Google Play Store (Android). Register an account and add your DVR by scanning the QR code or entering its serial number.
- Web Navegador: Access the DVR's web interface inserindo seu endereço IP em um web navegador no seu computador.
- Compatibilidade: The system is compatible with various devices including smartphones, tablets, laptops, and personal computers. It also supports integration with Alexa for voice control.

Image 6.2: Remote access via the ANNKE Vision App, showing compatibility with mobile devices and Alexa.
7. Gestão de Vídeo
7.1 Compressão de vídeo H.265+
The DVR utilizes advanced H.265+ video compression technology. This technology significantly reduces file sizes, saving up to 80% of storage space compared to H.264 compression, while maintaining video quality. This allows for longer recording durations on the same 2TB hard drive.

Image 7.1: Comparison illustrating the storage efficiency of H.265+ compression versus H.264.
8. Compatibilidade
The ANNKE AU-DT81DX200-V1 is a versatile 5-in-1 hybrid DVR, designed to be compatible with a wide range of security cameras:
- HD TVI Input: Supports 8 MP@15 fps, 5 MP@20 fps, 3K@20 fps, 4 MP@30 fps.
- AHD Input: Supports 5 MP@20 fps, 4 MP@30 fps, 1080p@25 fps, 1080p@30 fps.
- HD CVI Input: Supports 4 MP@30 fps, 4 MP@25 fps, 1080p@25 fps, 1080p@30 fps.
- Entrada CVBS: Supports PAL/NTSC standards.
- IPC Input: Supports up to 8MP IP cameras.
This broad compatibility ensures that the DVR can integrate with both older analog cameras and modern IP cameras, providing a flexible upgrade path for existing surveillance systems.

Image 8.1: The DVR's compatibility with various camera technologies, including TVI, CVI, AHD, and IP cameras.
9. Especificações
| Recurso | Especificação |
|---|---|
| Marca | ANNE |
| Número do modelo | AU-DT81DX200-V1 |
| Tecnologia de Conectividade | Com fio |
| Resolução de captura de vídeo | 4K (8 MP) |
| Número de canais | 8 (Analog) + 4 (IP) or 12 (IP) |
| Compressão de vídeo | H.265 Pro+/H.265 Pro/H.265/H.264+/H.264 |
| Tipos de câmeras compatíveis | TVI, AHD, CVI, CVBS, IPC |
| Recursos de IA | Human Detection, Vehicle Detection, Line Crossing, Intrusion Detection |
| Capacidade de armazenamento de memória | 2 TB HDD (Up to 10 TB supported) |
| Acesso Remoto | ANNKE Vision App, Web Navegador |
| Dispositivos compatíveis | Câmeras, laptops, computadores pessoais, smartphones, tablets |
| Fonte de energia | Elétrico com fio |
| Cor | Preto |
| Dimensões do item | 17.13 x 12.4 x 3.86 polegadas |
10. Manutenção
A manutenção regular garante o desempenho ideal e a longevidade do seu sistema DVR.
- Limpeza: Mantenha o DVR livre de poeira. Use um pano macio e seco para limpar a parte externa. Não use produtos de limpeza líquidos.
- Ventilação: Certifique-se de que o DVR esteja localizado em uma área bem ventilada para evitar superaquecimento. Não obstrua as aberturas de ventilação.
- Atualizações de firmware: Periodically check the ANNKE official website for firmware updates. Keeping your DVR's firmware updated can improve performance, add new features, and enhance security.
- Backup de dados: Faça backup regularmente de arquivos de vídeo importantes.tage para um dispositivo de armazenamento externo.
- Saúde do disco rígido: The DVR's menu may offer options to check the health status of the installed hard drive. Monitor this periodically.
11. Solução De Problemas
Esta seção aborda problemas comuns que você pode encontrar com seu DVR.
- Sem saída de vídeo:
- Check HDMI/VGA cable connections to both the DVR and the monitor.
- Certifique-se de que o monitor esteja configurado para a fonte de entrada correta.
- Verify the DVR is powered on (power indicator light should be active).
- Sem exibição da câmera:
- Check camera power supply and video cable connections.
- For IP cameras, ensure they are on the same network as the DVR and properly added in the DVR's camera management settings.
- Verify camera compatibility with the DVR (refer to Section 8).
- O acesso remoto não funciona:
- Certifique-se de que o DVR esteja conectado à internet.
- Check network settings on the DVR (e.g., DHCP enabled, correct IP address).
- Verify the ANNKE Vision App is updated to the latest version.
- Ensure the DVR is properly added to your ANNKE Vision account.
- Alarmes de movimento falsos:
- Adjust the sensitivity of motion detection in the DVR settings.
- Utilize the AI Human/Vehicle Detection feature (Section 6.1) to filter out irrelevant movements.
- Define specific detection zones to exclude areas with frequent non-threatening movement.
If you continue to experience issues, please contact ANNKE customer support.
12. Garantia e Suporte
ANNKE products typically come with a limited warranty. Please refer to the warranty card included in your package or visit the official ANNKE webConsulte o site para obter os termos e condições detalhados da garantia específicos para a sua região.
For technical support, product inquiries, or warranty claims, please contact ANNKE customer service through their official website or the contact information provided in your product documentation. Have your model number (AU-DT81DX200-V1) and purchase details ready when contacting support.
ANNKE Official Website: www.annke.com