Introdução
The Motorola DLR1060 is a 6-channel digital business radio designed for reliable and private communication in various professional environments. Operating in the digital 900 MHz ISM license-free band, this radio offers enhanced clarity and security compared to analog systems. Its compact and lightweight design, combined with robust features, makes it an essential tool for efficient team coordination.
O que está incluído
The Motorola DLR1060 package typically includes the following items:
- Motorola DLR1060 2-Way Digital Business Radio (quantity as per pack size)
- Bateria recarregável de Lithium-Ion
- Charging Tray with Power Adapter
- Swivel Belt Holster
- User Guide and Safety Leaflet

Image: A typical 6-pack of Motorola DLR1060 digital business radios, showcasing the compact design of each unit.
Principais características
- Digital 900 MHz ISM License-Free Band: Ensures private and reliable communication.
- Alcance estendido: Covers up to 300,000 square feet or 20 floors.
- 6 canais: Provides multiple communication lines for different teams or purposes.
- Comandos de voz: User-friendly voice prompts for channel navigation, battery status, and feature customization.
- Rádio Profissionalfile EU IA: Unique 4-digit ID for enhanced privacy and direct communication.
- Computer Programming Software (CPS): Allows for personalized setups, including Private Groups, custom channel names, and radio settings.
- Construção durável: Complies with Military Standards 810 C, D, E, F, and G for resistance against shock, vibration, extreme temperatures, and dust.
- Bateria de longa duração: Internal rechargeable battery provides up to 14 hours of continuous operation.
- Instant Mute: Quickly silence the radio when needed.
- Customizable Top Button: Assign frequently used functions for quick access.
Configurar
1. Carregando a bateria
- Insert the rechargeable Lithium-Ion battery into the radio, ensuring it clicks securely into place.
- Place the radio into the charging tray.
- Connect the power adapter to the charging tray and plug it into a standard electrical outlet.
- The charging indicator light on the tray will illuminate to show charging status. A full charge typically takes several hours.

Image: The Motorola DLR1060 radio securely seated in its charging cradle, ready for power connection.
2. Attaching the Belt Holster
- Align the radio with the swivel belt holster.
- Slide the radio into the holster until it locks into position.
- Attach the holster to your belt or clothing for convenient carrying.
Instruções de operação
1. Ligar/desligar
- Para ligar, pressione e segure o Energia / Menu button (usually located on the top or side) until you hear a tone or voice prompt.
- Para desligar, pressione e segure o Energia / Menu button again until the radio shuts down.

Imagem: Lado view of the DLR1060 radio, highlighting the power button and volume controls for easy access.
2. Ajustando o Volume
- Use o Aumentar volume (+) e Volume baixo (-) buttons on the side of the radio to adjust the listening volume.
3. Selecionando um Canal
- Gire o Botão Seletor de Canal (typically on the top) to choose one of the 6 available channels.
- The radio will provide a voice prompt announcing the selected channel number.
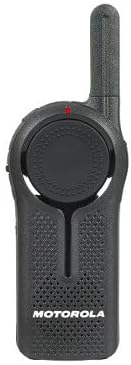
Imagem: Frente view of the DLR1060 radio, featuring the prominent channel selector knob and integrated speaker.
4. Transmissão e Recepção
- Para transmitir, pressione e segure o Push-to-Talk (PTT) botão na lateral do rádio. Fale claramente no microfone.
- Solte o botão PTT para ouvir uma resposta.
- Certifique-se de estar no mesmo canal que a pessoa com quem deseja se comunicar.
5. Private Communication (Radio Profile EU IA)
- The DLR1060 uses a unique 4-digit Radio Profile ID for private communication. This ID must be programmed into all radios intended for a private group.
- Refer to the Computer Programming Software (CPS) manual for detailed instructions on setting up and managing Radio Profile IDs and Private Groups.
Manutenção
Limpando o rádio
- Limpe a parte externa do rádio com um pano macio e seco.amp pano.
- Do not use harsh chemicals, cleaning solvents, or strong detergents, as these can damage the radio's casing e componentes internos.
- Ensure the radio is powered off and disconnected from any charging accessories before cleaning.
Cuidados com a bateria
- Always use genuine Motorola batteries and charging accessories.
- Evite expor a bateria a temperaturas extremas.
- If the radio will not be used for an extended period, store the battery separately in a cool, dry place.
Solução de problemas
| Problema | Solução possível |
|---|---|
| O rádio não liga. | Certifique-se de que a bateria esteja totalmente carregada e inserida corretamente. |
| Não é possível transmitir nem receber. | Verify that all radios are on the same channel and have the correct Radio Profile ID. Check if the battery is low. |
| Qualidade de áudio ruim ou estática. | Move closer to the other radio or to an open area. Check for obstructions. Ensure the antenna is clear. |
| A vida útil da bateria é menor do que o esperado. | Ensure the battery is fully charged before use. Battery performance can degrade over time; consider replacing older batteries. |
Especificações
| Recurso | Detalhe |
|---|---|
| Banda de frequência | 900 MHz ISM (License-Free) |
| Canais | 6 |
| Faixa | Up to 300,000 sq ft / 20 Floors |
| Duração da bateria | Até 14 horas (uso típico) |
| Padrões de durabilidade | Military Standards 810 C, D, E, F, G |
| Material da caixa | Policarbonato |
| Identificação da FCC | AZ489FT5870 |
| Dispositivos compatíveis | Speaker, Headphone, Laptop (for CPS) |
| Cor | Preto |
Garantia e Suporte
For detailed warranty information and technical support, please refer to the documentation provided with your product or visit the official Motorola Solutions website. Guarde o recibo de compra como comprovante para solicitações de garantia.