
1. Introdução
Thank you for choosing the VEVOR RV Vent Fan HQS-36AY. This 12V RV roof vent fan is designed to provide efficient and comfortable ventilation for your recreational vehicle. It features a powerful DC motor, 10 adjustable speeds, reversible airflow, remote control operation, and a built-in rain sensor for enhanced convenience and protection. Please read this manual thoroughly before installation and operation to ensure proper use and maintenance.
2. Informações de segurança
Observe sempre as seguintes precauções de segurança para reduzir o risco de lesões ou danos:
- Segurança elétrica: Ensure the power supply is disconnected before installation or maintenance. Connect the fan to a 12V DC power source only. Incorrect wiring can cause damage or fire.
- Instalação profissional: If you are not experienced with RV electrical systems or roof installations, seek professional assistance.
- Montagem segura: Ensure the fan is securely mounted to the RV roof according to installation instructions to prevent detachment during travel.
- Liberação: Maintain adequate clearance around the fan on the roof to allow for proper lid operation and airflow.
- Protective Mesh: Do not operate the fan without the protective mesh in place to prevent foreign objects or small animals from entering.
- Exposição à água: While the fan has a rain sensor, avoid direct high-pressure water spray on the unit.
3. Recursos do Produto
- Ventilação eficiente: Equipped with a 22W DC motor for effective air circulation and exhaust.
- Fluxo de ar reversível: Supports both exhaust and intake functions with 10 adjustable speeds.
- Controle fácil: Features an electric lid and a wireless remote control with a range of over 32 feet (10 meters).
- Design à prova de chuva: An automatic rain sensor closes the fan lid upon detecting rain.
- Proteção confiável: Durable, rust-resistant stainless steel protective mesh prevents entry of small animals.

Imagem: Acimaview of VEVOR RV Vent Fan features including 10-speed fan, wireless remote, and powerful motor.
4. Especificações
| Especificação | Detalhe |
|---|---|
| Número do modelo | HQS-36AY |
| Fonte de energia | Corrente contínua 12 V |
| O quetage | 22 W |
| Número de velocidades | 10 Níveis |
| Peso líquido | 11.02 libras (5 kg) |
| Dimensões do produto (P x L x A) | 16.1" x 16.1" x 9.9" (410 x 410 x 252 mm) |
| Fits Roof Openings | 14" x 14" (35.6 cm x 35.6 cm) |
| Método de controle | Controle remoto, botões manuais |
| Material | Plastic, Stainless Steel Mesh |
| Nível de ruído | 65 dB |

Image: Detailed product dimensions and key specifications of the RV Vent Fan.
5. Configuração e instalação
This RV vent fan is designed to fit standard 14" x 14" roof openings. Proper installation is crucial for optimal performance and safety.
5.1 Lista de verificação de pré-instalação
- Verify roof opening dimensions (14" x 14").
- Gather necessary tools: screwdriver, sealant, wire strippers, drill, measuring tape.
- Ensure the RV's 12V DC power supply is disconnected.
5.2 Etapas de instalação
- Preparar a abertura: Clean the roof opening thoroughly, removing any old sealant or debris.
- Aplicar selante: Apply a generous bead of approved RV roof sealant around the perimeter of the roof opening.
- Posição do ventilador: Carefully place the fan assembly into the roof opening, ensuring it is centered and flush.
- Ventilador seguro: Use appropriate screws (included in screw package) to secure the fan to the roof framing. Ensure a tight, waterproof seal.
- Conexões de fios: Connect the fan's 12V DC wires to the RV's electrical system. Ensure correct polarity (positive to positive, negative to negative). Use appropriate wire connectors and insulate all connections.
- Acabamento interior: Instale a peça de acabamento interno, se aplicável, para cobrir as bordas irregulares da abertura.
- Selo final: Apply additional sealant around the exterior base of the fan and over all screw heads to ensure a watertight installation.

Image: Visual guide illustrating the easy installation process and dimensions for the RV Vent Fan.
6. Instruções de operação
The VEVOR RV Vent Fan offers convenient operation via both a wireless remote control and integrated manual buttons.
6.1 Operação de controle remoto
The wireless remote control allows you to operate the fan from inside your RV, with a range of over 32 feet (10 meters).
- Ligar/desligar: Pressione o botão liga/desliga para ligar ou desligar o ventilador.
- Lid Open/Close: Use the designated buttons to open or close the fan lid.
- Ajuste de velocidade: Adjust the fan speed through 10 levels using the speed control buttons.
- Fluxo de ar reversível: Switch between intake (bringing air in) and exhaust (venting air out) modes.
- Rain Sensor Activation: The rain sensor automatically closes the lid when rain is detected. This feature can typically be overridden or enabled/disabled via the remote or manual controls.
6.2 Manual Button Operation
For direct control, buttons are located on the fan unit itself.
- Botão de energia: Liga ou desliga o ventilador.
- Lid Up/Down: Manually opens or closes the fan lid.
- Direção do fluxo de ar: Toggles between 'IN' (intake) and 'OUT' (exhaust) modes.
- Rain Sensor (RS) Indicator: Indicates the status of the rain sensor.

Image: Illustration of the two control methods: wireless remote and integrated manual buttons on the fan unit.
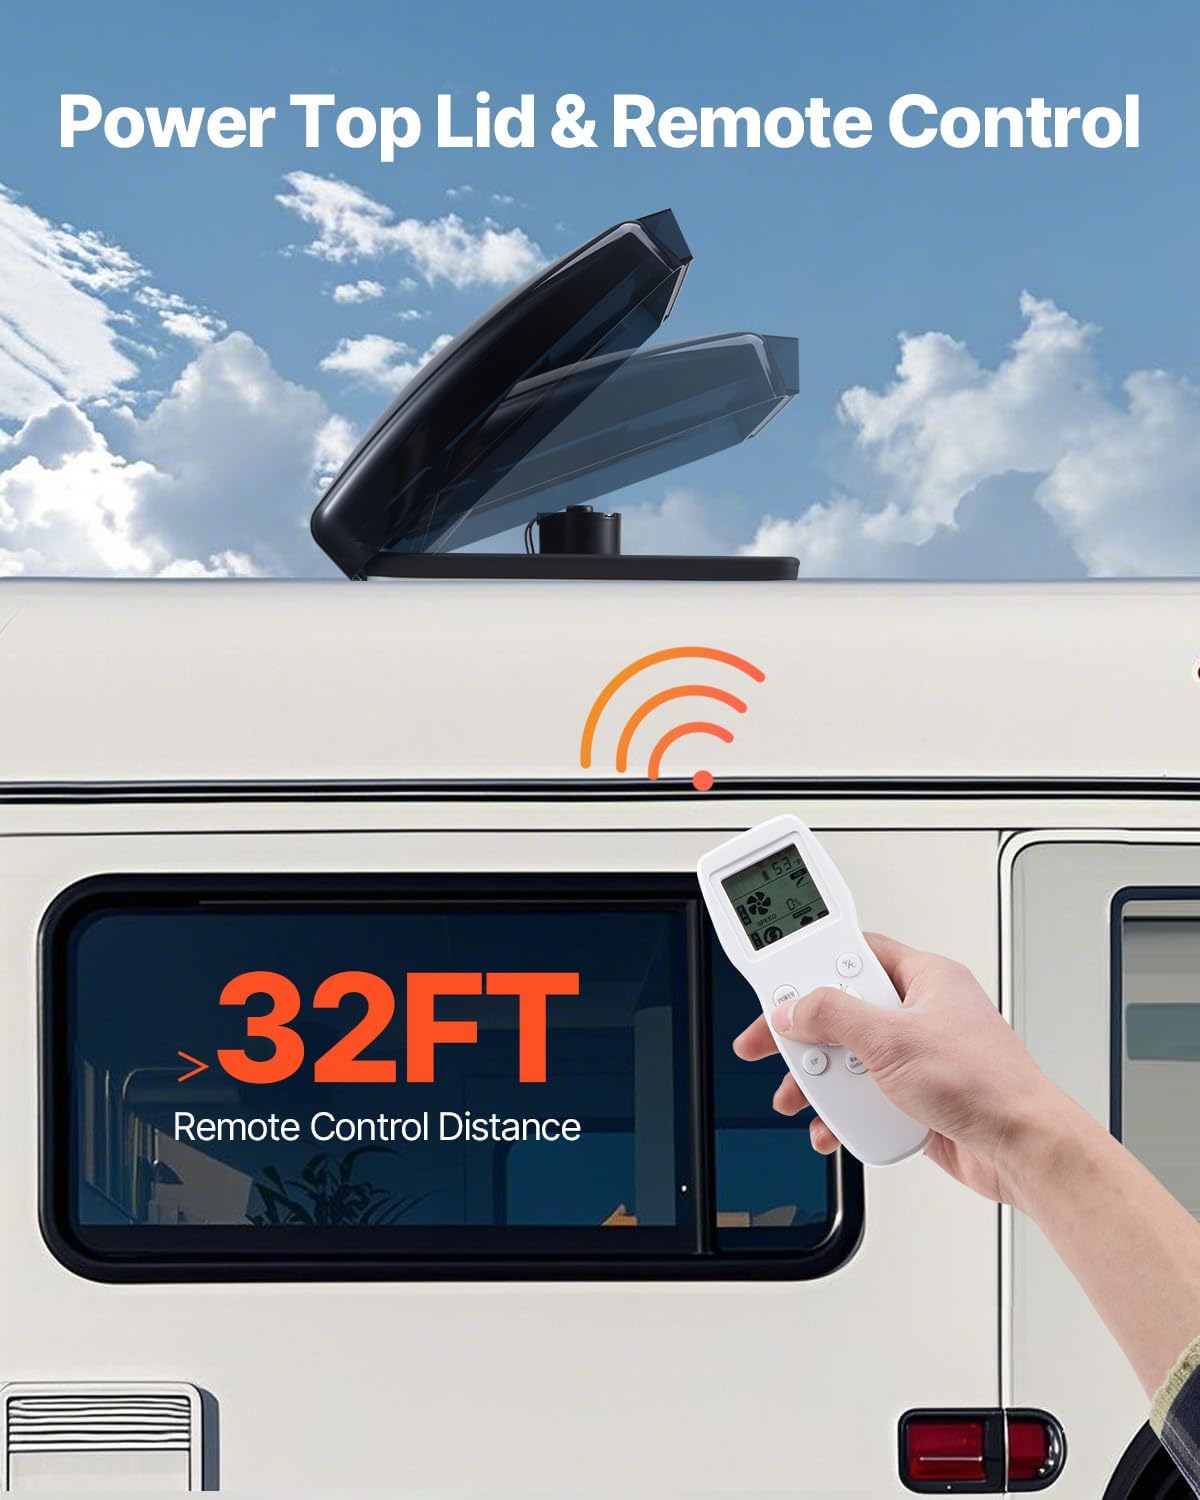
Image: A hand operating the remote control, demonstrating the fan lid opening on an RV roof.
7. Manutenção
Regular maintenance ensures the longevity and optimal performance of your VEVOR RV Vent Fan.
- Cleaning the Mesh Screen: The stainless steel protective mesh screen is removable for easy cleaning. Periodically remove the screen and wash it with mild soap and water. Ensure it is completely dry before re-installing.
- Limpeza das pás do ventilador: With the power disconnected, carefully wipe down the fan blades with a damp pano para remover poeira e detritos.
- Limpeza externa: Clean the exterior housing and lid with a soft cloth and mild detergent. Avoid abrasive cleaners or solvents.
- Inspeção de selante: Annually inspect the roof sealant around the fan for cracks or deterioration. Reapply sealant as needed to maintain a watertight seal.
- Sensor de chuva: Keep the rain sensor clean and free of obstructions to ensure proper function.

Image: A person demonstrating the removal and cleaning of the mesh screen for the RV Vent Fan.
8. Solução De Problemas
Consulte a tabela a seguir para obter informações sobre problemas comuns e suas soluções.
| Problema | Possível causa | Solução |
|---|---|---|
| O ventilador não liga. | No power, loose wiring, blown fuse. | Check 12V DC power supply. Inspect wiring connections. Check and replace fuse if necessary. |
| O controle remoto não funciona. | Baterias descarregadas, fora do alcance, interferência. | Replace remote batteries. Ensure you are within 32 feet of the fan. Remove any obstructions. |
| A tampa não abre/fecha. | Obstruction, motor issue, rain sensor active. | Check for physical obstructions. If rain sensor is active, wait for it to dry or manually override. Contact support if motor issue is suspected. |
| Fan is noisy or vibrates excessively. | Debris in fan blades, loose mounting, motor wear. | Disconnect power and clean fan blades. Check mounting screws for tightness. If noise persists, contact support. |
| Rain sensor not functioning. | Sensor dirty, faulty sensor. | Clean the rain sensor area. If still not working, contact support. |
9. Garantia e Suporte
For warranty information or technical support, please contact VEVOR customer service. Keep your purchase receipt and model number (HQS-36AY) handy for faster service.
Você pode encontrar mais informações e detalhes de contato no site oficial da VEVOR. website ou através do seu revendedor.