
1. Introdução
This manual provides essential information for the safe and efficient use of your CANDY Smart Inverter Washer Dryer, model CSWS496TWMRRE/FR. Please read these instructions carefully before installing, operating, or performing maintenance on the appliance. Keep this manual for future reference.
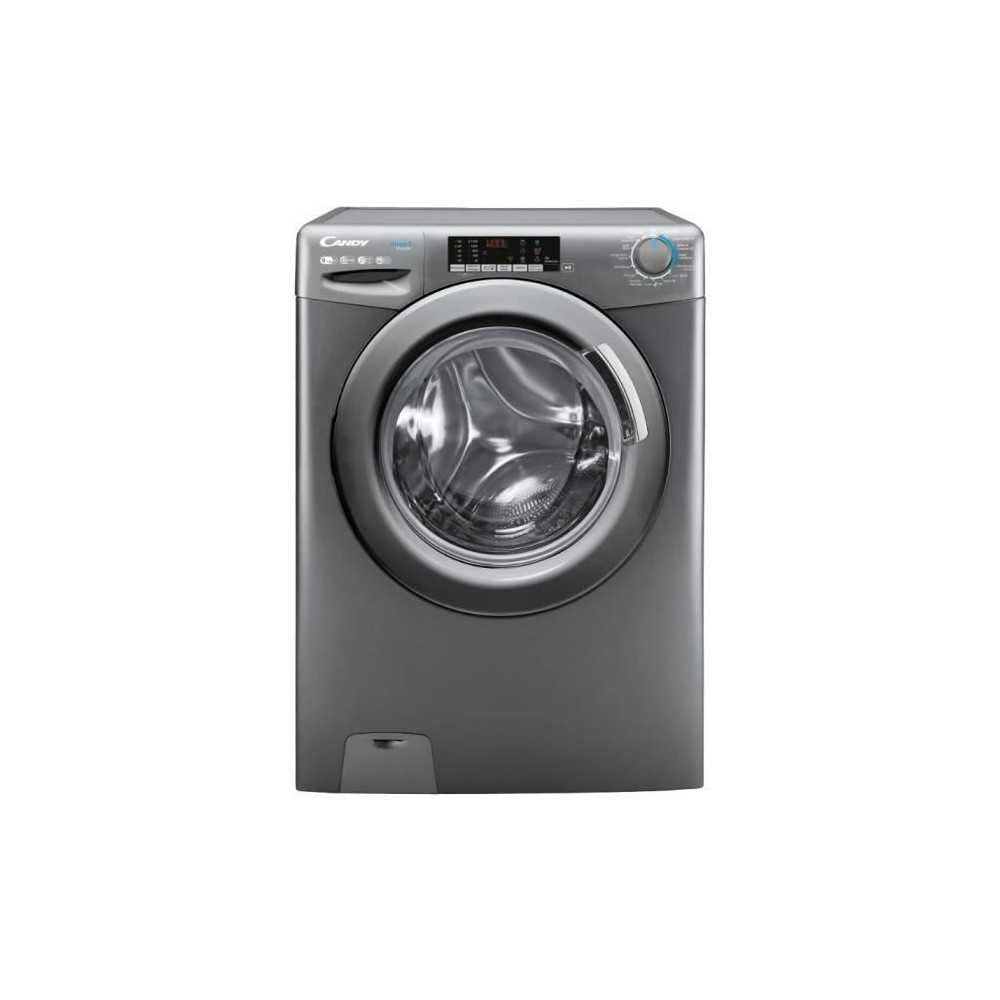
Imagem 1.1: Frente view of the CANDY Smart Inverter Washer Dryer.
2. Informações de segurança
Ao utilizar aparelhos elétricos, siga sempre as precauções básicas de segurança para reduzir o risco de incêndio, choque elétrico e ferimentos. Este aparelho destina-se apenas ao uso doméstico.
- Certifique-se de que o aparelho esteja devidamente aterrado.
- Não permita que crianças brinquem com o aparelho ou o operem.
- Não toque no aparelho com as mãos molhadas.
- Desligue o aparelho da tomada antes de limpá-lo ou realizar qualquer manutenção.
- Não lave nem seque peças de roupa que tenham sido limpas, lavadas, imersas ou manchadas com substâncias combustíveis ou explosivas.
- Keep the area around the exhaust opening free from the accumulation of lint, dust, and dirt.
3. Produto acabadoview
3.1. Componentes
- Painel de controle: Features a program selector dial, digital display, and touch buttons for various functions.
- Gaveta de detergente: Localizado no canto superior esquerdo, para adicionar detergente e amaciante de roupas.
- Tambor: Stainless steel interior for washing and drying clothes.
- Porta: Front-loading door with a secure latch.
- Filtro: Located at the bottom front, for collecting lint and foreign objects.
3.2. Painel de controle

Imagem 3.1: Detalhada view do painel de controle.
The control panel allows you to select wash and dry programs, adjust settings, and monitor the cycle status. Key elements include:
- Seletor de Programas: Used to choose from 15 available wash and dry programs.
- Tela digital: Mostra o tempo restante, os códigos de erro e as opções selecionadas.
- Seleção de temperatura: Adjusts wash water temperature.
- Seleção de velocidade de centrifugação: Modifies the spin cycle speed up to 1400 rpm.
- Início retardado: Sets a delayed start time for the cycle (1-24 hours).
- Options Buttons: Activates special functions like Steam, Mix Power System, and quick cycles.
3.3. Gaveta de Detergente
The detergent drawer has compartments for pre-wash detergent, main wash detergent, and fabric softener. Refer to the markings on the drawer for correct placement.
3.4. Drum Interior

Image 3.2: Interior of the washer dryer drum.
The stainless steel drum is designed for effective washing and drying. Ensure no foreign objects are left inside before starting a cycle.
4. Instalação
4.1. Desembalagem
- Remova todos os materiais de embalagem, incluindo a base de poliestireno e quaisquer inserções dentro do tambor.
- Remova os parafusos de transporte da parte traseira do aparelho. Guarde-os para transportes futuros.
4.2. Posicionamento
- Coloque o aparelho sobre um piso firme e nivelado.
- Adjust the feet to ensure the machine is stable and level.
- Ensure there is adequate space around the appliance for ventilation.

Imagem 4.1: Example of washer dryer placement in a domestic environment.
4.3. Ligações de água e eletricidade
- Conecte a mangueira de entrada de água a uma torneira de água fria.
- Posicione a mangueira de drenagem em um tubo vertical ou pia, certificando-se de que esteja firmemente fixada para evitar deslocamento durante o funcionamento.
- Ligue o cabo de alimentação a uma tomada elétrica aterrada (230 Volts).
5. Instruções de operação
5.1. Antes do primeiro uso
Run a short wash cycle without laundry and detergent to clean the drum and remove any manufacturing residues.
5.2. Carregando a roupa
- Open the door and load laundry into the drum, ensuring not to overload (max 9 kg for wash, 6 kg for dry).
- Feche a porta com firmeza.
5.3. Adicionando detergente e amaciante
Pull out the detergent drawer and add appropriate amounts of detergent and fabric softener to their respective compartments. Close the drawer.
5.4. Seleção de programas
- Turn the program selector dial to choose the desired wash or dry program. The appliance offers 15 programs, including 7 quick cycles.
- O visor digital mostrará as configurações padrão do programa selecionado.
5.5. Adjusting Settings and Special Functions
- Temperatura: Press the temperature button to adjust the wash temperature (e.g., 20°, 30°, 40°, 60°, 90°).
- Velocidade de rotação: Press the spin speed button to select the desired spin speed (e.g., 400, 800, 1000, 1400 rpm).
- Início retardado: Press the delay start button repeatedly to set a delay from 1 to 24 hours.
- Função de vapor: Activates the steam option to reduce wrinkles and refresh clothes.
- Sistema de Potência Mista: Ensures thorough cleaning by pre-mixing water and detergent.
- Ciclos Rápidos: Select one of the 7 rapid cycles, including a full load program in 59 minutes.
5.6. Iniciando o Ciclo
Pressione o botão Iniciar/Pausar para iniciar o programa selecionado. O visor mostrará o tempo restante.
5.7. Fim do ciclo
At the end of the cycle, the appliance will signal with an audible alert and/or a message on the display. Open the door and remove the laundry.
6. Manutenção
6.1. Limpeza da gaveta de detergente
Regularly clean the detergent drawer to prevent residue buildup. Remove the drawer, rinse it under running water, and clean any stubborn deposits with a brush. Reinsert the drawer.
6.2. Limpeza do Tambor
Use the dedicated 'Drum Cleaning' program (if available) or run an empty hot wash cycle with a descaling agent or white vinegar to maintain drum hygiene.
6.3. Limpando o Filtro
Periodically clean the drain pump filter to ensure proper drainage. Place a shallow container under the filter cover, unscrew the filter, remove any lint or debris, and then securely replace it.
6.4. Limpeza Externa
Limpe as superfícies externas do aparelho com um pano macio e seco.amp pano. Não use produtos de limpeza abrasivos ou solventes.
7. Solução De Problemas
If you encounter issues with your appliance, consult the table below for common problems and solutions. If the problem persists, contact customer support.
| Problema | Possível causa | Solução |
|---|---|---|
| O aparelho não liga | Cabo de alimentação desconectado; porta não fechada; programa não selecionado; botão Iniciar/Pausar não pressionado. | Verifique a ligação elétrica; certifique-se de que a porta está fechada; selecione um programa; pressione Iniciar/Pausar. |
| Sem ingestão de água | Water tap closed; water inlet hose kinked; water filter blocked. | Open water tap; straighten hose; clean water inlet filter. |
| Água não drena | Mangueira de drenagem dobrada ou obstruída; filtro da bomba de drenagem obstruído. | Endireite ou desobstrua a mangueira de drenagem; limpe o filtro da bomba de drenagem. |
| Vibração excessiva | Aparelho desnivelado; parafusos de transporte não removidos; carga desigual. | Adjust leveling feet; remove transport bolts; redistribute laundry. |
| As roupas não secam corretamente. | Overloaded; incorrect drying program; lint filter blocked. | Reduza a carga; selecione o programa de secagem apropriado; limpe o filtro de fiapos. |
8. Especificações
| Recurso | Especificação |
|---|---|
| Nome do modelo | C SWS496TWMRRE/FR |
| Marca | DOCE |
| Dimensões do produto (P x L x A) | 54 cm de largura x 60 cm de comprimento x 86 cm de altura |
| Capacidade de Lavagem | 9 quilos |
| Capacidade Seca | 6 quilos |
| Velocidade máxima de giro | 1400 rpm |
| Número de programas | 15 |
| Energy Class (Wash) | A |
| Nível de ruído | 76 dB |
| Volumetage | 230 Volts |
| Material (Tamborda) | Aço inoxidável |
| Peso | 65 quilos |
| Tipo de instalação | Freestanding |
| Tipo de controle | Tocar |
9. Garantia e Suporte
9.1. Informações de garantia
This CANDY appliance comes with a Garantia do fabricante de 2 anos. Please retain your proof of purchase for warranty claims. The warranty covers defects in materials and workmanship under normal domestic use.
9.2. Suporte ao cliente
For technical assistance, spare parts, or to schedule a service appointment, please contact CANDY customer support. Refer to the contact information provided in the separate warranty card or on the official CANDY website.
The user manual is included with the product for detailed instructions and further support.