1. Introdução
This manual provides detailed instructions for the safe and efficient operation of your Generic HiFi Tube Preamplifier. Please read this manual thoroughly before use and retain it for future reference. This device is designed to enhance your home stereo sound system by providing a warm, clear, and dynamic audio experience through its vacuum tube technology.
2. Informações de segurança
- Fonte de energia: Utilize apenas o adaptador de energia fornecido. Certifique-se de que o volume esteja correto.tage corresponde à sua fonte de alimentação local.
- Ventilação: Coloque o préamplifier in a well-ventilated area. Do not cover ventilation openings.
- Umidade: Mantenha o dispositivo longe de água, umidade e alta umidade relativa do ar.
- Aquecer: Evite colocar o aparelho perto de fontes de calor ou sob luz solar direta.
- Tubos a vácuo: Vacuum tubes can become hot during operation. Avoid touching them directly. Allow the unit to cool before handling tubes.
- Manutenção: Não tente realizar a manutenção da unidade por conta própria. Encaminhe todos os serviços de manutenção a pessoal qualificado.
3. Conteúdo da embalagem
Por favor, verifique se todos os itens estão presentes na embalagem:
- 1 x HiFi Vacuum Tube Preampmais vivo
- 1 x Manual do Usuário (este documento)
- 1 x adaptador de energia (plugue dos EUA)
- 2 x JAN5654 Vacuum Tubes
4. Produto acabadoview
The Generic HiFi Tube Preamplifier is designed to deliver a pleasant, transparent, and mellow sound quality with a wide soundstage. It features adjustable treble, midrange, and bass controls for precise audio customization.
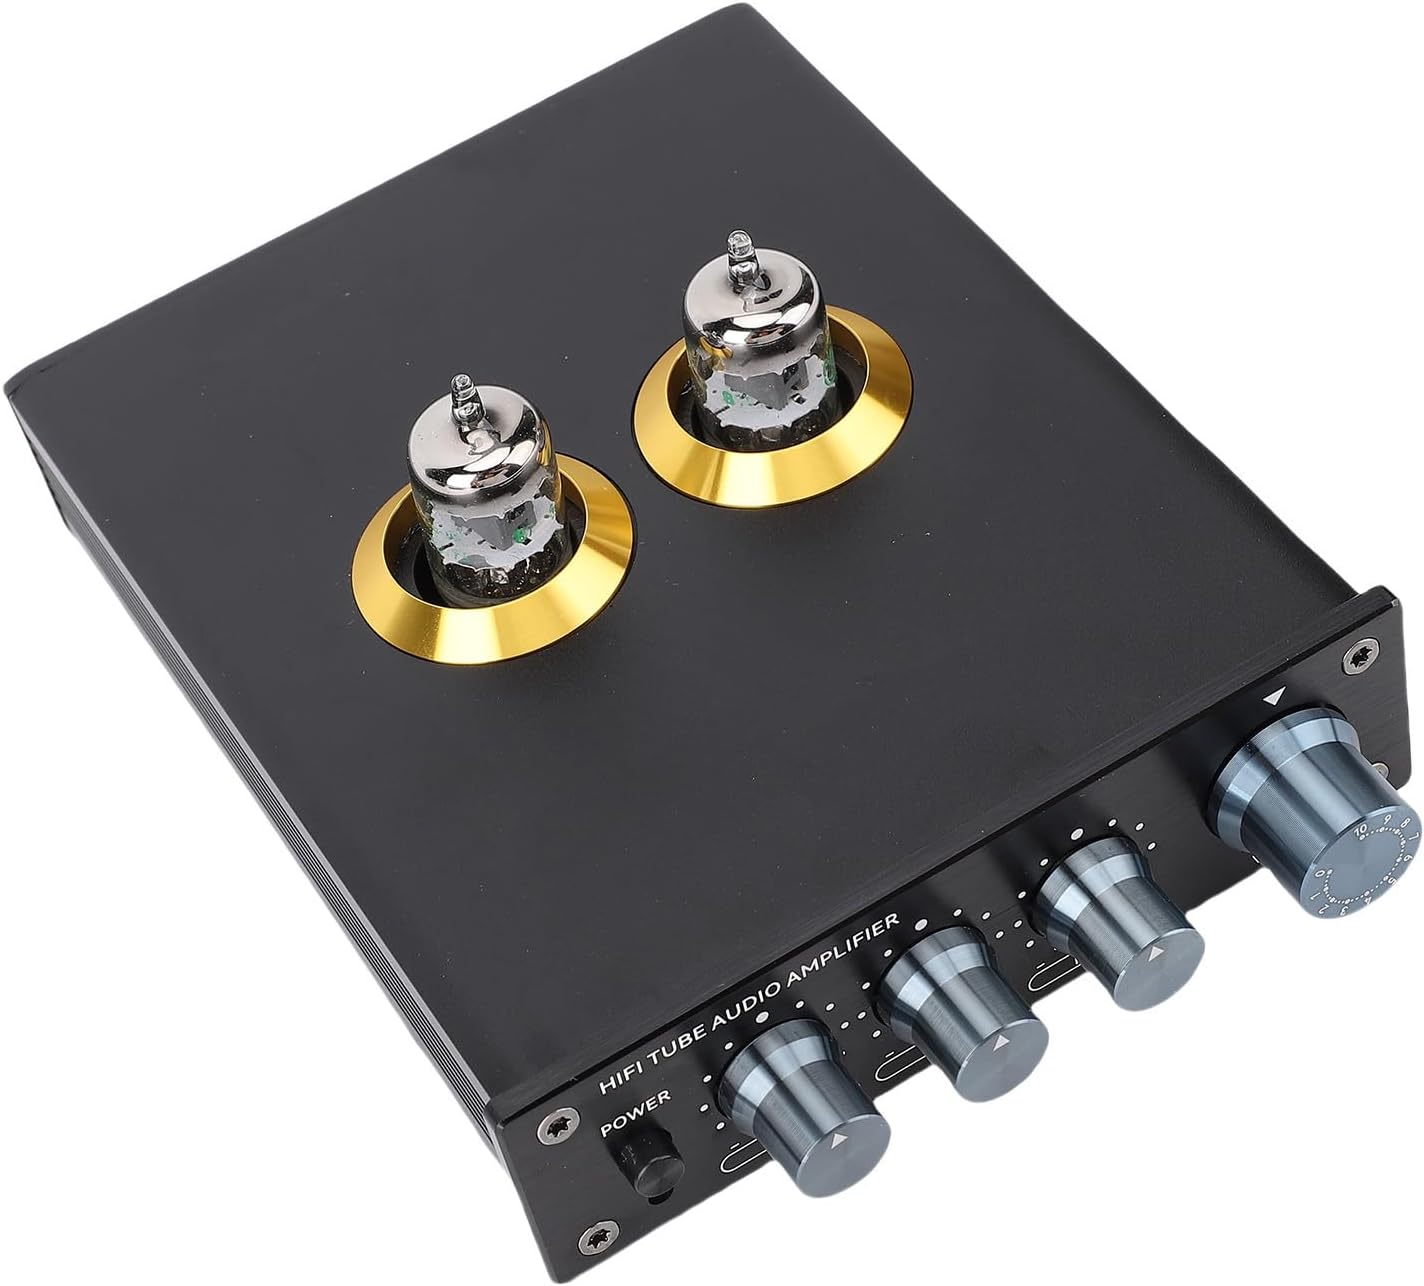
Figura 4.1: Frente e superior view of the HiFi Tube Preampamplificador, showcasing the two visible vacuum tubes and the front panel controls for power, low, mid, high, and volume.
Controles do painel frontal

Figura 4.2: Detalhado view do préamplifier's front panel. From left to right: Power button, Low (bass) adjustment knob, Mid (midrange) adjustment knob, High (treble) adjustment knob, and a larger Volume control knob.
- Botão de energia: Toggles the unit on and off.
- Botão BAIXO: Adjusts the bass frequencies (±6dB).
- Botão MID: Adjusts the midrange frequencies (±6dB).
- Botão ALTO: Adjusts the treble frequencies (±6dB).
- Botão VOLUME: Controla o volume geral de saída.
Conexões do painel traseiro

Figura 4.3: Traseira view do préamplifier. It features stereo RCA input jacks (L/R), stereo RCA output jacks (L/R), and a DC ±15V power input port.
- INPUT (RCA L/R): Connect your audio source (e.g., CD player, DAC, streamer) to these jacks.
- OUTPUT (RCA L/R): Connect these jacks to your power ampamplificador ou alto-falantes ativos.
- DC ±15V: Power input port. Connect the provided power adapter here.
5. Instruções de configuração
- Instalação do tubo: Carefully insert the two JAN5654 vacuum tubes into their respective sockets on the top of the preamplifier. Ensure they are seated firmly and correctly oriented.
- Conectar fonte de áudio: Using RCA cables, connect your audio source (e.g., CD player, media player) to the 'INPUT' RCA jacks on the rear panel of the preamplifier. Ensure left and right channels are correctly matched.
- Conectar a Amplificador/Alto-falantes: Using RCA cables, connect the 'OUTPUT' RCA jacks on the rear panel of the preamplifier para a entrada do seu poder amplifier or active speakers. Ensure left and right channels are correctly matched.
- Conecte a energia: Connect the provided power adapter to the 'DC ±15V' input on the rear panel of the preamplifier, then plug the adapter into a suitable wall outlet.
- Inicialização: Ensure all connections are secure. Press the 'POWER' button on the front panel to turn on the preamplifier. The tubes will glow as they warm up.
6. Instruções de operação
- Ligar/desligar: Press the 'POWER' button on the front panel to turn the unit on or off. Allow a few moments for the tubes to warm up after powering on.
- Ajuste de volume: Use the large 'VOLUME' knob to adjust the overall output level. Start with a low volume and gradually increase it to a comfortable listening level.
- Controle de Tom: Use the 'LOW', 'MID', and 'HIGH' knobs to adjust the bass, midrange, and treble frequencies according to your preference. These controls allow for fine-tuning of the sound to match your audio source and listening environment.
- Tube Rolling (Optional): The JAN5654 vacuum tubes can be replaced with compatible tubes such as 6J1, 6J4, 6J5, 6AK5, or 6*1N to explore different sound characteristics. Ensure the unit is powered off and cooled down before attempting to replace tubes. Handle tubes carefully by their base.
7. Manutenção
- Limpeza: Disconnect the power before cleaning. Use a soft, dry cloth to wipe the exterior of the unit. Do not use liquid cleaners or abrasive materials.
- Cuidados com o tubo: Avoid touching the glass part of the tubes with bare hands, as oils can leave residue. If tubes become dirty, wipe gently with a clean, lint-free cloth.
- Armazenar: Se for armazenar a unidade por um período prolongado, desconecte-a da energia e guarde-a em local fresco e seco, longe da luz solar direta e de temperaturas extremas.
8. Solução De Problemas
- Sem som:
- Certifique-se de que o adaptador de energia esteja conectado firmemente e que o aparelho esteja ligado.
- Check all RCA audio connections between the source, preamplificador, e ampamplificador/alto-falantes.
- Verify that the volume knob is not set to minimum.
- Confirm your audio source is playing and its output volume is adequate.
- Som distorcido:
- Reduce the volume level on both the preampamplificador e sua fonte de áudio.
- Check if the tubes are properly seated.
- Ensure cables are not damaged or faulty.
- Zumbido:
- Certifique-se de que todos os cabos estejam devidamente blindados e conectados.
- Try moving the preampMantenha o amplificador longe de outros dispositivos eletrônicos que possam causar interferência.
- Check for ground loop issues; try plugging all audio components into the same power strip.
- Tubes Not Glowing:
- Certifique-se de que a unidade está ligada.
- Check if tubes are correctly inserted.
- If only one tube is not glowing, it might be faulty and require replacement.
9. Especificações
| Modelo | Generichn0e5pdrs4-11 |
| Marca | Genérico |
| Préamp Ganho | 5x |
| Bass Treble Range | ±6 dB |
| Vol operacionaltage | DC±15V |
| Sensibilidade de entrada | 0.2V |
| Resposta de frequência | 20Hz-20kHz (±3dB) |
| Distorção | 0.1% |
| Relação sinal-ruído | ≥98 dB |
| Material | Liga de alumínio |
| Peso do item | 1.5 libras |
| Dimensões do produto | 11.81 x 7.48 x 2.36 polegadas |
10. Garantia e Suporte
Consulte a documentação da sua compra ou a do revendedor. website for specific warranty details and terms. For technical support or assistance with your Generic HiFi Tube Preamplifier, please contact your point of purchase or the manufacturer directly.


