1. Introdução
The EVILTO RGB Digital Alarm Clock is designed to provide clear time display, dual alarm functionality, and ambient lighting options. It features a high-contrast screen that shows time, temperature, date, and day of the week. With customizable RGB display colors and ambient light settings, it complements various room decors while offering practical features like Daylight Saving Time (DST) adjustment and power-outage memory.
2. Instruções de segurança
- Ensure the device is placed on a stable, flat surface to prevent falling.
- Keep away from water or high humidity environments to avoid electrical hazards.
- Não exponha à luz solar direta ou a temperaturas extremas.
- Use only the provided power adapter and cable.
- Mantenha fora do alcance de crianças.
- Do not attempt to disassemble or repair the device yourself. Contact customer support if needed.
3. Conteúdo da embalagem
Verifique se todos os itens estão presentes na embalagem:
- EVILTO RGB Digital Alarm Clock Unit
- Cabo de alimentação USB-C
- Adaptador de energia
- Manual do usuário
4. Produto acabadoview
The alarm clock features a large digital display and intuitive controls. Familiarize yourself with the main components and buttons:
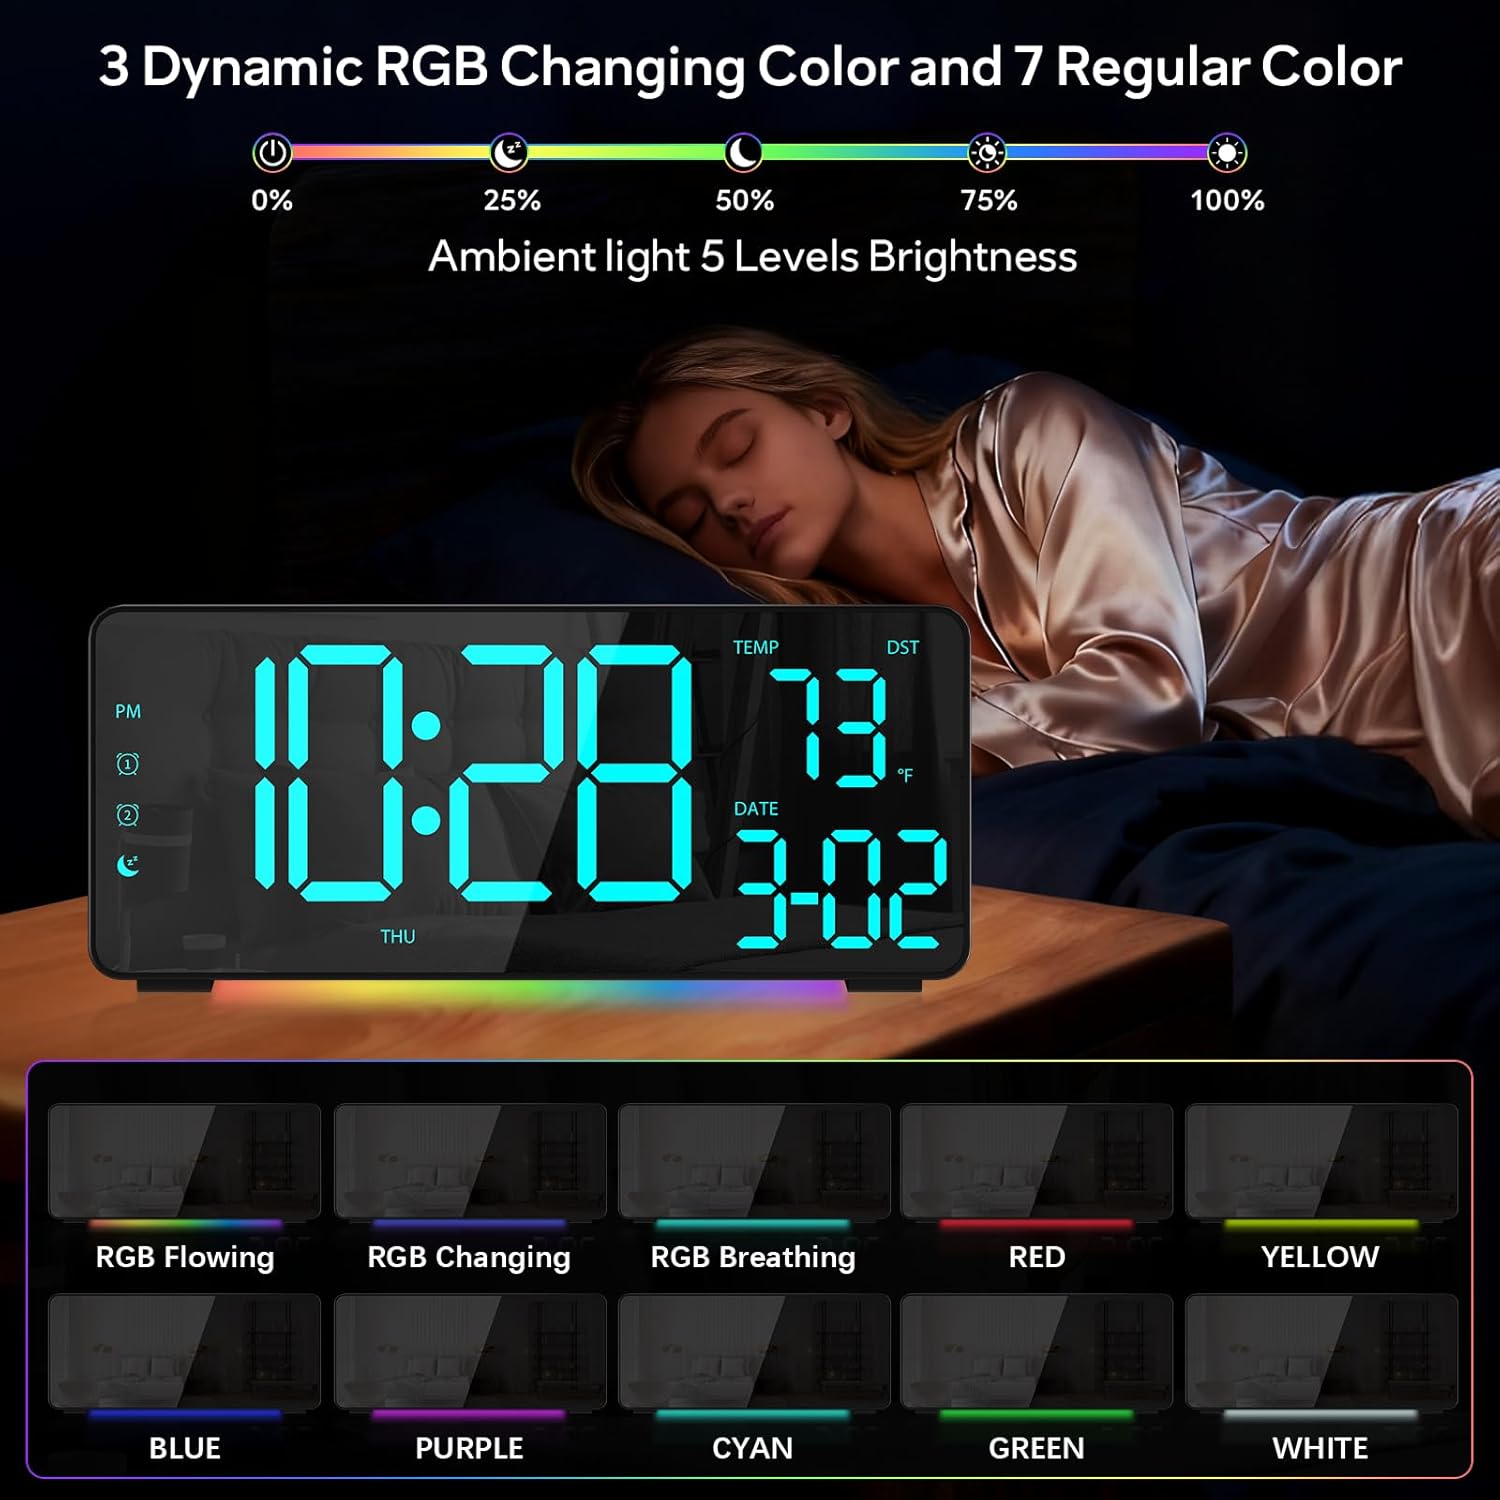
Figura 1: Frente view of the EVILTO RGB Digital Alarm Clock, showing the time, temperature, date, and day of the week. The display features vibrant RGB colors.

Figura 2: Traseira view of the EVILTO RGB Digital Alarm Clock, highlighting the control buttons for settings, alarms, display, and the USB-C input and USB output ports.
Botões de controle:
- Botão de configuração: Enters/confirms settings.
- Botão de brilho: Ajusta o brilho da tela.
- Botão RGB: Cycles through RGB display colors.
- Botões de alarme 1/2: Activates/deactivates and sets Alarm 1 or Alarm 2.
- Botão de volume: Ajusta o volume do alarme.
- Botão DST: Toggles Daylight Saving Time.
- 12/24H Button: Switches between 12-hour and 24-hour time format.
- Botão °C/°F: Switches between Celsius and Fahrenheit for temperature display.
5. Configuração
5.1 Ligando o dispositivo
The alarm clock operates via a corded electric connection. For power-outage memory, install 3 AAA batteries (not included).
- Connect the USB-C power cable to the INPUT port on the back of the clock.
- Conecte o adaptador de alimentação a uma tomada elétrica padrão.
- For backup power, open the battery compartment on the back and insert 3 AAA batteries, ensuring correct polarity.

Figure 3: The clock connected via USB-C for power, demonstrating its USB output for charging other devices.

Figure 4: Illustration of the power-outage memory function, showing the battery compartment for AAA batteries to retain settings during power interruptions.
6. Instruções de operação
6.1 Configuração de hora e data
- Pressione e segure o DEFINIR button on the back of the clock for 3 seconds to enter time setting mode. The hour digits will begin to flash.
- Use o + e - botões para ajustar a hora.
- Imprensa DEFINIR Novamente, para selecionar a configuração de minutos. Use + e - para ajustar os minutos.
- Continuar pressionando DEFINIR para alternar entre as configurações de ano, mês e dia, ajustando cada uma com + e -.
- Imprensa DEFINIR Mais uma vez para sair do modo de configuração.
- To switch between 12-hour and 24-hour format, short press the 12/24H botão.
- To switch between Celsius and Fahrenheit, short press the ° C / ° F botão.
6.2 Configurar alarmes
The clock supports two independent alarms with four modes (Daily, Weekday 1, Weekday 2, Weekend).
- Pressione e segure o Alarme 1 or Alarme 2 button for 3 seconds to enter alarm setting mode. The hour digits will flash.
- Use o + e - botões para definir a hora do alarme desejada.
- Pressione o Alarme button again to set the minutes, adjusting with + e -.
- Pressione o Alarme button a third time to select the alarm mode (Daily, Weekday 1, Weekday 2, Weekend) using + e -.
- Pressione o Alarme button one last time to confirm and exit.
- To activate or deactivate an alarm, short press its respective Alarme 1 or Alarme 2 button. An icon will appear/disappear on the display.
- Quando o alarme tocar, pressione o SONECA button (top center) to activate snooze for 5 minutes. To turn off the alarm, press any other button.

Figure 5: The clock illustrating the setup for dual alarms with options for daily, weekday, or weekend modes.
6.3 Adjusting Display and Ambient Light
- Brilho da tela: Pressione brevemente o Brilho button on the back to cycle through 5 adjustable brightness levels for the main display.
- RGB Display Colors: Pressione brevemente o RGB button on the back to cycle through 15 vibrant RGB display colors, including 4 dynamic RGB modes, 7 regular colors, and 4 specific color options.
- Iluminação ambiente: The clock features 10 ambient lighting options. These can be adjusted independently from the main display colors. Refer to the specific instructions in the included manual for ambient light control.
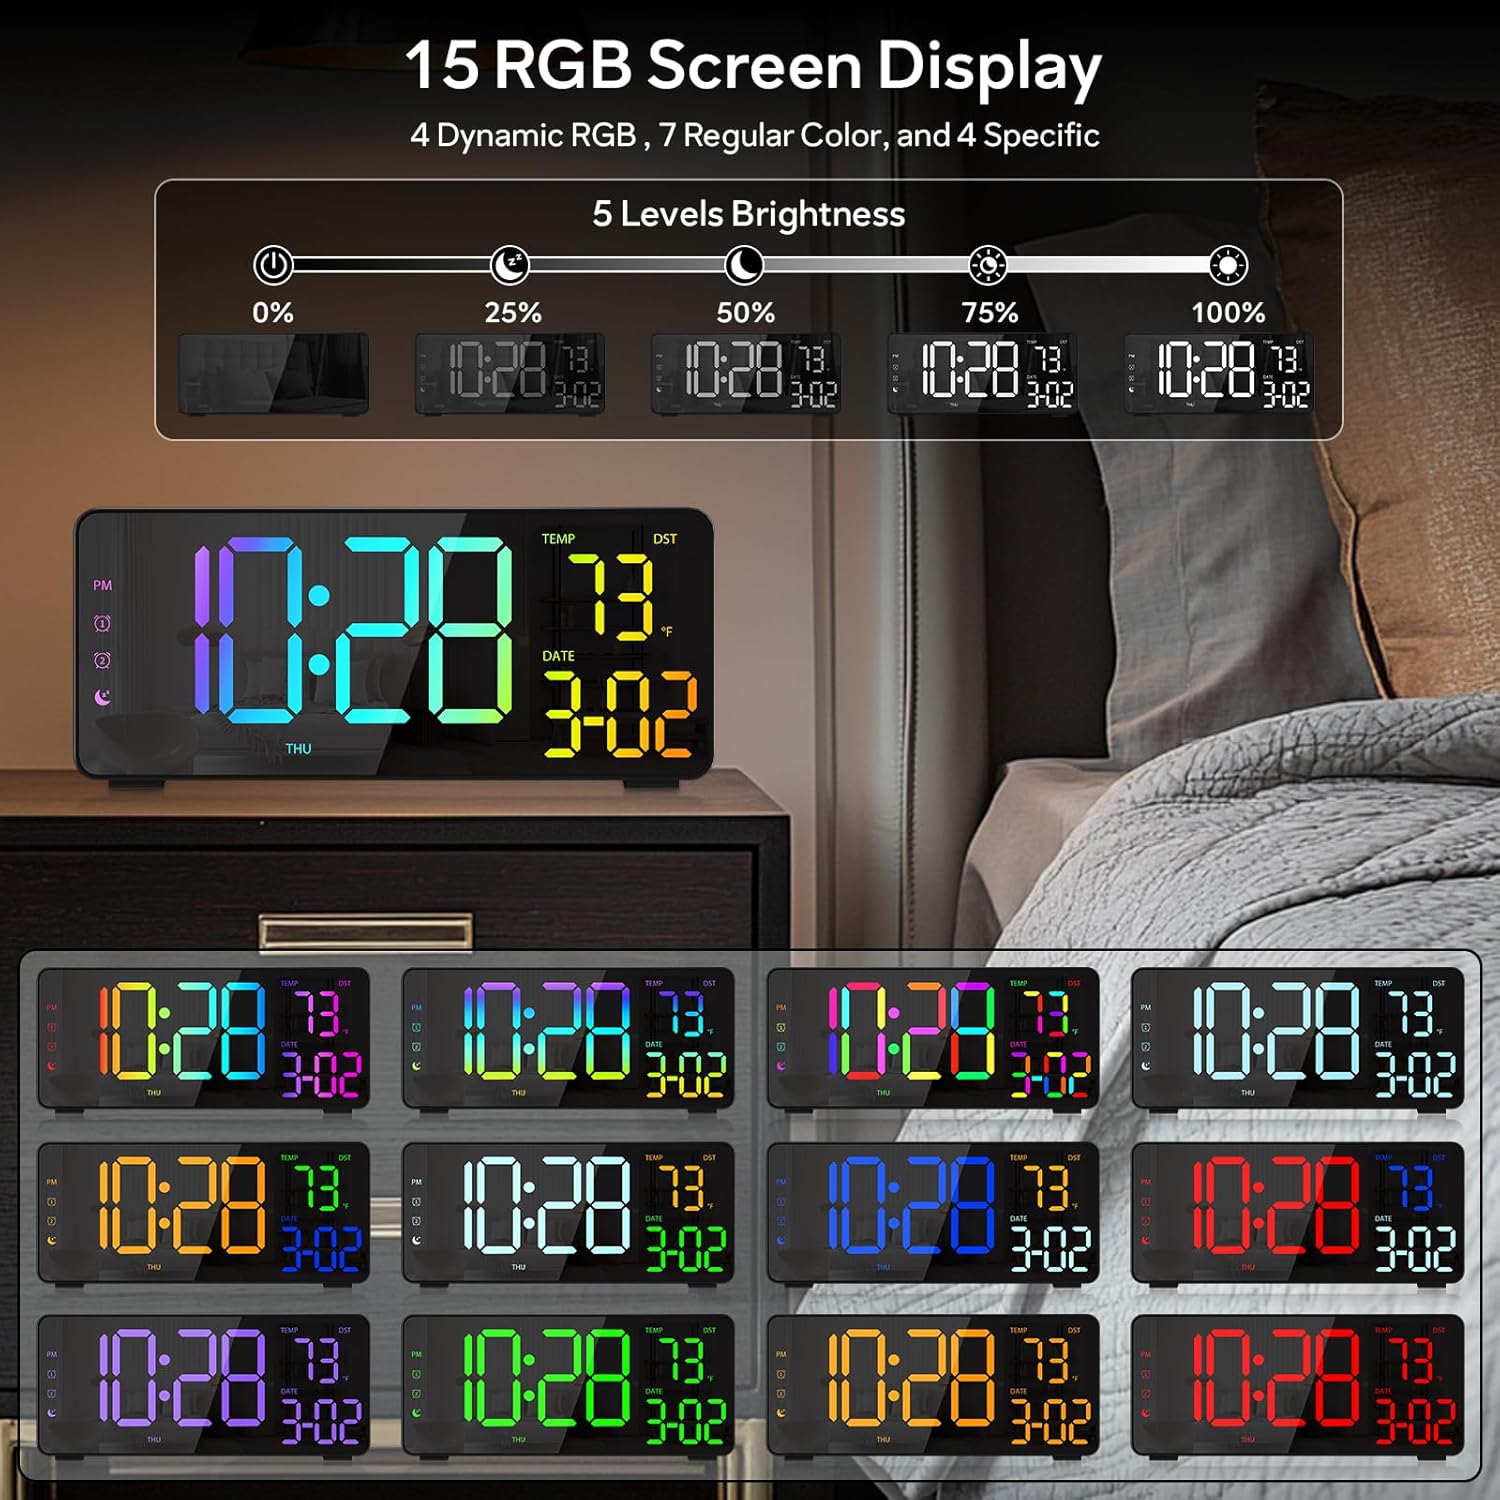
Figure 6: Various display color options and brightness levels of the digital alarm clock.
6.4 Daylight Saving Time (DST) Adjustment
To adjust for Daylight Saving Time, simply press the Horário de verão button on the back of the clock. This will move the time forward or backward by 1 hour, keeping your clock synchronized with seasonal changes.
7. Manutenção
- Clean the clock's surface with a soft, dry cloth. Avoid abrasive cleaners or solvents.
- If the display appears scratched, gently remove any protective film that may be present.
- Ensure the USB-C port and USB output port are free from dust and debris.
8. Solução De Problemas
8.1 Display Not Lighting Up
- Check if the power cable is securely connected to both the clock and the power outlet.
- Certifique-se de que o adaptador de energia esteja funcionando corretamente.
- If using battery backup, ensure batteries are correctly inserted and not depleted. Note that the display will not stay on continuously when running on battery power alone; it will only light up briefly when a button is pressed or an alarm sounds.
8.2 Alarme não soa
- Verify that the alarm is activated (alarm icon visible on the display).
- Check the alarm volume setting using the Volume botão.
- Ensure the alarm time and mode are set correctly.
8.3 Hora/Data Incorreta
- Re-enter the time and date settings as described in Section 6.1.
- If DST is active, ensure it is correctly set for your region.
9. Especificações
| Recurso | Detalhe |
|---|---|
| Marca | EVILTO |
| Número do modelo | RGBNZ |
| Cor | Preto |
| Tipo de exibição | Digital |
| Características especiais | Adjustable Brightness, Adjustable Volume, Large Display, Loud Alarm, Temperature Display |
| Dimensões do produto | 6.89"L x 3.1"A |
| Fonte de energia | Elétrico com fio |
| Tipo de quarto | Quarto, Escritório em casa, Quarto infantil, Sala de estar, Sala de estudos |
| Material | Plástico |
| Número de alarmes | 2 |
| Tamanho da tela | 8.1 polegadas |
| Peso do item | 10.9 onças |
10. Garantia e Suporte
For warranty information or technical support, please refer to the contact details provided in the product packaging or contact EVILTO customer service directly. Keep your purchase receipt for warranty claims.