
1. Introdução
Thank you for choosing the ROCKBROS Bike Taillight Smart Tag. This device is designed to enhance your cycling safety and provide additional security features. It integrates a powerful taillight with smart functionalities, including brake sensing, multiple light modes, and a built-in tracking locator compatible with iOS devices. Please read this manual carefully before use to ensure proper operation and maintenance.
2. Product List (What's in the Box)
Antes da instalação, verifique se todos os componentes estão presentes:
- ROCKBROS Bike Taillight Smart Tag
- Cabo de carregamento tipo C
- Porca M5
- Parafuso
- Seat cushion bracket
- Chave inglesa
- Rubber rings for seat post mounting

3. Configuração e instalação
The taillight offers dual mounting options: under the seat (saddle bow) or on the seat post.
3.1. Montagem do Canote do Selim
- Attach the seat post bracket to your bicycle's seat post using the provided rubber rings. Ensure a snug fit.
- Slide the taillight onto the bracket until it clicks into place.
- Adjust the angle of the taillight as desired.

3.2. Under-Seat (Saddle Bow) Mounting
- Secure the seat cushion bracket to the saddle rails using the M5 nut and screw with the provided wrench.
- Slide the taillight onto the bracket until it locks securely.
- Adjust the angle of the taillight for optimal visibility.
3.3. Ângulo ajustável
The taillight features an adjustable angle mechanism, allowing you to tilt it up or down to suit your riding position and ensure maximum visibility.

4. Instruções de operação
4.1. Ligar/desligar e seleção de modo
Press and hold the power button to turn the taillight on or off. Short press the button to cycle through the 6 available light modes. The device includes a memory function, retaining the last used mode upon restart.
4.2. Light Modes and Brightness
The taillight offers 6 distinct light modes and 2 brightness levels. To switch between high and low brightness, press the button when the taillight is off.
- Ring Steady: 11-15 hours runtime
- Center Steady: 26-35 hours runtime
- Center Slow Flash: 12-14 hours runtime
- Ring Fast Flash: 11-13 hours runtime
- Modo de respiração: 27-29 hours runtime
- Center Fast Flash: 42-45 hours runtime

4.3. Sensor Inteligente de Frenagem
The taillight is equipped with a smart brake sensor. When deceleration is detected, the light will automatically brighten and flash rapidly for approximately 3 seconds to alert vehicles and pedestrians behind you.

Turning Brake Sensor On/Off:
- Desabilitar: Rotate the light upward and hold for 1 second.
- Para habilitar: Rotate the light in the opposite direction and hold for 1 second. When enabled, the light will stay bright if tilted.
4.4. Built-in Tracking Locator
The taillight features an integrated tracking locator, compatible with iOS devices. This allows you to monitor your bike's location in real-time via a connected app, aiding in theft prevention and tracking during rides or when parked. Follow the instructions provided with your iOS device for pairing and tracking setup.
5. Carregamento e bateria
The taillight is powered by a 420mAh battery and charges via a Type-C port. A full charge typically takes approximately 2 hours.
5.1. Indicação de carga
- Luz vermelha: Indica que o dispositivo está sendo carregado.
- Luz verde: Indica que o dispositivo está totalmente carregado.
5.2. Power Status Indication
The remaining battery power is indicated by different light colors:
- Luz verde: Nível da bateria > 70%
- Luz Azul: Nível da bateria: 30% - 70%
- Luz vermelha: Nível da bateria < 30%
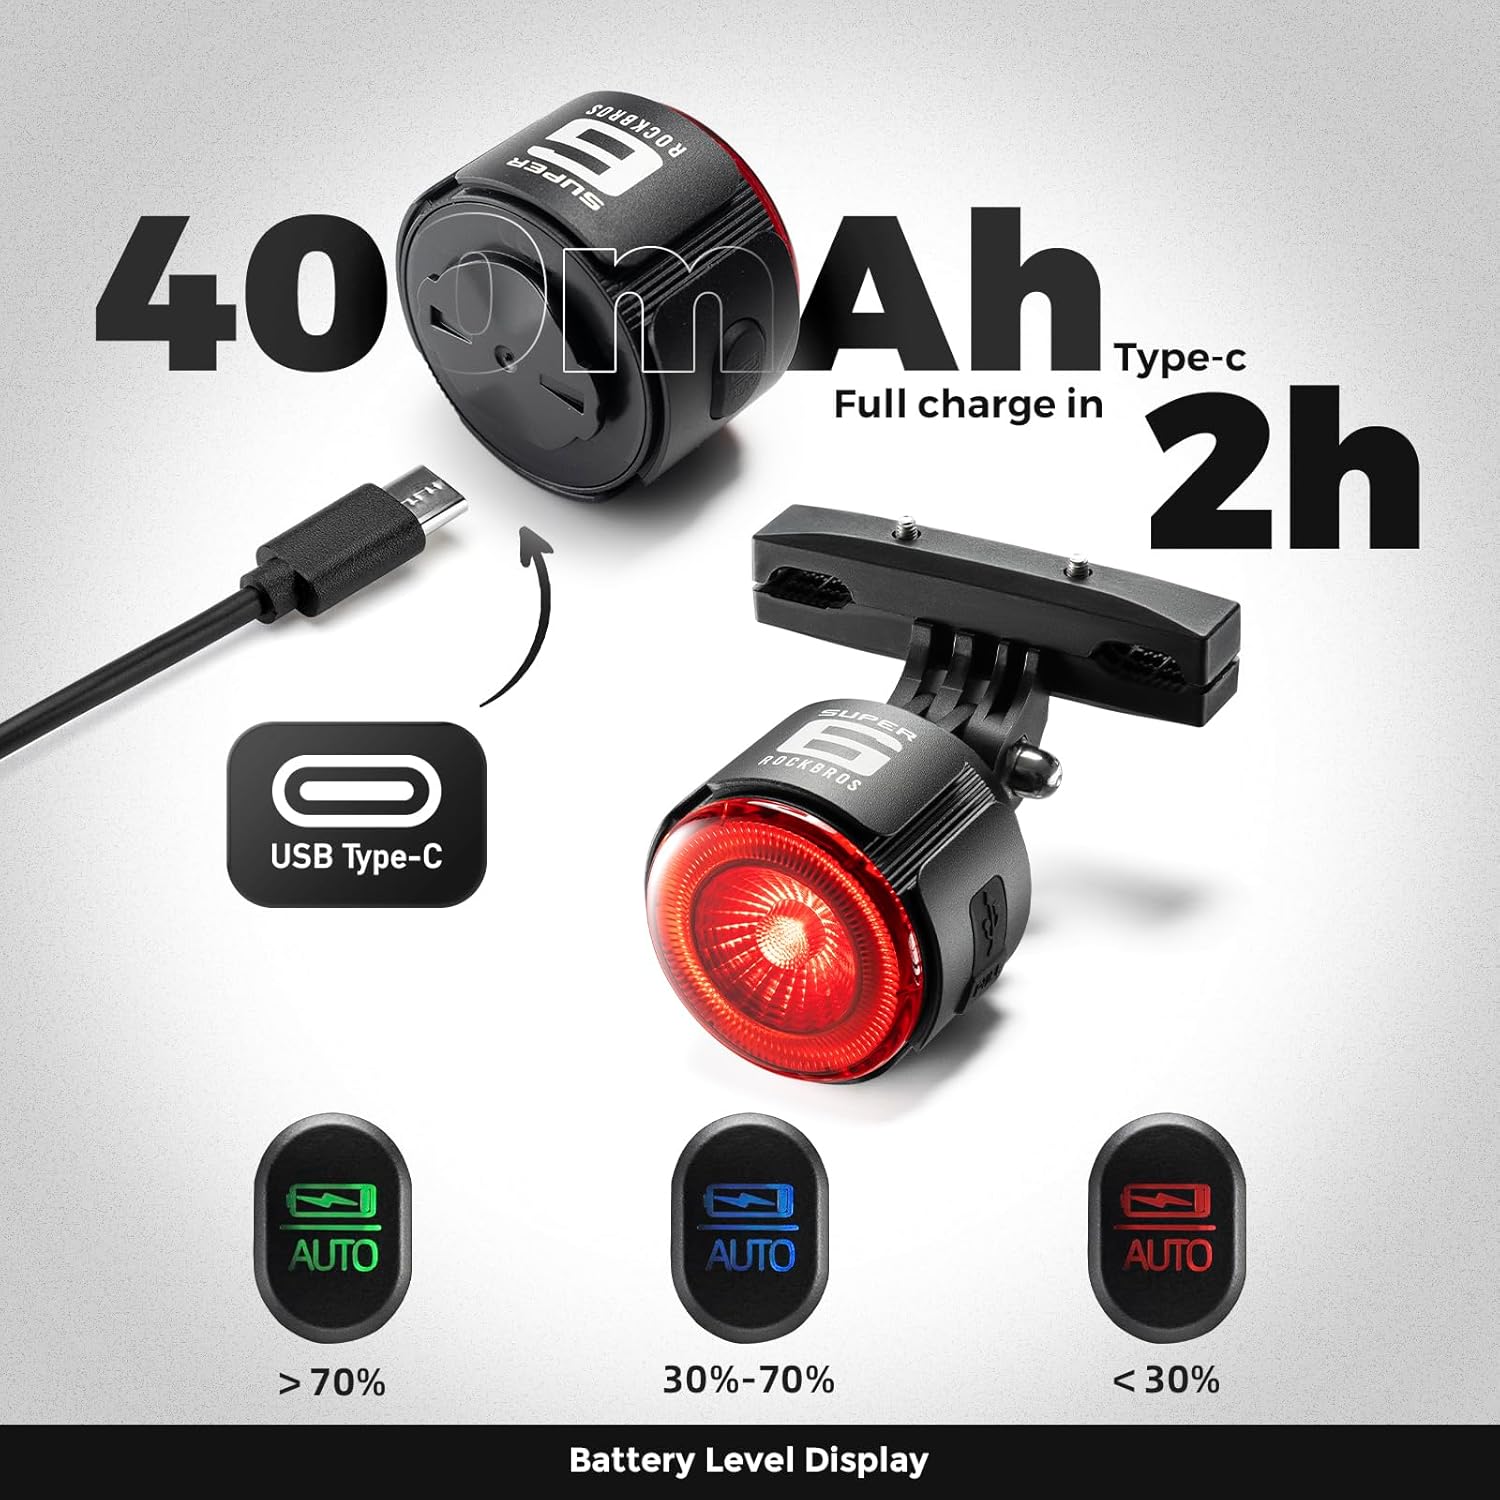
6. Manutenção
- Limpeza: Wipe the taillight with a soft, damp pano. Evite usar produtos de limpeza abrasivos ou solventes.
- Resistência à água: The device is rated IPX5 waterproof. Ensure the Type-C charging port's dust plug is firmly inserted to maintain water resistance, especially before riding in wet conditions.
- Dissipação de calor: The aluminum alloy shell is designed for efficient heat dissipation. Ensure the light is not covered during operation to prevent overheating.
- Armazenar: Store the taillight in a cool, dry place when not in use. If storing for extended periods, charge the battery to approximately 50% to prolong its lifespan.

7. Solução De Problemas
- Luz não acende: Ensure the battery is charged. Connect the taillight to a power source using the Type-C cable.
- Sensor de frenagem não funciona: Verify that the brake sensor is enabled (refer to section 4.3). Ensure the taillight is mounted securely and not obstructed.
- Tracking locator not connecting to iOS: Ensure Bluetooth is enabled on your iOS device. Follow the specific pairing instructions for the tracking feature. If issues persist, try resetting the taillight or consulting your iOS device's support resources.
- Vida curta da bateria: Ensure the taillight is fully charged before use. Operating in high brightness or certain flash modes will consume battery faster. Check for any background processes if the tracking feature is constantly active.
- Light appears dim: The light has two brightness levels. Ensure you have selected the desired brightness level (refer to section 4.2).
8. Especificações
| Marca | ROCKBROS |
| Número do modelo | 2420002001 |
| Material | Alumínio |
| Cor | Preto |
| Fonte de energia | Alimentado por bateria (420mAh) |
| Porta de carregamento | Tipo C |
| Nível de resistência à água | IPX5 (à prova d'água) |
| Number of Light Settings | 6 Modes, 2 Brightness Levels |
| Tipo de montagem | Seat Mount & Seatpost Mount |
9. Garantia e Suporte
9.1. Informações de garantia
This ROCKBROS Bike Taillight Smart Tag vem com um Garantia do fabricante de 2 anosEsta garantia cobre defeitos de materiais e de fabricação sob uso normal. Não cobre danos causados por uso indevido, acidentes, modificações não autorizadas ou desgaste normal. Guarde seu comprovante de compra para eventuais solicitações de garantia.
9.2. Suporte ao cliente
For technical assistance, warranty claims, or any questions regarding your ROCKBROS product, please visit the official ROCKBROS store or contact their customer service. You can find more information and contact details at the Loja ROCKBROS na Amazon.