1. Introdução
This manual provides essential information for the installation, operation, and maintenance of your TMF13 4PIN Display Dashboard, designed for KUGOO Kukirin G2 Max and G2 Pro electric scooters. Please read these instructions carefully before proceeding with installation or use to ensure proper function and safety.

Image 1.1: The TMF13 4PIN Display Dashboard for KUGOO Kukirin G2 Max/Pro scooters.
2. Produto acabadoview
The TMF13 4PIN Display Dashboard is a digital instrument meter designed to provide real-time information about your electric scooter's performance. It features a clear digital display for easy readability and is constructed from high-grade, durable materials.
Principais características:
- Tela digital: Provides clear readability of speed, battery life, riding mode, and other essential metrics.
- Material de qualidade: Crafted from high-grade acrylic, ensuring longevity and reliability under various conditions.
- Compatibilidade: Specifically designed for KUGOO Kukirin G2 Max and G2 Pro electric scooters.
- Facilidade de instalação: Equipped with a 4PIN TMF13 connector for a seamless and direct replacement.
- Resistência a altas temperaturas: Withstands temperatures up to 105℃, enhancing durability in extreme conditions.
3. Configuração e instalação
Before beginning installation, ensure your scooter is powered off and disconnected from any charging source. It is recommended to wear appropriate safety gear, such as gloves, during the installation process.
Etapas de instalação:
- Remove Old Dashboard: Carefully disconnect the existing dashboard from your scooter's handlebar. Note the routing of the cables and the type of connector used.
- Desconecte a fiação: Gently unplug the 4PIN connector from the old dashboard. Avoid pulling on the wires directly.
- Mount New Dashboard: Position the new TMF13 dashboard on the handlebar. Secure it using the integrated mounting clamps. Ensure it is firmly attached and does not obstruct steering or other controls.
- Conectar a fiação: Connect the scooter's 4PIN cable to the corresponding 4PIN TMF13 connector on the new dashboard. Ensure the connection is secure and fully seated.
- Gerenciamento de cabos: Route the cables neatly and securely to prevent them from getting snagged or damaged during operation.
- Funcionalidade de teste: Power on your scooter and verify that the new dashboard illuminates and displays information correctly. Check all functions, including speed, battery level, and mode selection.
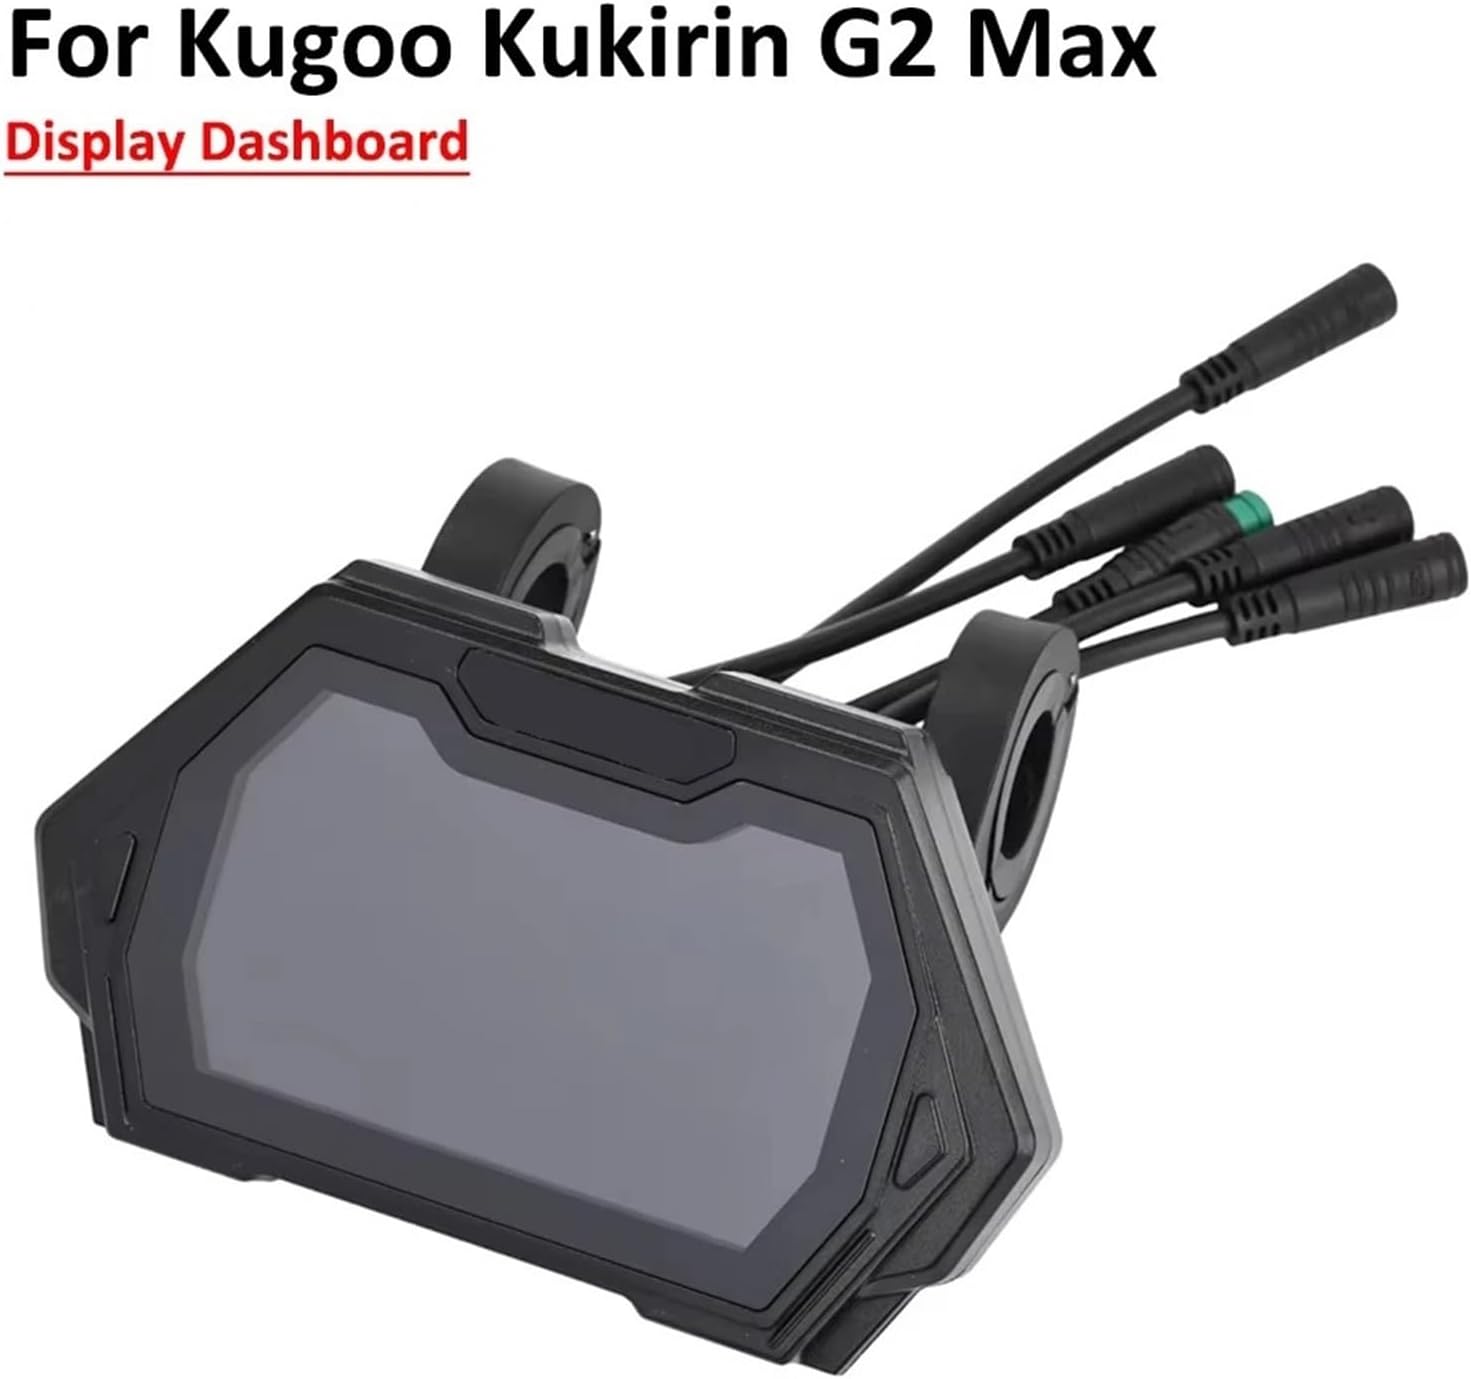
Image 3.1: The TMF13 dashboard correctly installed on a scooter handlebar.
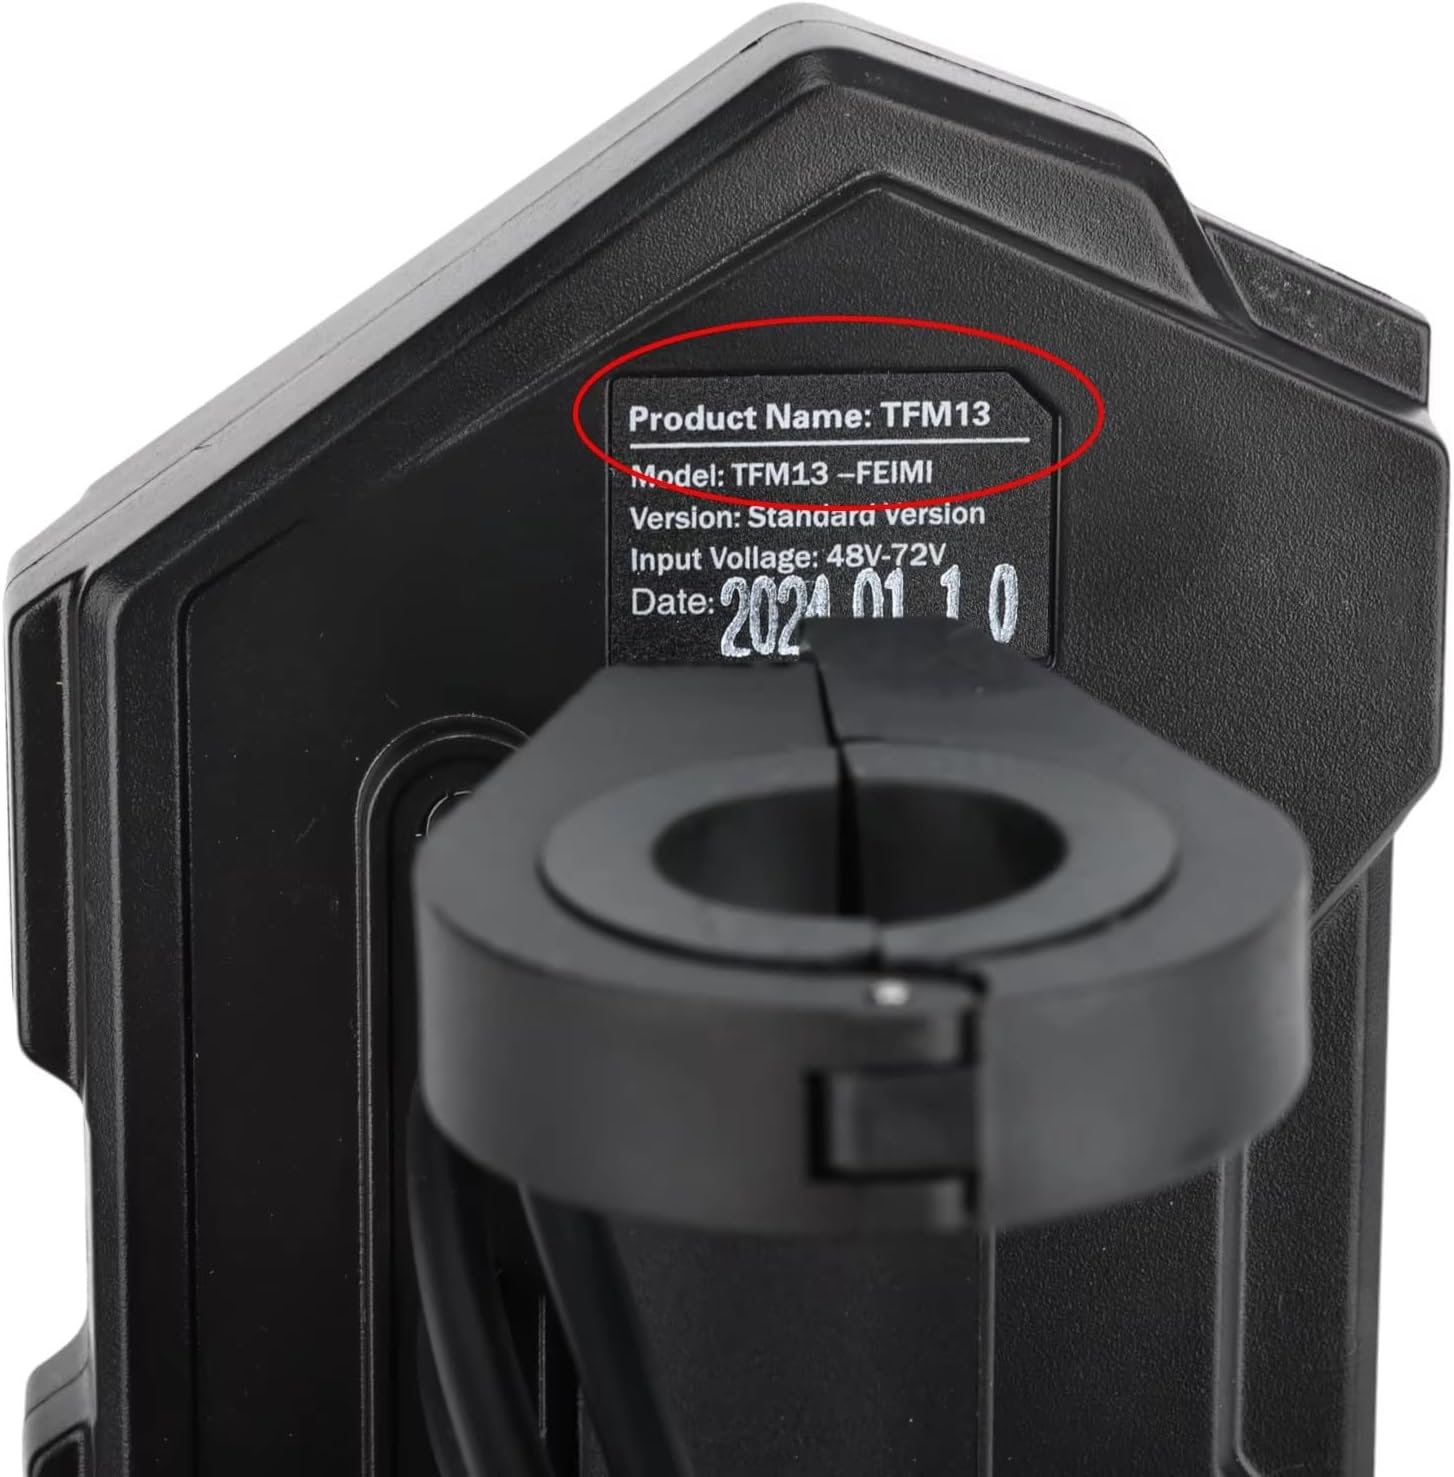
Imagem 3.2: Close-up view of the 4PIN connector, crucial for proper installation.
4. Instruções de operação
The TMF13 display dashboard provides essential information at a glance. Familiarize yourself with the display layout and controls for optimal use.
Informações do visor:
- Indicador de velocidade: Mostra a velocidade atual de condução.
- Nível da bateria: Exibe a carga restante da bateria.
- Modo de pilotagem: Indicates the selected power or speed mode (e.g., Eco, Standard, Sport).
- Odômetro/Contador Parcial: Shows total distance traveled or current trip distance.
- Indicador de farol: Confirms if headlights are active.

Image 4.1: The TMF13 dashboard displaying various operational data during use.
Controles:
Specific button functions for changing modes, turning on lights, or accessing settings will typically be located on the scooter's handlebar controls, which interface with the dashboard. Refer to your scooter's main user manual for detailed instructions on these controls.
5. Manutenção
Proper maintenance ensures the longevity and optimal performance of your display dashboard.
Cuidados Gerais:
- Limpeza: Use um pano macio e macioamp cloth to wipe the display screen. Avoid abrasive cleaners or solvents that could damage the acrylic surface.
- Proteção: While the dashboard is temperature resistant, avoid prolonged exposure to direct sunlight or extreme weather conditions when not in use.
- Verificação de conexão: Periodically inspect the 4PIN connector and cables for any signs of wear, corrosion, or loose connections. Ensure all connections remain secure.
- Dano Físico: Protect the dashboard from impacts or drops, which can cause internal or external damage.
6. Solução De Problemas
If you encounter issues with your TMF13 display dashboard, refer to the following common problems and solutions:
| Problema | Possível causa | Solução |
|---|---|---|
| Dashboard does not power on. | Loose or disconnected 4PIN cable. Scooter battery is dead. | Check the 4PIN connection. Ensure the scooter battery is charged. |
| Incorrect speed or battery reading. | Sensor malfunction. Loose connection. | Verify all connections are secure. If the problem persists, consult a professional. |
| A tela está escura ou piscando. | Low power supply. Internal fault. | Ensure scooter battery is adequately charged. If issue continues, professional inspection may be required. |
Se as etapas de resolução de problemas não resolverem o problema, entre em contato com o suporte ao cliente ou com um técnico qualificado.
7. Especificações
- Nome do produto: TMF13 Display Dashboard
- Modelo: TMF13
- Tipo de conector: 4PIN
- Compatibilidade: KUGOO Kukirin G2 Max, KUGOO Kukirin G2 Pro Electric Scooters
- Material: Acrílico
- Resistência à temperatura: Até 105℃
- Dimensões: Dimensões aproximadas da embalagem: 7.87 x 7.87 x 3.94 polegadas.
- Peso: Approximately 1000 Grams (Package Weight)

Image 7.1: Identification label showing the TMF13 model and input voltage gama.
8. Garantia e Suporte
This product is covered by a standard manufacturer's warranty against defects in materials and workmanship. For specific warranty terms and conditions, please refer to the documentation provided with your purchase or contact the seller directly.
For technical support, installation assistance, or warranty claims, please contact the retailer or manufacturer through their official support channels. Provide your purchase details and a clear description of the issue to facilitate a quicker resolution.


