1. Introdução
This manual provides detailed instructions for the proper installation, operation, and maintenance of your Lanzar VIBE211 Vibe 360 Watt 2 Channel Mosfet AmpAmplificador. Leia este manual atentamente antes de tentar instalar ou operar o aparelho. ampAmplificador para garantir desempenho e segurança ideais.
2. Informações de segurança
Observe sempre as seguintes precauções de segurança durante a instalação e operação:
- Disconnect the vehicle's negative battery terminal before any wiring connections are made.
- Certifique-se de que toda a fiação esteja devidamente instalada e fixada para evitar danos ou curtos-circuitos.
- Utilize fios com a bitola adequada para as conexões de energia e aterramento, conforme especificado na seção de instalação.
- Monte o ampInstale o amplificador em um local seguro que permita ventilação adequada e esteja protegido da umidade e do calor excessivo.
- Não opere o ampVerifique se o amplificador está danificado ou com mau funcionamento. Consulte a seção de solução de problemas ou procure assistência profissional.
3. Produto acabadoview
The Lanzar VIBE211 is a 2-channel Mosfet amplifier designed for car audio systems. It features a bridgeable design, allowing for flexible configuration, and incorporates a regulated Mosfet power supply for stable performance. Key features include variable high/low pass crossover controls and a remote subwoofer bass control.
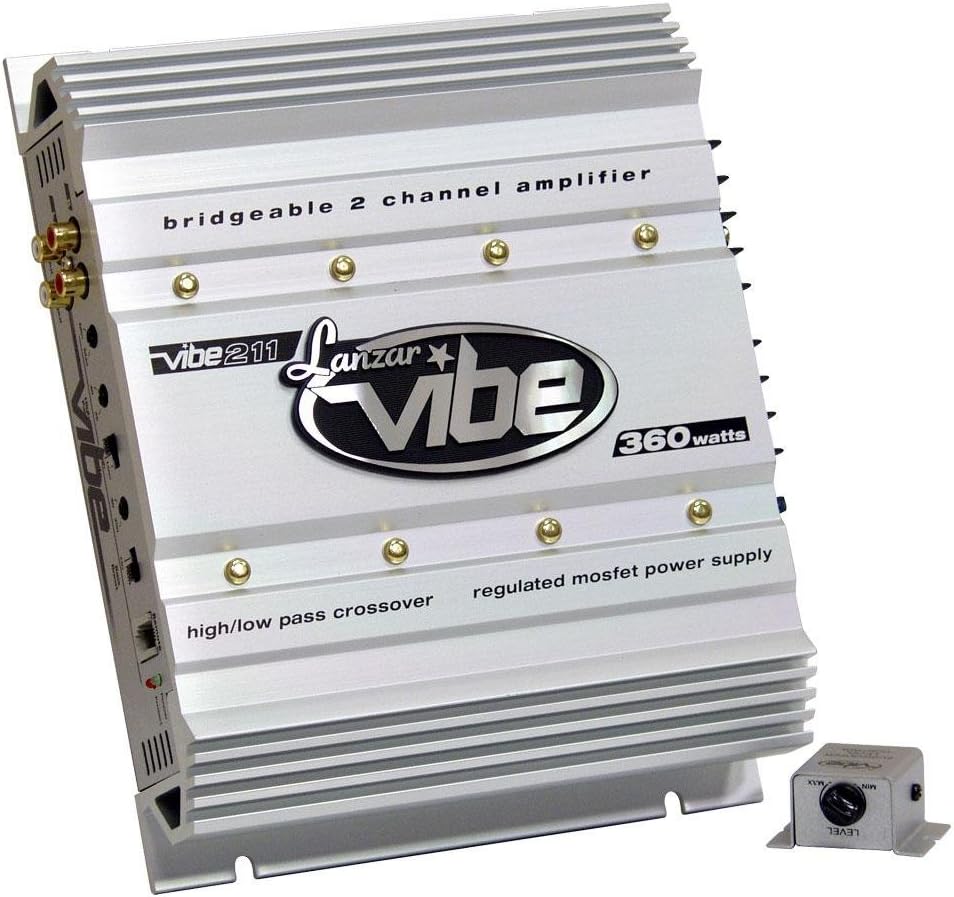
Um ângulo view of the silver Lanzar VIBE211 Vibe 360 Watt 2 Channel Mosfet Ampamplificador, showcasing its finned heatsink design, RCA inputs, and control panel. The amplifier features text indicating 'bridgeable 2 channel amplifier', 'vibe 211', 'Lanzar vibe', '360 watts', 'high/low pass crossover', and 'regulated mosfet power supply'. A small, separate remote bass level control unit is visible in the foreground.
4. Configuração e instalação
4.1 Montagem do Ampmais vivo
Choose a secure mounting location that provides adequate air circulation around the amplifier's heatsink. Avoid mounting in direct sunlight or areas prone to moisture. Use the provided mounting hardware to secure the ampFixe o amplificador firmemente a uma superfície sólida.
4.2 Conexões de Fiação
Ensure all connections are tight and properly insulated to prevent short circuits.
- Potência (B+): Connect a heavy-gauge wire (e.g., 8 AWG or larger) directly from the positive terminal of the vehicle's battery to the amplifier's B+ terminal. Install an appropriate fuse (15A) within 18 inches of the battery.
- Terrestre (GND): Connect a heavy-gauge wire of the same size as the power wire from the amplifier's GND terminal to a clean, unpainted metal surface of the vehicle chassis. Ensure a good electrical connection.
- Remoto (REM): Connect a smaller gauge wire (e.g., 18 AWG) from the ampConecte o terminal REM do amplificador à saída de ativação remota da sua unidade principal. Este fio ativa o sinal. ampLigar e desligar o amplificador com o seu aparelho de som.
- Entradas RCA: Connect the RCA audio cables from your head unit's pre-amp saídas para o amplifier's Gold RCA Inputs. The amplifier includes Line Outs for Left and Right Channels for daisy-chaining to other amplificadores.
- Saídas de alto-falanteConecte suas caixas de som ao amplifier's speaker terminals. Observe correct polarity (+ to + and - to -). The amplifier is 2 Ohm stereo stable and bridgeable at 4 Ohms.
- Remote Subwoofer Bass Control: Connect the remote bass control unit to the designated port on the amplifier. Mount the control unit in an accessible location for easy adjustment.
5. Instruções de operação
5.1 Inicialização
Após todas as conexões estarem feitas, reconecte o terminal negativo da bateria do veículo. Ligue o aparelho de som. amplifier features Soft Turn On/Off circuitry to prevent pops and clicks. Power Protection LED Indicators will illuminate to show operational status.
5.2 Adjusting Input Level Controls
O amplifier has Variable Input Level Controls. Start with the amplifier's input level set to minimum. Play a familiar piece of music through your head unit at about 75% of its maximum volume. Slowly increase the ampAjuste o nível de entrada do amplificador até ouvir uma leve distorção e, em seguida, reduza-o um pouco. Isso garante que... ampO amplificador recebe um sinal ideal sem distorção.
5.3 Configurações de Crossover
O amplifier features Variable High Low Pass Crossover Controls. These allow you to filter specific frequencies to your speakers or subwoofers.
- Filtro passa-altas (HPF): Used for full-range speakers to prevent low frequencies from reaching them, improving clarity.
- Filtro passa-baixo (LPF): Used for subwoofers to allow only low frequencies to pass, enhancing bass response.
Adjust these controls to match the frequency response characteristics of your speakers and subwoofers.
5.4 Bass Boost Circuit
The built-in Bass Boost Circuit allows for an increase in bass output at specific frequencies. Use this feature sparingly and adjust to your preference, avoiding excessive boosting that could lead to distortion or speaker damage.
5.5 Bridged Mode Operation
O amplifier can be bridged at 4 Ohms to combine the power of both channels into a single, higher-power output, typically for driving a subwoofer. Refer to the wiring diagram for specific instructions on bridging the ampmais vivo.
6. Manutenção
The Lanzar VIBE211 amplifier requires minimal maintenance. Periodically inspect the wiring connections for tightness and corrosion. Keep the amplifier's heatsink clean and free of dust or debris to ensure proper cooling. Use a soft, dry cloth for cleaning the exterior.
7. Solução De Problemas
Se você tiver problemas com seu ampAmplificador, consulte a tabela a seguir antes de procurar assistência técnica profissional:
| Problema | Possível causa | Solução |
|---|---|---|
| Sem energia / Sem som | Fusível queimado; Fio de alimentação/terra/remoto solto; Unidade principal com defeito. | Check and replace fuse; Verify all power, ground, and remote connections; Test head unit functionality. |
| Som distorcido | Input level too high; Speaker impedance too low; Damaged speakers. | Adjust input level; Verify speaker impedance (2 Ohm stereo stable, 4 Ohm bridged); Inspect speakers for damage. |
| Amplifier Goes into Protection Mode | Superaquecimento; Curto-circuito na fiação do alto-falante; Volume baixotage. | Ensure adequate ventilation; Check speaker wires for shorts; Verify battery voltage sistema de carregamento. |
| Sem graves do subwoofer | LPF not enabled or set too high; Phase issue; Remote bass control set to minimum. | Adjust LPF setting; Check subwoofer phase; Increase remote bass control level. |
8. Especificações
Technical specifications for the Lanzar VIBE211 ampmais vital:
- Power Output (RMS @ 4 Ohms): 2 x 90 Watts
- Power Output (Max @ 4 Ohms): 2 x 180 Watts
- Power Output (Max Bridged @ 4 Ohms): 1 x 360 Watts
- Power Output (RMS @ 2 Ohms): 2 x 150 Watts
- Amptipo mais vital: 2 Channel Mosfet
- Resposta de frequência: 15 Hz - 35 kHz
- Relação sinal-ruído (S/N): 90 dB
- Avaliação de fuzível: 15A
- Dimensões (L x A x C): 10.25 polegadas x 2 polegadas x 8 polegadas
- Controles de nível de entrada: Variável
- Controles de cruzamento: Variable High/Low Pass
- Estabilidade: 2 Ohm Stereo Stable, Bridgeable at 4 Ohms
- Circuito de Proteção: Advanced Power Protection LED Indicators
- Características adicionais: Remote Subwoofer Bass Control, Electronic Crossover Network, Bass Boost Circuit, Soft Turn On/Off
9. Garantia e Suporte
9.1 Informações de garantia
The Lanzar VIBE211 ampO lificador vem com um 1 ANOS limited warranty from the date of purchase. This warranty covers defects in materials and workmanship under normal use. Please retain your proof of purchase for warranty claims. The warranty does not cover damage caused by improper installation, accident, misuse, abuse, negligence, or unauthorized modification.
9.2 Suporte ao cliente
For technical assistance, troubleshooting beyond this manual, or warranty service, please contact Lanzar customer support. Refer to the official Lanzar webPara obter informações de contato atualizadas, consulte o site ou a embalagem do produto.


