1. Introdução
This manual provides detailed instructions for the proper installation, operation, and maintenance of your Lanzar RBHTG414 Heritage 600 Watt 4-Channel MOSFET Amplifier. To ensure optimal performance and safety, please read this manual thoroughly before attempting to install or operate the ampliifier. Guarde este manual para referência futura.
2. Instruções de segurança
Observe sempre as seguintes precauções de segurança durante a instalação e operação:
- Desconecte o terminal negativo da bateria do veículo antes de iniciar qualquer trabalho de instalação para evitar curtos-circuitos.
- Certifique-se de que toda a fiação esteja devidamente encaminhada e fixada para evitar danos causados por bordas afiadas ou peças móveis.
- Utilize fios com a bitola adequada para as conexões de energia e aterramento, conforme especificado na seção de instalação.
- Instalar o ampInstale o amplificador em um local que permita ventilação adequada para evitar superaquecimento.
- Evite montar o ampAmplificador em áreas expostas à umidade ou vibração excessiva.
- Não tente reparar ou modificar o ampFaça você mesmo a manutenção do amplificador. Encaminhe todos os serviços de manutenção para pessoal qualificado.
3. Produto acabadoview
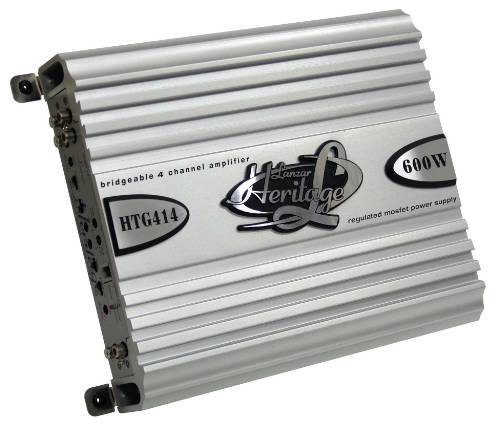
The Lanzar RBHTG414 Heritage amplifier is a 600 Watt, 4-channel MOSFET amplifier designed to deliver powerful and clear audio performance for your car audio system. It features a regulated MOSFET power supply and is bridgeable, offering flexible configuration options for various speaker setups.
4. Configuração e instalação
A instalação correta é crucial para o desempenho e a longevidade do seu produto. amplifier. The Lanzar RBHTG414 is designed for surface mounting.
4.1 Lista de verificação de pré-instalação
- Ensure you have all necessary tools and wiring kits (power wire, ground wire, remote turn-on wire, RCA cables, speaker wire, fuses, terminals).
- Choose a mounting location that is dry, well-ventilated, and secure.
- Plan your wiring routes to avoid interference and potential damage.
4.2 Conexões de Fiação
The following outlines general wiring procedures. Consult a professional installer if you are unsure about any steps.
- Power Connection (BATT+): Connect a heavy-gauge power cable (e.g., 8-gauge or 4-gauge depending on total system power) directly from the vehicle's positive battery terminal to the ampTerminal BATT+ do amplificador. Instale um porta-fusível em linha a uma distância máxima de 45 cm (18 polegadas) da bateria.
- Conexão de aterramento (GND): Connect a heavy-gauge ground cable of the same length as the power cable from the ampConecte o terminal GND do amplificador a uma superfície metálica limpa e sem pintura no chassi do veículo. Certifique-se de que a conexão esteja firme e com baixa resistência.
- Ativação remota (REM): Connect a smaller gauge wire (e.g., 18-gauge) from the ampConecte o terminal REM do amplificador à saída de ativação remota da sua unidade principal. Este fio envia o sinal para a saída REM. amplifier to turn on and off with your car's audio system.
- Conexões de entrada RCA: Connect RCA audio cables from your head unit's pre-amp saídas para o amplifier's RCA input jacks. For 4-channel operation, use two pairs of RCA cables (Front L/R, Rear L/R).
- Conexões de alto-falantesConecte suas caixas de som ao amplifier's speaker output terminals.
- 4-Channel Stereo Mode: Connect each speaker to its corresponding channel output (e.g., Front Left speaker to CH1+, CH1-, Front Right to CH2+, CH2-, etc.).
- Bridged Mode (2-Channel): For higher power output to subwoofers or a pair of speakers, the RBHTG414 can be bridged. Refer to the amplifier's terminal markings for specific bridged connection points (typically CH1+ and CH2- for one bridged channel, and CH3+ and CH4- for the second). Ensure your speakers are rated for the increased power output in bridged mode.
4.3 Montagem
Monte com segurança o amplifier to a solid surface using appropriate screws. Ensure there is sufficient space around the amplifier for air circulation, especially around the heat sink fins, to prevent thermal shutdown.
5. Instruções de operação
Uma vez instalado, o amplifier will turn on automatically with your head unit. Adjustments should be made carefully to achieve optimal sound quality.
- Ganhe controle: The gain control matches the amplifier's input sensitivity to the output level of your head unit. Start with the gain set to minimum, then slowly increase it until you hear distortion, then back off slightly. This is not a volume control.
- Configurações de crossover:Se o seu amplifier includes crossover controls (e.g., High-Pass Filter (HPF), Low-Pass Filter (LPF)), adjust them according to your speaker type. HPF is used for full-range speakers to block low frequencies, while LPF is used for subwoofers to block high frequencies.
- Bass Boost: Use the bass boost feature sparingly, if available, as excessive boosting can lead to distortion and potential speaker damage.
6. Manutenção
A manutenção regular ajuda a garantir a longevidade e o desempenho do seu equipamento. ampmais vivo.
- Limpeza: Limpe periodicamente o amplifier's exterior with a soft, dry cloth. Ensure the heat sink fins are free of dust and debris to maintain proper cooling.
- Conexões: Occasionally check all wiring connections for tightness and corrosion. Loose connections can cause poor performance or damage.
- Ventilação: Garantir que o amplifier's mounting location remains clear of obstructions that could impede airflow.
7. Solução De Problemas
Se você tiver problemas com seu ampSe você tiver um amplificador, consulte os problemas e soluções comuns a seguir antes de procurar assistência técnica profissional.
| Problema | Possível causa | Solução |
|---|---|---|
| Amplifier não liga | Blown fuse; loose power/ground/remote wire; no power from head unit remote output. | Verifique o fusível em linha e amplifier fuses; verify all power, ground, and remote connections are secure; test remote wire for 12V when head unit is on. |
| Nenhuma saída de som | Loose RCA cables; incorrect gain setting; speaker wires disconnected; ampAmplificador em modo de proteção. | Verifique as conexões RCA em ambos os pontos. amplifier and head unit; ensure gain is set correctly; verify speaker wire connections; check for protect light indicator. |
| Som distorcido | Gain set too high; improper crossover settings; damaged speaker; poor ground connection. | Reduce gain setting; adjust crossover filters; inspect speakers for damage; ensure ground connection is solid. |
| Ampo elevador superaquece | Insufficient ventilation; impedance mismatch; prolonged high-power operation. | Garanta uma circulação de ar adequada ao redor do amplifier; verify speaker impedance matches amplifier's rating; reduce volume or operating time. |
8. Especificações
The following are key specifications for the Lanzar RBHTG414 Heritage Ampmais vital:
- Marca: Lanzar
- Número do modelo: RBHTG414
- Número de canais: 4
- Potência de saída: 600 Watts (Peak)
- Ampclasse mais vital: MOSFET
- Tipo de montagem: Montagem em superfície
- Dimensões do produto (C x L x A): 2 x 2 x 2 polegadas
- Peso do item: 10.89 libras
- UPC: 068888725088
- Cor: BLACK (Unit shown in image is silver, but product data indicates BLACK)
9. Garantia e Suporte
Lanzar products are designed for reliability and performance. For information regarding warranty coverage, technical support, or service, please refer to the warranty card included with your product or visit the official Lanzar website. Please have your model number (RBHTG414) and purchase information ready when contacting support.


