1. Introdução
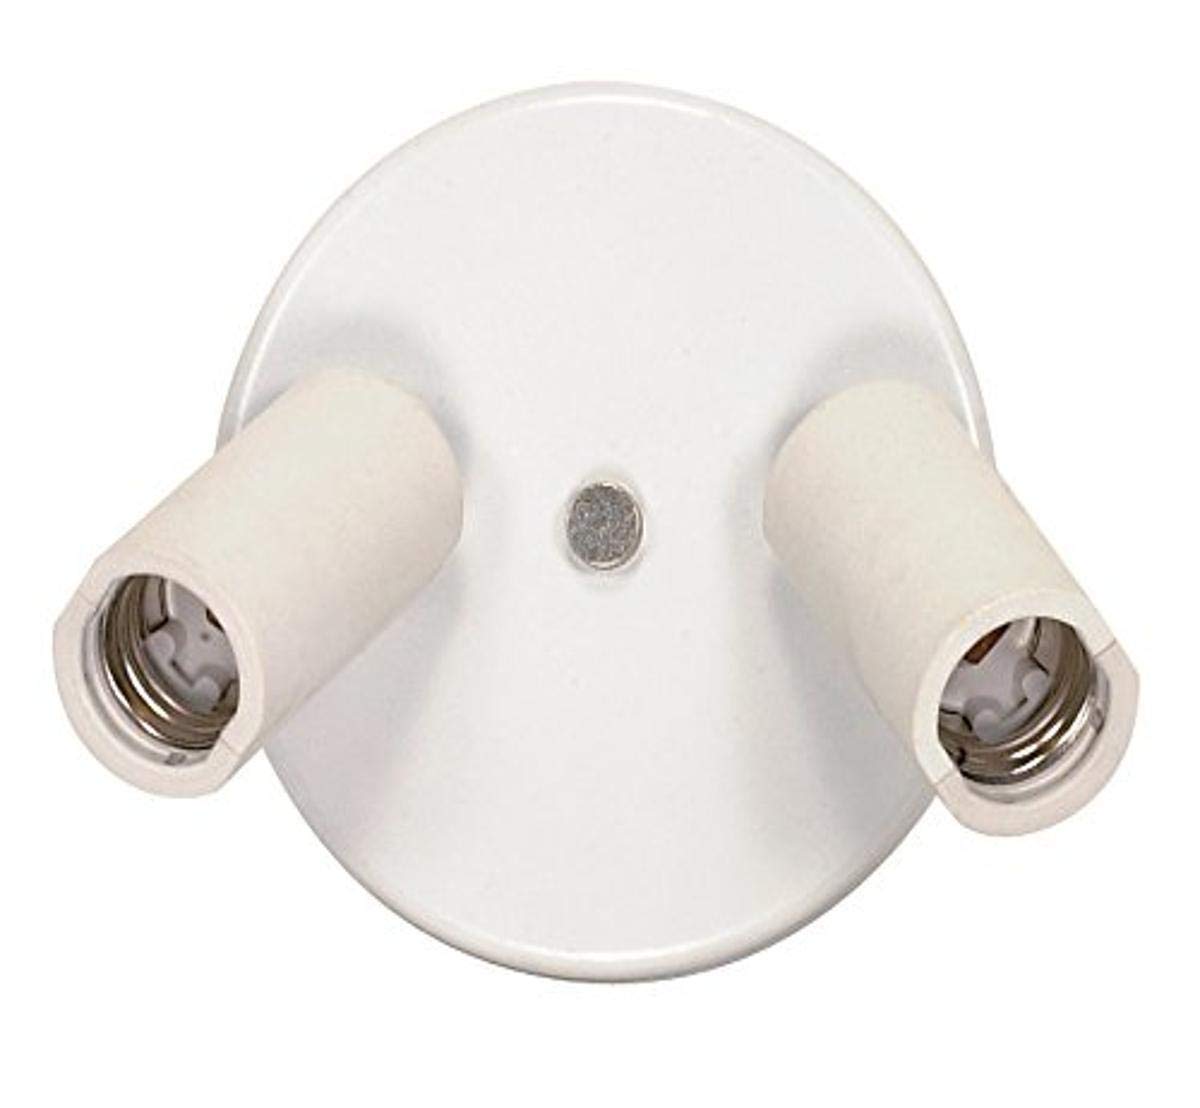
This manual provides detailed instructions for the safe installation, operation, and maintenance of your Satco SF77/602 Two-Light Ceiling Swivel Fixture. Please read all instructions carefully before beginning installation and retain this manual for future reference. This fixture is designed for indoor use and features two adjustable heads for directional lighting.
2. Informações de segurança
- AVISO: Risco de choque elétrico. Desligue a energia no disjuntor ou na caixa de fusíveis antes da instalação ou manutenção.
- Todas as conexões elétricas devem estar em conformidade com as normas e regulamentos locais ou com o Código Elétrico Nacional (NEC). Consulte um eletricista qualificado se não estiver familiarizado com as conexões elétricas adequadas.
- Não exceda a temperatura máximatage specified for this fixture (150 watts total).
- Certifique-se de que a luminária esteja fixada com segurança a um elemento estrutural do teto.
- Não instale esta luminária em locais úmidos ou secos.amp locations. It is rated for indoor use only.
- Allow bulbs to cool before touching or replacing them.
3. Conteúdo da embalagem
Verifique se todos os componentes estão presentes antes de iniciar a instalação:
- Satco SF77/602 Two-Light Ceiling Swivel Fixture (1)
- Kit de hardware de montagem (1)
- Socket Adapter (1)
- Manual de Instruções (1)
4. Instruções de instalação
Tempo estimado de instalação: 30-60 minutos
- Desligar a energia: Before starting, ensure the power to the circuit where you are installing the fixture is turned off at the main circuit breaker or fuse box.
- Preparar a superfície de montagem: Ensure the ceiling junction box is securely installed and capable of supporting the fixture's weight.
- Fixe o suporte de montagem: Fixe o suporte de montagem (incluído no kit de ferragens) à caixa de junção utilizando os parafusos fornecidos.
- Conexões de fiação: Carefully connect the fixture's wires to the corresponding house wires.
- Conecte o preto (live) wire from the fixture to the preto Fio energizado da caixa de junção.
- Conecte o branco fio (neutro) da luminária para o branco Fio neutro da caixa de junção.
- Conecte o verde or cobre nu fio (terra) da luminária para o verde or cobre nu (ground) wire from the junction box.
- Montagem do dispositivo: Carefully tuck all wires into the junction box. Align the fixture base with the mounting bracket and secure it with the provided screws or nuts.
- Instalar Lâmpadas: Insert two standard base household bulbs (E26 Medium, not included) into the sockets. Do not exceed 150 watts total for the fixture.
- Restaurar energia: Após a conclusão da instalação e com todas as conexões seguras, restabeleça a energia no disjuntor.
5. Instruções de operação
The Satco SF77/602 fixture is operated via a standard wall switch (not included) connected to the circuit. Once power is supplied, the lights will turn on.
- Ajustando os refletores: The two light heads are fully adjustable. They can rotate 360 degrees horizontally and angle up to 90 degrees vertically. Gently grasp the head of the spotlight and pivot it to direct light as desired. Avoid excessive force.
- Tipo de lâmpada: This fixture is designed for use with standard base (E26 Medium) household bulbs or reflector type flood/spot bulbs.
6. Manutenção
A manutenção regular garante o desempenho ideal e a longevidade do seu equipamento.
- Limpeza: Desligue a energia antes de limpar. Limpe a luminária com um pano macio e seco. Não use produtos de limpeza abrasivos, solventes ou polidores, pois podem danificar o acabamento.
- Substituição de lâmpada: Disconnect power before replacing bulbs. Allow bulbs to cool completely. Unscrew the old bulb and screw in a new E26 Medium base bulb, ensuring it does not exceed the 150-watt maximum for the fixture.
7. Solução De Problemas
| Problema | Possível causa | Solução |
|---|---|---|
| A luminária não acende. | 1. A alimentação está desligada. 2. Loose wiring connection. 3. Lâmpada com defeito. | 1. Verifique o disjuntor ou o interruptor de parede. 2. Desligue a energia e verifique as conexões da fiação. 3. Substitua a lâmpada. |
| Bulbs flicker. | 1. Lâmpada solta. 2. Loose wiring connection. 3. Tipo de lâmpada incorreto. | 1. Aperte a lâmpada. 2. Desligue a energia e verifique as conexões da fiação. 3. Ensure correct bulb type and wattage. |
| Fixture makes humming noise. | Interruptor dimmer incompatível (se aplicável). | Ensure dimmer switch is compatible with the bulb type used. |
8. Especificações
| Recurso | Detalhe |
|---|---|
| Número do modelo | SF77/602 |
| Marca | Satco |
| Tipo de fixação | Two-Light Ceiling Swivel Fixture |
| Cor | Branco |
| Material | Metal, Plástico |
| Dimensões (C x L x A) | 5.25 x 5.25 x 2.5 polegadas |
| Peso do item | 1.05 libras |
| Número de fontes de luz | 2 |
| Base de lâmpada | E26 Médio |
| Max Wattage | 150 watts (total) |
| Volumetage | 250 Volts (rated) |
| Uso interno/externo | Interior |
| Recurso especial | Adjustable heads (360° rotation, 90° angle) |
| Certificações | C.U.L. Listed |
9. Informações de garantia
Satco products are manufactured to high standards and are warranted against defects in materials and workmanship. Specific warranty terms and duration may vary. Please refer to the packaging or contact Satco customer support for detailed warranty information.
10. Suporte ao cliente
If you have any questions, require assistance with installation, or need to report a defect, please contact Satco customer support:
- Website: Visite o site oficial da Satco. webSite com recursos de suporte e informações de contato.
- Telefone: Refer to the product packaging or Satco's webConsulte o site para obter o número de telefone mais atualizado do serviço de atendimento ao cliente.
Please have your model number (SF77/602) and purchase date available when contacting support.


