1. Introdução
This manual provides detailed instructions for the setup, operation, and maintenance of your TFA 35.1089 Digital Wireless Weather Station. This device offers a comprehensive overview of current weather conditions and forecasts, enhancing your daily planning.
The weather station features a wireless outdoor sensor for accurate external temperature readings, a clear display for indoor temperature, and a radio-controlled clock for precise timekeeping. Please read this manual thoroughly before using the product to ensure optimal performance and longevity.
2. Conteúdo da embalagem
- TFA 35.1089 Digital Wireless Weather Station (Main Unit)
- Wireless Remote Temperature Sensor
- Batteries (5 x AA, included)
- Manual do usuário
3. Recursos do Produto
- Weather forecast display using intuitive symbols.
- Large, easy-to-read display with indoor and outdoor temperature.
- Atmospheric pressure trend indicator.
- Maximum and minimum temperature memory for both indoor and outdoor readings.
- Radio-controlled clock for automatic time synchronization.
- Função de alarme com opção de soneca.
- Wireless outdoor temperature sensor for flexible placement.
4. Configuração
4.1 Instalação da bateria
- Open the battery compartment on the back of the main unit and the remote sensor.
- Insert the included AA batteries, observing the correct polarity (+/-).
- Feche os compartimentos da bateria com segurança.
4.2 Colocação do Sensor
Place the remote sensor in a shaded, dry location outdoors, protected from direct sunlight and precipitation, to ensure accurate temperature readings. The maximum transmission range is approximately 30 meters (100 feet) in open air. Avoid placing the sensor near large metal objects or electrical appliances that may interfere with the wireless signal.
4.3 Sincronização Inicial
After installing batteries, the main unit will automatically search for the remote sensor and the radio-controlled time signal (DCF). This process may take several minutes. Ensure both units are within range of each other during initial setup.
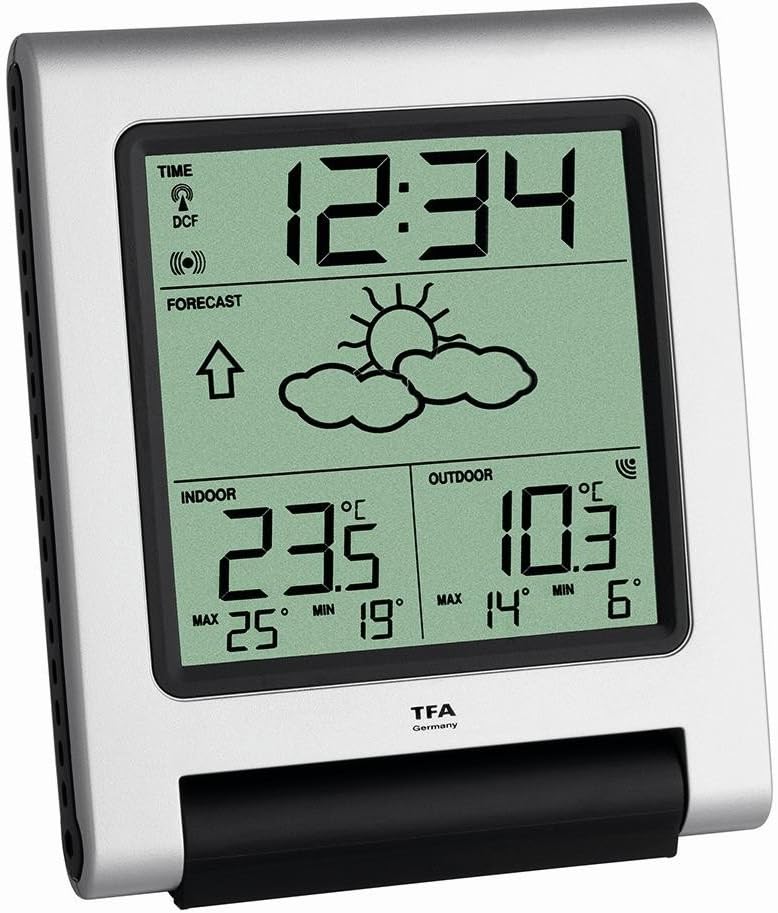
Figure 1: Main Unit Display Overview
This image shows the main unit's display. The top section displays the radio-controlled time (12:34) and DCF signal indicator. The middle section shows the weather forecast (sun and clouds) with an atmospheric pressure trend arrow. The bottom left displays indoor temperature (23.5°C) with maximum (25°C) and minimum (19°C) records. The bottom right displays outdoor temperature (10.3°C) with maximum (14°C) and minimum (6°C) records.
5. Instruções de operação
5.1 Informações de Exibição
The main unit's display is divided into several sections:
- Time (Top): Displays the current time, synchronized via DCF radio signal. A signal icon indicates successful reception.
- Forecast (Middle): Shows weather forecast symbols (e.g., sun, clouds, rain) and an arrow indicating atmospheric pressure trend (rising, stable, falling).
- Indoor (Bottom Left): Displays the current indoor temperature and the recorded maximum (MAX) and minimum (MIN) indoor temperatures.
- Outdoor (Bottom Right): Displays the current outdoor temperature received from the remote sensor, along with the recorded maximum (MAX) and minimum (MIN) outdoor temperatures.
5.2 Configurando o Alarme
Refer to the specific buttons on your device (usually labeled 'MODE', 'SET', 'ALARM') to access and adjust the alarm settings. Typically, you will press an 'ALARM' button to enter alarm setting mode, then use '+' or '-' buttons to set the desired alarm time. Confirm your selection to activate the alarm. The snooze function is usually activated by pressing any button (except 'ALARM OFF') when the alarm sounds.
5.3 Viewing Max/Min Temperatures
Press the 'MAX/MIN' button (or similar) to cycle through the current, maximum, and minimum recorded temperatures for both indoor and outdoor readings. To reset the max/min records, hold down the 'MAX/MIN' button for a few seconds.
6. Manutenção
6.1 Substituição da bateria
When the battery indicator appears on the display, replace all batteries in both the main unit and the remote sensor with new AA batteries. Ensure correct polarity. It is recommended to replace batteries in both units simultaneously to maintain optimal performance.
6.2 Limpeza
Limpe a estação meteorológica e o sensor com um pano macio e seco.amp pano. Não utilize produtos de limpeza abrasivos ou solventes, pois estes podem danificar a tela ou o computador.asing. Ensure no moisture enters the battery compartments or electronic components.
7. Solução De Problemas
| Problema | Possível causa | Solução |
|---|---|---|
| No outdoor temperature display. | Remote sensor out of range, low batteries, or interference. | Relocate sensor closer to main unit. Replace batteries in sensor. Avoid sources of interference. Manually re-sync if necessary (refer to device-specific instructions). |
| Time not synchronizing (DCF icon flashing or absent). | Weak DCF signal, interference, or incorrect time zone setting. | Move main unit to a location with better signal reception (e.g., near a window). Avoid electronic devices. Check manual for manual time setting or time zone adjustment. |
| Leituras de temperatura imprecisas. | Sensor exposed to direct sunlight, heat sources, or moisture. | Relocate sensor to a shaded, dry, and well-ventilated area. Ensure main unit is not near heat sources. |
| A tela está em branco ou com brilho reduzido. | Baterias fracas. | Substitua todas as pilhas da unidade principal. |
8. Especificações
- Número do modelo: 35-1089
- Marca: TFA
- Dimensões do produto: 4.5 x 11.9 x 13.6 cm
- Peso do produto: 415 gramas
- Fonte de energia: Bateria
- Tipo de Bateria: 5 x AA (incluído)
- Função especial: Alarm with Snooze
- Material: Vários materiais
- Cor: Prata
9. Garantia e Suporte
For warranty information and technical support, please refer to the documentation provided with your purchase or contact TFA customer service directly. Keep your proof of purchase for any warranty claims.


