Introdução
Obrigado pela compra.asing the Muse M-12 CR Radio Alarm Clock. This compact and versatile device combines an FM radio with a dual alarm clock, offering convenience and functionality for your daily routine. Featuring a clear red LED display and intuitive controls, the M-12 CR is designed for ease of use. Please read this manual carefully to ensure proper operation and to fully utilize all features of your new alarm clock.
Conteúdo da embalagem
Por favor, verifique se todos os itens estão presentes e em boas condições:
- Muse M-12 CR Radio Alarm Clock Unit
- Adaptador de energia
- Manual do usuário (este documento)
Produto acimaview e controles
Familiarize yourself with the various parts and controls of your Muse M-12 CR Radio Alarm Clock.

Figura 1: Frente e superior view of the Muse M-12 CR Radio Alarm Clock, highlighting the red LED display and the arrangement of control buttons.
Botões de controle (painel superior):
- Botão SNOOZE/DIMMER: Press to temporarily silence the alarm (snooze function). Press and hold to adjust display brightness.
- Botão ALARME 1: Press to activate/deactivate Alarm 1. Press and hold to set Alarm 1 time.
- Botão ALARME 2: Press to activate/deactivate Alarm 2. Press and hold to set Alarm 2 time.
- Botão de AJUSTE DE HORA: Press and hold to set the current time.
- HR (Hour) Button: Used to adjust the hour during time or alarm setting.
- MIN (Minute) Button: Used to adjust the minute during time or alarm setting.
- VOL- / PREV Button: Decreases volume. In radio mode, short press for previous preset station, long press for backward auto-scan.
- VOL+ / NEXT Button: Increases volume. In radio mode, short press for next preset station, long press for forward auto-scan.
- FM / MEM Button: Press to switch to FM radio mode. Press and hold to automatically scan and store FM stations.
- Botão de suspensão: Ativa a função de temporizador de sono.
- NAP Button: Activates the nap timer function.
Configurar
1. Conexão de energia
- Unpack the Muse M-12 CR unit and the power adapter.
- Insert the DC plug of the power adapter into the DC IN jack located at the back of the unit.
- Plug the power adapter into a standard AC wall outlet (100-240V, 50/60Hz). The display will light up, and the clock will be ready for time setting.
2. Bateria de reserva (opcional)
To maintain time and alarm settings during a power outage, you can install backup batteries (not supplied). The unit typically uses AAA batteries. Refer to the battery compartment on the bottom of the unit for correct battery type and polarity.
Instruções de operação
Definir o tempo
- Pressione e segure o HORÁRIO DEFINIDO Pressione o botão até que os dígitos da hora comecem a piscar.
- Pressione o HR button repeatedly to adjust the hour.
- Pressione o MÍNIMO button repeatedly to adjust the minute.
- Pressione o HORÁRIO DEFINIDO Pressione novamente o botão para confirmar e sair do modo de configuração de hora.
Configurar alarmes (Alarme 1 e Alarme 2)
The M-12 CR features two independent alarms.
- Pressione e segure o ALARME 1 or ALARME 2 Pressione o botão até que os dígitos da hora do alarme comecem a piscar.
- Pressione o HR botão para definir a hora do alarme desejada.
- Pressione o MÍNIMO para definir o minuto do alarme desejado.
- Pressione o ALARME 1 or ALARME 2 button again to select the alarm source (Radio or Buzzer). The corresponding indicator will light up.
- Pressione o ALARME 1 or ALARME 2 button one more time to confirm and activate the alarm. The alarm indicator (1 or 2) will appear on the display.
Para desativar um alarme, pressione o botão correspondente. ALARME 1 or ALARME 2 button until its indicator disappears from the display.
Radio Operation (FM)
- Pressione o FM / MEM button to switch to FM radio mode. The frequency will be displayed.
- Digitalização e armazenamento automáticos: Pressione e segure o FM / MEM button to automatically scan for and store available FM stations (up to 20 presets).
- Sintonia manual: Use o VOL- / PREV e VOL+ / NEXT buttons to manually tune to a specific frequency. Long press for auto-scan to the next strong station.
- Selecionando predefinições: Pressione brevemente o VOL- / PREV or VOL+ / NEXT buttons to cycle through stored preset stations.
- Ajustando o volume: Use o VOL- / PREV e VOL+ / NEXT buttons (when not in tuning mode) to adjust the radio volume.
Função soneca
Quando o alarme tocar, pressione o SNOOZE / DIMER button to temporarily silence the alarm. The alarm will sound again after a few minutes (default snooze time is usually 9 minutes, refer to specific product behavior if different).
Função Sleep Timer
O temporizador permite que você adormeça ouvindo rádio, que desligará automaticamente após um período definido.
- Enquanto o rádio estiver tocando, pressione o DORMIR button repeatedly to cycle through available sleep timer durations (e.g., 120, 90, 60, 30, 15, 10, 5 minutes, or OFF).
- O rádio desligará automaticamente após o tempo selecionado.
Função Temporizador de soneca
The nap timer sets an alarm to sound after a short, predefined period.
- Pressione o SESTA button repeatedly to select a nap duration (e.g., 120, 90, 60, 30, 15, 10, 5 minutes, or OFF).
- The alarm will sound after the selected nap time has elapsed.
Dimmer de exibição
Para ajustar o brilho do display LED:
- Pressione o SNOOZE / DIMER button (when the alarm is not sounding) to cycle through different brightness levels (e.g., High, Medium, Low, Off).
Manutenção
- Limpeza: Use um pano macio e seco para limpar a parte externa da unidade. Não use produtos de limpeza abrasivos, ceras ou solventes, pois podem danificar o acabamento.
- Colocação: Coloque a unidade em uma superfície estável e plana, longe da luz solar direta, fontes de calor e excesso de poeira ou umidade.
- Ventilação: Assegure ventilação adequada ao redor do aparelho para evitar superaquecimento. Não obstrua as aberturas de ventilação.
- Desconexão de energia: If the unit is not going to be used for a long period, unplug the power adapter from the wall outlet.
Solução de problemas
| Problema | Possível causa | Solução |
|---|---|---|
| Sem energia / Tela desligada | Power adapter not connected or faulty. Power outlet not active. | Verifique se o adaptador de energia está firmemente conectado à unidade e a uma tomada elétrica em funcionamento. Tente usar outra tomada. |
| O alarme não soa | Alarm not activated. Alarm volume too low (for radio alarm). Incorrect alarm time set. | Ensure the alarm indicator (1 or 2) is visible on the display. Increase radio volume if using radio alarm. Verify alarm time is correctly set. |
| Má recepção de rádio | Antenna not extended or positioned correctly. Interference from other electronic devices. Weak signal in the area. | Fully extend and adjust the FM wire antenna for best reception. Move the unit away from other electronics. Try auto-scanning for stronger stations. |
| Botões não respondem | Falha temporária do sistema. | Unplug the unit from power for a few minutes, then plug it back in to reset. |
Especificações
| Modelo | M-12 CR |
| Tipo de exibição | LED (Vermelho) |
| Tamanho da tela | 1.5 cm (0.6 polegadas) |
| Frequência de rádio | FM (with 20 preset stations) |
| Funções de alarme | Dual Alarm (Radio or Buzzer), Snooze, Sleep, Timer (Nap) |
| Fonte de energia | Wired (AC Power Adapter) |
| Dimensões (C x L x A) | 12.9 x 5.3 x 6.5 cm (aprox.) |
| Peso | 290 g (aprox.) |
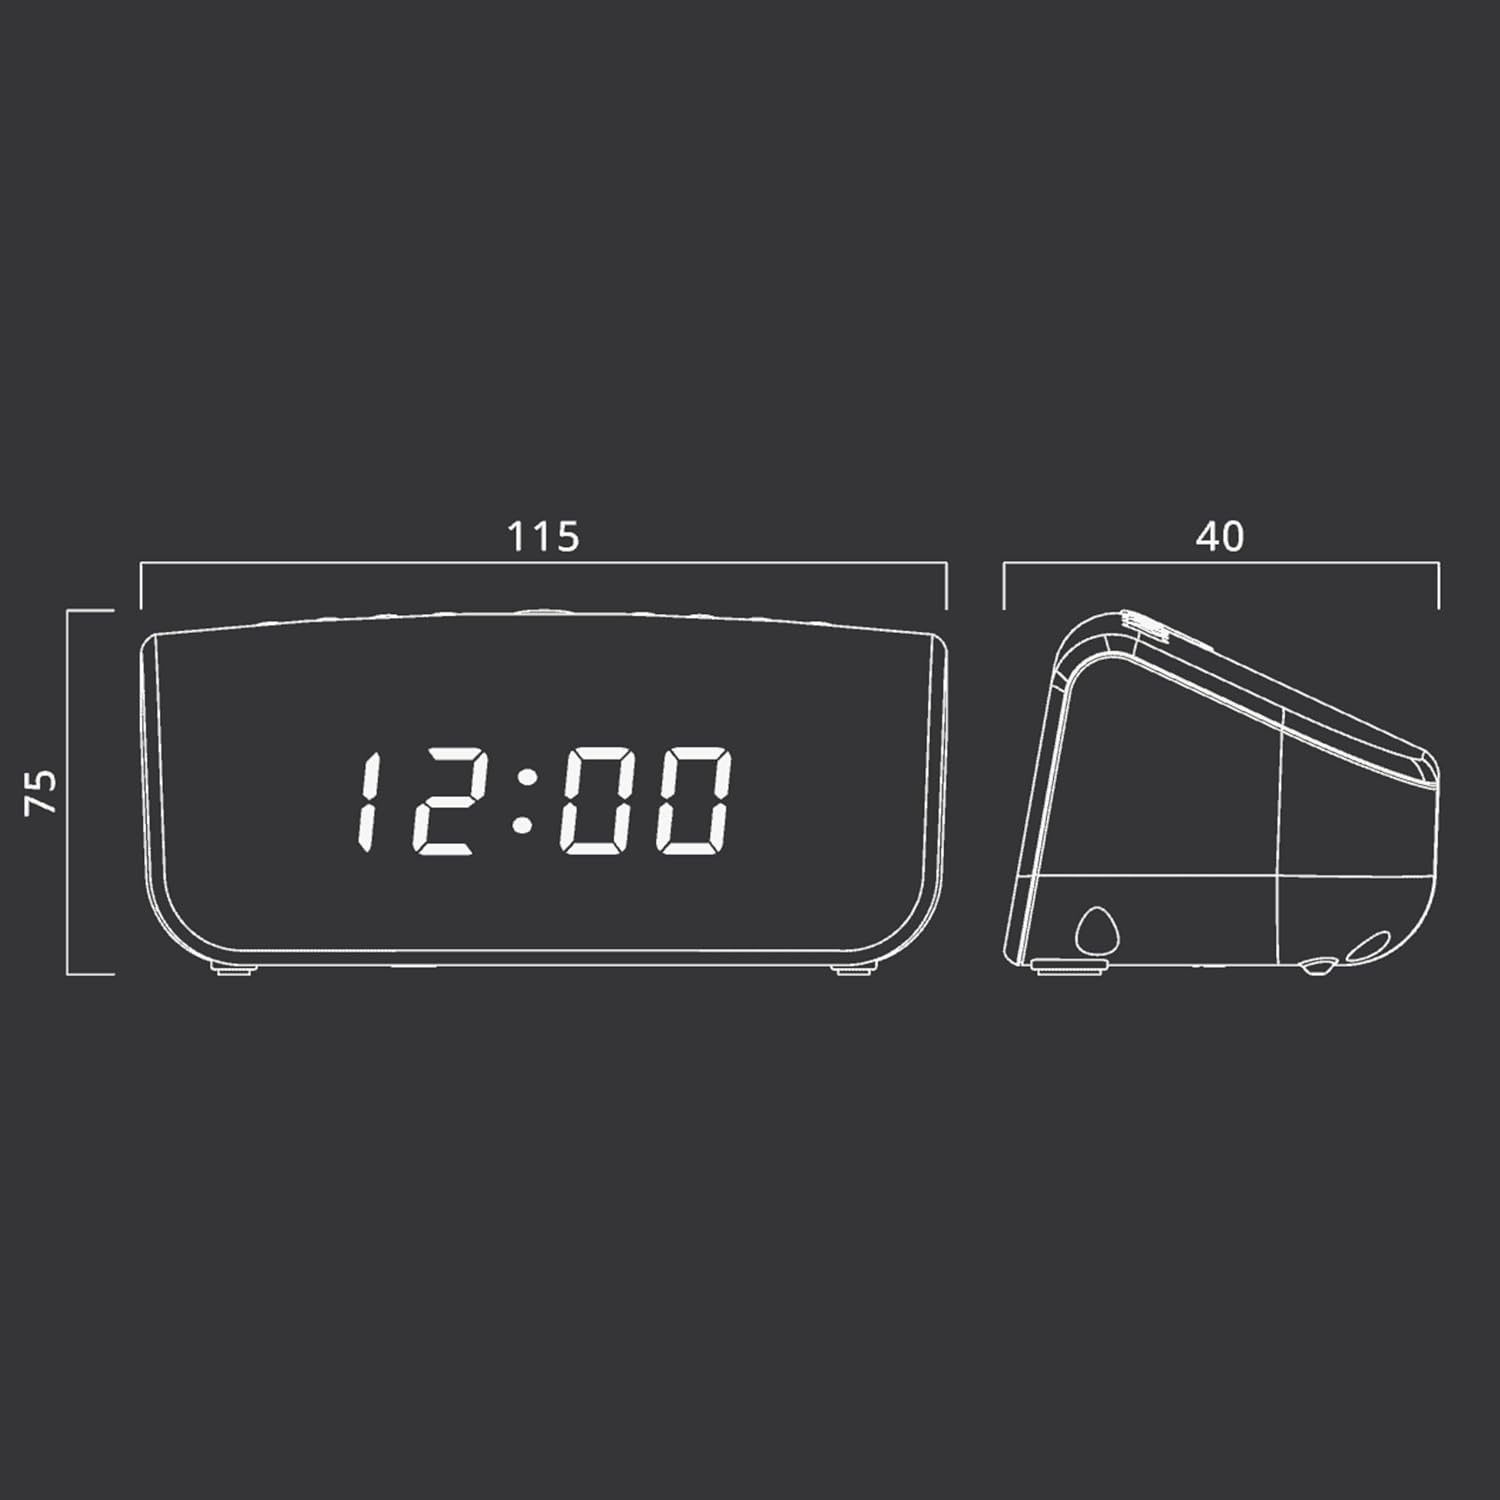
Figura 2: Approximate dimensions of the Muse M-12 CR unit.
Garantia e Suporte
For warranty information and technical support, please refer to the warranty card included with your product or visit the official Muse webGuarde o comprovante de compra como prova para eventuais solicitações de garantia.
For further assistance, please contact Muse customer service.


