1. Introdução
Obrigado pela compra.asing the Atlanta 1669/19 Quartz Alarm Clock. This digital alarm clock features a silent movement, a light sensor for automatic display illumination, and a snooze function. This manual provides detailed instructions for setup, operation, and maintenance to ensure optimal performance and longevity of your device.
2. Informações de segurança
- Mantenha o dispositivo longe de água e alta umidade.
- Avoid exposing the clock to direct sunlight or extreme temperatures.
- Não tente desmontar ou consertar o relógio por conta própria. Consulte um técnico qualificado.
- Descarte as baterias usadas de maneira responsável, de acordo com os regulamentos locais.
- Não misture pilhas velhas e novas, ou tipos diferentes de pilhas.
3. Conteúdo da embalagem
- Atlanta 1669/19 Quartz Alarm Clock Unit
- Manual do usuário (este documento)
Observação: as pilhas não estão incluídas e devem ser adquiridas separadamente.
4. Produto acabadoview
The Atlanta 1669/19 features a clear digital display, intuitive controls, and a light sensor for enhanced visibility in low-light conditions.
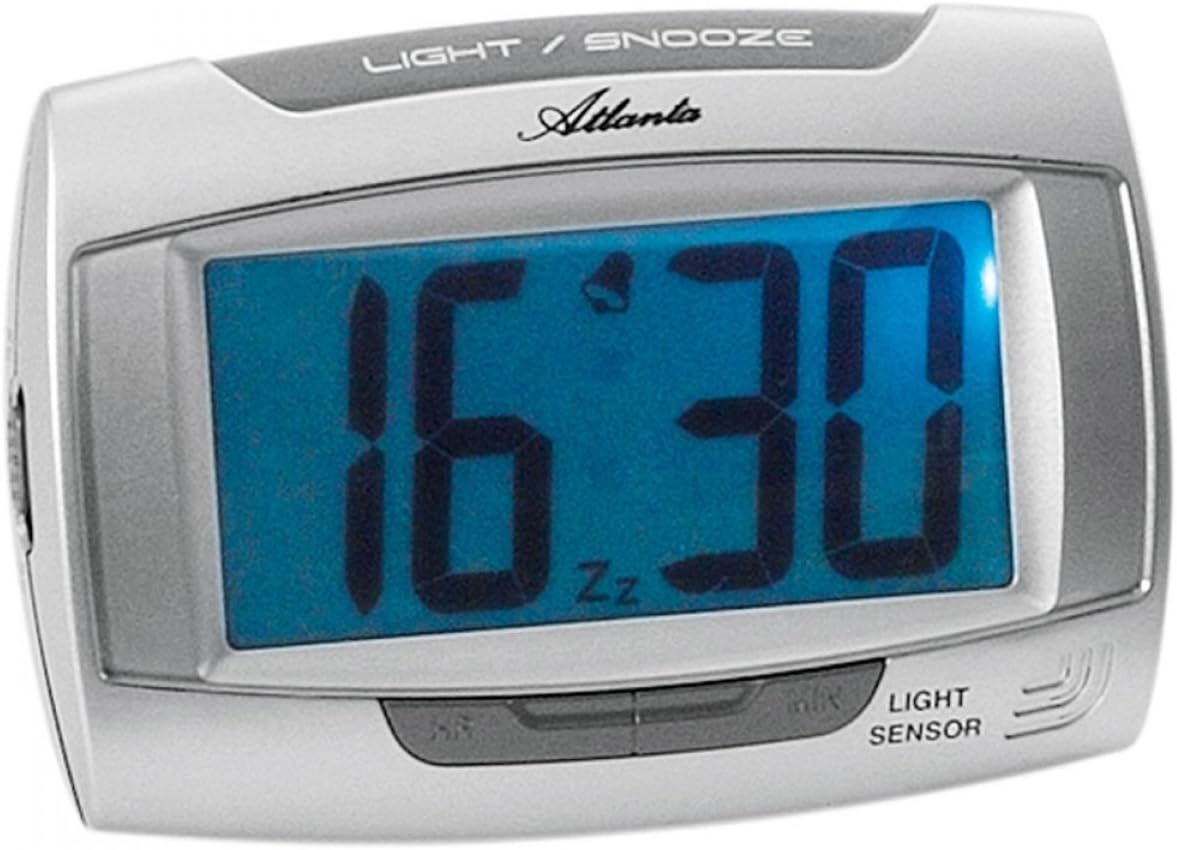
Figura 1: Frente view of the Atlanta 1669/19 Quartz Alarm Clock. The clock features a large digital display, a "LIGHT / SNOOZE" button at the top, and a "LIGHT SENSOR" indicator at the bottom right. The display shows the time 16:30, with an alarm bell icon and 'Zz' indicating snooze functionality.
Componentes principais:
- Tela digital: Shows time and alarm status.
- LIGHT / SNOOZE Button: Activates temporary backlight and snooze function.
- Sensor de luz: Automatically illuminates the display in dark environments.
- Control Buttons (Rear/Side): Para configurar a hora e o alarme.
- Battery Compartment (Rear): Contém as baterias necessárias.
5. Configuração
5.1. Instalação da bateria
- Localize a tampa do compartimento da bateria na parte traseira do despertador.
- Remova a tampa deslizando-a ou levantando-a.
- Insert the required batteries (typically 1x AA, refer to compartment markings) ensuring correct polarity (+ and -).
- Recoloque a tampa do compartimento da bateria com segurança.
5.2. Configuração inicial da hora
Upon battery installation, the display will typically show a default time. You will need to set the current time.
- Locate the time setting buttons, usually labeled "SET", "HOUR", and "MINUTE" or similar, on the back or side of the clock.
- Press the "SET" button (or equivalent) to enter time setting mode. The hour digits may start flashing.
- Use the "HOUR" button to adjust the hour.
- Press "SET" again to move to minute setting. The minute digits may start flashing.
- Use the "MINUTE" button to adjust the minutes.
- Press "SET" one more time to confirm and exit time setting mode.
6. Instruções de operação
6.1. Configurando o Alarme
- Locate the alarm setting buttons, typically labeled "ALARM SET", "ALARM HOUR", and "ALARM MINUTE" or similar.
- Press the "ALARM SET" button to enter alarm setting mode. The alarm hour digits may flash.
- Use the "ALARM HOUR" button to adjust the desired alarm hour.
- Press "ALARM SET" again to move to alarm minute setting. The alarm minute digits may flash.
- Use the "ALARM MINUTE" button to adjust the desired alarm minutes.
- Press "ALARM SET" one more time to confirm and exit alarm setting mode.
6.2. Ativar/Desativar o Alarme
There is usually a switch or button to turn the alarm on or off. Look for a switch labeled "ALARM ON/OFF" or an alarm icon button. When the alarm is active, an alarm icon (e.g., a bell) will typically appear on the display.
6.3. Função soneca
When the alarm sounds, press the large "LIGHT / SNOOZE" button located on the top of the clock. This will temporarily silence the alarm, and it will sound again after a few minutes (typically 5-9 minutes). The "Zz" icon on the display indicates that the snooze function is active.
6.4. Light Sensor and Display Backlight
- Automatic Backlight (Light Sensor): The clock is equipped with a light sensor. When enabled, the display will automatically illuminate with a soft, constant light in dark environments, making it easy to read the time at night without pressing any buttons. Look for a switch or button labeled "SENSOR ON/OFF" or similar to enable or disable this feature.
- Temporary Backlight: To briefly illuminate the display in any lighting condition, press the "LIGHT / SNOOZE" button on the top of the clock. The backlight will stay on for a few seconds and then turn off automatically.
7. Manutenção
- Limpeza: Wipe the clock with a soft, dry cloth. Do not use abrasive cleaners or solvents, as these may damage the casing ou exibição.
- Substituição da bateria: When the display dims or the clock stops functioning correctly, it is time to replace the batteries. Follow the battery installation steps in Section 5.1.
- Armazenar: If the clock will not be used for an extended period, remove the batteries to prevent leakage and damage.
8. Solução De Problemas
| Problema | Possível causa | Solução |
|---|---|---|
| O visor do relógio está apagado ou com brilho reduzido. | Baterias fracas ou descarregadas; instalação incorreta da bateria. | Substitua as pilhas por novas, certificando-se de que a polaridade está correta. |
| O alarme não dispara. | Alarm is not activated; alarm time is incorrect; low batteries. | Ensure alarm is switched ON (bell icon visible); verify alarm time setting; replace batteries. |
| Automatic backlight not working. | Light sensor feature is disabled; insufficient darkness. | Ensure the light sensor switch is ON; test in a completely dark room. |
| O horário está incorreto. | Time was not set correctly; batteries were removed/replaced. | Reset the current time following Section 5.2. |
9. Especificações
| Modelo | 1669/19 |
| Marca | Atlanta |
| Modo de operação | Digital |
| Características especiais | Alarm, Lighting (Light Sensor) |
| Material | Plástico |
| Material da estrutura | Plástico |
| Tipo de montagem | Mesa |
| Cor | Blue (display), Silver-coloured (case) |
| Pilhas necessárias | Yes (Type not specified, typically AA or AAA for such clocks) |
| Pilhas incluídas | Não |
| Dimensões (aprox.) | 11 x 7 cm |
10. Garantia e Suporte
Para informações sobre garantia ou suporte técnico, consulte a documentação fornecida no momento da compra ou entre em contato com o revendedor. Guarde o comprovante de compra para eventuais solicitações de garantia.


