1. Introdução
This manual provides detailed instructions for the installation, operation, and maintenance of your Foxconn TSAA725 ATX Tower Case. Please read this manual thoroughly before beginning installation to ensure proper setup and safe use of the product. Keep this manual for future reference.
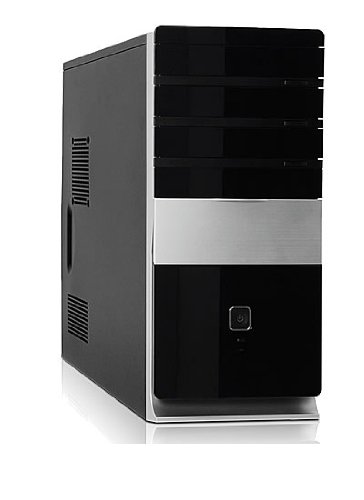
Imagem: Frente view of the Foxconn TSAA725 ATX Tower Case, showcasing its design and front panel ports.
2. Informações de segurança
Observe as seguintes precauções de segurança para evitar danos ao produto ou ferimentos a você mesmo:
- Always disconnect the power supply from the wall outlet before opening the computer case or performing any installation/maintenance.
- Handle internal components with care to avoid electrostatic discharge (ESD) damage. Use an anti-static wrist strap if available.
- Assegure-se de que haja ventilação adequada ao redor do gabinete para evitar superaquecimento.
- Do not expose the case to moisture or extreme temperatures.
- Mantenha as peças pequenas longe das crianças.
3. Conteúdo da embalagem
Verifique se todos os itens estão presentes na embalagem:
- Foxconn TSAA725 ATX Tower Case
- Fonte de alimentação de 350 W (pré-instalada)
- Kit de acessórios (parafusos, espaçadores, abraçadeiras)
- Este manual de instruções
4. Principais características
The Foxconn TSAA725 ATX Tower Case offers the following features:
- Material: 0.5mm SGCC Alloy Steel construction for durability.
- Suporte para placa-mãe: Compatible with ATX and Micro ATX motherboards.
- Baias de unidade:
- 3x 5.25" External Bays
- 2x 3.5" External Bays
- 4x 3.5" Internal Bays
- Sistema de refrigeração:
- 1x 80/92/120mm rear fan support (fan not included)
- Optional 1x 80/92/120mm front fan support (fan not included)
- 80mm Air Duct for CPU cooling.
- Painel de E/S frontal:
- 2 portas USB 2.0
- 1x Conector para fone de ouvido
- 1x Microphone jack
- Fonte de energia: Integrated 350W Power Supply.
5. Configuração e Instalação de Componentes
Follow these steps to install your computer components into the Foxconn TSAA725 case:
- Prepare o caso:
Place the case on a flat, stable surface. Remove the side panel(s) by unscrewing the thumbscrews at the rear of the case and sliding the panel backward.
- Instalar placa-mãe:
Install the necessary standoffs onto the motherboard tray according to your motherboard's form factor (ATX or Micro ATX). Carefully place the motherboard onto the standoffs, aligning the screw holes. Secure the motherboard with screws provided in the accessory kit.
- Install Drives (HDD/SSD):
For 3.5" internal drives, slide the drive into an available 3.5" internal bay and secure it with screws from the side. For 5.25" external drives (e.g., optical drives), remove the front panel bay cover, slide the drive in from the front, and secure it with screws.
- Instalar placas de expansão:
Remove the appropriate expansion slot covers at the rear of the case. Insert your graphics card or other expansion cards into the PCIe/PCI slots on the motherboard and secure them with screws.
- Cabos de conexão:
Connect the power supply cables to the motherboard (24-pin ATX, 4/8-pin CPU), graphics card (if applicable), and drives (SATA power). Connect the front panel cables (USB, audio, power switch, reset switch, LED indicators) to the corresponding headers on the motherboard. Refer to your motherboard manual for header locations.
- Gerenciamento de cabos:
Route cables neatly to improve airflow and aesthetics. Use cable ties from the accessory kit if needed.
- Feche o caso:
Once all components are installed and cables are connected, reattach the side panel(s) and secure them with the thumbscrews.
6. Instruções de operação
After successful assembly, connect your peripherals (monitor, keyboard, mouse) and power cable to the case. Press the power button on the front panel to start your computer.
Portas de E/S do painel frontal:
- Portas USB 2.0: Para conectar dispositivos USB, como teclados, mouses e dispositivos de armazenamento externo.
- Plug do fone de ouvido: Para conectar fones de ouvido ou alto-falantes.
- Tomada para microfone: Para conectar um microfone.
- Botão de energia: Para ligar ou desligar o computador.
- Botão de reinicialização: To restart the computer.
7. Manutenção
Regular maintenance helps ensure optimal performance and longevity of your computer case:
- Limpeza de pó: Periodically clean dust from inside the case, especially from fans and heatsinks, using compressed air. Ensure the computer is powered off and unplugged before cleaning.
- Limpeza externa: Limpe a parte externa da capa com um pano macio e seco.amp pano. Evite produtos de limpeza abrasivos ou solventes.
- Gerenciamento de cabos: Verifique periodicamente o roteamento dos cabos para garantir que nenhum cabo esteja obstruindo o fluxo de ar ou o funcionamento do ventilador.
8. Solução De Problemas
Caso encontre algum problema, consulte as seguintes soluções comuns:
- Computer does not power on:
- Ensure the power cable is securely connected to both the case's power supply and the wall outlet.
- Check if the power supply switch (if present) is in the 'ON' position.
- Verifique se o cabo do botão liga/desliga do painel frontal está conectado corretamente à placa-mãe.
- Nenhuma imagem exibida no monitor:
- Ensure the monitor is powered on and connected to the correct video output on your graphics card or motherboard.
- Reinstale a placa gráfica e os módulos de RAM.
- Portas USB não funcionam:
- Verify that the front panel USB cables are correctly connected to the motherboard's USB headers.
- Tente conectar o dispositivo a uma porta USB diferente.
9. Especificações
| Recurso | Detalhe |
|---|---|
| Marca | FOXCONN |
| Modelo | TSAA725-ISO450 |
| Material | 0.5mm SGCC Alloy Steel |
| Compatibilidade da placa-mãe | ATX, Micro ATX |
| Drive Bays (External) | 3x 5.25", 2x 3.5" |
| Drive Bays (Internal) | 4x 3.5" |
| Suporte do sistema de resfriamento | 1x 80/92/120mm rear fan, 1x 80/92/120mm front fan (optional), 80mm Air Duct |
| Portas de E / S frontais | 2x USB 2.0, 1x Headphone, 1x Microphone |
| Fonte de energia | 350W (Integrated) |
| Dimensões do produto (CxLxA) | 50.17 x 24.13 x 54.61 cm |
| Peso do item | 6.96 kg |
10. Garantia e Suporte
For warranty information and technical support, please refer to the official Foxconn webConsulte o site ou entre em contato com o revendedor local. Guarde o comprovante de compra para eventuais solicitações de garantia.
Recursos on-line: For additional support and updated drivers, visit the official Foxconn support page.
Observação: Os termos da garantia podem variar conforme a região.


