1. Introdução
Thank you for choosing the Ground Zero GZIA 4115HPX 4-Channel Car Audio Ampmais vivo. Esse amplifier is designed to deliver high-quality audio performance for your vehicle's sound system. This manual provides essential information for the proper installation, operation, and maintenance of your ampAmplificador. Leia este manual atentamente antes de tentar a instalação ou operação para garantir o melhor desempenho e segurança.
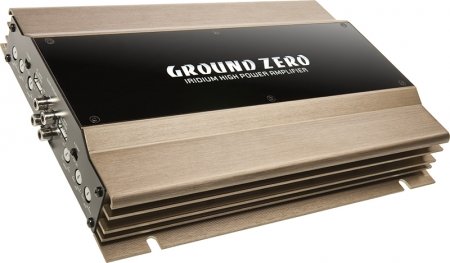
Figure 1: Ground Zero GZIA 4115HPX 4-Channel Car Audio Amplifier. This image displays the external casing do amplifier, highlighting its compact design and heat sink fins.
2. Instruções de segurança
Informações importantes de segurança: Improper installation or use can lead to serious injury, damage to the amplifier, or damage to your vehicle.
- Sempre desconecte o terminal negativo da bateria do veículo antes de iniciar qualquer trabalho elétrico.
- Ensure all wiring is properly routed and secured to prevent pinching, chafing, or short circuits.
- Use appropriate gauge wiring for power, ground, and speaker connections as recommended by the manufacturer.
- Install a fuse or circuit breaker on the main power wire as close to the battery as possible.
- Evite montar o ampAmplificador em locais expostos à luz solar direta, calor excessivo, umidade ou poeira.
- Não opere o amplifier if it is damaged or malfunctioning. Seek professional assistance.
- Mantenha o amplifier's ventilation areas clear to prevent overheating.
3. Configuração e instalação
A instalação correta é crucial para o desempenho e a longevidade do seu produto. amplifier. If you are unsure about any part of the installation process, consult a professional car audio installer.
3.1 Desembalagem
Remova cuidadosamente o amplifier from its packaging. Inspect the unit for any signs of damage that may have occurred during shipping. Retain the packaging for future transport or service needs.
3.2 Montagem
The GZIA 4115HPX amplifier is designed for surface mount installation. Choose a mounting location that is:
- Secure and stable, preventing vibration.
- Well-ventilated to allow for proper heat dissipation.
- Protegido da umidade e da luz solar direta.
- Acessível para fiação e ajustes.
Utilize os parafusos de montagem fornecidos para fixar o amplifier to a solid surface in your vehicle. Ensure no existing wiring, fuel lines, or brake lines are damaged during drilling.
3.3 Conexões de Fiação
Refer to the connection diagrams below for proper wiring. All connections should be tight and secure to prevent signal loss or electrical issues.
3.3.1 Fiação de alimentação e aterramento
- Potência (B+): Connect a suitable gauge power cable directly from the positive terminal of the vehicle's battery to the amplifier's B+ terminal. Install an inline fuse (not included) within 18 inches (45 cm) of the battery.
- Terra (GND): Conecte um cabo de aterramento de bitola adequada a partir do amplifier's GND terminal to a clean, unpainted metal surface of the vehicle's chassis. Ensure a good electrical connection. The ground cable should be as short as possible.
- Remoto (REM): Conecte um fio de acionamento remoto da saída remota da sua unidade principal ao ampTerminal REM do amplificador. Este fio ativa o ampLigar e desligar o amplificador com a unidade principal do seu aparelho.
3.3.2 Fiação do alto-falante
The GZIA 4115HPX is a 4-channel amplifier. Connect your speakers to the corresponding speaker output terminals (CH1, CH2, CH3, CH4). Ensure correct polarity (+ to + and - to -) for each speaker.
- For stereo operation, connect one speaker per channel.
- For bridged operation (e.g., for a subwoofer), refer to the specific bridging instructions on the amplifier or in a detailed wiring diagram.
3.3.3 Conexões de entrada RCA
Conecte os cabos RCA das entradas pré-amplificadas da sua unidade principal...amp saídas para o amplifier's RCA input jacks (INPUT CH1/2, INPUT CH3/4).

Figura 2: interno view of the Ground Zero GZIA 4115HPX amplifier's circuit board. This image shows the internal components, including capacitors, resistors, and the transformer, which are responsible for audio processing and power delivery.

Figure 3: Detailed internal view of the Ground Zero GZIA 4115HPX amplifier. This image provides a closer look at the power supply section and output stage components, indicating the amplifier's robust construction.
3.4 Ajustes Iniciais
Before powering on, ensure all connections are correct and secure.
- Controle de Ganho: Set the gain controls (LEVEL) on the amplifier to their minimum position.
- Configurações de cruzamento: Se o seu amplifier has built-in crossovers (HPF/LPF), set them according to your speaker type. For full-range speakers, you might use the HPF (High Pass Filter) to protect them from low frequencies. For subwoofers, use the LPF (Low Pass Filter).
4. Operando o Ampmais vivo
Uma vez instalado, o amplifier will turn on automatically with your head unit via the remote wire.
4.1 Setting Gain Levels
The gain control is not a volume knob; it matches the output voltage of your head unit to the input sensitivity of the ampmais vivo.
- Turn your head unit volume to about 75-80% of its maximum.
- Aumente lentamente o ampAjuste o controle de ganho do amplificador até ouvir uma leve distorção e, em seguida, reduza-o um pouco até que o som fique nítido.
- Repeat for all channels if independent gain controls are present.
4.2 Adjusting Crossovers and Bass Boost
- Filtro passa-alta (HPF): Used for full-range speakers to block low frequencies that they cannot reproduce effectively. Adjust to protect speakers and improve clarity.
- Filtro passa-baixo (LPF): Used for subwoofers to allow only low frequencies to pass through. Adjust to blend with your main speakers.
- Reforço de graves: Use sparingly. Excessive bass boost can lead to distortion and potential damage to speakers or the amplifier. Adjust to enhance low-frequency response as desired, but avoid overdriving the system.
5. Manutenção
The Ground Zero GZIA 4115HPX ampO amplificador requer manutenção mínima.
- Limpeza: Limpe periodicamente a parte externa do ampLimpe o aspirador com um pano macio e seco para remover a poeira. Não utilize produtos químicos agressivos ou abrasivos.
- Ventilação: Assegurar que o amplifier's heat sink fins and surrounding area remain free of obstructions to allow for proper airflow and cooling.
- Verificação de conexão: Occasionally check all power, ground, remote, and speaker connections to ensure they remain tight and free of corrosion.
6. Solução De Problemas
Se você tiver problemas com seu ampSe você tiver problemas com o amplificador, consulte o guia de solução de problemas a seguir antes de entrar em contato com o suporte.
| Problema | Possível causa | Solução |
|---|---|---|
| AmpO amplificador não liga (nenhum indicador de energia). |
|
|
| Nenhum som dos alto-falantes. |
|
|
| Som distorcido ou de má qualidade. |
|
|
| Amplifier overheats (protection light on). |
|
|
7. Especificações
The following are the technical specifications for the Ground Zero GZIA 4115HPX 4-Channel Car Audio Ampmais vital:
| Recurso | Detalhe |
|---|---|
| Número do modelo | GZIA 4115HPX |
| Número de canais | 4 |
| Output Channel Quantity | 4 |
| Volumetage | 14.4 Volts |
| O quetage (máx.) | 500 Watts |
| Tipo de montagem | Montagem em superfície |
| Peso do item | 2 kg 900 g |
| Dimensões da embalagem | 43.4 x 25 x 7.9 cm |
| ASIN | B006VTSQ8C |
8. Informações de garantia
Ground Zero products are designed and manufactured to the highest quality standards. For detailed warranty terms and conditions, please refer to the warranty card included with your product or visit the official Ground Zero webGuarde seu comprovante de compra para eventuais solicitações de garantia.
9. Suporte ao cliente
If you require further assistance or have questions not covered in this manual, please contact Ground Zero customer support or your authorized dealer. Contact information can typically be found on the official Ground Zero website.


