1. Introdução
This manual provides essential information for the proper installation, operation, maintenance, and troubleshooting of your new DB Electrical ADR0410 Alternator. Designed for heavy-duty vehicle applications, this alternator delivers reliable power to your vehicle's electrical system. Please read this manual thoroughly before installation and operation to ensure safety and optimal performance.
2. Informações de segurança
Always prioritize safety when working with vehicle electrical systems. Failure to follow safety precautions can result in serious injury or damage to the vehicle.
- Disconnect the vehicle's battery before beginning any installation or maintenance work.
- Utilize equipamento de proteção individual (EPI) adequado, incluindo óculos de segurança e luvas.
- Certifique-se de que o veículo esteja desligado e o freio de estacionamento acionado.
- Evite o contato com componentes quentes do motor.
- Consult a qualified mechanic if you are unsure about any step of the installation or repair process.
- Keep tools and work area clean and organized.
Aviso da Proposta 65: Este produto pode conter substâncias químicas que o Estado da Califórnia reconhece como causadoras de câncer, defeitos congênitos ou outros danos reprodutivos. Para mais informações, visite [link para o site do Estado da Califórnia]. www.P65Warnings.ca.gov.
3. Produto acabadoview
The DB Electrical ADR0410 is a new aftermarket alternator designed to meet OEM specifications for various heavy-duty trucks. It features a 12-volt system with 155 amperage output, an internal regulator (IR), and an external fan (EF).

Figura 3.1: Frente view of the DB Electrical ADR0410 Alternator, showing the pulley and mounting points.
Principais características:
- Tipo de unidade: Alternador
- Volumetage: 12V
- Ampidade: 155A
- Rotação: BI (Bi-directional)
- Regulador: IR (Internal Regulator)
- Tipo de ventilador: EF (External Fan)
Modelos de veículos compatíveis:
This alternator is compatible with a wide range of heavy-duty vehicles. Please verify fitment for your specific vehicle before purchase and installation.
- FREIGHTLINER: Argosy (2000-2002), C112/C120 Century Class (1999-2004), Classic (1999-2004), Columbia (1999-2004), FLD 112/120 (1998-2003)
- INTERNACIONAL: 8100-8600 Heavy-Duty (1998-2000), 9100-9900 Heavy-Duty (1997-2000)
- KENWORTH: C500 (1996-2003), T2000 (1996-2004), T600/T800 (1996-2005), W900 (1996-2005)
- PETERBILT: 357 (1996-2005), 359 (1996-2003), 362 (1996-2003), 375 (1996-2001), 377 (1996-2000), 378 (1996-2005), 379 (1996-2005), 385 (1996-2005), 387 (2000-2005)
- STERLING: A-Line A9500/AT9500 (1999-2004), Condor (1999-2003), L-Line 7500/8000/8500/9500 (1999-2004), Silver Star Series (1999-2001)
- VOLVO: ACL42/ACL64 Series (1997-2002), FE42 (1997-1998), WA/WC/WG/WH/WI/WX Series (1997-2001)
- WESTERN STAR: All Models (By Engine) (1997-2004)
4. Instalação
Proper installation is crucial for the performance and longevity of your alternator. If you are not experienced with automotive electrical systems, it is recommended to seek professional assistance.
Ferramentas e materiais necessários:
- Conjunto de Soquetes/Chaves
- Limpador de terminal de bateria
- Escova de aço
- Multímetro (para teste)
- Óculos e luvas de segurança
Etapas de instalação:
- Prepare o veículo:
- Ensure the vehicle engine is off and cool.
- Locate the vehicle battery and disconnect the negative (-) terminal first, followed by the positive (+) terminal. This prevents accidental short circuits.
- Securely store the disconnected battery cables away from the battery terminals.
- Remove the Old Alternator:
- Identify and label all electrical connections to the old alternator (e.g., battery cable, field wire, sense wire). Take photos if necessary for reference.
- Carefully disconnect all electrical wires from the old alternator.
- Loosen and remove the tensioner bolt and any mounting bolts securing the old alternator.
- Remove the serpentine belt from the alternator pulley.
- Carefully remove the old alternator from its mounting bracket.
- Prepare the New Alternator:
- Inspect the new DB Electrical ADR0410 Alternator for any shipping damage.
- Compare the new alternator with the old one to ensure it is the correct replacement part, paying attention to mounting points and electrical connections.
- Clean any corrosion or debris from the vehicle's mounting bracket and electrical connectors using a wire brush or terminal cleaner.
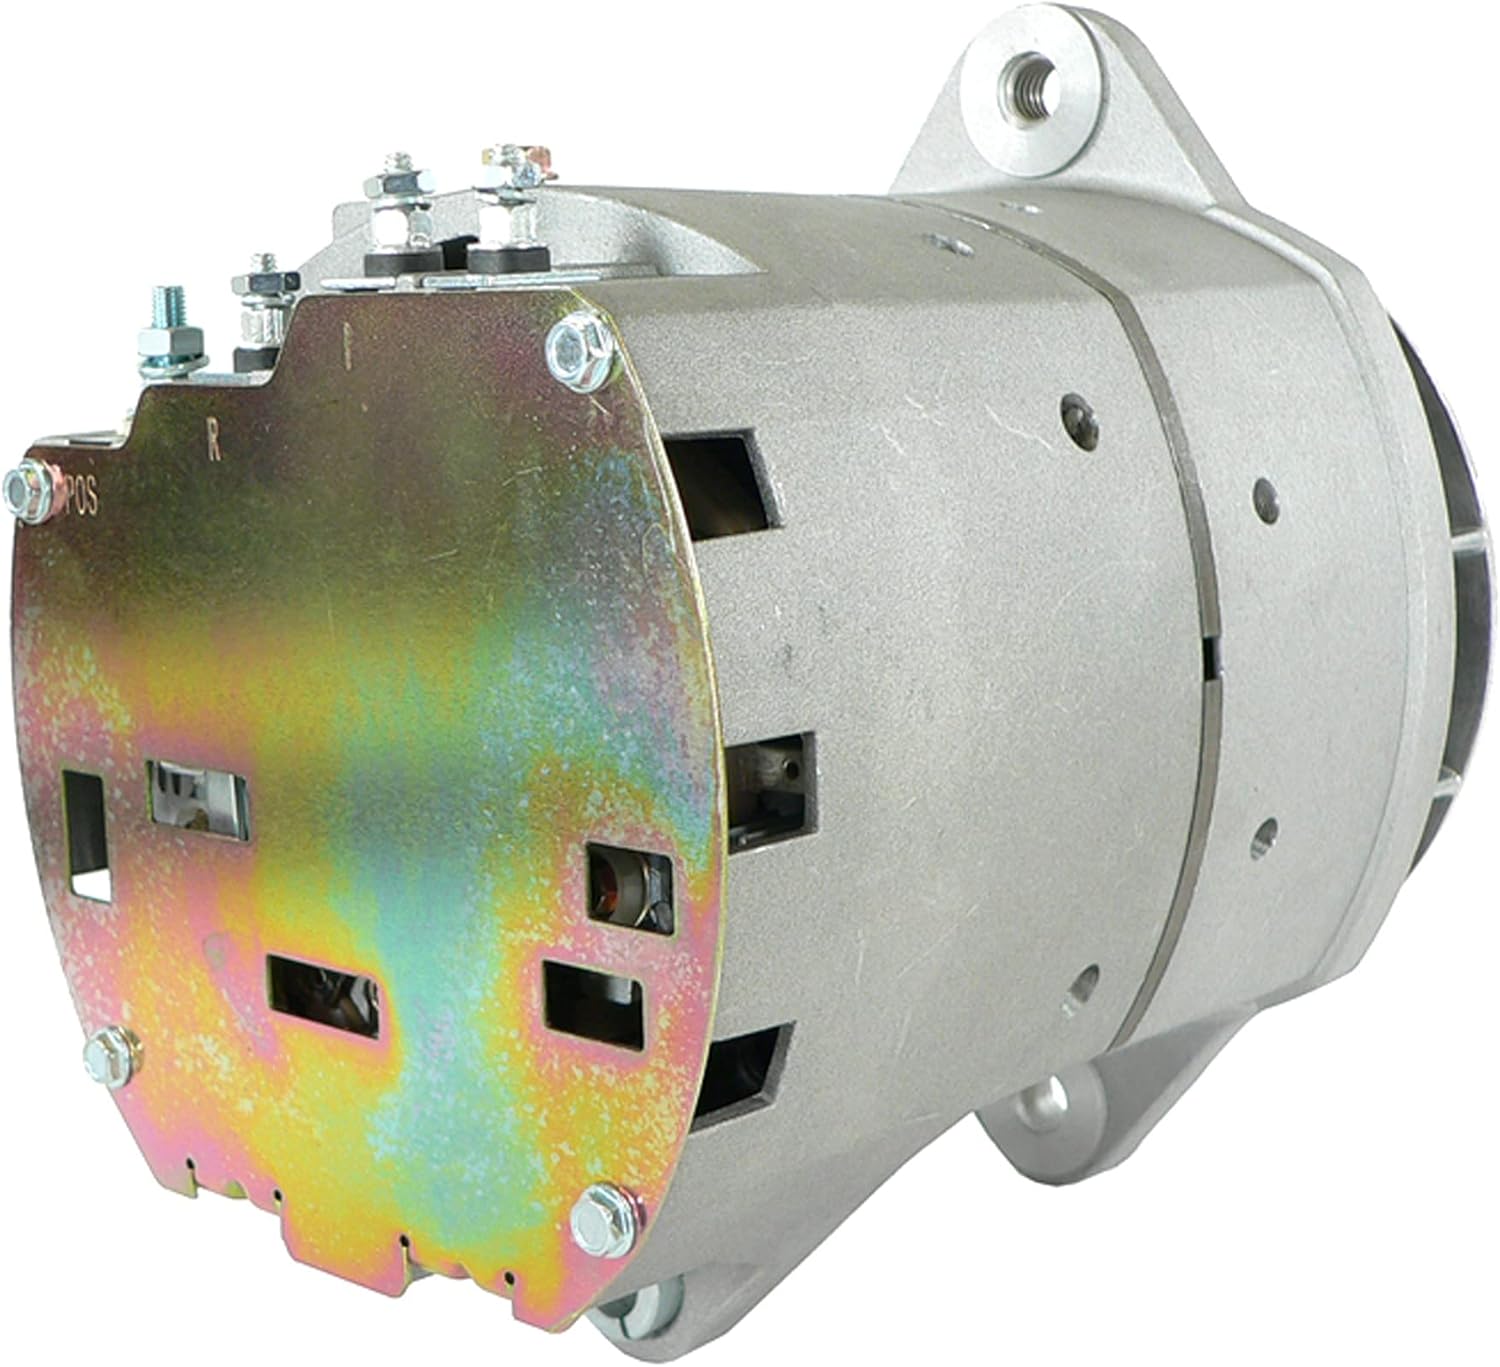
Figura 4.1: Traseira view of the alternator, highlighting the electrical connection points (POS, R, I).
- Install the New Alternator:
- Position the new alternator onto its mounting bracket.
- Insert and hand-tighten the mounting bolts. Do not fully tighten yet.
- Reinstall the serpentine belt onto the alternator pulley. Ensure the belt is correctly routed according to the vehicle's diagram.
- Adjust the belt tensioner to achieve the correct belt tension as specified by the vehicle manufacturer.
- Fully tighten all mounting bolts to the manufacturer's torque specifications.
- Reconnect Electrical Wires:
- Reconnect all electrical wires to the new alternator, matching them to the labels or photos taken during removal. Ensure connections are clean and secure.
- Reconnect the positive (+) battery terminal first, then the negative (-) battery terminal.

Figura 4.2: Detalhado view of the alternator's electrical terminals, ensuring proper connection.
- Teste o sistema:
- Ligue o motor do veículo.
- Observe the dashboard warning lights. The battery or charging system warning light should turn off.
- Usando um multímetro, verifique o voltage across the battery terminals with the engine running. It should typically read between 13.8V and 14.8V, indicating proper charging.
- Turn on various electrical accessories (headlights, radio, HVAC fan) and recheck the voltage. It should remain within the healthy range.
5. Princípios de operação
The alternator is a key component of your vehicle's charging system. Its primary function is to convert mechanical energy from the engine into electrical energy to power the vehicle's electrical components and recharge the battery.
- When the engine is running, the serpentine belt drives the alternator pulley, spinning the rotor inside the alternator.
- This rotation generates an alternating current (AC) through electromagnetic induction.
- The internal rectifier converts this AC into direct current (DC), which is what the vehicle's electrical system and battery require.
- O vol internotagO regulador monitora a tensão do sistema.tage and adjusts the alternator's output to maintain a stable charging voltage, preventing overcharging or undercharging of the battery.
A properly functioning alternator ensures that your vehicle's battery remains charged and all electrical systems operate correctly while the engine is running.
6. Manutenção
While alternators are generally low-maintenance components, periodic checks can help ensure their longevity and prevent unexpected failures.
- Inspeção da correia: Regularly check the serpentine belt for cracks, fraying, or excessive wear. Ensure it has the correct tension. A loose belt can cause the alternator to slip and undercharge.
- Conexões de fiação: Periodically inspect all electrical connections to the alternator for corrosion, looseness, or damage. Clean terminals as needed.
- Saúde da bateria: A weak or failing battery can put excessive strain on the alternator. Ensure your battery is in good condition and holds a charge.
- Verificação de ruído: Listen for unusual noises coming from the alternator, such as grinding or squealing, which could indicate worn bearings or a failing pulley.
- Inspeção visual: Look for any signs of oil leaks, physical damage, or excessive dirt buildup on the alternator.
7. Solução De Problemas
If you experience issues with your vehicle's charging system, the following table provides common symptoms and potential solutions.
| Sintoma | Possível causa | Solução |
|---|---|---|
| Battery warning light on dashboard | Failing alternator, loose/damaged belt, faulty wiring, dead battery | Check belt tension and condition. Inspect wiring. Test battery and alternator output with a multimeter. Replace faulty component. |
| Dim headlights or interior lights | Volume de carregamento baixotage from alternator, weak battery | Test alternator output. Check battery voltage. Ensure all connections are clean and tight. |
| Bateria não segura carga | Alternator not charging, parasitic drain, old battery | Test alternator output. Have battery tested. Check for electrical drains when vehicle is off. |
| Squealing noise from engine bay | Loose or worn serpentine belt, worn alternator pulley bearing | Inspect and adjust belt tension or replace belt. If noise persists, inspect alternator pulley and bearings. |
| Burning rubber smell | Slipping serpentine belt | Check belt tension and condition. Replace belt if worn. |
Se as etapas de resolução de problemas não solucionarem o problema, recomenda-se consultar um técnico automotivo certificado.
8. Especificações
Detailed technical specifications for the DB Electrical ADR0410 Alternator:
| Especificação | Valor |
|---|---|
| Tipo de unidade | Alternador |
| Volumetage | 12V |
| Ampidade | 155A |
| Rotação | BI (Bi-directional) |
| Tipo de regulador | IR (Internal Regulator) |
| Tipo de ventilador | EF (External Fan) |
| Peso do item | 26.4 libras |
| Dimensões do produto | 9.28 x 5.46 x 6.14 polegadas |
| Número da peça do fabricante | 400-12309 |
| Números de peça OEM substituídos | ARROWHEAD: ADR0410, D8600126, D8700046; DELCO: 10459615, 19011225, 8600072, 8600082, 8600126, 8600177, 8700041, 8700046; J & N: 400-12309; LESTER: 8598, 8604, 8605, 8612; NSA: ALT-3602 |
9. Garantia e Suporte
Informações sobre garantia:
DB Electrical provides a Garantia de 1 ano on this aftermarket alternator. This warranty protects you after your purchase, ensuring that the product will work flawlessly once installed in your vehicle. In the rare event that the product does not perform as expected, DB Electrical will replace it anytime within one year of your order date.
Suporte ao cliente:
If you encounter any problems with your DB Electrical ADR0410 Alternator or require assistance, please contact DB Electrical customer support. They are committed to assisting you with replacements or any product-related inquiries.
For support, please refer to the contact information provided with your purchase or visit the official DB Electrical website.


