Instruções importantes de segurança
Please read and save these important safety instructions before using this fan. Failure to follow these instructions may result in electric shock, fire, or serious personal injury.
- Desligue sempre o ventilador da tomada antes de limpá-lo ou realizar qualquer manutenção.
- Não opere nenhum ventilador com o cabo ou plugue danificado.
- Mantenha o ventilador longe da água e da umidade.
- Certifique-se de que o ventilador esteja colocado em uma superfície estável e nivelada para evitar que tombe.
- Não introduza os dedos ou quaisquer objetos pela grelha quando a ventoinha estiver em funcionamento.
- Este ventilador destina-se apenas ao uso interno.
Produto acimaview
The PELONIS FS40-8JR is a 16-inch oscillating pedestal fan designed to provide efficient airflow and cooling in various indoor environments. Its adjustable height and wide-angle oscillation ensure comprehensive air distribution.
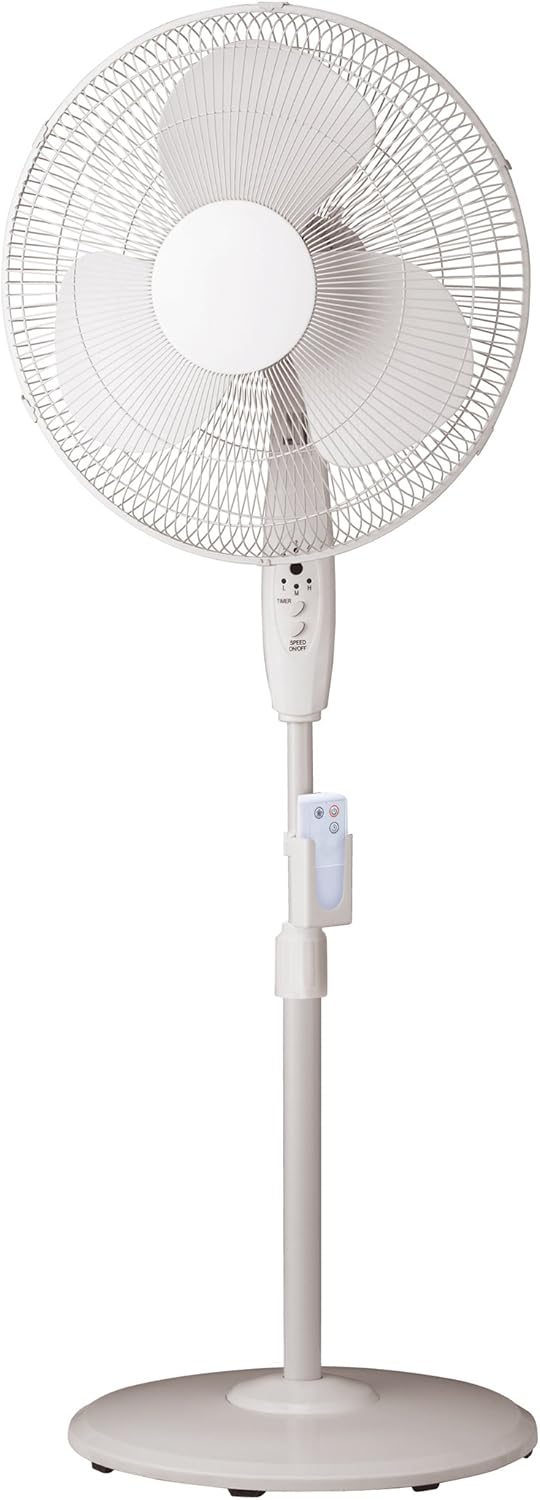
Figure 1: PELONIS FS40-8JR Pedestal Fan. This image displays the complete fan assembly, highlighting its white finish, the protective grille, fan blades, central control panel, the adjustable stand with a remote control holder, and the stable round base.
Principais características:
- Wide-angle oscillation and tilt for broad air coverage.
- Convenient 4-hour timer function.
- Remote control with a dedicated holder for easy access.
- Adjustable height to suit different cooling needs.
- Stable round base for secure placement.
- Three-speed settings (Low, Medium, High).
Lista de peças
Before assembly, ensure all parts are present and undamaged. Refer to the diagram in the Product Overview section for visual identification.
- Grade frontal
- Grade Traseira
- Pás de ventilador
- Carcaça do motor
- Painel de controle
- Haste de suporte ajustável
- Base Redonda
- Controle remoto
- Suporte de controle remoto
- Fasteners (nuts, screws, washers - specific types may vary)
Configuração e montagem
Minimal assembly is required to set up your PELONIS pedestal fan. Follow these steps carefully:
- Monte a base: Attach the adjustable stand pole securely to the round base using the provided fasteners. Ensure it is stable and upright.
- Attach Motor Housing: Mount the motor housing onto the top of the adjustable stand pole. Secure it firmly.
- Instalar a grade traseira: Place the rear grille onto the motor housing, aligning it correctly.
- Montagem das pás do ventilador: Carefully slide the fan blades onto the motor shaft. Secure them with the retaining cap or nut.
- Attach Front Grille: Position the front grille over the fan blades and secure it to the rear grille using the clips or screws provided. Ensure the grille is fully closed and locked for safety.
- Insira as pilhas do controle remoto: Open the battery compartment on the remote control and insert 3 AAA batteries (not included), observing polarity.
- Fixar suporte para controle remoto: Clip the remote control holder onto the adjustable stand pole at a convenient height.
Once assembled, place the fan on a firm, level surface and plug it into a standard electrical outlet.
Instruções de operação
Your PELONIS fan can be operated using the control panel on the fan unit or the included remote control.
Funções do painel de controle:
- Ligar/desligar: Press the "ON/OFF" button to turn the fan on or off.
- Controle de velocidade: Press the "SPEED" button repeatedly to cycle through Low (L), Medium (M), and High (H) speed settings.
- Temporizador: Press the "TIMER" button to set the fan to operate for a specific duration (e.g., 1, 2, 4 hours). The fan will automatically turn off after the set time.
- Oscilação: Press the "OSC" button (if present on the panel, otherwise use remote) to activate or deactivate the oscillation function, allowing the fan head to sweep from side to side.
Funções do controle remoto:
The remote control provides convenient operation from a distance. Ensure the remote is pointed towards the fan's control panel for optimal response.
- Botão de energia: Liga ou desliga o ventilador.
- Botões de velocidade: Separate buttons for Low, Medium, and High speeds, or a single button to cycle through them.
- Botão do temporizador: Define o temporizador de funcionamento.
- Botão de oscilação: Activates or deactivates the oscillation feature.
Ajuste de altura e inclinação:
- Altura: Loosen the height adjustment knob on the stand pole, raise or lower the fan to the desired height, and then tighten the knob securely.
- Inclinar: Gently push the fan head up or down to adjust the vertical angle of airflow.
Manutenção e Limpeza
A limpeza e a manutenção regulares ajudarão a garantir a longevidade e o desempenho ideal do seu ventilador.
- Desligue sempre o ventilador da tomada. Desligue da tomada antes de limpar.
- Limpeza externa: Use um pano macio e macioamp cloth to wipe down the exterior surfaces of the fan. Do not use abrasive cleaners or solvents.
- Limpeza da grelha: Dust and lint can accumulate on the grilles and blades. Periodically remove the front grille (refer to assembly instructions in reverse) to clean the fan blades and inside of the grilles with a soft cloth or vacuum cleaner. Ensure all parts are dry before reassembling.
- Armazenar: Quando não estiver em uso por longos períodos, guarde o ventilador em local fresco e seco, de preferência em sua embalagem original, para protegê-lo contra poeira e danos.
Solução de problemas
Se você tiver problemas com o seu ventilador, consulte a tabela a seguir para problemas comuns e suas soluções.
| Problema | Possível causa | Solução |
|---|---|---|
| O ventilador não liga. | Not plugged in; Power outlet not working; Fan switch off. | Ensure fan is securely plugged into a working outlet; Check household circuit breaker; Press the power button on the fan or remote. |
| Fluxo de ar fraco. | Fan speed set too low; Grilles or blades are dirty. | Increase fan speed; Clean the fan grilles and blades as per maintenance instructions. |
| Ventilador é barulhento. | Loose parts; Fan not on a level surface; Obstruction. | Check for loose screws or components and tighten; Place fan on a stable, level surface; Ensure nothing is obstructing the fan blades. |
| O controle remoto não funciona. | Pilhas descarregadas ou inseridas incorretamente; Obstrução entre o controle remoto e o ventilador. | Replace batteries (3 AAA); Ensure correct polarity; Remove any obstructions and point remote directly at the fan's control panel. |
Especificações
| Atributo | Detalhe |
|---|---|
| Número do modelo | FS40-8JR |
| Marca | PELONIS |
| Tipo de ventilador | Ventilador de pedestal |
| Tamanho do ventilador | 16 polegadas |
| Número de velocidades | 3 (Baixo, Médio, Alto) |
| Características especiais | Oscillating, Adjustable Height, Timer, Remote Control |
| Temporizador | Até 4 horas |
| Fonte de energia | Elétrico com fio |
| O quetage | 60 watts |
| Cor | Branco |
| Peso do item | 8.16 libras (aproximadamente 3.7 kg) |
| Dimensões do produto (C x L x A) | 57.71 x 11.99 x 46.41 cm |
| Montagem necessária | Montagem Mínima |
| Baterias para controle remoto | 3 x AAA (não incluído) |
Garantia e Suporte
For warranty information or technical support, please refer to the warranty card included with your product or visit the official PELONIS website. You may also contact customer service for assistance with product operation, parts, or troubleshooting beyond this manual.
Contato de atendimento ao cliente: Please refer to the contact information provided on the product packaging or the manufacturer's official website.


