1. Introdução
Thank you for choosing the Melitta MKM-531-W Pure White Aroma Thermo Stainless Coffee Maker. This manual provides essential information for the safe and efficient operation, maintenance, and care of your new coffee maker. Please read these instructions thoroughly before first use and keep them for future reference.

Figura 1: Melitta MKM-531-W Coffee Maker. This image shows the complete coffee maker unit with its thermal carafe and filter cone.
2. Instruções importantes de segurança
- Leia todas as instruções antes de usar o aparelho.
- Não toque em superfícies quentes. Use alças ou botões.
- Para se proteger contra incêndio, choque elétrico e ferimentos pessoais, não mergulhe o cabo, os plugues ou o aparelho em água ou outro líquido.
- É necessária supervisão rigorosa quando qualquer aparelho for usado por crianças ou perto delas.
- Desligue da tomada quando não estiver em uso e antes de limpar. Deixe esfriar antes de colocar ou retirar peças e antes de limpar o aparelho.
- Não opere nenhum aparelho com um cabo ou plugue danificado ou após o aparelho apresentar mau funcionamento ou ter sido danificado de qualquer maneira. Devolva o aparelho à assistência técnica autorizada mais próxima para exame, reparo ou ajuste.
- O uso de acessórios não recomendados pelo fabricante do aparelho pode resultar em incêndio, choque elétrico ou ferimentos às pessoas.
- Não utilize ao ar livre.
- Não deixe o cabo pendurado na borda da mesa ou do balcão, nem toque em superfícies quentes.
- Não coloque sobre ou perto de um queimador a gás ou elétrico quente, nem em um forno aquecido.
- Sempre conecte primeiro o plugue ao aparelho e, em seguida, ligue o cabo na tomada. Para desconectar, gire qualquer controle para a posição "desligado" e, em seguida, retire o plugue da tomada.
- Não utilize o aparelho para outro fim que não o pretendido.
- Podem ocorrer escaldamentos se a tampa for removida durante o ciclo de preparo.
3. Identificação das peças
Familiarize yourself with the components of your Melitta coffee maker:
- Reservatório de água
- Indicador de nível de água
- Filter Holder (removable)
- Mecanismo anti-gotejamento
- Thermal Carafe with Lid
- Heating Plate (for filter holder, not for carafe warming)
- Power Switch with Indicator Light
- Cabo de alimentação

Figura 2: View of the filter basket area. This image highlights the internal structure of the filter holder where the coffee grounds are placed.

Figura 3: Diagram of the filter's drip stop mechanism. This illustration shows how the stopper at the bottom of the filter interacts with the carafe to prevent dripping when the carafe is removed.
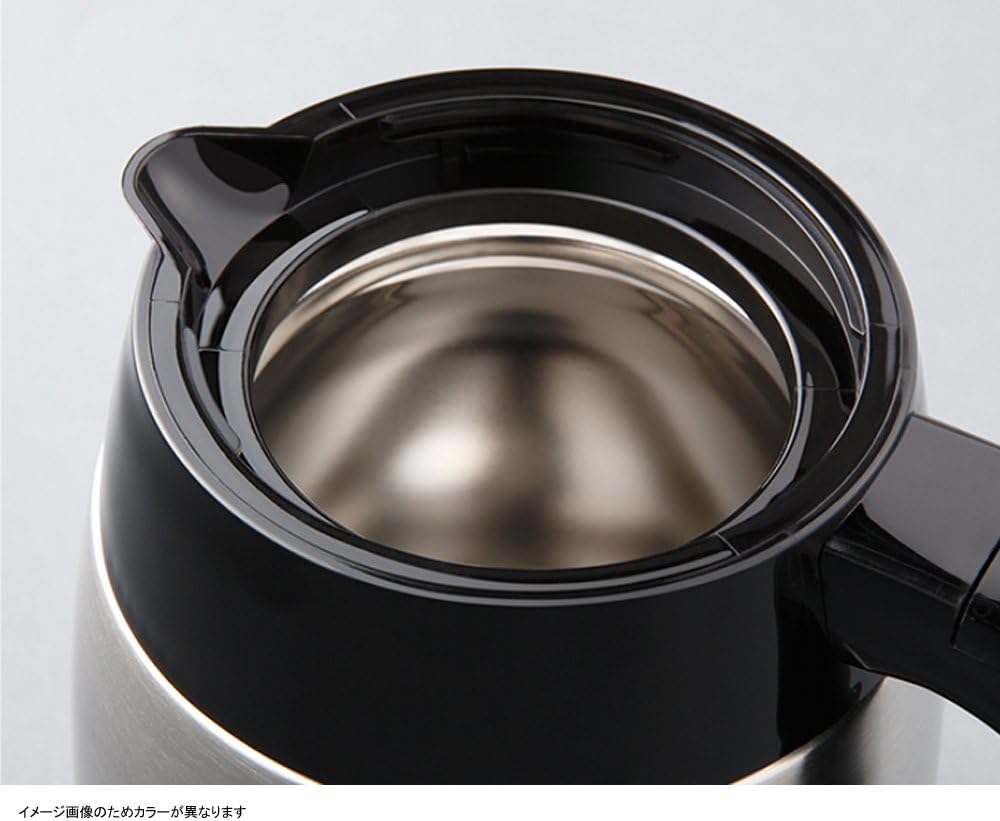
Figura 4: Principal view of the thermal carafe. This image displays the opening of the stainless steel thermal carafe, designed to keep coffee warm.
4. Configuração e primeiro uso
- Descompacte: Remova cuidadosamente todos os materiais de embalagem e certifique-se de que todas as peças estejam presentes.
- Limpar: Wash the thermal carafe, its lid, and the removable filter holder in warm, soapy water. Rinse thoroughly and dry. Wipe the exterior of the coffee maker with a damp pano.
- Primeiro ciclo de preparo (limpeza):
- Encha o reservatório de água com água fria até a linha de enchimento máximo.
- Place the empty thermal carafe with its lid on the heating plate.
- Do not add coffee grounds for this cycle.
- Ligue a cafeteira a uma tomada elétrica com aterramento.
- Press the power switch to start the brewing cycle.
- Allow the full cycle to complete. Discard the hot water.
- Repeat this cleaning cycle once more with fresh water.
- Sua cafeteira está pronta para uso.
5. Instruções de operação
Siga estas etapas para preparar café:
- Encha o reservatório de água: Open the lid of the water reservoir and fill it with fresh, cold water to your desired level, indicated by the water level markings. Do not exceed the maximum fill line.
- Inserir filtro: Place a Melitta #1x2 or #1x4 cone-shaped paper filter (depending on model variant, check your filter holder size) into the removable filter holder.
- Adicione borra de café: Add your desired amount of ground coffee into the paper filter. A general guideline is one tablespoon of coffee per cup (5 oz). Adjust to taste.
- Posicione a garrafa: Ensure the thermal carafe, with its lid securely attached, is placed correctly on the heating plate beneath the filter holder. The lid must be properly aligned to activate the drip stop mechanism.
- Comece a preparar: Plug the coffee maker into a grounded electrical outlet. Press the power switch. The indicator light will illuminate, and brewing will begin.
- Desligamento automático: The coffee maker will automatically shut off approximately 10 minutes after the brewing cycle is complete. The indicator light will turn off.
- Servir: Once brewing is complete, carefully remove the thermal carafe to serve. The thermal carafe is designed to keep coffee warm for an extended period without a heating plate.

Figura 5: Power indicator light showing auto-off. This image illustrates the power indicator light, showing it illuminated during operation and off approximately 10 minutes after brewing, indicating the automatic shut-off feature.
6. Limpeza e Manutenção
A limpeza regular garante o desempenho ideal e prolonga a vida útil da sua cafeteira.
Limpeza diária:
- Sempre desligue a cafeteira antes de limpá-la.
- Descarte a borra de café usada e o filtro de papel.
- Wash the thermal carafe, its lid, and the removable filter holder in warm, soapy water. Rinse thoroughly and dry. These parts are generally not dishwasher safe; refer to specific markings if present.
- Limpe o exterior da cafeteira com um pano macio e úmidoamp pano. Não use produtos de limpeza abrasivos ou esfregões.
- Nunca mergulhe a unidade principal da cafeteira em água ou qualquer outro líquido.
Descalcificação (mensal ou conforme necessário):
Depósitos minerais da água podem se acumular e afetar o desempenho. Limpe sua cafeteira regularmente.
- Prepare a descaling solution according to the descaler manufacturer's instructions, or use a solution of white vinegar and water (e.g., 1 part vinegar to 2 parts water).
- Despeje a solução descalcificante no reservatório de água.
- Place the empty thermal carafe with its lid on the heating plate.
- Start a brewing cycle. Allow half of the solution to brew through, then turn off the coffee maker and let it stand for 15-20 minutes to allow the solution to work.
- Ligue a cafeteira novamente e deixe a solução restante ser infundida.
- Descarte a solução e enxágue a garrafa.
- Run two full cycles with fresh, cold water to rinse out any remaining descaling solution.
7. Solução De Problemas
| Problema | Possível causa | Solução |
|---|---|---|
| O café não se prepara. | Coffee maker not plugged in; power switch not on; no water in reservoir. | Ensure plug is securely in outlet; press power switch; fill water reservoir. |
| O gosto do café é fraco. | Not enough coffee grounds; coffee too coarsely ground; water reservoir overfilled. | Add more coffee grounds; use finer ground coffee; ensure water level matches desired cups. |
| O café transborda do filtro. | Too much coffee grounds; filter not seated correctly; clogged drip stop; carafe not positioned correctly. | Reduce coffee grounds; ensure filter is properly seated; clean drip stop; ensure carafe is fully pushed in. |
| O café não está quente o suficiente. | Thermal carafe not pre-warmed; carafe lid not sealed properly. | Rinse carafe with hot water before brewing; ensure carafe lid is tightly closed. |
| O processo de fermentação é lento. | Mineral deposits (scale) in the coffee maker. | Perform a descaling cycle as described in the maintenance section. |
8. Especificações do produto
| Recurso | Detalhe |
|---|---|
| Número do modelo | MKM-531 |
| Marca | Melitta |
| Capacidade | 0.7 litros (aproximadamente 5 xícaras) |
| Cor | White (with stainless steel accents) |
| Modo de operação | Totalmente automático |
| Peso do item | 1.7 quilogramas (3.74 libras) |
| Dimensões da embalagem | 12.68 x 11.02 x 6.54 polegadas |
| Data da primeira disponibilidade | 21 de abril de 2013 |
9. Garantia e Suporte
Melitta products are manufactured to high-quality standards. For specific warranty information, please refer to the warranty card included with your purchase or visit the official Melitta website. If you encounter any issues not covered in the troubleshooting section, or require further assistance, please contact Melitta customer support.
Melitta Customer Support: Por favor visite www.melitta.com for contact details and further product information.


