1. Introdução
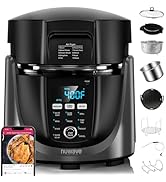
The NUWAVE Bravo XL is a versatile countertop appliance designed to simplify your cooking experience. It combines the functions of an air fryer, convection oven, and toaster oven, featuring a smart grill combo for a wide range of culinary tasks. This manual provides essential information for safe and efficient operation of your appliance.
2. Informações de segurança
Leia atentamente todas as instruções antes de usar o aparelho. Guarde este manual para futuras consultas.
- Coloque sempre o aparelho sobre uma superfície estável e resistente ao calor.
- Assegure-se de que haja ventilação adequada ao redor da unidade durante o funcionamento.
- Não toque em superfícies quentes. Use luvas ou alças de forno.
- Desligue o aparelho quando não estiver em uso e antes de limpá-lo.
- Não mergulhe o aparelho, o cabo ou a ficha em água ou outros líquidos.
- Mantenha crianças e animais de estimação longe do aparelho durante o funcionamento.
3. O que está incluído
Your NUWAVE Bravo XL package includes the following components:
- NUWAVE Bravo XL Air Fryer Toaster Smart Oven
- 1 Non-stick Reversible Grill/Griddle Plate
- 1 Grill/Griddle Rack
- 1 Heavy-duty Wire Cooking Rack
- 1 bandeja de migalhas
- 1 Smart Digital Thermostat
- 1 Owner’s Manual (this document)
- 1 Guia de início rápido
- 1 Recipe Book

4. Configuração
- Desembalagem: Carefully remove all packaging materials, including any protective films or inserts from inside the oven.
- Colocação: Place the oven on a flat, stable, heat-resistant countertop. Ensure there is at least 4 inches of clearance on all sides and above the oven for proper ventilation.
- Limpeza Inicial: Antes da primeira utilização, limpe o interior e o exterior do forno com um pano.amp cloth. Wash all accessories (racks, trays, probe) with warm, soapy water, rinse thoroughly, and dry completely.
- Conexão de energia: Conecte o cabo de alimentação a uma tomada elétrica aterrada.

5. Instruções de operação
The NUWAVE Bravo XL features intuitive digital controls and a variety of cooking functions.
5.1 Painel de controle sobreview

The control panel features a digital display, a central knob for adjustments, and various buttons for specific functions:
- LIGADO/DESLIGADO: Liga ou desliga a unidade.
- CARDÁPIO: Cycles through main cooking functions (Air Fry, Bake, Broil, Dehydrate, Frozen, Grill, Pizza, Reheat, Roast, Slow Roast, Toast, Yogurt).
- TEMP/HORA: Adjusts temperature and cooking time using the central knob.
- TOP/BTM: Independently controls top and bottom heating elements.
- SONDA: Activates the smart digital thermostat.
- PRÉ-AQUECIMENTO: Inicia o ciclo de pré-aquecimento.
- VENTILADOR: Controls the convection fan speed.
- LUZ: Liga/desliga a luz interna do forno.
5.2 Operação básica
- Ligar: Press the ON/OFF button. The display will illuminate.
- Selecione a função: Use the MENU button to cycle through desired cooking functions. The selected function will flash.
- Ajustar configurações: Use the central knob to adjust temperature and time. Press the TEMP/TIME button to toggle between adjusting temperature and time.
- Comece a Cozinhar: Press the central knob (START/PAUSE) to begin the cooking cycle.
5.3 Recursos avançados
- Linear Thermal (Linear T) Technology: The oven continuously monitors temperature fluctuations and makes constant adjustments to maintain the set temperature, ensuring consistent results.
- Dual Heat Zones: Customize the top and bottom heaters and convection fan independently. For example, for pizza, set bottom heaters to full power and top heaters to 30% for a crispy crust and melted toppings.
- Integrated Smart Digital Thermometer: Insert the probe into your food. Set the desired internal temperature. The oven will automatically end the cooking process when the food reaches the target temperature.
- Carryover Cooking Mode: This feature compensates for residual cooking that occurs after the oven turns off, preventing overcooking.
- Multi-Layer Cooking: With 4 rack positions and heavy-duty racks, you can cook multiple items simultaneously.
- 112 predefinições: Utilize 12 pre-programmed cooking functions and 100 additional recipe presets for convenience.

5.4 Vídeos oficiais do produto
The following videos provide further guidance on using your NUWAVE Bravo XL:
5.4.1 vídeo: NuWave Bravo Instructional Video - A comprehensive guide to operating the NuWave Bravo XL oven, demonstrating its various functions and features.
5.4.2 vídeo: Nuwave Bravo XL Smart Oven - An overview of the Nuwave Bravo XL Smart Oven, highlighting its smart capabilities and design.
5.4.3 vídeo: Nuwave Bravo XL Grill - No More Guess Work - Full of Flavor - Demonstrates the grilling capabilities of the Nuwave Bravo XL, focusing on achieving flavorful results.
5.4.4 vídeo: Nuwave Bravo XL Pro for Even Cooking and Pizza - Highlights the even cooking performance of the Nuwave Bravo XL Pro, particularly for pizza.
5.4.5 vídeo: Nuwave Bravo XL Oven - Grill - Showcases the combined oven and grill functions of the Nuwave Bravo XL.
6. Limpeza e Manutenção
Regular cleaning ensures optimal performance and longevity of your NUWAVE Bravo XL.
- Antes da limpeza: Desligue sempre o aparelho da tomada e deixe-o arrefecer completamente.
- Interior: Limpe o interior com anúncioamp Pano e detergente neutro. Para manchas difíceis, use uma esponja não abrasiva.
- Exterior: Limpe o exterior com um pano macio e seco.amp pano. Não use produtos de limpeza abrasivos ou esfregões.
- Bandeja de migalhas: The removable crumb tray should be emptied and cleaned after each use to prevent grease buildup and odors.
- Acessórios: The cooking rack, grill/griddle plate, and air fryer basket are dishwasher safe for easy cleaning.

7. Solução De Problemas
If you encounter issues with your NUWAVE Bravo XL, refer to the following common troubleshooting tips:
- Aparelho não liga: Certifique-se de que o cabo de alimentação esteja firmemente conectado a uma tomada elétrica em funcionamento. Verifique o disjuntor.
- Alimentos que não cozinham uniformemente: Ensure the convection fan is active for even heat distribution. Adjust rack positions as needed. Avoid overcrowding the oven.
- Imprecisão de temperatura: Ensure the smart digital thermostat is properly inserted into the food and calibrated according to the manual.
- Fumaça excessiva: This may be due to food residue or grease buildup. Clean the interior and accessories thoroughly.
Para obter informações mais detalhadas sobre a resolução de problemas ou para questões persistentes, entre em contato com o suporte ao cliente.
8. Especificações
| Recurso | Especificação |
|---|---|
| Marca | Nova onda |
| Nome do modelo | Nuwave Bravo XL Air Fryer Toaster Smart Oven |
| Dimensões do produto | 12.88"P x 20"L x 11.13"A |
| Profundidade Interior | 12.5" |
| Cor | Aço inoxidável escovado |
| Tipo de controle | Controle de botão |
| Estilo de porta | Porta suspensa |
| Fonte de energia | Elétrico |
| Faixa de temperatura | 50-500 Degrees Fahrenheit (adjustable in 5°F increments) |
| Número de prateleiras | 4 posições de rack |
| Peso do item | 17.8 libras |
| Características especiais | 112 One-touch Presets, 50 Memory Slots, 30QT XL Large Capacity, 3X Faster Cooking, 90% Less Oil, Heaters Adjustable From 0-100, Indoor Grill with Original Flavor and Marks, Linear Thermal Technology, Dual Heat Zones, Integrated Smart Digital Thermometer, Carryover Cooking Mode |
9. Garantia e Suporte
For warranty information, please refer to the documentation included with your product or visit the official Nuwave website. For customer support, please contact Nuwave directly through their official channels.


