Introdução
This manual provides essential instructions for the safe operation, maintenance, and troubleshooting of your JBM 51838 Industrial Wet and Dry Vacuum Cleaner. Please read this manual thoroughly before using the appliance to ensure proper function and to prevent injury or damage.
The JBM 51838 is designed for both wet and dry vacuuming tasks in industrial and commercial environments. Its robust construction and 80-liter capacity make it suitable for demanding cleaning applications.
Instruções de segurança
Sempre siga as precauções básicas de segurança ao usar aparelhos elétricos para reduzir o risco de incêndio, choque elétrico e ferimentos pessoais.
- Leia todas as instruções antes de usar.
- Não deixe o aparelho sem vigilância quando conectado. Desconecte da tomada quando não estiver em uso e antes da manutenção.
- Não utilize ao ar livre ou em superfícies molhadas.
- Não permita que seja usado como brinquedo. É necessária muita atenção quando usado por ou perto de crianças.
- Utilize apenas conforme descrito neste manual. Utilize somente os acessórios recomendados pelo fabricante.
- Não use com cabo ou plugue danificado. Se o aparelho não estiver funcionando como deveria, tiver sido derrubado, danificado, deixado ao ar livre ou caído na água, devolva-o a um centro de serviços.
- Não puxe ou carregue pelo fio, use o fio como alça, feche uma porta no fio ou puxe o fio em torno de bordas ou cantos afiados. Não passe o aparelho sobre o fio. Mantenha o fio longe de superfícies aquecidas.
- Não desconecte puxando o cabo. Para desconectar, segure o plugue, não o cabo.
- Não manuseie o plugue ou o aparelho com as mãos molhadas.
- Não coloque nenhum objeto nas aberturas. Não use com nenhuma abertura bloqueada; mantenha livre de poeira, fiapos, cabelos e qualquer coisa que possa reduzir o fluxo de ar.
- Mantenha cabelos, roupas largas, dedos e todas as partes do corpo longe de aberturas e peças móveis.
- Não pegue nada que esteja queimando ou soltando fumaça, como cigarros, fósforos ou cinzas quentes.
- Não utilize para coletar líquidos inflamáveis ou combustíveis, como gasolina, nem em áreas onde eles possam estar presentes.
- Não utilize sem o saco coletor de pó e/ou filtros instalados.
- Desligue todos os controles antes de desconectar.
- Tenha cuidado extra ao limpar escadas.
- Guarde o seu aparelho dentro de casa, em um local fresco e seco.
Componentes do produto
The JBM 51838 Industrial Wet and Dry Vacuum Cleaner includes the following main components:
- Motor head assembly
- Stainless steel tank (80 L capacity)
- Mangueira
- Extension wands (chrome-plated)
- Bocal de chão
- Cartridge filter (for dry use)
- Foam filter (for wet use)
- Wheeled base with handle
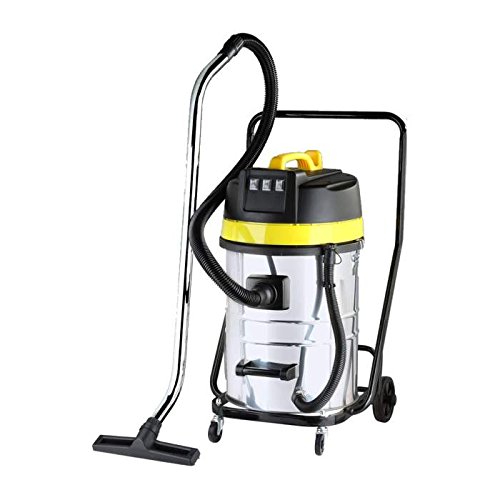
Figura 1: JBM 51838 Industrial Wet and Dry Vacuum Cleaner. This image shows the complete vacuum cleaner assembly, including the stainless steel tank, motor head (yellow and black), flexible hose, chrome extension wand, and floor nozzle, all mounted on a wheeled base with a handle.
Configuração e montagem
Follow these steps to assemble your JBM 51838 vacuum cleaner:
- Descompacte os componentes: Carefully remove all components from the packaging. Verify that all parts listed in the "Product Components" section are present.
- Anexar rodas: Secure the wheels to the wheeled base if they are not pre-assembled. Ensure they are firmly attached for stability.
- Mount Tank to Base: Place the stainless steel tank onto the wheeled base.
- Instalar filtro:
- Para Aspiração a seco: Install the cartridge filter onto the motor head's filter cage. Ensure it is securely seated.
- Para Aspiração úmida: Remove the cartridge filter and install the foam filter over the filter cage.
- Attach Motor Head: Place the motor head assembly onto the tank. Secure it with the locking clips on either side of the tank.
- Conecte a mangueira: Insert the flexible hose into the suction inlet on the tank. Ensure a tight connection.
- Anexe acessórios: Connect the extension wands to the hose, and then attach the desired floor nozzle or other accessory to the end of the wands.
- Conexão de energia: Ensure the vacuum cleaner is switched off before plugging the power cord into a suitable 220V electrical outlet.
Instruções de operação
Aspiração a seco
- Ensure the cartridge filter is correctly installed.
- Connect the hose and desired dry vacuuming accessory.
- Conecte o cabo de alimentação a uma tomada de 220 V.
- Gire o interruptor de energia para a posição "LIGADO".
- Comece a aspirar a superfície desejada.
- When finished, turn the power switch to "OFF" and unplug the appliance.
- Empty the tank and clean the filter as described in the Maintenance section.
Aspiração úmida
Importante: Before wet vacuuming, ensure the cartridge filter is removed and the foam filter is installed. Failure to do so will damage the cartridge filter and potentially the motor.
- Remove the cartridge filter and install the foam filter.
- Connect the hose and a suitable wet vacuuming accessory (e.g., squeegee nozzle).
- Conecte o cabo de alimentação a uma tomada de 220 V.
- Gire o interruptor de energia para a posição "LIGADO".
- Begin vacuuming liquids. The vacuum has an automatic shut-off when the tank is full.
- When the tank is full or you are finished, turn the power switch to "OFF" and unplug the appliance.
- Empty the tank and clean the foam filter as described in the Maintenance section.
Manutenção
A manutenção regular garante o desempenho ideal e prolonga a vida útil do seu aspirador de pó. Desligue sempre o aparelho da tomada antes de realizar qualquer manutenção.
Esvaziar o tanque
- Desligue o aspirador.
- Release the locking clips and remove the motor head assembly.
- Carefully lift the tank from the wheeled base and empty its contents into a suitable disposal area.
- Clean the inside of the tank with water and mild detergent if necessary, then dry thoroughly.
Limpeza e substituição do filtro
- Filtro de cartucho (uso a seco):
- Remove the cartridge filter from the motor head.
- Gently tap the filter to dislodge dust and debris. For heavy dirt, rinse under running water. Allow to air dry completely before reinstallation. Do not use the filter if it is still wet.
- Substitua o filtro se estiver danificado ou excessivamente gasto.
- Filtro de espuma (para uso em ambientes úmidos):
- Remove the foam filter from the motor head.
- Rinse the foam filter thoroughly under running water until clean.
- Squeeze out excess water and allow to air dry completely before storage or next use.
Limpeza Geral
- Limpe o exterior do aspirador com anúncioamp pano. Não use produtos de limpeza agressivos ou solventes.
- Check the hose and accessories for blockages and clear them as needed.
- Inspect the power cord for any signs of damage. If damaged, have it replaced by a qualified technician.
Solução de problemas
| Problema | Possível causa | Solução |
|---|---|---|
| O aspirador não liga. | Sem fonte de alimentação. O interruptor de alimentação está desligado. Cabo de alimentação/plugue danificado. | Verifique se a ficha está bem encaixada na tomada. Certifique-se de que o interruptor de energia esteja na posição "LIGADO". Do not use if damaged; contact service. |
| Perda de sucção. | O tanque está cheio. O filtro está entupido. Hose or accessory is blocked. Cabeçote do motor não está devidamente vedado. | Esvazie o tanque. Limpe ou substitua o filtro. Clear any blockages from the hose or accessories. Ensure motor head clips are securely fastened. |
| Vazamentos de água durante a aspiração de líquidos. | Filtro de espuma não instalado ou danificado. Tank overfilled (automatic shut-off may be faulty). As vedações estão danificadas. | Ensure foam filter is correctly installed and undamaged. Do not overfill the tank; empty before it reaches maximum capacity. Inspect seals and replace if necessary. |
| Ruído ou vibração incomum. | Foreign object in motor. Motor danificado. | Turn off and unplug immediately. Inspect for foreign objects. If noise persists, contact service. |
Especificações
| Recurso | Detalhe |
|---|---|
| Número do modelo | 51838 |
| Marca | JBM |
| Tipo | Aspirador industrial úmido e seco |
| Capacidade | 80 litros |
| O quetage | 1000 Watts |
| Volumetage | 220 Volts |
| Fonte de energia | Electric with cable |
| Tipo de filtro | Cartucho (seco), espuma (úmida) |
| Peso do produto | 28 kg |
| Dimensões (Pacote) | 111 x 59 x 57.5 cm |
| Recomendação de superfície | Chão duro |
Garantia e Suporte
For warranty information, please refer to the documentation provided at the time of purchase or contact your retailer. JBM products are designed for durability and performance. Should you require technical assistance or spare parts, please contact JBM customer support or an authorized service center.
Fabricante: JBM
Informações de contato: Please refer to the official JBM website or your purchase documentation for the most current contact details for customer support and service.


