1. Introdução
Thank you for choosing the HUBER 1-Way Real Metal Doorbell Button. This manual provides essential information for the safe and efficient installation, operation, and maintenance of your new doorbell button. Please read these instructions carefully before installation and retain them for future reference.
This doorbell button is designed for surface mounting and features a durable, weather-resistant metal housing with a chrome-plated brass push button. It includes a nameplate for personalization.
2. Informações de segurança
- Segurança elétrica: Installation should only be performed by a qualified electrician or competent person. Ensure the power supply to the doorbell circuit is disconnected at the main breaker before commencing any work.
- Volumetage e atual: This doorbell button is designed for low-voltage doorbell systems. The maximum operating voltage is 24V AC/DC and maximum switching current is 2A. Connecting to higher voltage or current systems may cause damage or present a safety hazard.
- Condições ambientais: The product is suitable for both indoor and outdoor use. However, avoid direct exposure to extreme weather conditions if possible, and ensure all connections are properly sealed to prevent moisture ingress.
- Crianças: Mantenha as embalagens e as peças pequenas longe do alcance de crianças para evitar risco de asfixia.
3. Conteúdo da embalagem
Por favor, verifique se todos os itens estão presentes na embalagem:
- HUBER 1-Way Surface-Mounted Doorbell Button with Nameplate
- Parafusos de montagem
- Plugues de parede
4. Configuração e instalação
Siga estas etapas para uma instalação correta:
- Prepare a área de instalação: Choose a suitable location near your entrance. Ensure the surface is flat and clean.
- Desconecte a energia: Before starting any electrical work, turn off the power to your doorbell circuit at the main electrical panel. Verify that the power is off using a voltage testador.
- Marque os pontos de perfuração: Hold the doorbell button against the desired installation surface. Use a pencil to mark the positions for the mounting screws.
- Furos de perfuração: Drill pilot holes at the marked positions. If installing on masonry or concrete, insert the provided wall plugs into the drilled holes.
- Conexão do fio: Connect the doorbell wires to the screw terminals on the back of the doorbell button. This model features screw contacts for quick and easy wiring. Ensure a secure connection for both wires.
- Mount the Doorbell Button: Align the doorbell button with the drilled holes and secure it using the provided mounting screws. Do not overtighten.
- Insert Nameplate: Carefully slide your personalized nameplate into the designated slot on the doorbell button.
- Restaurar energia: Once installation is complete and all connections are secure, restore power to the doorbell circuit at the main electrical panel.
- Funcionalidade de teste: Press the doorbell button to ensure it activates your chime.

Imagem: Traseira view of the HUBER doorbell button, illustrating the screw terminals for electrical connections. This design facilitates quick and secure wiring during installation.

Image: The HUBER doorbell button mounted on a dark, textured wall, demonstrating its surface-mount installation and aesthetic integration.
5. Instruções de operação
The HUBER doorbell button operates as a simple push-button switch. When pressed, it completes an electrical circuit, sending a signal to your connected doorbell chime or system.
- To activate your doorbell chime, simply press the button firmly.
- The button is designed for reliable operation and is resistant to typical wear and tear.
6. Manutenção
The HUBER doorbell button requires minimal maintenance to ensure long-lasting performance:
- Limpeza: Wipe the surface of the doorbell button with a soft, damp pano. Evite usar produtos de limpeza abrasivos, solventes ou produtos químicos agressivos, pois podem danificar o acabamento.
- Inspeção: Periodically check the mounting screws for tightness and ensure the nameplate is securely in place.
- Resistência às intempéries: While designed for outdoor use, regular cleaning can help maintain its appearance and prevent buildup from environmental elements.
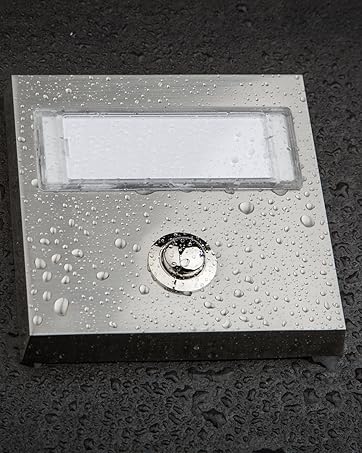
Image: The HUBER doorbell button featuring water droplets on its surface, highlighting its weather-resistant construction suitable for outdoor environments.
7. Solução De Problemas
If your doorbell button is not functioning correctly, consider the following:
- A campainha não toca:
- Check if the power to the doorbell circuit is on.
- Inspect the wiring connections at the doorbell button and the chime unit for looseness or corrosion.
- Ensure the doorbell chime unit itself is functioning (e.g., check its power supply or batteries if applicable).
- Verifique se o voltage and current of your doorbell system are within the specified limits (24V, 2A).
- Button Feels Loose: Check and tighten the mounting screws if necessary.
- Nameplate Issues: Ensure the nameplate is correctly inserted and not obstructed.
If problems persist after checking these points, it is recommended to consult a qualified electrician.
8. Especificações
| Marca | HUBER |
| Número do modelo | AK3-AT1-GL-M-X (Reference: 12031) |
| Material | Zinc die-cast (housing), Chrome-plated Brass (button) |
| Cor/Acabamento | Stainless steel look, brushed / Chromed |
| Dimensões (C x L x A) | 8.62 cm x 3.95 cm x 1.64 cm (3.39 pol x 1.56 pol x 0.65 pol) |
| Peso | 100 gramas (0.22 libras) |
| Vol operacionaltage | Max. 24V AC/DC (Note: Product specifications list 42V, but feature bullets indicate 24V for standard connection. Use 24V for typical doorbell systems.) |
| Corrente de comutação | Máx. 2A |
| Tipo de energia | CA/CC |
| Ambiente de uso | Interior e exterior |
| Características especiais | Quick mounting by screw contact, Weather-resistant |
| País de origem | China |

Image: Technical drawing providing precise dimensions of the HUBER doorbell button in millimeters for accurate planning and installation.
9. Garantia e Suporte
HUBER products are manufactured to high-quality standards. For information regarding warranty coverage, please refer to the documentation provided at the time of purchase or contact your retailer.
For technical support or inquiries, please visit the official HUBER webou entre em contato com o departamento de atendimento ao cliente. Os detalhes de contato geralmente podem ser encontrados na embalagem do produto ou no site do fabricante. website.