1. Produto acabadoview
The AW 0.3mm Dual Action Airbrush Gun Kit is designed for precise application in various fields such as painting, tattoo art, nail art, makeup, cake decorating, and hobby projects. This kit features a 0.3mm fine nozzle for accurate spraying and a dual-action trigger for comprehensive control over airflow and paint volume.

Image 1.1: The AW 0.3mm Dual Action Airbrush Gun Kit, including the airbrush, storage case, wrench, dropper, and air hose connector.
Componentes do kit:
- 0.3mm Dual Action Gravity Feed Airbrush: The main spraying tool with a 0.3mm nozzle for fine detail work.
- 7cc Gravity Feed Fluid Cup: Integrated cup with a lid for holding paint, designed for efficient flow at low pressures.
- Air Hose Connector: For connecting the airbrush to an air compressor hose.
- Conta-gotas: For precise measurement and mixing of paints.
- Chave inglesa: Used for disassembling the nozzle for cleaning and maintenance.
- Estojo de armazenamento: A protective case for organizing and transporting the airbrush and its accessories.
2. Instruções de configuração
Before using your airbrush, ensure all components are clean and properly assembled. A clean setup prevents clogs and ensures optimal performance.
2.1 Initial Inspection and Cleaning
- Desembale todos os componentes da caixa de armazenamento.
- Inspect the airbrush for any visible damage or debris from manufacturing.
- Perform an initial flush with water or appropriate airbrush cleaner through the airbrush to remove any manufacturing residues.
2.2 Connecting to Air Source
- Attach the air hose connector to the air inlet at the bottom of the airbrush body. Ensure it is securely tightened.
- Connect your air hose from a compatible air compressor to the air hose connector.
- Ensure your air compressor is set to the recommended operating pressure for airbrushing (typically between 15-30 PSI, refer to your paint manufacturer's recommendations).

Image 2.1: Detail of the air hose connector properly attached to the airbrush.
2.3 Preparando a tinta
- Select the appropriate paint for your project. Ensure it is suitable for airbrush use.
- Thin the paint to the consistency of milk using the recommended thinner for your specific paint type. Use the dropper for accurate mixing ratios.
- Pour the prepared paint into the 7cc gravity feed fluid cup. Do not overfill.
3. Instruções de operação
The AW airbrush features a dual-action trigger, allowing for precise control over both air and paint flow.
3.1 Dual-Action Trigger Control
- Controle de fluxo de ar: Press the trigger straight down to release air. The further you press, the more air flows.
- Paint Volume Control: While holding the trigger down for air, pull the trigger back to release paint. The further you pull back, the more paint is sprayed.
- Practice combining these two actions to achieve desired spray patterns and paint coverage.

Image 3.1: Detail of the dual-action trigger mechanism on the airbrush.
3.2 Basic Spraying Technique
- Hold the airbrush approximately 2-6 inches (5-15 cm) from your working surface, depending on the desired spray pattern.
- Begin by pressing the trigger down to start airflow.
- While air is flowing, pull the trigger back to begin spraying paint.
- Move the airbrush steadily across your surface. Release the paint trigger (push forward) before releasing the air trigger (lift up) to prevent paint from drying in the nozzle.
- Always start and end your spray off the actual work surface to avoid splatters or heavy spots.

Image 3.2: An airbrush in operation, demonstrating the spray pattern.
4. Manutenção e Limpeza
Proper cleaning and maintenance are crucial for the longevity and performance of your airbrush. Clean your airbrush immediately after each use.
4.1 Quick Cleaning (Between Color Changes)
- Empty any remaining paint from the fluid cup.
- Add a small amount of appropriate airbrush cleaner or water to the cup.
- Spray the cleaner through the airbrush onto a paper towel or into a cleaning pot until the spray runs clear.
- Repita se necessário.
4.2 Thorough Cleaning (After Each Session)
- Perform a quick clean as described above.
- Unscrew the needle chucking guide and carefully pull the needle out from the front of the airbrush. Clean the needle with a soft cloth and cleaner.
- Use the provided wrench to carefully unscrew the nozzle cap and then the nozzle itself. Clean the nozzle thoroughly with a small brush and cleaner. Be extremely careful as the nozzle is delicate.
- Clean the inside of the fluid cup and the airbrush body with a brush and cleaner.
- Reassemble the airbrush in reverse order. Ensure the nozzle is tightened gently to avoid damage.

Image 4.1: Key components of the airbrush disassembled for thorough cleaning.
4.3 Lubrificação
Occasionally, apply a tiny drop of airbrush-specific lubricant to the needle packing and trigger mechanism to ensure smooth operation. Do not use petroleum-based lubricants.
5. Solução De Problemas
This section addresses common issues you might encounter during airbrush operation.
| Problema | Possível causa | Solução |
|---|---|---|
| Sem fluxo de tinta ou borbulhamento. | Clogged nozzle or needle tip; paint too thick; insufficient air pressure. | Clean nozzle and needle; thin paint properly; increase air pressure. |
| Padrão de pulverização irregular | Damaged or bent needle/nozzle; paint consistency issues; inconsistent air pressure. | Inspect and replace damaged parts; adjust paint thinning; check compressor. |
| Air bubbles in fluid cup | Loose nozzle; cracked nozzle; debris in nozzle. | Tighten nozzle gently; inspect nozzle for cracks and replace if necessary; clean nozzle thoroughly. |
| Trigger sticks or is stiff | Dried paint in mechanism; lack of lubrication. | Thoroughly clean the trigger area; apply airbrush lubricant. |
| Vazamento de ar | Conexões soltas; anéis de vedação danificados. | Check all connections for tightness; inspect and replace O-rings if worn. |
6. Especificações
Technical specifications for the AW 0.3mm Dual Action Airbrush Gun Kit.
- Número do modelo: AW-ABR000010
- Diâmetro do bico: 0.3 mm
- Capacidade do copo de fluido: 7cc (Gravity Feed)
- Tipo de ação: Gatilho de dupla ação
- Material: Nickel-plated Copper & Oxidized Aluminum
- Dimensões do produto: 5.75 x 0.5 x 2.7 polegadas (14.6 x 1.3 x 6.8 cm)
- Peso do item: 12 onças (aproximadamente 340 gramas)
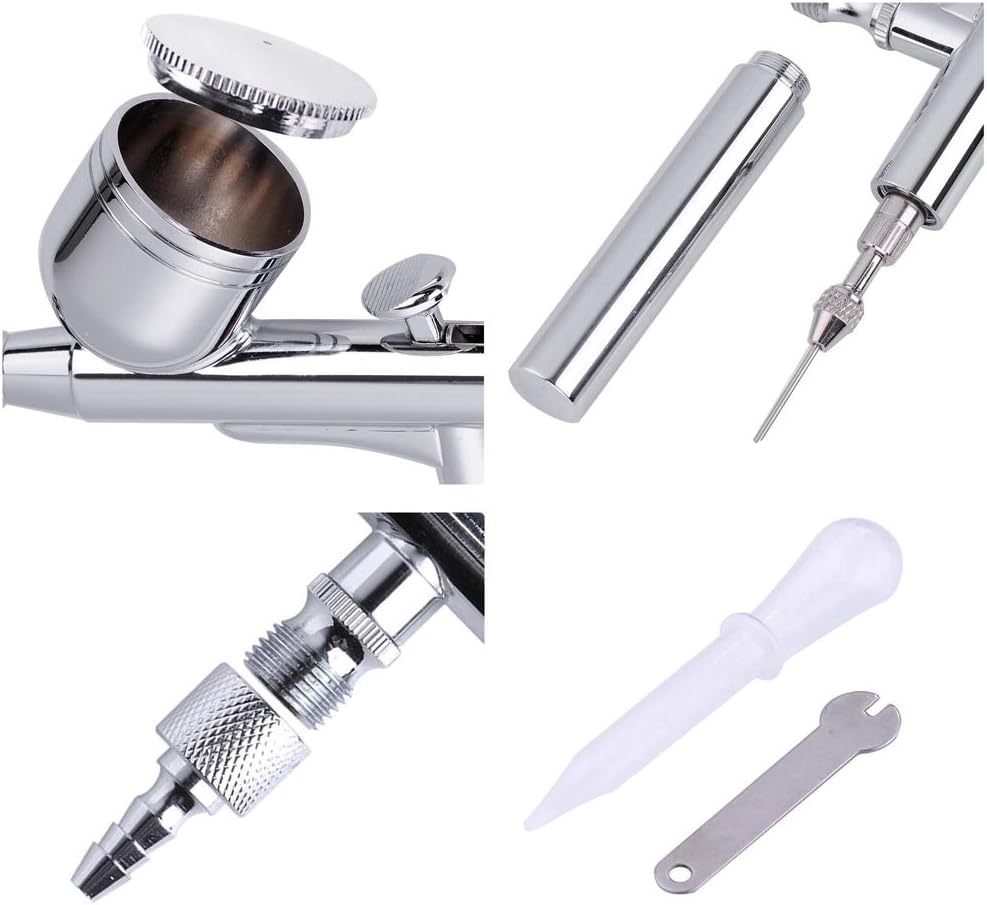
Image 6.1: Diagram illustrating the dimensions of the airbrush.