Introdução
The C2G 40914 Compact Amplifier é projetado para amplify dynamic microphone or stereo audio signals, providing 15 Watts of power per channel to a sound reinforcement system. This amplifier features a discreet installation and remote control capability via an included wall plate. It is suitable for various audio setups requiring compact amplification and external volume management.
O que está na caixa
Verifique se todos os componentes estão presentes antes de prosseguir com a instalação:
- Compactar Ampmais vivo
- Decorator Volume Control Wall Plate
- Tampa da placa frontal
- Adaptador de energia
- Bracket Mounting Screws 6-32 (25mm) qty. 2
- Wall Plate Mounting Screw M3.5 (8mm) qty. 3
- Manual do usuário
Produto acimaview
Familiarize-se com o amplifier and wall plate components.

Figura 1: Frente view of the C2G 40914 Compact Amplifier. This image displays the local volume control knob, power indicator LED, 1/4 inch microphone input, 3.5mm auxiliary input, and input select switch.

Figura 2: Traseira view of the C2G 40914 Compact Ampmais vivo. Esse view shows the speaker output terminals (L+, L-, R+, R-), the remote volume control port (RJ45), and the DC 12V power input.

Figura 3: Decorator Volume Control Wall Plate and face plate cover. The wall plate features a rotary volume knob and a power indicator LED.
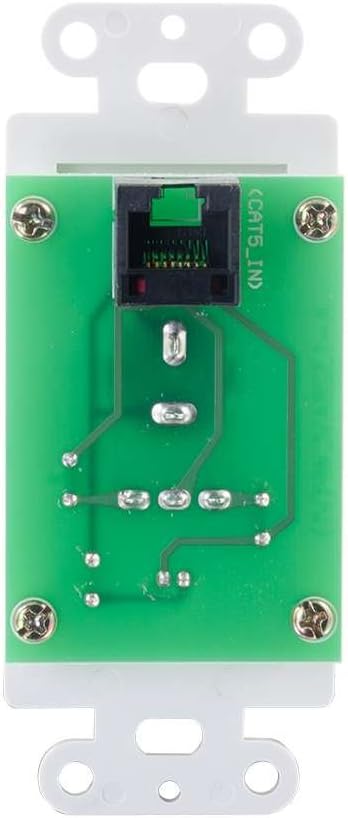
Figura 4: Traseira view of the Decorator Volume Control Wall Plate, showing the RJ45 connector for remote communication with the ampmais vivo.
Configurar
-
Montando o Ampmais vital:
O amplifier includes a built-in mounting bracket. Secure the amplifier to a suitable surface using the provided 6-32 (25mm) mounting screws. Ensure adequate ventilation around the unit.
-
Conectores de alto-falantes:
Conecte suas caixas de som passivas aos terminais de saída de áudio na parte traseira do aparelho. amplifier (L+, L-, R+, R-). Ensure correct polarity (+ to + and - to -) for each speaker channel. The amplifier provides 15 watts per channel.
-
Conectando Fontes de Áudio:
- Entrada de microfone: Connect a dynamic microphone to the 1/4 inch MIC IN jack on the front panel.
- Entrada auxiliar: Connect an audio source (e.g., smartphone, media player) to the 3.5mm AUX IN jack on the front panel.
-
Connecting the Remote Wall Plate:
Install the Decorator Volume Control Wall Plate in a standard wall box. Connect a Cat5e/Cat6 cable (not included) from the RJ45 port on the rear of the wall plate to the REMOTE port (RJ45) on the rear of the amplifier. Secure the wall plate with the provided M3.5 (8mm) screws and attach the face plate cover.
-
Alimentando o Ampmais vital:
Connect the included power adapter to the DC 12V input on the rear of the amplifier, then plug the adapter into a standard AC power outlet. The power indicator LED on the amplifier and wall plate will illuminate.
Instruções de operação
-
Ligar/desligar:
O amplifier powers on automatically when connected to power. The power indicator LED on both the amplifier and the wall plate will light up.
-
Seleção de entrada:
Use o SELEÇÃO DE ENTRADA switch on the front panel of the amplifier to choose between the MIC IN and AUX IN audio sources.
-
Controle de volume:
O amplifier offers both local and remote volume control options:
- Local Volume: Adjust the rotary knob labeled VOLUME no painel frontal do ampmais vivo.
- Remote Volume: Adjust the rotary knob labeled VOLUME on the Decorator Volume Control Wall Plate.
Use o SELEÇÃO DE VOLUME ligar o amplifier to determine whether the local or remote volume control is active. Set to 'LOCAL' to use the amplifier's knob, or 'REMOTE' to use the wall plate's knob.
-
Uso do microfone:
When MIC IN is selected, speak into the connected dynamic microphone. Adjust the volume using the selected volume control (local or remote) to achieve the desired output level.
Manutenção
- Mantenha o amplifier and wall plate clean by wiping with a soft, dry cloth.
- Avoid using liquid cleaners or aerosol sprays, which may damage the unit.
- Garanta a ventilação adequada ao redor do amplificador para evitar superaquecimento.
- Não exponha o aparelho a umidade excessiva ou temperaturas extremas.
Solução de problemas
If you encounter issues with your C2G 40914 Compact AmpAmplificador, consulte as seguintes soluções comuns:
-
Sem saída de áudio:
- Ensure the power adapter is securely connected and the power indicator LEDs are lit.
- Verify that speakers are correctly wired to the amplifier's output terminals with correct polarity.
- Verifique se o SELEÇÃO DE ENTRADA switch is set to the correct source (MIC or AUX).
- Confirme que o SELEÇÃO DE VOLUME switch is set to the active volume control (LOCAL or REMOTE) and that the volume knob is turned up.
- Test with a different audio source or microphone to rule out source device issues.
-
Remote Volume Control Not Working:
- Ensure the Cat5e/Cat6 cable connecting the wall plate to the amplifier is securely plugged into both RJ45 ports.
- Verifique se o SELEÇÃO DE VOLUME ligar o amplifier is set to 'REMOTE'.
- Check the wall plate's power indicator LED to ensure it is receiving power.
-
Áudio distorcido:
- Reduce the volume level on both the amplifier/wall plate and the audio source device.
- Certifique-se de que a impedância do alto-falante corresponda à amplifier's requirements (typically 4-8 ohms).
- Verifique se todas as conexões dos cabos estão soltas ou danificadas.
Especificações
| Recurso | Detalhe |
|---|---|
| Dimensões do produto | 1.95 x 1.3 x 4.05 polegadas (L x W x H) |
| Peso do item | 1 libra |
| Número do modelo | 40914 |
| Potência de saída | 15 Watts per channel (30W total) |
| Conectores de entrada | 1/4 inch Dynamic Microphone, 3.5mm Stereo Audio Line Level |
| Conectores de saída | Speaker Terminals (L+, L-, R+, R-) |
| Controle remoto | RJ45 for external volume control wall plate |
| Fonte de energia | DC 12V (Power Adapter included) |
| Dispositivos compatíveis | Oradores |
| Cor | Preto |
Garantia e Suporte
The C2G 40914 Compact Amplifier is thoroughly inspected and tested to ensure quality and comes with a warranty for your complete satisfaction. For specific warranty terms and conditions, please refer to the documentation included with your purchase or visit the official C2G website.
For technical support, troubleshooting assistance, or further inquiries, please visit the C2G Store ou seus canais de suporte oficiais.


