1. Introdução e informações de segurança
Obrigado pela compra.asing the Sharp R-742BKW Microwave Grill. This manual provides essential instructions for the safe and efficient operation of your appliance. Please read it thoroughly before use and keep it for future reference.
Instruções importantes de segurança
- Leia todas as instruções antes de usar o aparelho.
- Não tente utilizar este forno com a porta aberta, pois isso pode resultar em exposição prejudicial à energia das micro-ondas.
- Não aqueça líquidos ou outros alimentos em recipientes fechados, pois eles podem explodir.
- Permita que crianças utilizem o forno sem supervisão somente quando instruções adequadas forem fornecidas para que a criança consiga usar o forno de forma segura e entenda os perigos do uso indevido.
- Se a porta ou as vedações da porta estiverem danificadas, o forno não deve ser operado até que seja reparado por uma pessoa competente.
- O forno deve ser limpo regularmente e quaisquer depósitos de alimentos removidos.
- Deixar de manter o forno limpo pode levar à deterioração da superfície, o que pode afetar negativamente a vida útil do aparelho e possivelmente resultar em uma situação perigosa.
2. Produto acabadoview
The Sharp R-742BKW is a 25-liter microwave grill designed for versatile cooking. It features a powerful 900W microwave and a 1000W grill, along with an electronic control panel and a 31.5 cm turntable.
Principais características:
- Capacidade de 25 litros
- Potência do micro-ondas: 900 W
- Potência da grelha de 1000 W
- 31.5 cm Turntable
- 11 níveis de poder
- 6 Automatic Programs (Popcorn, Jacket Potatoes, Pizza, Frozen Vegetables, Beverage, Dinner Plate)
- Defrost by Time and Weight
- Sequência de Cozimento
- Trava de segurança para crianças
Componentes:
Your microwave grill comes with the following components:
- Microwave Grill Unit
- Glass Turntable (31.5 cm diameter)
- Anel de suporte para plataforma giratória
- Rack de grelha

Figura 2.1: Frente view of the Sharp R-742BKW Microwave Grill, showcasing o painel de controle e a porta.
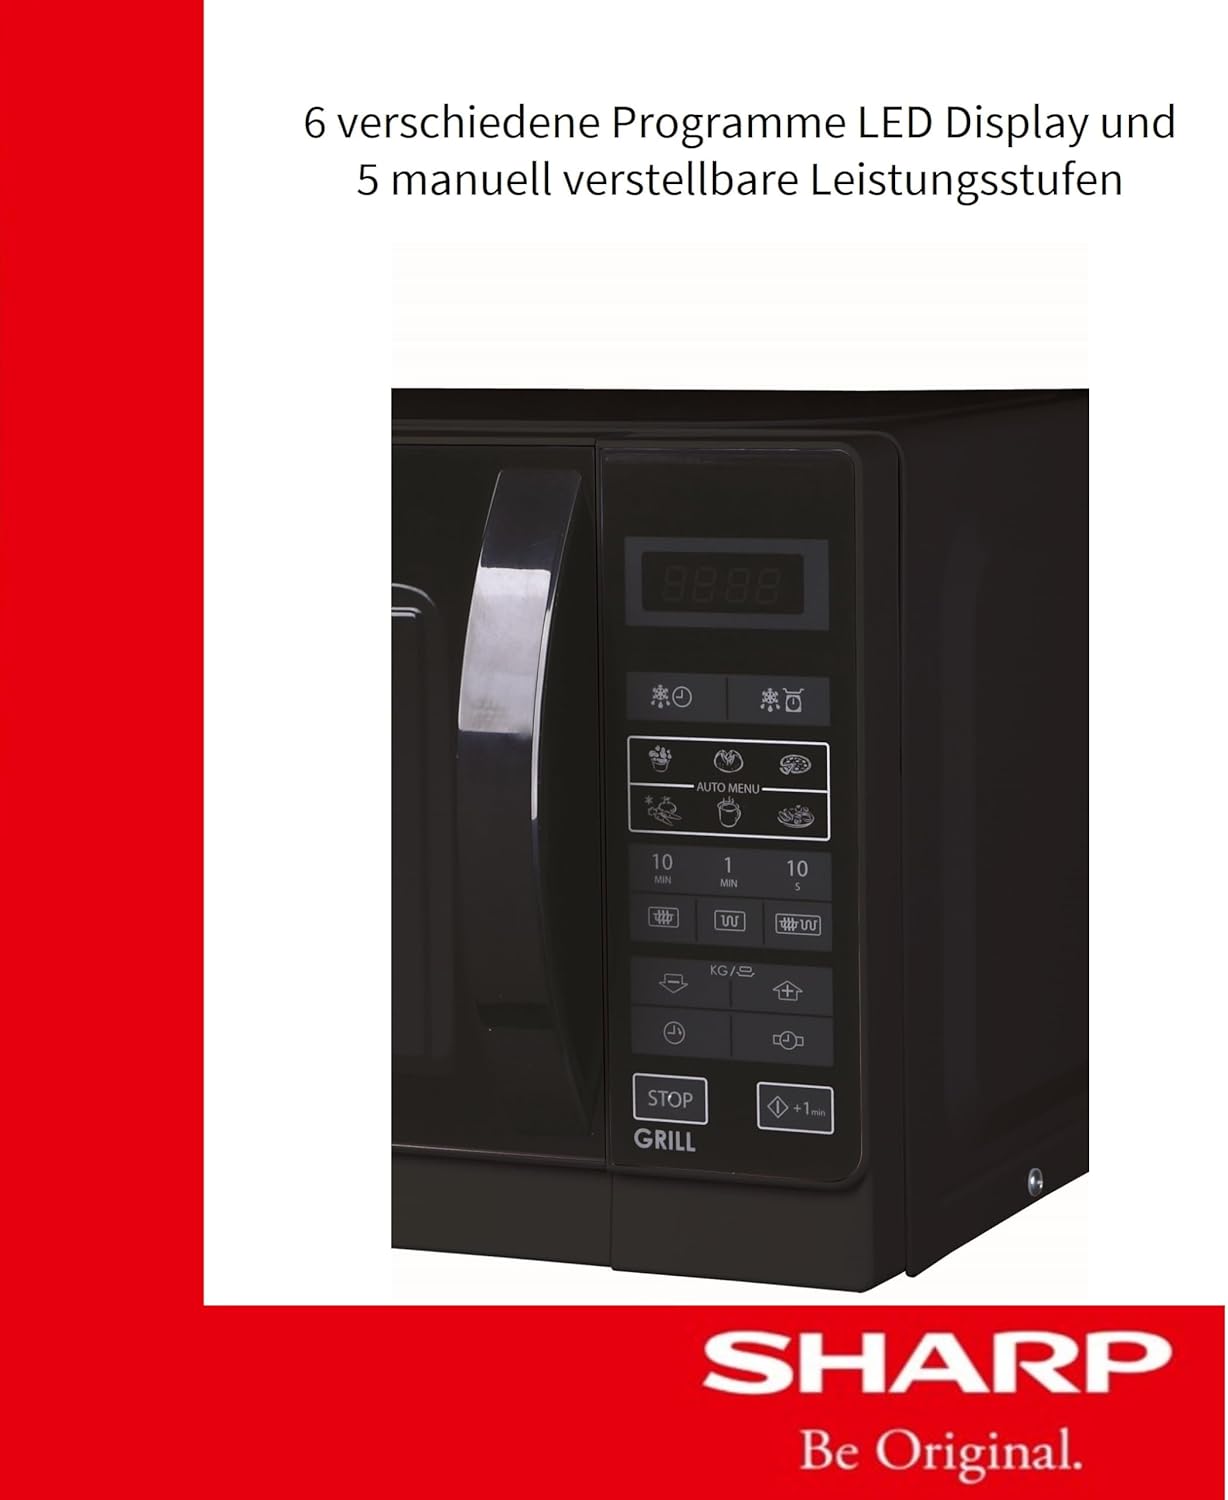
Figura 2.2: Interior view of the microwave grill, showing the heating element and the included grill rack.
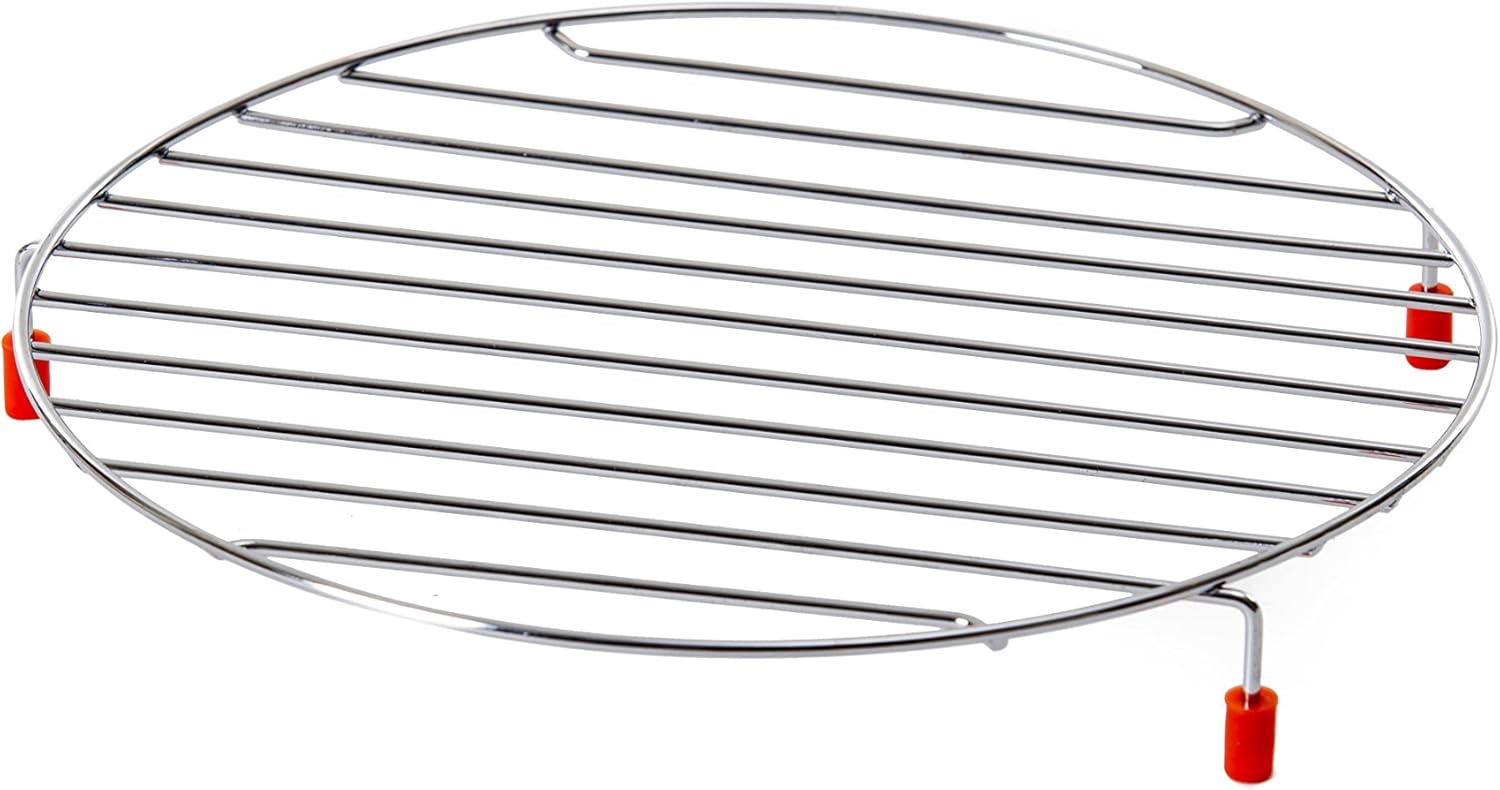
Figura 2.3: Interior view of the microwave grill, showing the glass turntable in place.

Figure 2.4: The glass turntable and metal grill rack, essential accessories for cooking and grilling.
3. Configuração e instalação
Desembalando
- Remova todos os materiais de embalagem de dentro e de fora do forno.
- Check the oven for any damage, such as a misaligned or bent door, damaged door seals and sealing surface, broken or loose door hinges and latches, or dents inside the cavity or on the door. If any damage is present, do not operate the oven and contact your dealer.
Colocação
Place the microwave grill on a flat, stable surface that can support its weight and the heaviest food likely to be cooked in it. Ensure adequate ventilation around the unit.
- Allow a minimum of 20 cm (8 inches) of space above the oven.
- Allow a minimum of 10 cm (4 inches) of space at the rear and sides for proper ventilation.
- Não bloqueie nenhuma abertura de ventilação.
- Do not place the oven near heat sources such as a conventional oven or radiator.

Figura 3.1: Lateral view of the microwave, illustrating the compact design and ventilation requirements.
Conexão elétrica
Ligue o cabo de alimentação a uma tomada elétrica devidamente aterrada. Certifique-se de que o volume esteja correto.tage corresponde à etiqueta de classificação do aparelho.
4. Instruções de operação
Painel de controle encerradoview
The electronic control panel features an LED display and various buttons for setting cooking functions, time, and power levels.

Figura 4.1: Detalhado view of the electronic control panel with LED display and function buttons.
Cozinha básica no micro-ondas
- Coloque os alimentos em um recipiente próprio para micro-ondas sobre o prato giratório.
- Feche a porta.
- Press the 'Microwave' button to select desired power level (11 levels available).
- Use the '10 MIN', '1 MIN', '10 SEC' buttons to set the cooking time.
- Pressione 'INICIAR' para começar a cozinhar.
Operação da churrasqueira
Use the grill function for browning and crisping food. Always use the provided grill rack.
- Coloque os alimentos na grelha e, em seguida, coloque a grelha no prato giratório.
- Feche a porta.
- Pressione o botão 'Grelha'.
- Defina o tempo de grelha desejado usando os botões de tempo.
- Press 'START'.
Cozinha Combinada (Microondas + Grelhador)
This mode combines microwave energy with grilling for faster cooking and browning.
- Coloque os alimentos na grelha e, em seguida, no prato giratório.
- Feche a porta.
- Press the 'Combi' button to select the desired combination mode.
- Defina o tempo de cozimento.
- Press 'START'.
Programas Automáticos
The oven includes 6 pre-set automatic programs for common food items:
- Pipoca
- Batatas
- Pizza
- Legumes congelados
- Bebida
- Prato de jantar
Para usar um programa automático:
- Coloque a comida no forno.
- Press the 'Auto Menu' button repeatedly to select the desired program.
- Use the 'KG/G' button to select the weight or quantity if applicable.
- Press 'START'.
Descongelamento
The oven offers defrosting by time or by weight.
- Descongele por peso: Press the 'Defrost by Weight' button, select the weight using the 'KG/G' button, then press 'START'.
- Descongelar por tempo: Press the 'Defrost by Time' button, set the time using the time buttons, then press 'START'.
Trava de segurança para crianças
To prevent unintended operation, activate the child safety lock.
- Para ativar: Press and hold the 'STOP' button for 3 seconds until a lock indicator appears on the display.
- Para desativar: Press and hold the 'STOP' button for 3 seconds until the lock indicator disappears.
5. Manutenção e Limpeza
Regular cleaning and maintenance will ensure the longevity and optimal performance of your microwave grill.
Limpeza do Exterior
Limpe as superfícies exteriores com um pano macio, damp pano. Não use produtos de limpeza abrasivos ou produtos químicos agressivos.
Limpeza do interior
Limpe a cavidade do forno após cada utilização. Limpe com um pano.amp cloth and mild detergent. For stubborn food splatters, place a bowl of water with lemon juice inside and microwave for a few minutes to loosen residue, then wipe clean.
Limpeza do prato giratório e da grelha
The glass turntable and grill rack can be washed in warm, soapy water or in a dishwasher.
6. Solução De Problemas
If you encounter issues with your microwave grill, consult the following table before contacting service.
| Problema | Possível causa | Solução |
|---|---|---|
| O forno não liga | Cabo de alimentação não conectado; Porta não fechada corretamente; Fusível queimado ou disjuntor desarmado. | Verifique se a ficha está bem encaixada na tomada; Feche bem a porta; Verifique o fusível/disjuntor da casa. |
| Comida não aquece | Door not closed properly; Incorrect cooking time/power level set; Food not suitable for microwave. | Ensure door is closed; Adjust time/power; Use microwave-safe dishes. |
| Faíscas ou arcos elétricos dentro do forno | Metal in oven; Food residue. | Remove any metal objects; Clean oven cavity thoroughly. |
| A plataforma giratória não está girando | Turntable not correctly placed; Obstruction; Motor fault. | Ensure turntable and support ring are correctly positioned; Remove any obstructions; Contact service if motor fault suspected. |
7. Especificações
| Recurso | Especificação |
|---|---|
| Marca | Afiado |
| Número do modelo | R-742BKW (18100111) |
| Capacidade | 25 litros |
| Potência de micro-ondas | 900 Watts |
| Potência da grelha | 1000 Watts |
| Volumetage | 230 Volts |
| Dimensões do produto (C x L x A) | 51.3 x 42.95 x 30.62 cm |
| Peso | 15.1 quilos |
| Diâmetro da plataforma giratória | 31.5 centímetros |
| Material | Vidro, metal |
| Tipo de instalação | Freestanding |
| Características especiais | Microwave Function, Grill, Automatic Programs, Child Safety Lock |
8. Garantia e Suporte
Informações de garantia
Your Sharp R-742BKW Microwave Grill is covered by a manufacturer's warranty. Please refer to the separate warranty card included with your purchase for specific terms and conditions, including the warranty period and coverage details.
Suporte ao cliente
For technical assistance, service, or to order replacement parts, please contact Sharp customer support. Contact details can typically be found on the Sharp official webno site ou na documentação da sua garantia.


