1. Introdução
The STANLEY SXVC20PE is a versatile wet/dry vacuum cleaner designed for effective cleaning of dust, liquids, and solid debris. Its robust construction makes it suitable for various environments, including homes, garages, workshops, construction sites, and industrial areas. This manual provides essential information for the safe and efficient operation and maintenance of your vacuum cleaner.
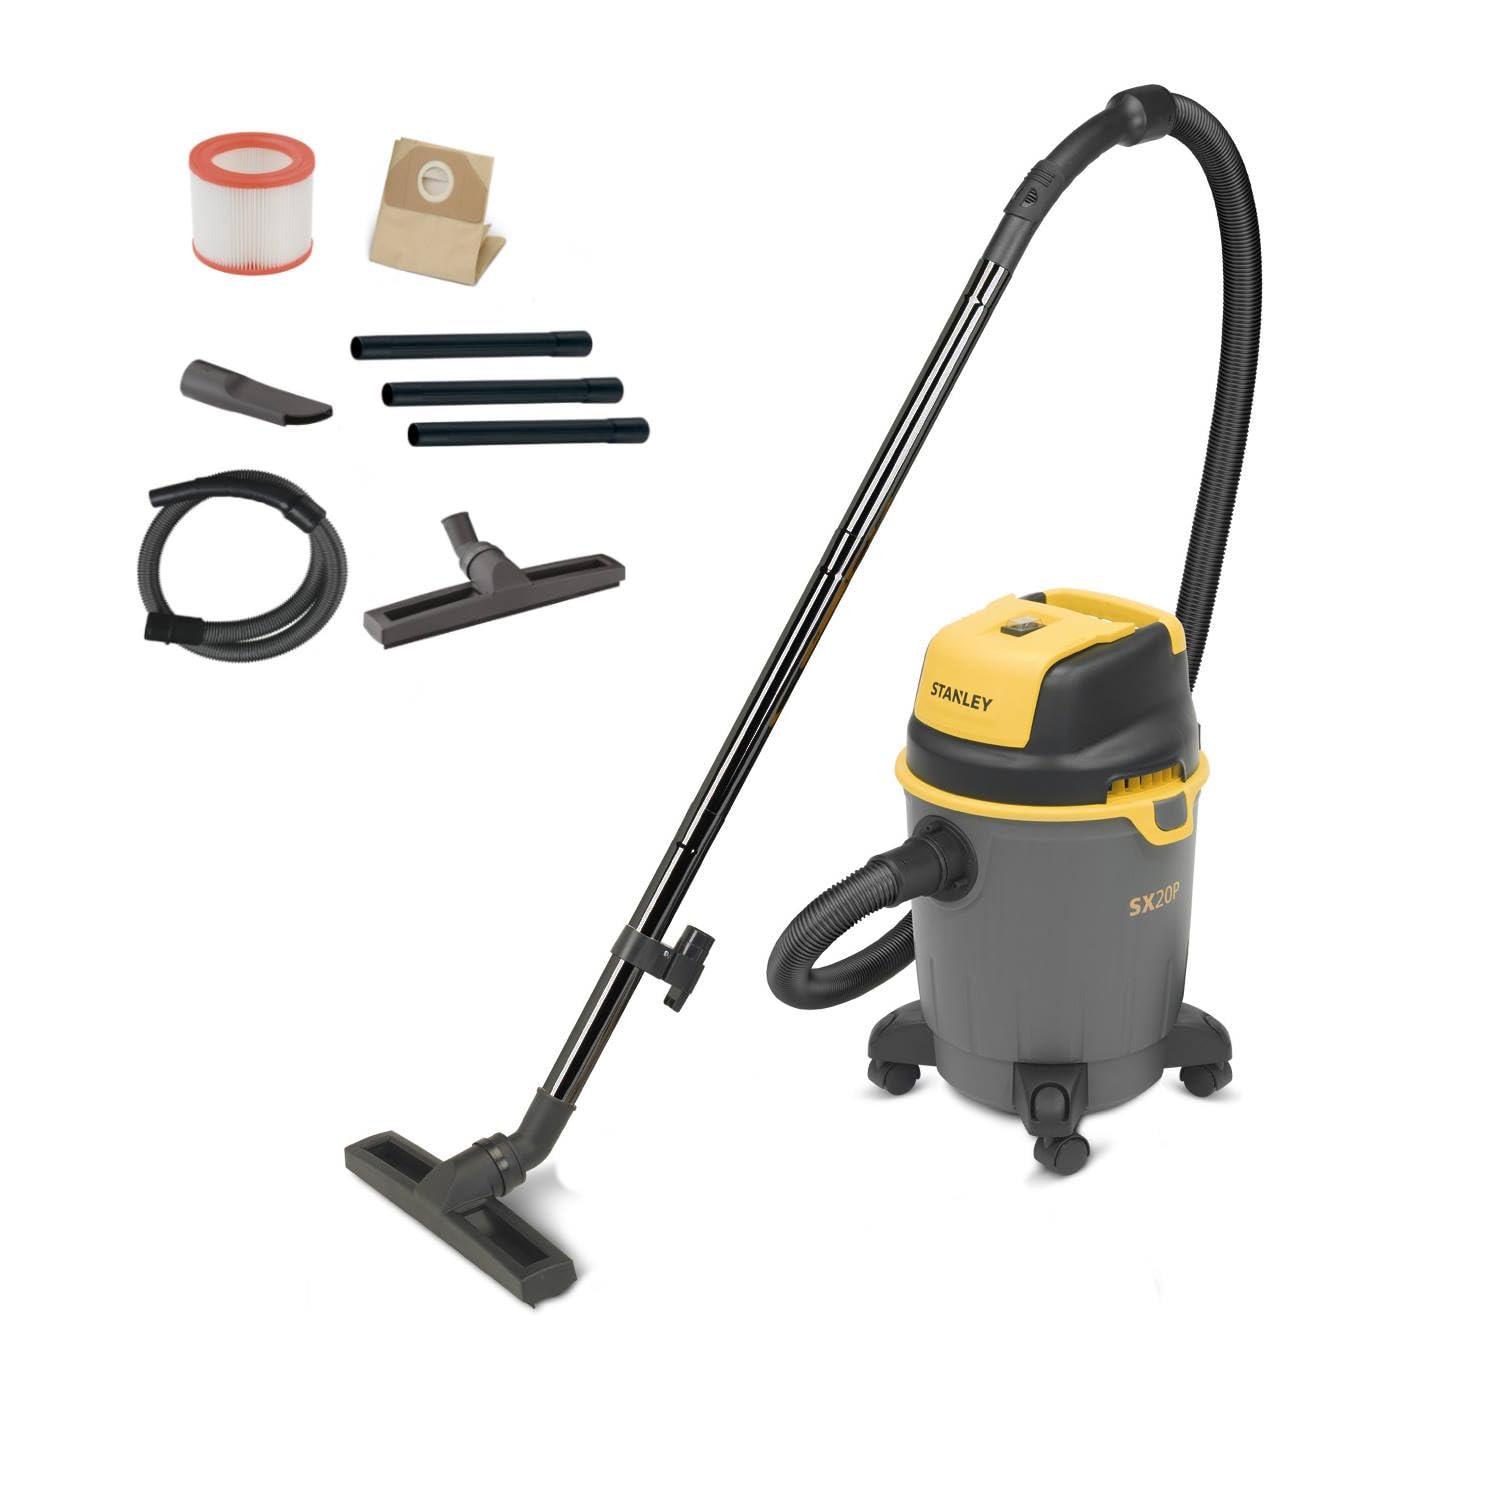
Figure 1: STANLEY SXVC20PE 20L Wet/Dry Vacuum Cleaner - Front View
Informações importantes de segurança
Always read and understand all safety warnings and instructions before using this appliance. Failure to follow the warnings and instructions may result in electric shock, fire, and/or serious injury. Keep this manual for future reference.
- Não deixe o aparelho sem vigilância quando conectado. Desconecte da tomada quando não estiver em uso e antes da manutenção.
- Não use com cabo ou plugue danificado. Se o aparelho não estiver funcionando como deveria, tiver sido derrubado, danificado, deixado ao ar livre ou caído na água, devolva-o a um centro de serviços.
- Não puxe ou carregue pelo fio, use o fio como alça, feche uma porta no fio ou puxe o fio em torno de bordas ou cantos afiados. Não passe o aparelho sobre o fio. Mantenha o fio longe de superfícies aquecidas.
- Não desconecte puxando o cabo. Para desconectar, segure o plugue, não o cabo.
- Não manuseie o plugue ou o aparelho com as mãos molhadas.
- Não coloque nenhum objeto nas aberturas. Não use com nenhuma abertura bloqueada; mantenha livre de poeira, fiapos, cabelos e qualquer coisa que possa reduzir o fluxo de ar.
- Mantenha cabelos, roupas largas, dedos e todas as partes do corpo longe de aberturas e peças móveis.
- Não pegue nada que esteja queimando ou soltando fumaça, como cigarros, fósforos ou cinzas quentes.
- Tenha cuidado extra ao limpar escadas.
- Não utilize para coletar líquidos inflamáveis ou combustíveis, como gasolina, nem em áreas onde eles possam estar presentes.
- Do not use the appliance in an enclosed space where vapors are given off by oil-based paint, paint thinner, some mothproofing substances, flammable dust, or other explosive or toxic vapors.
- Do not use to pick up asbestos or asbestos-containing materials.
2. Conteúdo da embalagem
Verifique se todos os itens listados abaixo estão incluídos em seu pacote. Caso alguma peça esteja faltando ou danificada, entre em contato com o suporte ao cliente.
- 1 x STANLEY SXVC20PE Wet/Dry Vacuum Cleaner Unit
- 1 x Flexible and twist-resistant suction hose (2 meters length, 35mm diameter)
- 2 x Metal extension tubes (33 cm length each)
- 1 x Liquid brush / Wet nozzle
- 1 x Floor brush / Dry nozzle
- 1 x Carpet and sofa brush
- 1 x bico de fenda
- 1 x Washable high-efficiency cartridge filter
- 1 x Paper filter bag
- 4 x Swivel casters
- Manual do usuário
3. Configuração e montagem
3.1 Fixação dos Rodízios
- Carefully invert the tank of the vacuum cleaner.
- Insert each of the four swivel casters into the designated slots on the base of the tank until they click securely into place.
- Return the vacuum cleaner to its upright position.
3.2 Instalação de Filtro
The vacuum cleaner uses a dual-filtration system. Ensure the correct filter is installed for your cleaning task.
Para aspiração a seco:
- Remove the motor head by unlatching the side clips.
- Ensure the washable high-efficiency cartridge filter is securely installed over the filter cage.
- Place the paper filter bag inside the tank, ensuring the opening aligns with the suction inlet. This collects solid debris and prevents fine dust from spreading.
- Replace the motor head and secure the side clips.
Para Aspiração Úmida:
- Remove the motor head by unlatching the side clips.
- Remove the paper filter bag if installed.
- Ensure the washable high-efficiency cartridge filter is securely installed. This filter protects the motor from liquids.
- Replace the motor head and secure the side clips.
- Importante: Do not use the paper filter bag for wet vacuuming.
3.3 Conectando a mangueira e os acessórios
- Insert the flexible suction hose into the main suction inlet on the front of the tank until it locks into place.
- Attach the desired extension tubes and nozzle (e.g., floor brush, liquid brush, crevice nozzle) to the end of the hose.
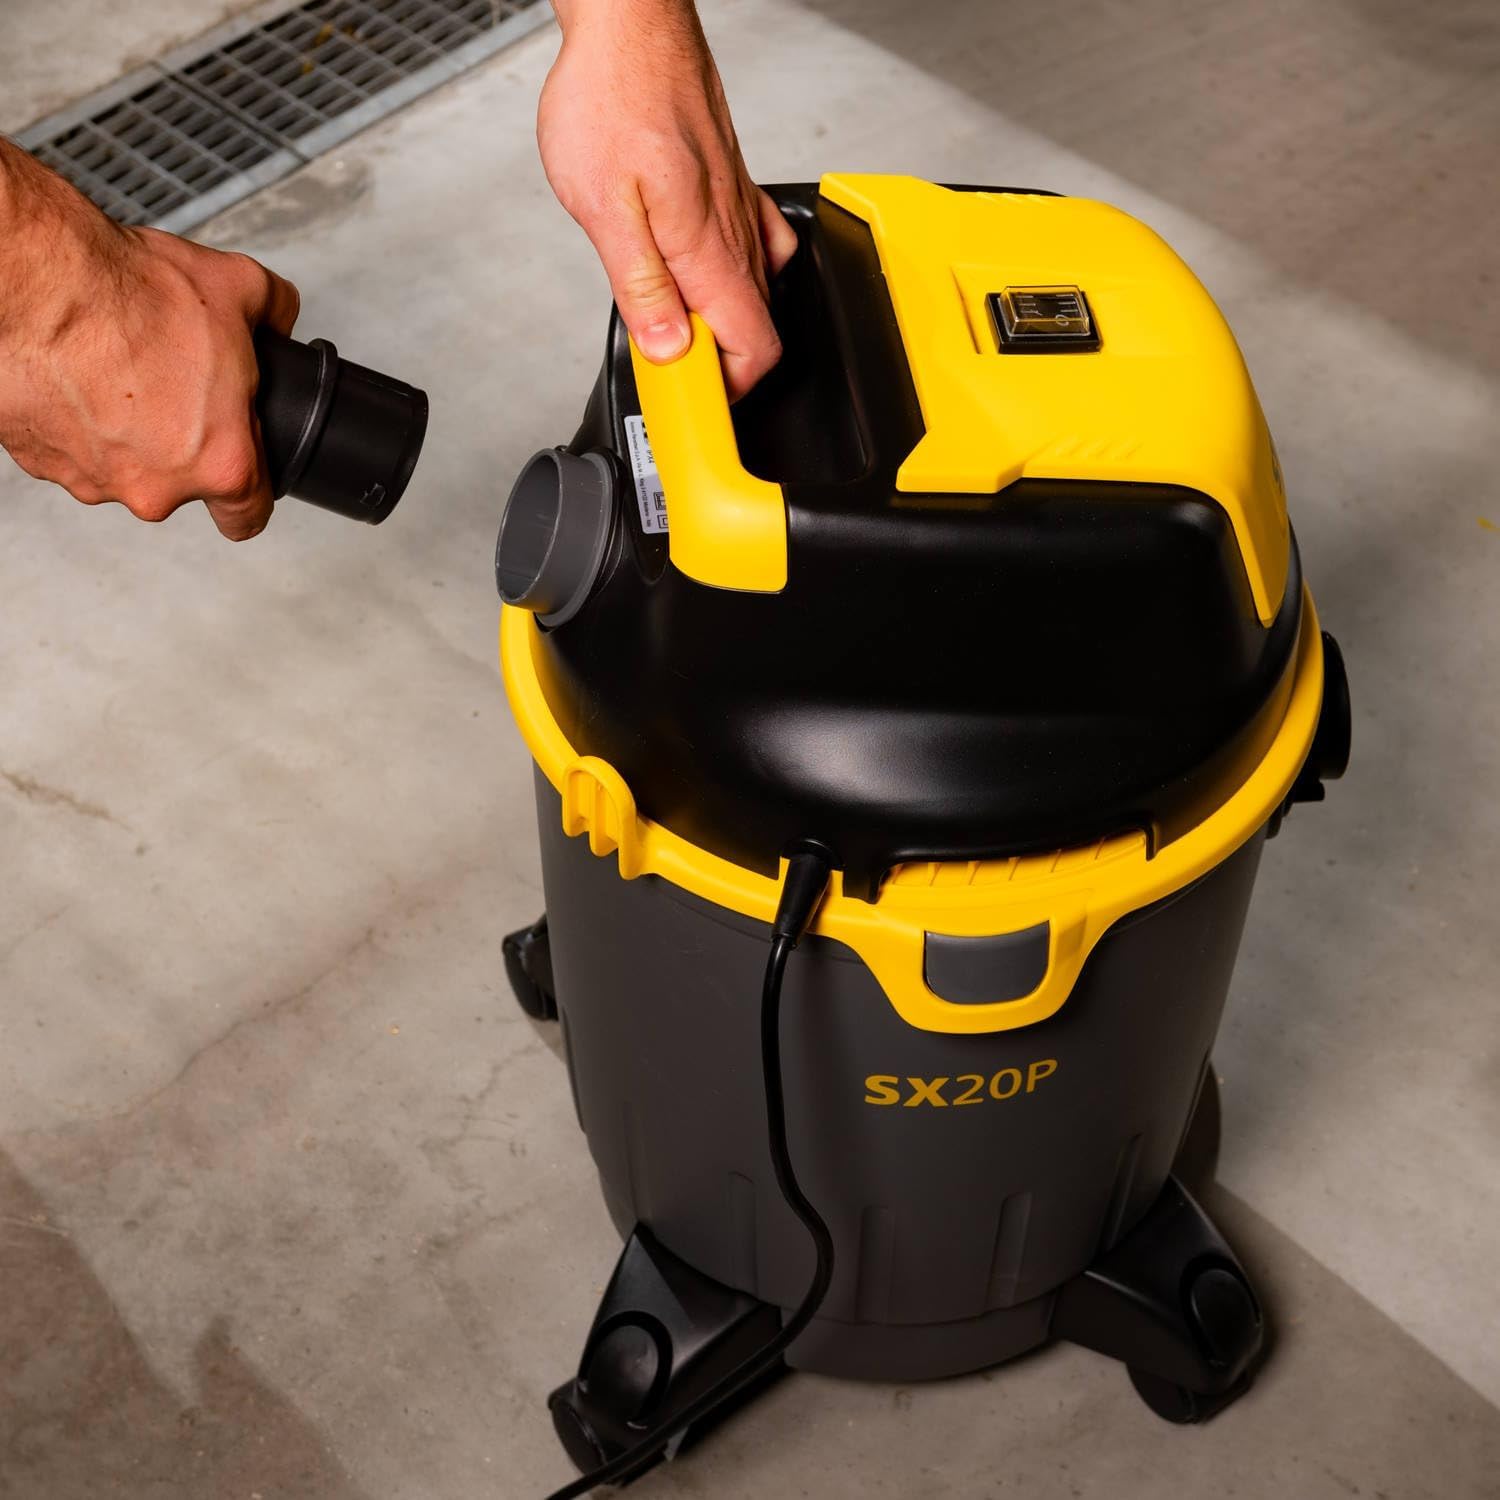
Figure 2: Connecting the hose to the suction inlet.
4. Instruções de operação
4.1 Ligar/Desligar
- Ligue o cabo de alimentação a uma tomada elétrica adequada (230V).
- Locate the power switch on the motor head.
- To turn on the vacuum cleaner, move the switch to the "I" (ON) position.
- To turn off the vacuum cleaner, move the switch to the "O" (OFF) position.
4.2 Aspiração a Seco
For dry vacuuming, ensure the cartridge filter and paper filter bag are correctly installed (refer to Section 3.2). Use the floor brush or crevice nozzle as appropriate for the surface.

Figure 3: Dry vacuuming solid debris.
4.3 Aspiração úmida
For wet vacuuming, ensure the paper filter bag is removed and the cartridge filter is installed (refer to Section 3.2). Use the liquid brush for best results.
- The internal float system will automatically interrupt suction when the tank is full, indicating it needs to be emptied.
- After wet vacuuming, always clean the tank and filters thoroughly to prevent mold and odors.
4.4 Função de sopro
The SXVC20PE also features a blowing function, useful for clearing debris from hard-to-reach areas or surfaces where suction is not ideal (e.g., gravel).
- Desconecte a mangueira de sucção da entrada frontal.
- Locate the blowing port on the motor head (usually opposite the suction inlet).
- Insert the flexible suction hose into the blowing port until it locks into place.
- Turn on the vacuum cleaner to activate the blowing function.
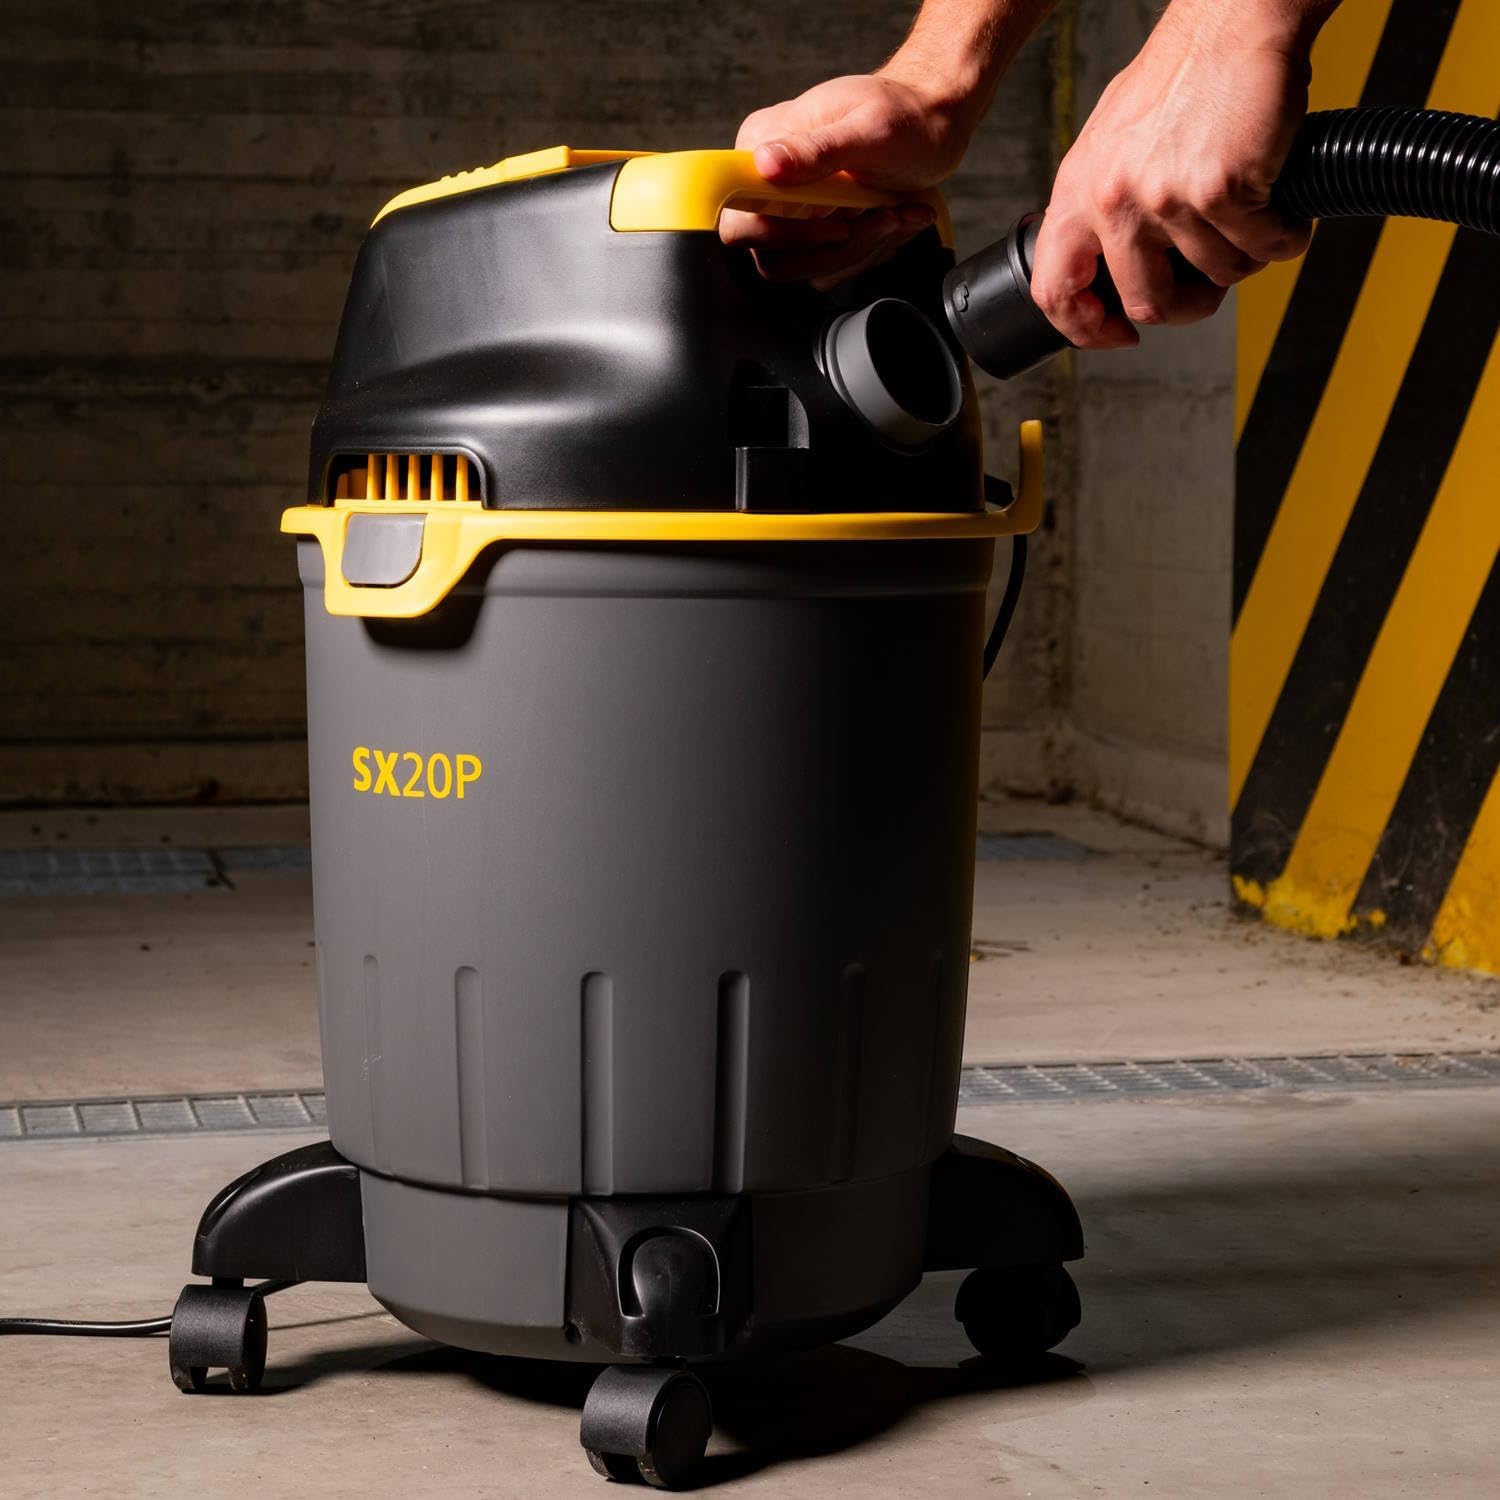
Figure 4: Connecting the hose to the blowing port.
4.5 Power Tool Socket (If Applicable)
Some models of the SXVC20PE may include an integrated power tool socket. This feature allows for synchronized operation with power tools, automatically activating the vacuum when the tool is switched on.
- Plug your power tool (e.g., circular saw) into the integrated socket on the vacuum cleaner.
- Set the vacuum cleaner's power switch to the "Auto" or "Tool Sync" position (if available).
- When you switch on the connected power tool, the vacuum cleaner will automatically start. It will typically continue to run for a few seconds after the tool is switched off to clear any remaining debris.
- To use the vacuum cleaner independently, set the switch to the "I" (ON) position.
5. Manutenção
Regular maintenance ensures optimal performance and extends the life of your vacuum cleaner. Always unplug the unit before performing any maintenance.
5.1 Esvaziando o tanque
- Desligue o aspirador de pó da tomada elétrica.
- Unlatch the side clips and carefully remove the motor head.
- For dry debris, carefully lift out the paper filter bag and dispose of its contents.
- For liquids, carefully pour out the contents of the tank into a suitable drain.
- Clean the inside of the tank with water and a mild detergent if necessary, then dry thoroughly.
- Recoloque a cabeça do motor e aperte os clipes.
5.2 Limpeza/Substituição de Filtros
Filtro de cartucho:
- Remove the cartridge filter from the filter cage.
- Tap the filter gently to dislodge loose dust.
- For thorough cleaning, rinse the filter under running water. Allow it to air dry completely before reinstallation. Do not use heat to dry.
- Substitua o filtro se estiver danificado ou excessivamente gasto.
Saco de filtro de papel:
- The paper filter bag is disposable and should be replaced when full or when suction performance decreases.
- Do not wash or reuse paper filter bags.
5.3 Armazenamento
After use, store all accessories and the power cord in the designated storage compartments on the vacuum cleaner. Store the unit in a dry place, away from direct sunlight and extreme temperatures.
6. Solução De Problemas
| Problema | Possível causa | Solução |
|---|---|---|
| O aspirador de pó não liga. | Sem fonte de alimentação. O interruptor de alimentação está desligado. | Verifique o cabo de alimentação e a tomada. Ensure power switch is in the "I" (ON) position. |
| Perda de sucção. | O tanque está cheio. A mangueira ou o bico estão entupidos. O filtro está entupido. Cabeçote do motor não está devidamente vedado. | Esvazie o tanque. Check and clear any blockages in the hose or accessories. Limpe ou substitua o filtro. Ensure side clips are securely latched. |
| Water/liquid escaping during wet vacuuming. | Tank is overfilled (float activated). Filter not correctly installed for wet use. | Esvazie o tanque. Ensure paper filter bag is removed and cartridge filter is correctly installed. |
| Ruído incomum durante a operação. | Blockage in hose or nozzle. Componente solto. | Verifique e remova quaisquer bloqueios. Inspect the unit for any loose parts and secure them. |
7. Especificações
| Recurso | Detalhe |
|---|---|
| Número do modelo | SXVC20PE |
| Consumo de energia | 1200 W |
| Volumetage | 230 V |
| Capacidade do tanque | 20 litros |
| Suction Power (Depression) | 170 mbar |
| Air Flow (Suction Air) | 28 l/s |
| Comprimento da mangueira | 2 metros |
| Diâmetro da mangueira | 35 milímetros |
| Comprimento do cabo de alimentação | 5 metros |
| Nível de ruído | 80 decibéis |
| Dimensões (C x L x A) | 38.1 x 41.7 x 53.9 cm |
| Peso | 4.8 kg |
| Tipo de filtro | Cartridge filter (washable) + Paper filter bag |
| Características especiais | Blowing function, Lightweight, Float system for wet vacuuming |
8. Garantia e Suporte
This STANLEY product is manufactured to high-quality standards and is guaranteed against manufacturing defects for a period specified by your retailer or local regulations from the date of purchase. Please retain your proof of purchase.
For warranty claims, technical support, or to purchase replacement parts, please contact your local STANLEY dealer or visit the official STANLEY website for contact information in your region. Do not attempt to repair the appliance yourself, as this may void the warranty.


