1. Introdução
This manual provides detailed instructions for the installation, operation, and maintenance of your Hunter 54-inch Contemporary Ceiling Fan. Please read all instructions carefully before beginning installation to ensure safe and proper operation. Retain this manual for future reference.

Figure 1.1: Hunter 54-inch Contemporary Ceiling Fan with remote control.

Figure 1.2: Key features of the Hunter 54-inch Contemporary Ceiling Fan.
2. Informações de segurança
Para reduzir o risco de choque elétrico, incêndio ou ferimentos pessoais, siga sempre estas precauções básicas de segurança:
- Leia todas as instruções antes de instalar o ventilador.
- Toda a fiação deve estar em conformidade com as normas elétricas nacionais e locais. Se você não estiver familiarizado com instalações elétricas, consulte um eletricista qualificado.
- Antes da instalação, desligue a energia desligando os disjuntores da caixa de distribuição elétrica do ventilador.
- Ensure the outlet box is securely attached to the building structure and can support the fan's weight (approximately 18.1 lbs).
- Não utilize o ventilador com as pás danificadas. Substitua todas as pás se alguma estiver danificada.
- Evite colocar objetos no caminho das pás do ventilador.
- Este ventilador foi projetado apenas para uso interno.
3. Conteúdo da embalagem
Verifique se todos os componentes listados abaixo estão incluídos em seu pacote:
- 1 x Fan Motor Assembly
- 3 x Fan Blades (Reversible: Light Gray Oak / Greyed Walnut)
- 1 x Kit de Luz
- 3 x LED Bulbs (E26 Medium Base)
- 1 x 4-inch Downrod
- 1 x 2-inch Downrod (for standard profile montagem)
- 1 x Controle Remoto Portátil
- 2 pilhas AAA (para o controle remoto)
- Kit de ferragens (parafusos, arruelas, conectores de fio, etc.)
4. Configuração e instalação
Recomenda-se a instalação por um profissional. Certifique-se de que a energia esteja desligada no disjuntor antes de prosseguir.
4.1 Montagem do ventilador
- Securely attach the mounting bracket to the ceiling outlet box. The outlet box must be listed for fan support.
- Select the appropriate downrod (4-inch or 2-inch) for your ceiling height. Insert the downrod through the canopy and connect it to the fan motor assembly.
- Com cuidado, levante o conjunto do ventilador e pendure-o no suporte de montagem.
4.2 Conexões de Fiação
- Connect the fan's electrical wires to the household wiring according to local electrical codes. Typically, this involves connecting the black (hot) wire from the fan to the black (hot) wire from the ceiling, the white (neutral) wire from the fan to the white (neutral) wire from the ceiling, and the green (ground) wire from the fan to the bare copper (ground) wire from the ceiling.
- Ensure all wire connections are secure using the provided wire nuts.
- Coloque todos os fios cuidadosamente na caixa de tomadas.
4.3 Montagem das lâminas e do kit de iluminação
- Attach the fan blades to the motor housing using the provided screws. Ensure the desired blade finish (Light Gray Oak or Greyed Walnut) is facing downwards.
- Install the light kit to the bottom of the fan motor assembly, following the specific instructions for your model.
- Screw the three E26 Medium Base LED bulbs into the light kit sockets.
- Attach the glass shade to the light kit.

Figure 4.1: Annotated view of fan components and features.

Figura 4.2: Example of the fan installed in a room.
5. Instruções de operação
Your Hunter ceiling fan is operated using the included handheld remote control.
5.1 Funções de controle remoto

Figure 5.1: Handheld Remote Control.
- Fan On/Off & Speed Control: Use the fan speed buttons (up/down arrows) to cycle through the three available fan speeds (low, medium, high) or turn the fan off.
- Light On/Off & Dimming: Press the light bulb button to turn the light on or off. To dim the light, press and hold the light bulb button. Release when the desired brightness is reached.
- Sentido de rotação do ventilador (motor reversível): The remote control includes a button to reverse the fan's blade direction. This feature allows for seasonal use:
- Fluxo de ar descendente (verão): Creates a cooling effect.
- Fluxo de ar ascendente (inverno): Circulates warm air trapped near the ceiling.
5.2 lâminas reversíveis
The fan features reversible blades with Light Gray Oak on one side and Greyed Walnut on the other. You can choose the finish that best complements your room's decor during installation.
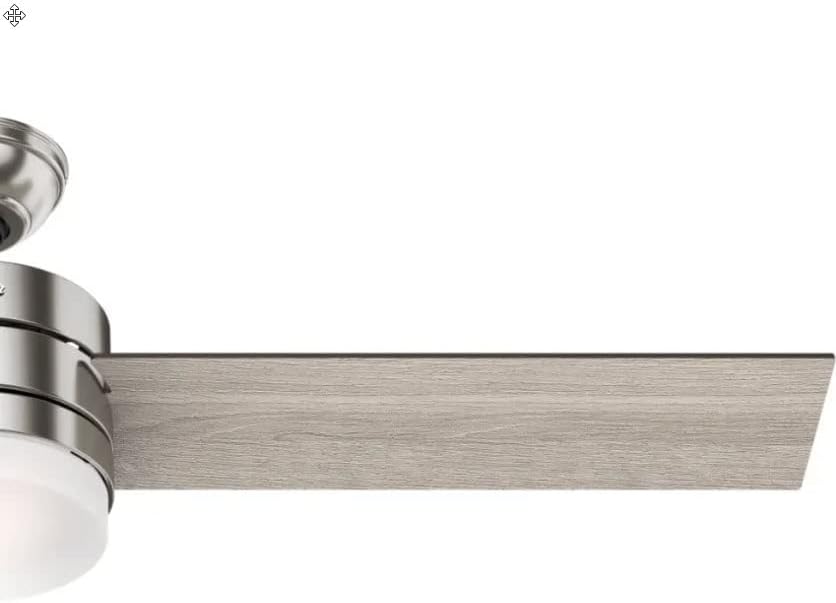
Figura 5.2: Example of the Light Gray Oak blade finish.
6. Manutenção
A manutenção regular garante o desempenho ideal e a longevidade do seu ventilador de teto.
6.1 Limpeza
- Desligue sempre a energia do ventilador antes de limpá-lo.
- Use um pano macio e macioamp cloth to clean the fan blades and motor housing. Avoid abrasive cleaners that may scratch the finish.
- Clean the glass shade with a mild glass cleaner.
6.2 Substituição da lâmpada
The fan uses E26 Medium Base LED bulbs. When replacing, ensure the power is off and allow bulbs to cool before handling.
- Unscrew the glass shade.
- Carefully unscrew the old LED bulb(s) and screw in new ones.
- Recoloque a cúpula de vidro.
6.3 Blade Balancing
If the fan wobbles during operation, ensure all blade screws are tight. A balancing kit (often included with fans, though not explicitly listed here) can be used to correct persistent wobbling.
7. Solução De Problemas
Consulte a tabela a seguir para obter informações sobre problemas comuns e suas soluções.
| Problema | Possível causa | Solução |
|---|---|---|
| Ventilador não inicia | O ventilador não liga; conexões de fios soltas; bateria do controle remoto fraca. | Verifique o disjuntor; verifique se todas as conexões dos fios estão seguras; substitua as pilhas do controle remoto. |
| A luz não funciona | Loose wire connections; Faulty bulb(s); Light switch off. | Check wiring to light kit; Replace bulb(s); Ensure light is turned on via remote. |
| O ventilador balança | Parafusos das lâminas soltos; Lâminas desbalanceadas; Suporte de montagem solto. | Aperte todos os parafusos das lâminas; Utilize um kit de balanceamento de lâminas; Certifique-se de que o suporte de montagem esteja firmemente fixado. |
| Controle remoto não responde | Pilhas fracas ou descarregadas; controle remoto não emparelhado com o ventilador. | Replace AAA batteries; Refer to remote pairing instructions (usually involves cycling power and pressing a button on the remote). |
8. Especificações
| Recurso | Detalhe |
|---|---|
| Marca | Caçador |
| Número do modelo | CC5C91C61 |
| Tamanho | 54 polegadas |
| Terminar | Níquel escovado |
| Material da lâmina | Wood (Reversible: Light Gray Oak / Greyed Walnut) |
| Tipo de motor | AC Motor, Whisperwind |
| Fonte de luz | Integrated Dimmable LED (3 bulbs) |
| Base de lâmpada | E26 Médio |
| Temperatura de cor | 3000 Kelvin |
| Saída de luz | 800 Lúmens |
| Método de controle | Controle remoto |
| Volumetage | 120 Volts |
| O quetage | 44 watts (fan only) |
| Peso do item | 18.1 libras |
| Dimensões do produto | 54"C x 54"L x 14.5"A |
| Uso interno/externo | Interior |
| Custo de energia anual estimado | $12 (based on 6.4 hours/day, 12 cents/kWh, excluding lights) |
| Fluxo de ar | 3,590 pés cúbicos por minuto |
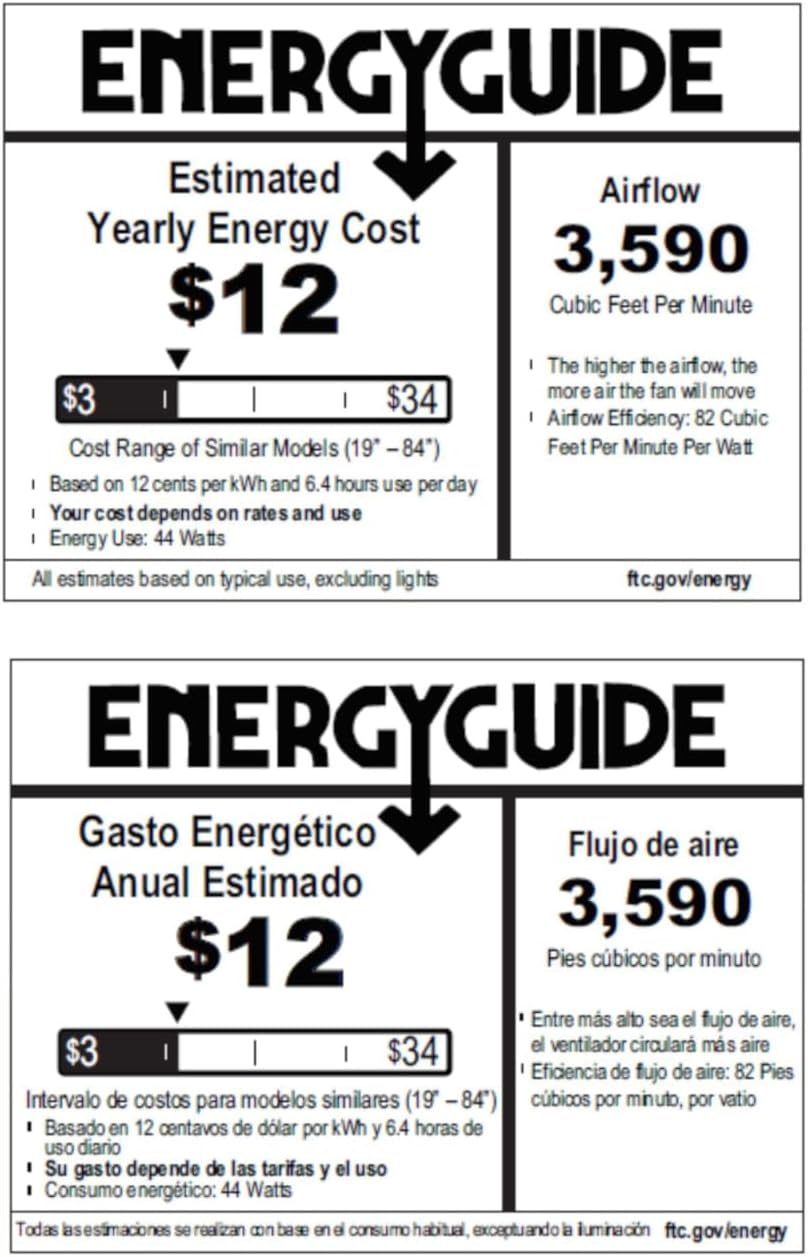
Figure 8.1: Energy Guide for the Hunter 54-inch Ceiling Fan.
9. Garantia e Suporte
For warranty information or technical support, please refer to the official Hunter webou entre em contato com o serviço de atendimento ao cliente. Guarde o comprovante de compra como prova para eventuais solicitações de garantia.


