1. Introdução
Obrigado pela compra.asing the Project Source 2-Pack 13-inch Bronze Flush Mount Light fixtures. These fixtures are designed to provide ambient lighting with a traditional aesthetic, featuring a durable bronze finish and an elegant alabaster glass shade. They are suitable for various indoor spaces, including bathrooms, bedrooms, kitchens, dining rooms, and living rooms, enhancing the decor while providing reliable illumination.
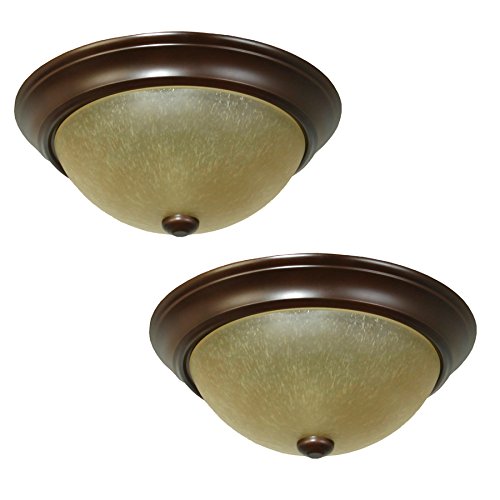
Figura 1: Two Project Source 13-inch Bronze Flush Mount Light fixtures. Each fixture features a round bronze base and a dome-shaped alabaster glass shade, secured by a small finial at the bottom center of the shade.
2. Informações importantes de segurança
AVISO: Risco de choque elétrico. Desligue a energia na caixa de fusíveis ou disjuntor antes da instalação ou manutenção.
- Leia todas as instruções cuidadosamente antes de iniciar a instalação.
- Todas as conexões elétricas devem estar em conformidade com as normas e regulamentos locais ou com o Código Elétrico Nacional (NEC). Consulte um eletricista qualificado se não estiver familiarizado com as conexões elétricas adequadas.
- Use only UL-listed wire connectors for the electrical connections.
- Não exceda a temperatura máximatage specified for this fixture (14 Watts per bulb).
- Use óculos de segurança e equipamentos de proteção individual adequados durante a instalação.
- Certifique-se de que o aparelho esteja devidamente aterrado.
3. Conteúdo da embalagem
Verifique se todos os componentes estão presentes antes de iniciar a instalação:
- 2 x 13-inch Bronze Flush Mount Light Fixtures (with alabaster glass shades)
- Acessórios de montagem (parafusos, conectores de fio, suporte de montagem)
- Note: Light bulbs are NOT included.
4. Especificações
| Recurso | Detalhe |
|---|---|
| Marca | Fonte do Projeto |
| Número do modelo | 40804 |
| Dimensões (Largura x Altura) | 13 polegadas x 5.36 polegadas |
| Terminar | Bronze |
| Material de Sombra | vidro de alabastro |
| Número de luzes | 2 per fixture |
| Tipo de base de lâmpada | Medium base (E-26) |
| Formato de bulbo recomendado | A15 |
| Potência Máxima da Lâmpadatage | 14 Watts (per bulb) |
| Lista de Segurança | Listado pela UL |
| Compatibilidade de quartos | Bathroom, Bedroom, Kitchen, Dining Room, Living Room |
| Tipo de instalação | Montagem embutida |
| Peso do item (pacote) | 7.04 libras |
5. Configuração e instalação
Ferramentas necessárias: Phillips head screwdriver, flathead screwdriver, wire strippers, electrical tape, safety glasses.
Etapas de pré-instalação:
- Desligue a alimentação: Locate the circuit breaker or fuse box that supplies power to the light fixture location. Turn off the power completely before proceeding.
- Prepare a área: Clear the work area and ensure you have stable footing if using a ladder.
- Descompacte: Retire cuidadosamente o acessório e todos os componentes da embalagem.
Etapas de instalação:
- Fixe o suporte de montagem: Secure the mounting bracket (included) to the electrical junction box in the ceiling using the provided screws. Ensure it is firmly attached.
- Conecte os fios elétricos:
- Conecte o preto (hot) wire from the ceiling to the preto wire of the fixture using a wire nut.
- Conecte o branco (neutral) wire from the ceiling to the branco wire of the fixture using a wire nut.
- Conecte o chão wire (bare copper or green) from the ceiling to the chão wire of the fixture (or the ground screw on the mounting bracket) using a wire nut or by wrapping it securely around the screw.
- Fixe o acessório ao suporte de montagem: Carefully push the wired fixture up towards the ceiling, aligning the holes in the fixture base with the screws on the mounting bracket. Secure the fixture in place with the decorative nuts or screws provided.
- Instale lâmpadas: Insert the recommended A15 shape, E-26 medium base light bulbs (not included) into the sockets. Do not exceed 14 Watts per bulb.
- Fixar a cúpula de vidro: Carefully place the alabaster glass shade onto the fixture. Secure it in place using the finial or retaining ring provided, tightening it gently until snug. Do not overtighten.
- Restaurar energia: Após a conclusão da instalação e com todas as conexões seguras, restabeleça a energia no disjuntor.
6. Instruções de operação
Once the Project Source Flush Mount Light fixtures are correctly installed and power is restored, they can be operated using the standard wall switch connected to the circuit. Simply toggle the wall switch to turn the lights on or off.
7. Cuidados e Manutenção
Regular cleaning will help maintain the appearance and performance of your light fixtures.
- Limpeza do acessório: Dust the bronze finish regularly with a soft, dry cloth. For more thorough cleaning, wipe the bronze finish with a damp cloth and a mild, non-abrasive soap solution, then dry immediately with a clean, soft cloth to prevent water spots.
- Cleaning the Glass Shade: The alabaster glass shade can be removed for cleaning. Wash it with mild soap and water, then rinse thoroughly and dry completely before reattaching to the fixture.
- Substituição de lâmpada: Always ensure the power is turned off at the circuit breaker and the bulbs have cooled down before attempting to replace them. Use only bulbs that meet the specified wattage e tipo base.
- Do not use abrasive cleaners, solvents, or polishes on any part of the fixture, as they may damage the finish or glass.
8. Solução De Problemas
Se você tiver problemas com sua luminária, consulte os problemas e soluções comuns a seguir:
- A luz não acende:
- Verifique se a alimentação elétrica está ligada no disjuntor.
- Ensure the light bulbs are correctly installed and are not burnt out. Try replacing with a known working bulb.
- Verify that all wire connections (black to black, white to white, ground) are secure and properly connected.
- A luz pisca:
- Ensure the light bulbs are fully tightened in their sockets.
- Check for any loose wire connections within the fixture or junction box.
- Confirm that the bulbs used are compatible with the fixture and are not exceeding the maximum wattage.
- Glass shade is loose or wobbles:
- Gently tighten the finial or retaining ring that secures the glass shade. Do not overtighten.
If the problem persists after attempting these solutions, please consult a qualified electrician or contact customer support.
9. Garantia e Suporte ao Cliente
For detailed warranty information regarding your Project Source 2-Pack 13-in W Bronze Flush Mount Light, please refer to the documentation included with your original purchase. Warranty terms typically cover defects in materials and workmanship for a specified period.
If you require technical assistance, have questions about installation, or need to report a defect, please contact Project Source customer service directly through their official website ou as informações de contato fornecidas na embalagem do seu produto. Tenha em mãos o número do modelo (40804) e os detalhes da compra ao entrar em contato com o suporte.


